Part 1: Voice-First Experiences for Kids
June 22, 2021
Voice technology offers education publishers, toy and game developers new avenues and approaches to creating immersive learning and play experiences for kids. From working closely with our clients, SoapBox Head of UX Declan Moore and Senior Software Engineer Ronan Tumelty see these voice-driven experiences come to life on a first-hand basis.
In this Part 1 of our new Beginner’s Guide series, Declan and Ronan walk us through a sample use case for speech recognition tech in a kids’ app and share some of the lessons and best practices they’ve learned working with clients to design and integrate voice experiences into their apps, tools, and games for kids.
Introduction:
Product managers, designers and engineers all aim to create experiences that work seamlessly for kids, and bring them confidence, joy and engagement. But, interactive voice experiences are still brand new and our understanding of what actually works for kids is not a one-size-fits-all exercise. It’s still very much evolving.
Voice interactions, although intuitive, are still new to a lot of people.
This Beginner’s Guide is written for those who aspire to create and deliver great voice experiences for kids online, offline and on-device. In Part 1 we walk through an online experience and kick off the discussion with 3 core concepts:
3 Core Concepts:
- Voice-First Experiences
A “voice-first” or “voice-led” experience is when a child uses their voice as the primary means of interacting. This is distinct from a “voice-only” experience – think screenless smart speakers like Siri or Alexa, where there is little or no UI.
- Input and Outputs
In a voice-first learning or play experience for kids — be it a tool, toy or game experience — voice is rarely used in isolation. Other interfaces are also leveraged like physical buttons, touch screens and sensors, that offer the designer a wide range of inputs or outputs to work with.
In the voice-first use case detailed below, the child is using a tablet. On an average tablet we can assume we have access to the following:
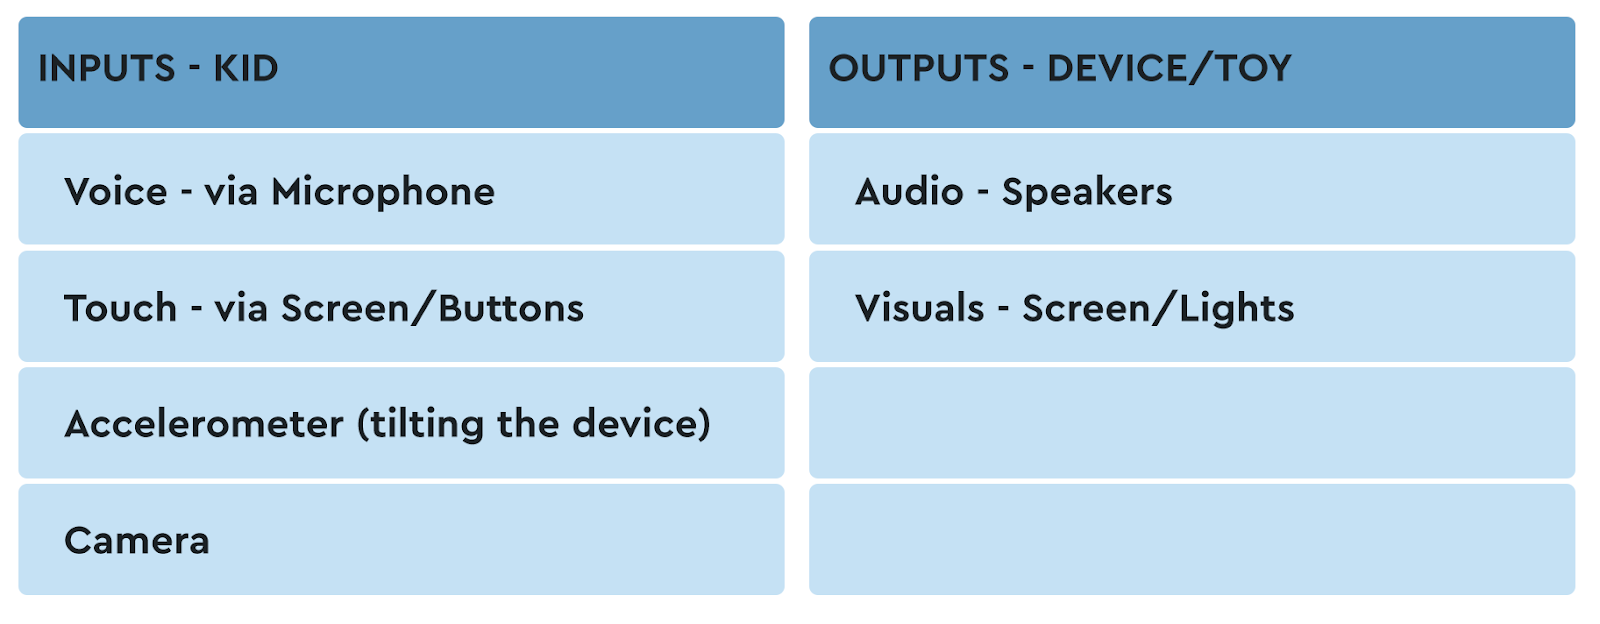
Making all of these inputs and outputs gel together and feel natural is key to the success of any kids’ voice experience.
In the below use case we’re showcasing an online experience using a tablet and leveraging its graphical interface, touchscreen, microphone and audio capabilities. We’ll use the microphone as the input, and as outputs, visuals and audio. The same principles apply to a browser-based/web/internet driven experience.
- How Visuals Support Voice
While voice experiences come in many different shapes and sizes, there are a number of key considerations to take into account when designing for kids. In an interactive play experience on a tablet, for example, visuals provide context, clarity and direction. Visuals help a child to:
- Know when they can speak
- Know when the system can hear them
- Know when the system is taking action
- See the results of the action
A Sample App Experience
Let’s step through a sample App experience, and going forward, let’s refer to the product as the “App” and the user as the “child”. To deliver maximum clarity and immersion in this experience, kid-specific voice technology like the SoapBox voice engine is combined with third party voiceover, visuals and sound effects.
The aim is to deliver an experience that doesn’t require the child to touch the screen once the game has started.
Note: For accessibility and pedagogical reasons related to some products, there may need to be more ways than one to interact with a given activity.
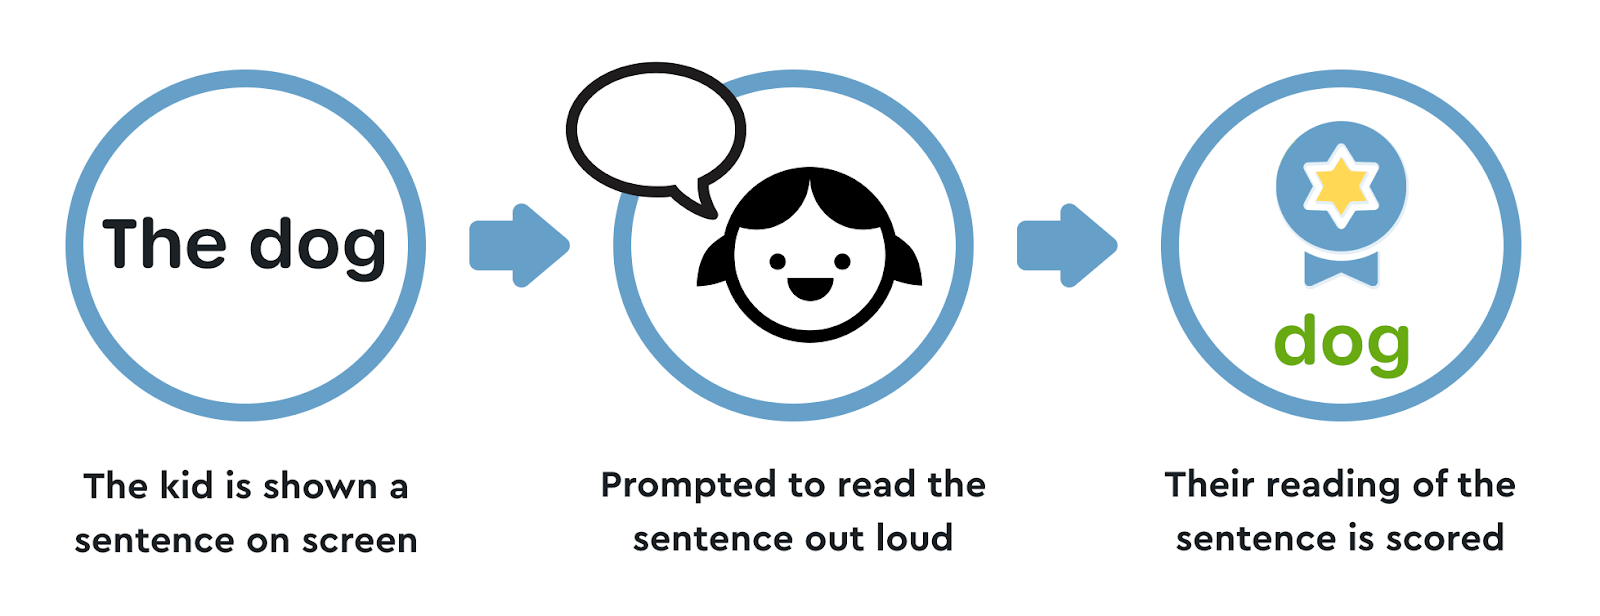
In this example, the child is playing a reading game.
Step by Step:
- Present the experience
- Starting the voice interaction
- Show the App is listening
- Let the child know they can be heard
- Ending the voice interaction
- The processing/thinking state (optional)
- Providing feedback
01. Present the Experience
This is the default state of the experience. The Voice UI is in its “off” state

02. Start the Voice Interaction
We then instruct the child on what to do. In this case we use an audio prompt.

Lessons:
– Simply asking a child to read may prompt them to read silently in their head. Be clear that they should read out loud by giving them audio or visual instructions, or both.
– Ensure any audio – instructions, background music or sound effects – are complete before moving to the next step. Loud audio may impact the voice performance.
03. Show the App is listening
Give the child a cue that they can speak, that the App is ready. To communicate this clearly, we’ve scaled the UI, coupled with a color change.

The blue circle with the dots symbol will by now be familiar to the child as we will have introduced it during the App on-boarding.
Lesson: Be consistent with any UI element you choose. This use case is no different to a Home or Back button experience in a regular GUI.
04. Let the child know they can be heard
With a touch based UI interaction you can give feedback through physical, visual, auditory or animation cues. A “hands-free” experience doesn’t have those options but the feedback is just as important. In this example we’re using an audio reactive animation.

The size of the white bars will react, in real-time, to the amplitude of the audio coming in from the mic. This signals to the child that the App is listening. Think of it as the digital equivalent of eye contact or nodding during a conversation.
Lesson: Strike a balance between input and UI. Make sure the child focuses on the text they are reading and is not distracted by the UI.
05. Ending the Voice Interaction

Once the child has finished speaking, we want to stop listening and score their audio. At that point, we need to show another visual cue to let them know the recording is stopping.

Lessons:
– If we do this immediately we’ll inadvertently cut off a child who wants to speak after a pause. To deliver more flexibility and ensure a positive experience, the UI needs to revert back to its “off” state.
– Remember, we are still listening for speech, so if at any point the child starts to speak again, we need to immediately jump back to listening.
06. The processing/thinking state (optional)

Once the App has stopped listening for speech two things need to happen:
- Let the child know that they can not interact using their voice at this point.
- If work needs to be done by the App before the child can interact again (processing of data, gamification calculations) we must show this.
To reduce the potential for frustration the child needs to understand that the App is “thinking” and that while thinking, speech isn’t available.
07. Provide Feedback

In this example, the SoapBox voice engine has scored the child’s reading attempt. The score set for “correct” is 70% and since the child has exceeded it the App plays celebratory/correct feedback.
One of the most powerful things you can show a child is meaningful feedback. Showing them that their voice has determined the outcome is magical.
On Visual Metaphors

Voice Interfaces (VUIs) are still evolving. We haven’t yet reached a point of standardization, and different visuals may suit different interactions. So when testing your product give consideration to your visual cues. You and I may know what a microphone icon represents but will every 4, 5 or 8 year old?
What’s Next?
From the child’s perspective, they’ve just read a short sentence out loud and the App has reacted and fed back to them. Behind the scenes however, so much more is happening!
As an inventor, designer, or engineer involved in creating these kinds of experiences for kids, there remain so many questions, like:
- How do I know when to start listening?
- When do I stop listening (or how long do I listen for)?
- How do I score the child’s reading?
Do not fear! We’ll answer these and more in Part 2 of this Guide, and following on from there, we’ll be sharing best practices around microphone usage, and how voice data can help with scoring and gamification of voice-first products.
Get In Touch
Voice experiences for kids are as varied as the approaches we take to tackling them. At SoapBox we may be experts when it comes to speech recognition for kids, but we’re still at the beginning of an exciting journey of experimentation and learning when it comes to voice-first experiences for kids, and we’d love to keep learning as we help you with yours.
All feedback, questions and suggestions for future topics in this Beginner’s Guide series are welcome. Watch this space for Part 2 and if you’d like to get in touch just email us: Hello@SoapBoxLabs.com