
25 Days of STE(A)M
The season of giving is almost here and we have a special gift just for you!
This December, you’re invited to discover the magic of STE(A)M along with PCS Edventures. Each day, unwrap wonder and excitement with our 25 engineering design challenges. All necessary materials are bolded to make setup simple. You’ll even find a few freebies along the way!
These fun holiday STE(A)M activities are based on many of PCS Edventures’ engaging programs. For lessons that are perfect for any learning environment, be sure to check out our featured products:
- Flight & Aerodynamics
- Build a Better World
- Traveling Artist
- Discover Digital Video LAB
- Oceanic Exploration
- Plants and Seeds
- Unleash Your Wild Side
- BrickLAB STEAMventures
We wish you a joyous holiday season full of creativity and fun. Be sure to leave a comment to let us know which activity left you feeling merry and bright!
25 Days of STEAM Activities

Day 1: Santa Takes Flight
Santa’s looking for a new ride that travels long distances. Design an airplane to help!
Directions:
- Build a paper airplane of any design.
- Test your design at least 3 times.
- Measure and record the distance of each flight.
Tip: Place a long string at the start and end of your plane’s flight path. Then, use a ruler to measure the length of the string. - Repeat with a different airplane design to determine which will help Santa travel the farthest.
Resources:
Airplane Data Collection Template
Step-By-Step Paper Airplane Designs from The Art of Manliness

Day 2: Marshmallow Snow Forts
Build a snow fort to shelter you from winter weather. Be sure it’s strong enough to support heavy snowfall!
Directions:
- Start by drawing a “connect the dots” model of your structure on paper.
- Build your structure out of toothpicks and marshmallows.
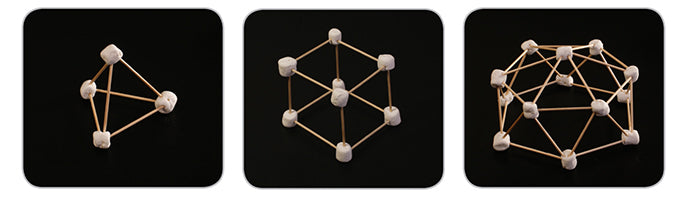
Helpful Tip:
An Igloo’s three-dimensional dome shape helps distribute the weight of snow.

Day 3: Floating Snowflakes
Create your own winter wonderland with this hands-on activity that proves ink is less dense than water.
Directions:
- On a piece of paper, draw any winter wonderland scene.
- Place a glass dish on top of the paper.
- Draw snowflakes with a blue dry-erase marker directly on the glass dish.
- Pour a bit of water onto the glass dish.
- Use a straw to blow the snowflakes and make it snow!
Example:
Falling Leaves activity from mothercould

Day 4: Holiday Slime Jars
Give your slime some holiday character with these festive jars!
Directions:
- Decorate a small jar to look like a holiday character using any craft supplies.
- In a large bowl, mix 3/4 cup Elmer’s Glue, 1/2 tsp baking soda, up to 1/4 cup water, and food coloring if desired.
- Slowly add up to 1½ tbsp contact solution containing Boric Acid and Sodium Borate. Fold in a bit at a time to ensure the slime doesn’t harden.
- Knead until you achieve your desired slime consistency.
- Keep your slime in your jar!
Example:
Holiday Slime activity from thebestideasforkids

Day 5: Surface Tension Decorations
Decorate a holiday picture with colorful water droplets!
Directions:
- Tape a piece of parchment paper to a flat surface.
- Use permanent markers to draw a holiday image on the parchment paper (e.g., Christmas tree, wreath, menorah).
- Mix a few small cups of water with different food colorings to create colored water.
- Use a dropper to drop colored water on the parchment paper.
- Use a toothpick to drag the drops and decorate your holiday drawing. Notice how the water moves!
Example:
Moving Water activity from mothercould

Day 6: Winter Weather Report
Perform and record your own winter weather report!
Directions:
- Plan your weather report and write a script. Is there a blizzard? Wintery-mix? Snowfall?
- Gather props and costumes.
- THINK: What might a weather person dress like while reporting the news? What visuals can you create to show your viewers? (e.g. weather maps, weekly forecast charts)
- Record your weather report!
Resource:
Practice your reporting skills with this freebie from Discover Digital Video LAB!

Day 7: Build a Holiday Feast
What’s your favorite food to have during the holiday season? Don’t just cook it...build it!
Directions:
- Use bricks to build a model of your favorite holiday treat.
- Challenge yourself to build a whole feast!
Examples:
Check out some examples in our Earth Day and Celebrations Activity Card freebies!

Day 8: Holiday Sink or Float
The snow has melted, leaving a pool of water behind! What a perfect place for a sink or float experiment.
Directions:
- Gather all the holiday and winter objects you want to test (e.g. candy canes, pinecones, pine tree leaves, present bows).
- Record each object and your predictions in your Sink or Float Record Sheet.
- Fill a bucket with water. Place one item in the bucket.
- Observe what happens and record your findings.
- Repeat steps 3-4 for each object.

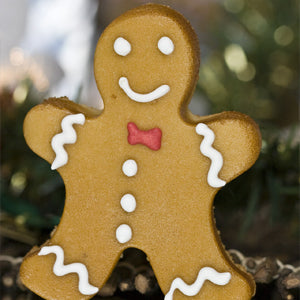
Day 9: Santa’s Magic Milk and Cookies
Santa’s milk and cookie platter will look magical after this experiment!
Directions:
- Pour just enough milk to cover the bottom of a plate.
- Place a holiday cookie cutter in the center of the plate.
- Drip 3-4 drops of food coloring in and/or around the cookie cutter.
- Drip dish soap directly onto food coloring drops and observe the magic!

Day 10: Christmas Melting Ice Art
Create Christmas art that’s sure to melt any grinch’s icy heart!
Directions:
- Drip red or green food coloring into ice cube tray compartments.
- Add water to each. Freeze.
- On a plastic bag (for less mess), make a holiday design with ice cubes (tree, wreath, candy cane, etc.).
- Press a piece of white paper on top of your ice cube design. Feel the cold through the paper!
- Peel the paper off to reveal a print!

Day 11: Self-Standing Tree
Oh, Christmas tree! Oh, Christmas tree! Please do not topple over.
Directions:
- Use pipe cleaners to build a self-standing tree.
Bonus if you can balance a tree topper of your own design on top!

Day 12: Snowball Catapult
Watch out for flying snowballs as you try to land them on the target!
Directions:
- CLICK HERE to download and follow steps 1-5 for building your very own catapult. You will need: 10 craft sticks (popsicle stick or tongue depressor size), 5 rubber bands and 1 plastic spoon.
- Place paper bowls or plates, labeling each with different point values. (e.g. 1 bowl worth 5 points, another worth 10, etc.)
- Place a cotton ball or marshmallow on the spoon. Hold down the catapult with one hand and use your other hand to push down the spoon.
- Aim for a target and let go of the spoon. Keep track of your score and have fun!

Day 13: Design a Unique Snowflake
Channel Mother Nature and design your very own snowflake!
Directions:
- Use a variety of materials to create a unique snowflake!
Suggested Materials:
Think about what you have at home! Get creative and use household items like:
- Pipe cleaners
- Popsicle sticks
- Glue
- White felt
- Q-tips
- Cotton balls
- White paper
- White foam

Day 14: Jingle Bell Brick Maze
Jingle Bells! Jingle Bells! Jingle through the maze! Plan, design, and test your own holiday brick mazes.
Directions:
- Start by drawing a map for your maze with paper and pencil.
- Make sure the path is wide enough for a jingle bell.
- Consider how many dead ends to include and make sure there is an entrance and exit.
- Create a base from large BrickLAB Bricks (or other construction blocks) baseplates. Check out our freebie, Seasonal STEM Challenges for Fall, for more details.
- Add longer bricks to construct the walls of your maze.
- Test the maze by sending the jingle bell through from beginning to end.

Day 15: My Holiday Traditions Tunnel Book
Tell a story about your favorite holiday tradition by creating a three-dimensional piece of art!
Directions:
- Picture your favorite holiday tradition in your mind. Think about what’s happening in the foreground, middle ground and background of the scene you’re seeing.
- Bring the image to life in a three-dimensional tunnel book!
For step-by-step directions, visuals, materials and templates, download our FREE activity, A Peek Down the Tunnel!

Day 16: Holiday Paper Chain Decoration Challenge
Ring in the holiday season with a festive STEM challenge! How long can you make your paper chain?
Directions:
- Choose 2 pieces of different colored paper.
- Carefully use scissors to cut the paper into strips. THINK CAREFULLY BEFORE CUTTING: How can you make a long chain using only 2 pieces of paper?
- Form a ring with one strip of paper and glue or tape the ends together.
- Thread the second strip into the ring and tape its ends together to form another loop. Repeat until you've used all the strips.
- Measure your chain with a ruler. How long is your chain? How might you improve your design?
Challenge yourself to craft an even longer chain!

Day 17: Winter Wonderland Watercolor Paintings
A bit of salt will bring your snowman’s world to life in this artsy science activity!
Directions:
- Use a pencil to draw a snowman on white cardstock. Be sure to include features that bring the snowman to life! (e.g. hat, eyes, carrot nose, scarf, etc.)
- Use crayons to add color to your drawing. You may also choose to add a few details around your snowman.
- Use watercolors to paint the background.
- Sprinkle salt over the picture, then let the paint dry.
- The salt will leave behind a snowfall-like pattern!
Example:
Check out the Watercolor Turtles activity video from Unleash Your Wild Side for an example.

Day 18: Erupting Snowman
Winter fun bubbles over with this exciting experiment!
Directions:
- Decorate an empty plastic bottle to look like a snowman, using materials such as buttons, googly eyes, ribbon and colored paper.
- Once decorated, fill the bottle with about 2 tablespoons of dish soap, 1/2 cup baking soda, and 1-2 tablespoons of warm water.
- Finally, pour 1 cup of distilled white vinegar into the snowman. Observe the reaction!
Example:
Snowman Eruptions activity from 123Homeschool4Me

Day 19: Santa’s Growing Gift Bag
Create a chemical reaction between two common cooking ingredients and watch Santa’s bag grow!
Directions:
- Stretch a laytex balloon so it's ready to inflate.
- Use a permanent marker to draw Santa’s gift bag. See our example for inspiration, but feel free to make it your own.
- Now you're ready to use your paper funnel, empty plastic bottle, baking soda, vinegar and spoon to fill Santa’s gift bag!
To download the step-by-step directions and visuals to fill Santa's gift bag, visit our Hot Air Balloon Experiment!

Day 20: Snowstorm in a Jar
Bring winter weather indoors by making your own mini snowstorm in a jar!
Directions:
- Fill a glass jar (baby food jars work well!) 1/4 of the way with water.
- Mix in about 1 teaspoon of white paint and some glitter (optional).
- Fill the jar with baby oil. It will rise above the water and paint mixture.
- Break up an Alka-Seltzer tablet, then add small bits to the jar one at a time. Watch the model snowstorm form inside the jar!
Example:
Snowstorm in a Jar Science Experiment from Mombrite
Day 21: Tis’ the Season for Symmetry
Let light shine in on your holiday season with these beautiful window decorations.
Directions:
- Print out one of these templates.
- Use scissors to cut out the template so that only the black outline is left.
- Fold one sheet of construction paper or cardstock in half. Align the center of the template with the folded edge of the paper.
- Trace the inner and outer edge of the template onto the paper with a pencil. Cut along the pencil lines.
- Open the paper to reveal the full image!
Follow the step-by-step instructions in our STEAM Butterfly Symmetry Investigation to fill the inside of your decoration with colorful tissue paper.

Day 22: Code a Holiday Dress-Up Game
Add some holiday glam to your own Scratch dress-up game!
Directions:
- Code your own dress-up game in Scratch. For step-by-step directions and visuals, download How to Code a Dress-Up Game in Scratch for free!
- Add new sprites to give your game some holiday spirit!
- Draw a new sprite that will fit on the characters, such as a santa hat, an ugly sweater, or a reindeer headband. Be creative!
- Then, upload your sprite and code it to appear in the game! (click here for full instructions)
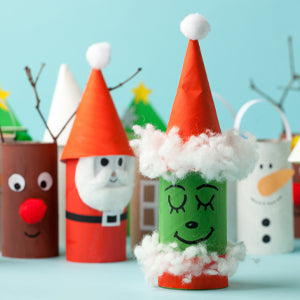
Day 23: Toilet Paper Roll Ornaments
Transform a simple household recyclable into a festive holiday decoration!
Directions:
- Grab an empty toilet paper roll, and choose a holiday character that you want to make. See this example for ideas.
- Gather supplies and THINK: How can I use what I have creatively to make this roll look like my character?
- Glue each decoration to your toilet paper roll.
- Glue a ribbon to the back of the roll and hang your ornament for all to see!
Example:
Christmas Toilet Paper Roll Crafts from thebestideasforkids.

Day 24: A Cloudy Night for Clause
Find out why Santa needs Rudolph’s bright light to guide his travels on a cloudy night!
Directions:
- For step-by-step directions and visuals, download our FREE activity, Cloud in a Jar!
- Observe the experiment and reflect on the following:
- What does Santa see when he delivers gifts on a cloudy night?
- Describe why it is important for Santa and other pilots to have special tools to help them fly through clouds.

Day 25: Winter Zentangle
Everyone loves a handmade gift! Make your own Winter Zentangle to give to any loved one this holiday season.
Directions:
- With a pencil, draw the outline of a winter/holiday image onto the first piece of colored paper.
- Use scissors to cut out the image.
- Glue the cutout to a second color of paper.
- With a black marker, draw one line up the center of the image, extending off the image to the edge of the paper.
- Draw more lines radiating out from the center like veins, also extending to the edge of the paper.
- Add additional lines to create an artistic grid.
- Fill in each section with a different pattern.