The Ultimate Guide to Jetpack Galleries: Tiled Galleries, Widgets, and Carousels

You can find all types of general guides to the WordPress Jetpack plugin. But what you won’t easily find is an in-depth guide to Jetpack Galleries.
Despite the multifaceted improvements offered by Jetpack Galleries, most guides only give it a short mention. We’re going to change that!
We’ll give you an in-depth guide to all things Jetpack Galleries, covering everything from:
- The various ways in which Jetpack improves on the core WordPress Gallery functionality
- What you need to do to enable Jetpack Galleries
- How to use the various Jetpack Gallery tools
- How to modify Jetpack Galleries with filters to change how they look and function
Whether you’re a total beginner or a code-savvy power user, you should be able to gain something from this Jetpack Gallery guide.
A Beginner’s Guide to Jetpack Galleries
Jetpack bills itself as “the ultimate toolkit for WordPress.” Essentially, it brings many of the features available to WordPress.com users to self-hosted WordPress users.
Most of those features have nothing to do with galleries. But those aren’t the features we’re interested in for this guide.
Instead, we’re going to focus specifically on the gallery functionality that’s baked into Jetpack. Jetpack builds on the core WordPress Gallery to add on various new styling options and functionality.
Those new features come in three forms:
- Tiled Galleries – lets you arrange your galleries in three ways: rectangular mosaic, square mosaic, and circular grid.
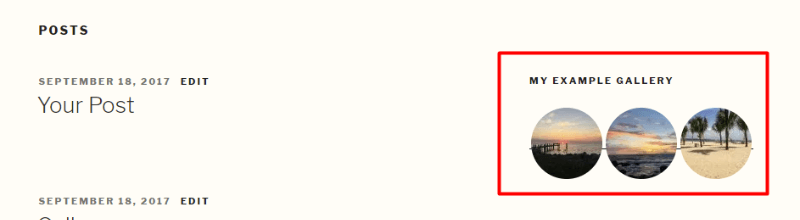
- Gallery Widget – lets you display a photo gallery or photo slideshow in your site’s sidebar (or other widgetized areas).
- Carousel – lets you display a lightbox carousel version of an image when a visitor clicks on an image in your gallery.
Below, we’ll dig into how to use each specific function. We’ll cover it from both a beginner’s and an advanced user’s perspective. That is, for each Jetpack Gallery feature, we’ll:
- Show you how to set up the basic feature
- Give you some advanced tweaks like using filters to change gallery sizing
The only thing you’ll absolutely need to follow this guide is a working copy of Jetpack installed on your site. If you haven’t already installed and activated Jetpack, you can follow this guide.
If you want to get more advanced with PHP filters, you should also understand where to add filters to your WordPress site. This plugin is a good option if you’re not sure where to start.
How to Enable Jetpack Galleries After Installing Jetpack
Before you can get started using Jetpack Galleries, you need to make sure that the basic gallery functionality is enabled.
To do that, head to Jetpack → Settings. Then, scroll to the Media section and make sure to enable these two options:
- Speed up images and photos
- Display images and galleries in a gorgeous, full-screen browsing experience
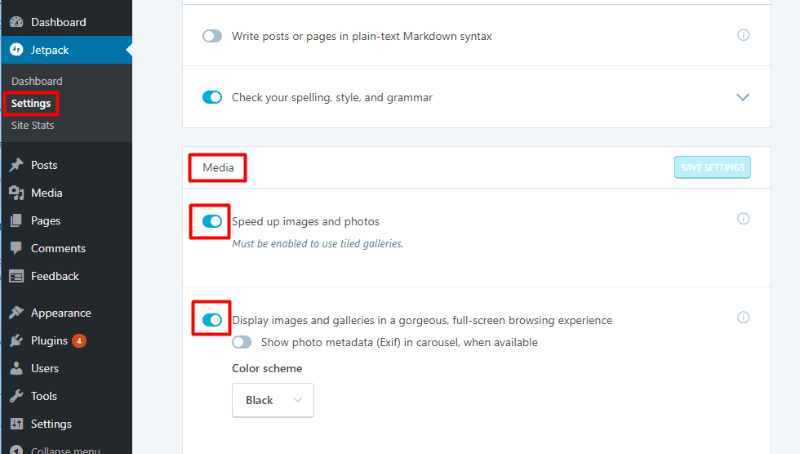
Make sure to click Save Settings. Then, you’re ready to continue.
How to Use Jetpack Tiled Galleries
Once you activate Tiled Galleries in the Jetpack Settings, you’re ready to start using them on your site.
Because Jetpack Galleries build on the core WordPress Gallery functionality, you can use the regular Create Gallery interface to create a Tiled Gallery.
Whenever you’re creating a new post or page, click the Add Media button like usual. Then, choose Create Gallery:
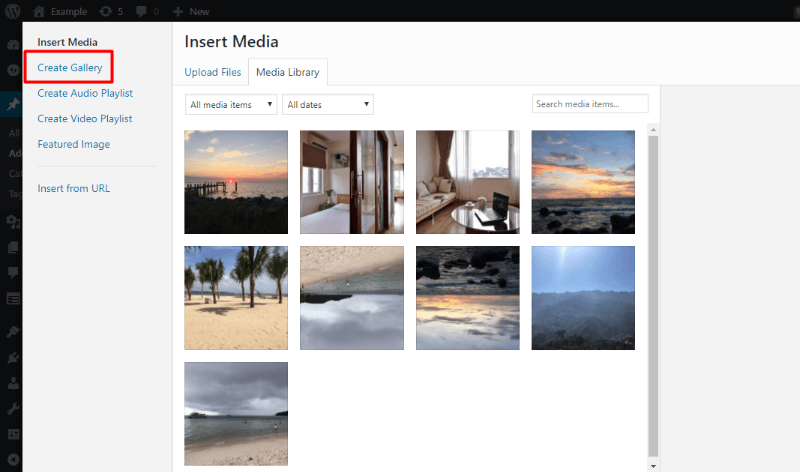
From there, select the images that you want to include in your gallery and click Create a new gallery:
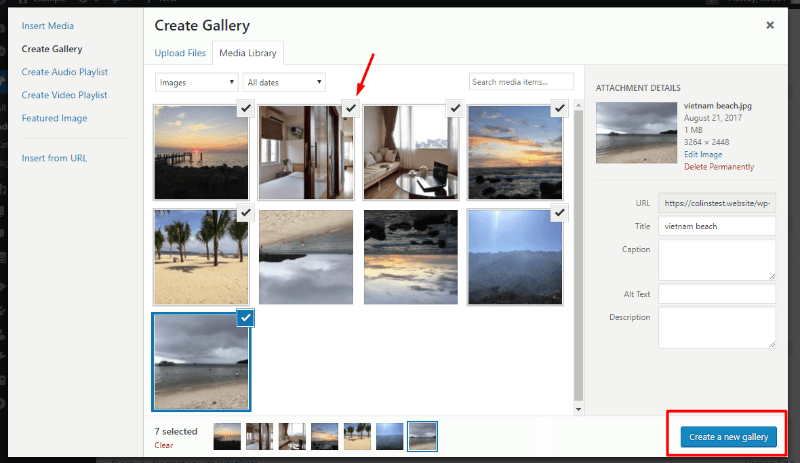
On the next screen, you’ll be able to choose what type of Tiled Gallery to insert by selecting from the Type drop-down:
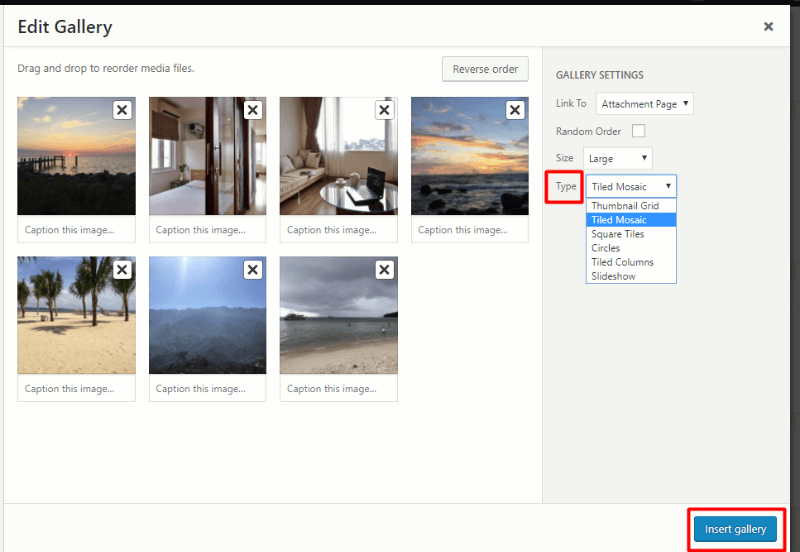
As with regular galleries, you can also:
- Add captions
- Choose ordering by dragging and dropping images
- Set image sizes
Once you’re happy with the settings, click Insert gallery to add your gallery.
If you look at the text tab of the WordPress Editor, you’ll see that the gallery shortcode generated is identical to the core WordPress Gallery shortcode, just with a new parameter added for the type.
And on the front-end of your site, you’ll see the new Tiled Gallery design applied to your gallery:

Make Your Galleries Tiled By Default
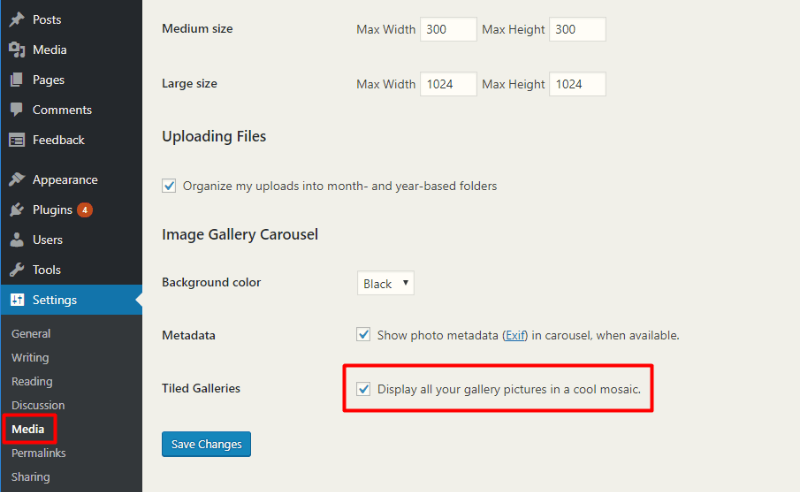
If you have old galleries that you want to turn into Tiled Galleries, or if you just want to make sure all of your new galleries have the tiled effect, Jetpack includes an option to make all of your galleries tiled by default.
To activate it, go to Settings → Media and check the box for Display all your gallery pictures in a cool mosaic:
Going More In-Depth With Code: Jetpack Tiled Gallery Filters
As you can see, the basic Jetpack Tiled Gallery functionality is fairly simple. That doesn’t mean you can’t make more advanced tweaks, though.
Jetpack includes a number of hooks and filters to let you further modify how Tiled Galleries function.
Here are some neat things you can do:
Set a Custom Content Width For Jetpack Galleries
By default, Tiled Galleries pull their width from your theme’s defined content_width. Or, if your theme doesn’t define a content_width, Tiled Galleries default to 500px wide.
If you want to override this functionality, you can use the tiled_gallery_content_width filter to set a custom width.
For example, to set a custom Tiled Gallery width of 800px, you could use this code snippet:
function jeherve_custom_tiled_gallery_width() {
 return '800';
 }
 add_filter( 'tiled_gallery_content_width', 'jeherve_custom_tiled_gallery_width' );
Change Default Tiled Gallery Type
If you want to change the default gallery type from the previous step to something else, you can use the jetpack_default_gallery_type filter.
For example, to make the default gallery type “circle”, you could use this code snippet:
function jeherve_custom_gallery_type() {
 return 'circle';
 }
 add_filter( 'jetpack_default_gallery_type', 'jeherve_custom_gallery_type', 30 );
How to Use Jetpack Gallery Widget
In addition to the Tiled Gallery functionality, Jetpack also lets you create galleries via a dedicated widget.
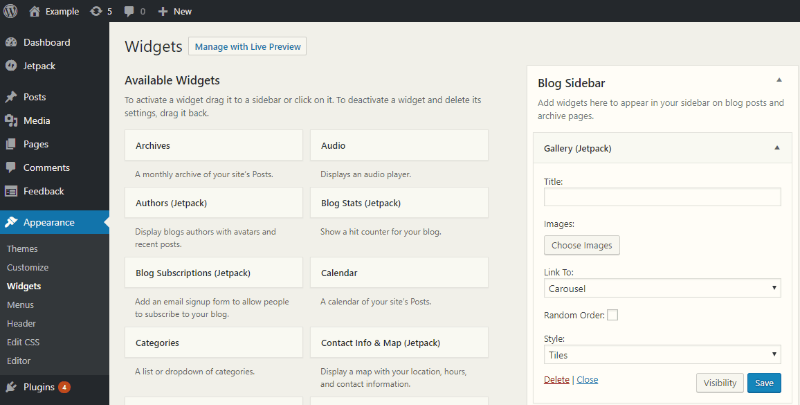
Assuming you’ve activated Tiled Galleries, you can access this widget like normal by going to Appearance → Widgets. To activate the Gallery Widget, drag the Gallery (Jetpack) widget into your blog sidebar (or another widgetized area):
To configure the Gallery Widget:
- Give it an optional name
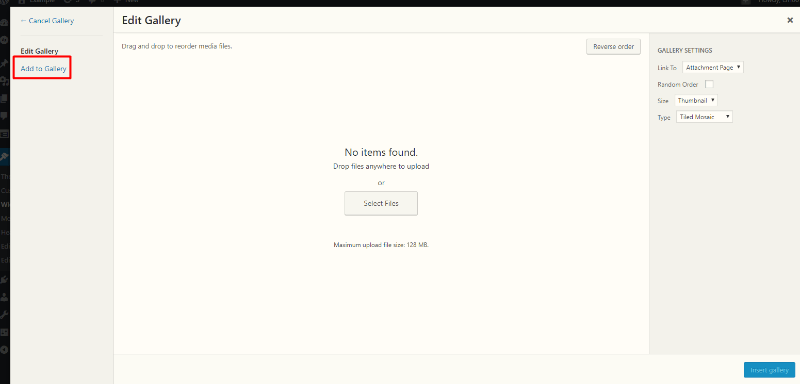
- Click Choose Images. You can either upload new images or add existing images from your WordPress Media Library by clicking the Add to Gallery tab:
- Choose where to link images to
- Choose whether or not to randomize the order of gallery images
- Select a gallery style
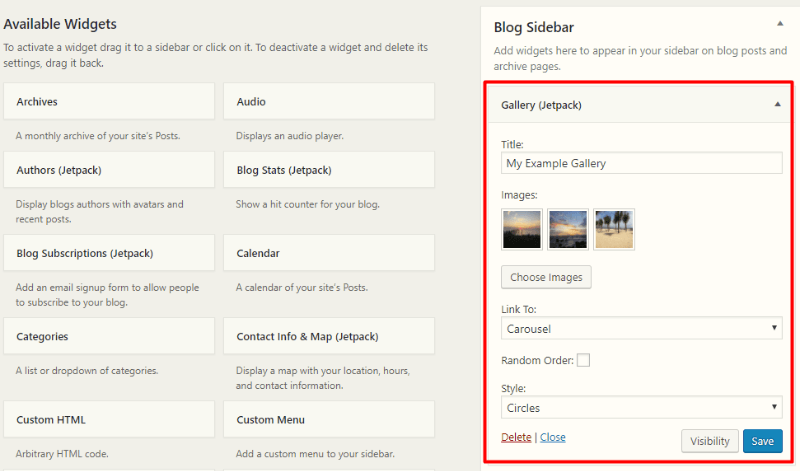
Once you finish configuring the Gallery Widget, click Save to make your changes live:
Going More In-Depth With Code: Jetpack Gallery Widget Filters
Just like with Tiled Galleries, you can also further modify how the Gallery Widget works by using some of the available filters.
Here’s what you can do with the included filter:
Change Jetpack Gallery Widget Width
By default, the Gallery Widget has a width of 265px. If you want to manually increase this width, you can use the gallery_widget_content_width filter.
For example, to increase the width to 400px, you could using the following code snippet:
function jetpackcom_custom_gallery_content_width(){
 return 400;
 }
 add_filter( 'gallery_widget_content_width', 'jetpackcom_custom_gallery_content_width' );
How to Use Jetpack Carousel
Now, we come to the third and final bit of Jetpack Gallery functionality:
The Jetpack Carousel.
The Jetpack Carousel effect isn’t something you insert by itself. Rather, it’s something you add to existing galleries and/or images.
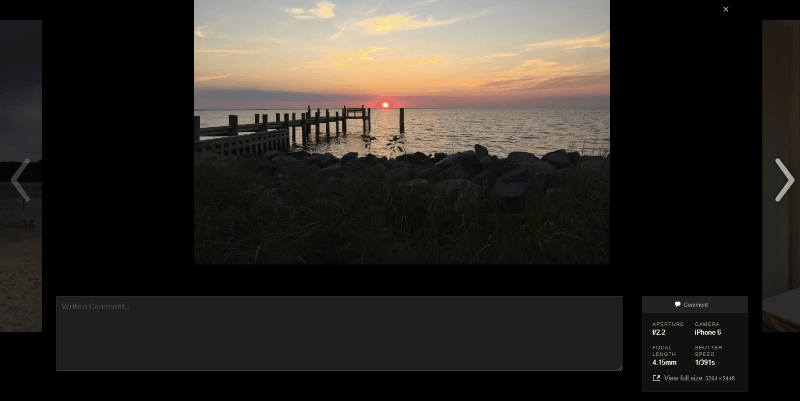
When enabled, visitors can click on any of your images to open a fullscreen lightbox view complete with:
- Previous/next buttons (when applicable)
- EXIF data (if enabled)
- Comments section
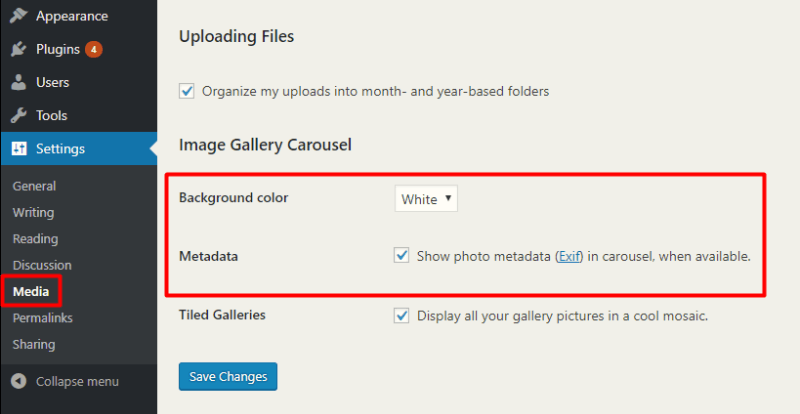
How to Change Background Color or Remove Exif Data
Jetpack gives you two built-in options to customize how the Jetpack Carousel functionality works. You can:
- Change the background color to white or black
- Disable the image Exif metadata
To make these changes, go to Settings → Media in your WordPress dashboard and configure the options as desired:
Going More In-Depth With Code: Jetpack Carousel Filters
Like Tiled Galleries and the Gallery Widget, you can also further modify the Jetpack Carousel.
Here are some ways in which you can modify the Jetpack Carousel with filters
Remove the Comment Form
If you don’t want to display the comment form on your images in Carousel view, you can use the following filter from the Jetpack blog:
function tweakjp_rm_comments_att( $open, $post_id ) {
 $post = get_post( $post_id );
 if( $post->post_type == 'attachment' ) {
 return false;
 }
 return $open;
 }
 add_filter( 'comments_open', 'tweakjp_rm_comments_att', 10 , 2 );
Automatically Close Comments After a Certain Number Of Days
If you’d prefer to leave comments available, but close them after a certain number of days, you can use the following code snippet:
function jpcarousel_auto_close_comments( $open, $post_id ) {
 $post = get_post( $post_id );
 $days_old = (int) get_option( 'close_comments_days_old' );
 if ( ! $days_old )
 return $open;
 if( $post->post_type == 'attachment' && time() - strtotime( $post->post_date_gmt ) > ( $days_old * DAY_IN_SECONDS ) ) {
 return false;
 }
 return $open;
 }
 add_filter( 'comments_open', 'jpcarousel_auto_close_comments', 10 , 2 );
You can define how long to leave comments open by going to Settings → Discussion in your dashboard.
Common Problems With Jetpack Galleries + Solutions
Most of the time, Jetpack Galleries work just fine out of the box. But because your theme and site configuration can have an effect on Jetpack Galleries, you might run into situations where Jetpack Galleries:
- Just plain aren’t working
- Are causing an error
- Don’t look right on your site
In this section, we’ll go over some common problems with Jetpack Galleries, as well as how you can try to fix each problem to get things working again.
Jetpack Gallery Not Working At All
Assuming you definitely enabled Tiled Galleries and Carousel in the Jetpack settings (what we covered at the beginning of this post), the most likely reason that Jetpack Galleries aren’t working is because your theme has custom gallery functionalities that interfere with Jetpack.
According to Jetpack Support, “The Carousel will deactivate if it detects that the theme in use is overwriting the gallery shortcode, so as to not conflict with the theme.”
Similarly, if you or your theme is using the Cleaner Gallery plugin, neither Jetpack Tiled Galleries nor Jetpack Carousel will work. You can find mention of this conflict here.
So…if that’s the issue – how can you fix it?
First, some themes recognize this potential conflict and give you an option to turn off custom WordPress Gallery styling. For example, the popular Total theme offers a toggle to activate or deactivate its gallery feature:
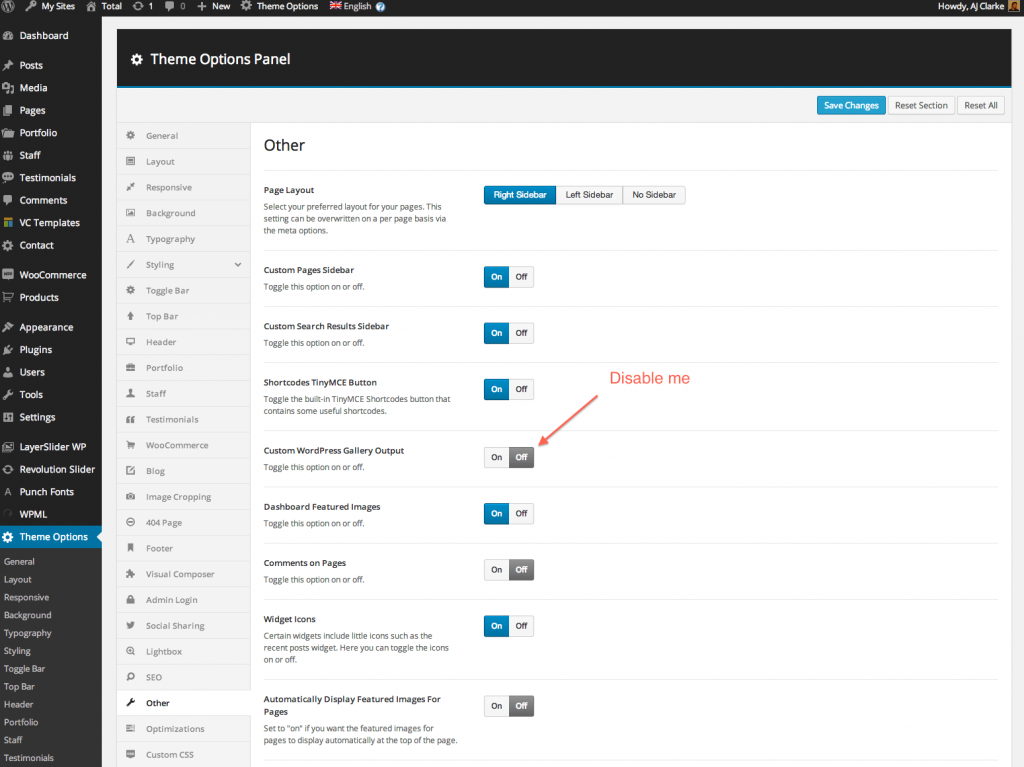
That won’t cover all themes – but if you’re lucky, you’ll have an option like this one.
If you’re using the Cleaner Gallery plugin, or if your theme includes functionality from Cleaner Gallery, you can also use this plugin from Jetpack to solve the issue.
Finally, if Jetpack Carousels is automatically deactivating itself due to a conflict with another theme or plugin, you can use a filter to force re-enable it. We can’t promise that this won’t cause issues, but you can try and see if force re-enabling Jetpack Carousel functionality fixes the problem.
To do that, use the jp_carousel_force_enable filter.
add_filter( ‘jp_carousel_force_enable’, function( $input ) { return true; } );
If none of the above have fixed the problem, there are all kinds of smaller errors that might be causing the issue as well. Unfortunately, because these problems are site-specific, it’s impossible to provide blanket solutions.
Instead, your best course of action is likely to speak to your theme’s support staff.
Make Jetpack Gallery Full Width
We already touched on how to change the width of both Jetpack Tiled Galleries and the Jetpack Gallery Widget.
But if you specifically want to make the Jetpack Gallery full width, here’s how to do it:
For Jetpack Tiled Galleries, you need to figure out the width of the main content area. Every theme will have a different width, so we can’t give you one size here.
Remember – Jetpack will try to do this by itself, but sometimes it fails because of the way that your theme is coded.
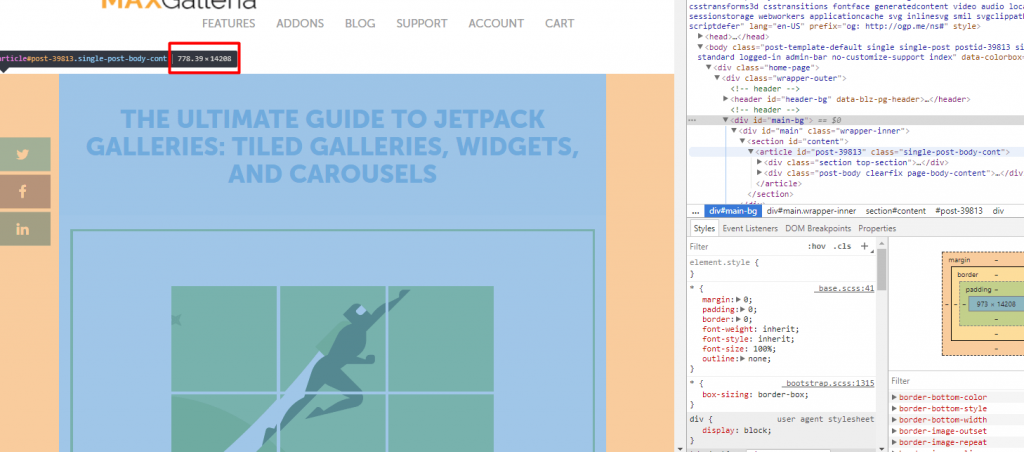
An easy way to figure it out is to use the Inspect option in your browser’s Developer Tools:
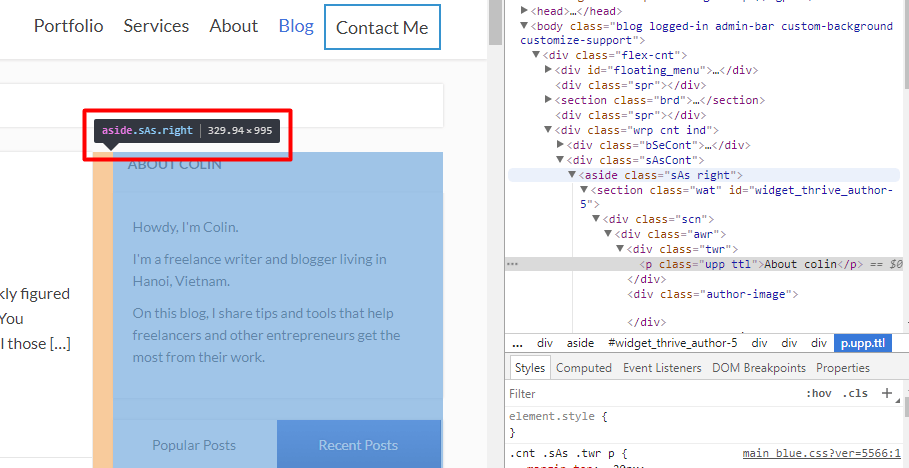
You can use a similar approach to find the width of your sidebar for the Gallery Widget:
Once you have the values for the width of your content area and sidebar, you can use the aforementioned filters to change the width of Jetpack Tiled Galleries and the Gallery Widget.
For the first example, our blog (in the screenshot) had a max width of 778 px, so you could use this snippet:
function jeherve_custom_tiled_gallery_width() {
 return '778';
 }
 add_filter( 'tiled_gallery_content_width', 'jeherve_custom_tiled_gallery_width' );
You can also bypass using the filter by defining a $content_width variable using the free Custom Content Width plugin.
And for the sidebar example, the sidebar was 330 px, so you could use this snippet:
function jetpackcom_custom_gallery_content_width(){
 return 330;
 }
 add_filter( 'gallery_widget_content_width', 'jetpackcom_custom_gallery_content_width' );
Use Jetpack Galleries In Page Builders
One thing people often struggle with is how to use Jetpack Galleries in WordPress page builders.
While some page builders might give you dedicated gallery modules, the simple fact remains that as long as your page builder lets you execute shortcodes, you should be able to use Jetpack Tiled Galleries in your page builder.
While you can always build the WordPress Gallery shortcode yourself, a simpler way is to just create a Jetpack Gallery in a regular post or page like normal and then copy the shortcode into your page builder interface.
Organizing The Images You Use In Your Jetpack Galleries
Just as with the core WordPress Gallery function, it can be difficult to keep track of all the images you use in your galleries if you regularly make use of Jetpack Tiled Galleries.
One way to fix that is to use actual folders to organize the images you use in your galleries.
The WordPress Media Library Folders Pro plugin both adds real folders to the WordPress Media Library and integrates with Jetpack Tiled Galleries to make it easy to create a gallery directly from the images in a folder.
Read this post for a full overview of how to organize your WordPress Media Library with folders. Otherwise, we’ll jump into how to actually use those folders to create Jetpack Tiled Galleries.
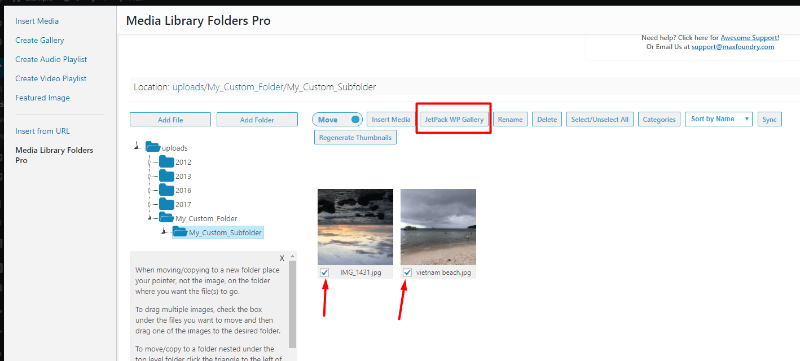
When you go to Add Media, you can select all/some of the images in one of your Media Library folders. Then, all you need to do is click the JetPack WP Gallery button to start creating a gallery:
Then, you’ll be able to configure exactly how your gallery functions:
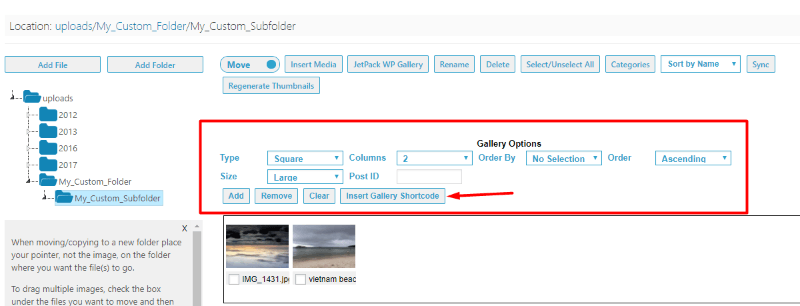
When you’re done, all you need to do is click the Insert Gallery Shortcode button to add the Tiled Gallery to your post.
Now, instead of your gallery’s images being lost somewhere in the depths of your WordPress Media Library, you can always find them right in the folder.
You can even sync your media uploads with your FTP server if you want to use FTP to upload the images you use in Jetpack Galleries.
Other Plugins That Play Nice With Jetpack Galleries
Beyond WordPress Media Library Folders Pro, there are some other plugins that also play nice with Jetpack Galleries:
- Responsive Lightbox by dFactory – lets you force a different lightbox for Jetpack Tiled Galleries if you don’t like Jetpack Carousel
- WP Flexslider – lets you add Flexslider to native WordPress Galleries without breaking Jetpack Tiled Galleries
- Divi Lightbox for Jetpack Tiled Galleries – helps Divi users by adding the Divi Lightbox to Jetpack Tiled Galleries
- Jetpack Without Promotions – removes Jetpack admin notices and upgrade nags
Wrapping Things Up
Jetpack Galleries build on the core WordPress Gallery functionality to add better styling and functionality.
At a basic level, Jetpack Galleries are easy to get started with. But thanks to Jetpack’s hooks and filters, those who are willing to get their hands dirty can dig in and further customize things.
Finally, if you want a more organized way to manage the images that you use in Jetpack Galleries, you can use the Media Library Folders Pro plugin to generate the Jetpack Gallery shortcode straight from an organized folder of images.