

If you're anything like me; you enjoy the huge yet rewarding challenge of painting, which is why collecting and painting miniatures for skirmish level games is how I spend most of my time.
A good skirmish game usually only requires ten to fifteen miniatures. So, when I originally got into Wild West Exodus, having to paint this amount of minis didn't seem too much of a nightmare (even for me!).
That’s what I thought...
Early on I realised, after looking at gorgeously painted minis for Wild West Exodus, that a signature part of the WWX look was OSL (Object Source Lighting) along with NMM or Non-Metallic Metal - a technique that’s typically laborious but annoyingly very rewarding on completion.
After I started painting miniatures for Wild West Exodus at Warcradle Studios I set myself a challenge. This challenge was to find or develop a method of painting that allowed for:
Speed - I needed to be able to finish a model or group of models in under eight hours (either in the studio or on my day off).
Simplicity - techniques or methods developed had to have a no fuss and easy to replicate approach. Any form of blending would soak up time so glazing, washing and dry brushing were at the top of my list.
Delivery of high-quality NMM - having practised NMM for a while, I concluded airbrushing would give the best and speediest result over using a regular brush technique.
It’s taken a few months of playing around but I’ve finally settled on a method that’s fast, simple and produces a high-quality NMM finish every time.
After a bit of practice, you'll get your models to a good tabletop standard using this method with Non-Metallic Metal and everything!
Resources you’ll need:
Airbrush or black, grey and white undercoat sprays
GW Shades: Nuln Oil, Agrax Earthshade
Vallejo Game Inks: Yellow, Sepia, Brown, Violet
Vallejo Game Air: White
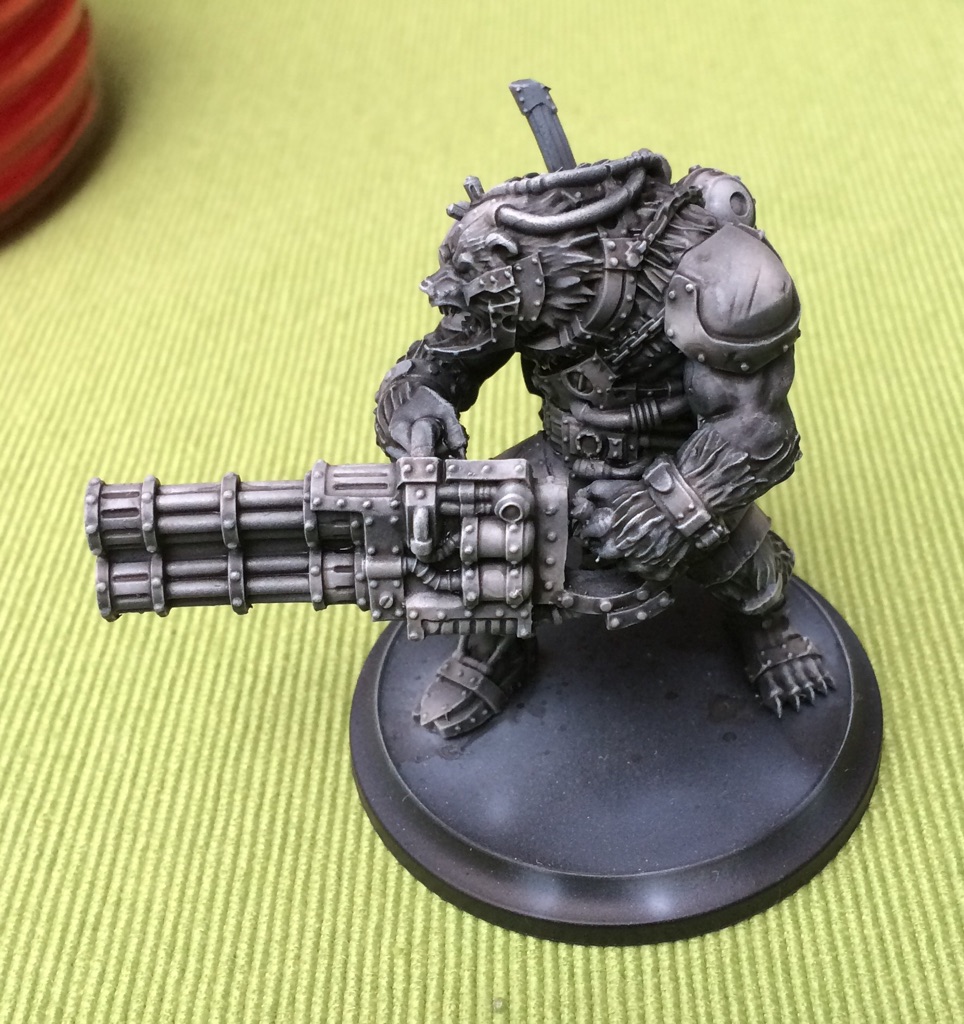
Stage 1 - Undercoat and Light Source
I recommend starting with a Zenithal undercoat. For this stage, I used an airbrush but you can get good results using spray cans too.
The key to a good Zenithal undercoat is planning where your light source is coming from. I tend to bring the layers in from around two o'clock as though the natural light is coming in from over and in front of the model's right shoulder.
Firstly, Vallejo Model Air Grey should be applied to the majority of the models outward facing areas. After, use white to create light sources by placing on all raised areas and any area that would later become NMM. All layers should be put down in several passes to get a smooth blend (it also helps begin to define the volumes of the model).
A wash of GW Nuln Oil should then be applied liberally to the entire model. Once again this will help define all the separate elements and force strong contrasts for your NMM.
Ensure that the wash does not pool up on any of the flat areas.

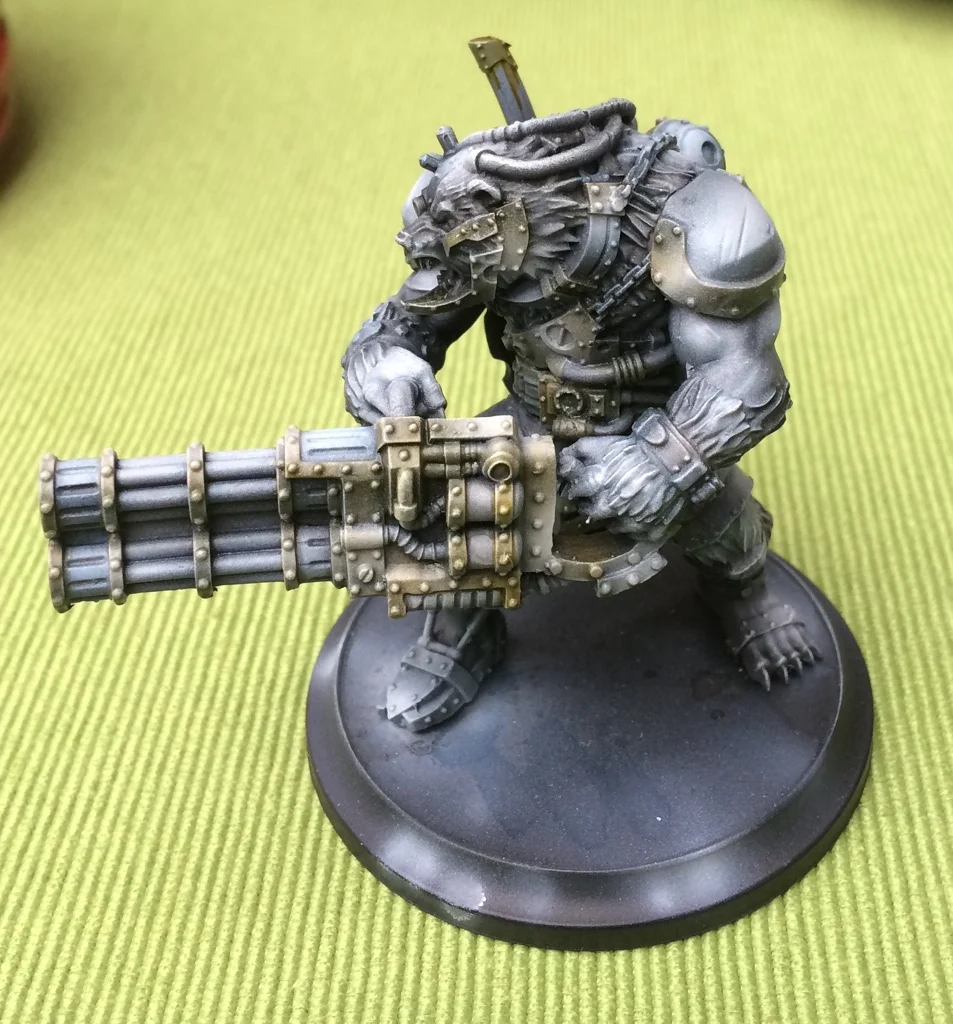
Stage 2 - Creating Highlights and Introducing Colour
Once completely dry (I use a hairdryer to speed up drying), applying a soft and light drybrush of Vallejo Game Air White against the grain of the detail with a very large and soft brush will intensify highlights.
Before I start adding colour on the model, I remove 99% of the paint from the brush and always test it out on my finger first. If it just about picks out my fingerprint it's good to go.
Now it's time to start bringing in some colour!
Apply a thin Glaze of Blue Ink to any area that will later become steel NMM. I used Vallejo Game Ink Blue diluted with water around 8/1. For the best results, do not let this glaze pool up.
Applying thin layers means the paint dries within a few seconds. I then glaze brass/gold areas with a 50/50 mix of Vallejo Game Ink Sepia and yellow (once again diluted 8/1). I always allow this glaze to pool up slightly in recesses and around rivets because it adds definition and depth.

Stage 3 - Lighting Effects and Detailing
The next stage is to go back and force in some lighting effects. I used an airbrush for this stage but you can achieve a similar effect with dry brushing and stippling (if you have more time).
Small amounts of white should be placed in key areas to accentuate surface shine and keep the light source at two o'clock.
At this stage, I also glazed skin areas with Vallejo Game Ink Violet and any leather straps Vallejo Game Ink Brown. This was applied using the same recipe as previous glazing steps; watered down around 8/1.
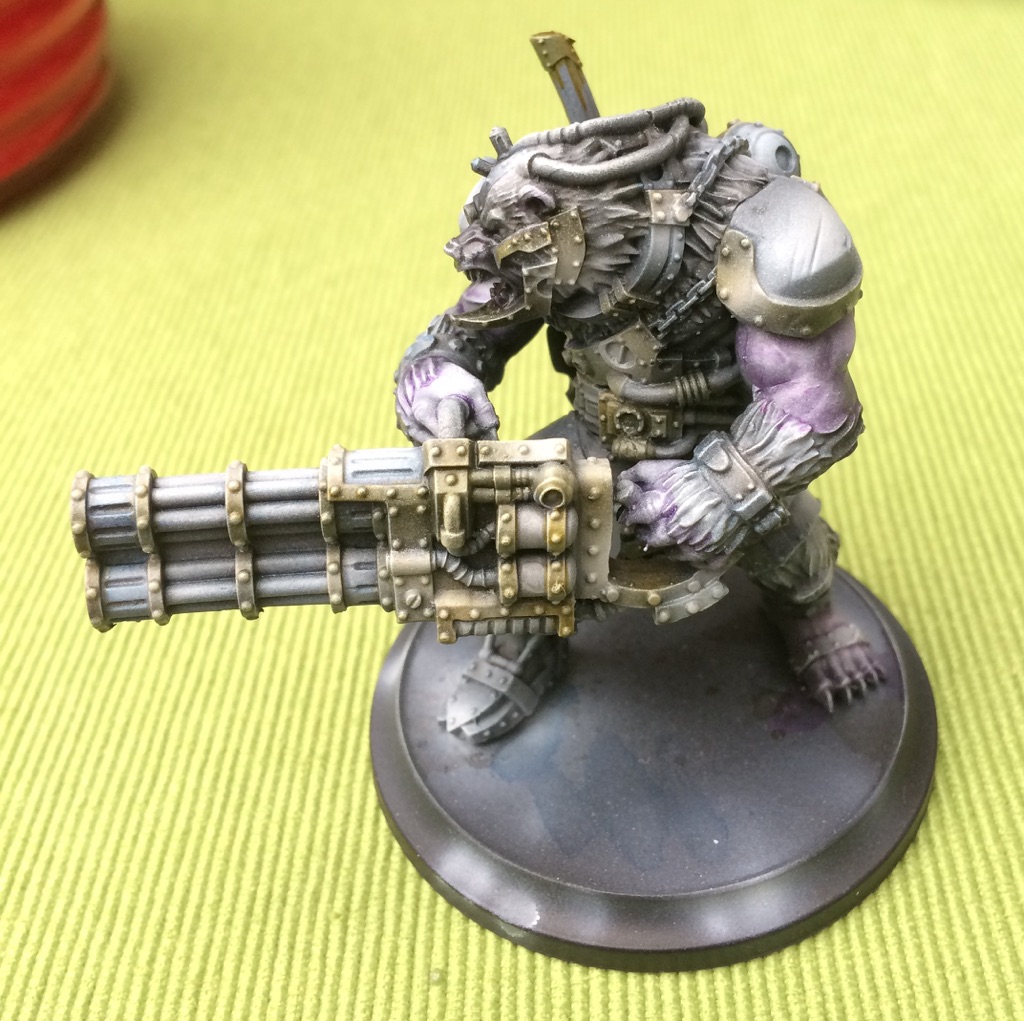
Next I washed the entire model liberally with Agrax Earthshade to bring depth to the miniature and tone down the NMM.

Once dry, I dry brushed the model again in white as repeating this stage helps build up the solid white edges for our NMM.
If we used an edging method it would take a lot longer to get the same result. As you can see, brushing in white for a second time really starts to make highlights pop!

Using the previous glazing method, you can deepen the models colours further. I deepened the steel, brass, leather and skin areas using the exact steps as before.
For the fur I wanted to get good separation from any other details so I washed fur areas with a 50/50 mix of Vallejo Game Ink Black and watered down Brown Ink at around 2/1.
Airbrushing with white again in smaller yet more intense amounts forces the highlights though. At this stage, we can really see the NMM coming together.
Finally, to bring a satisfying glint to the NMM, dry brush in white once again, but only at the highest points of light.
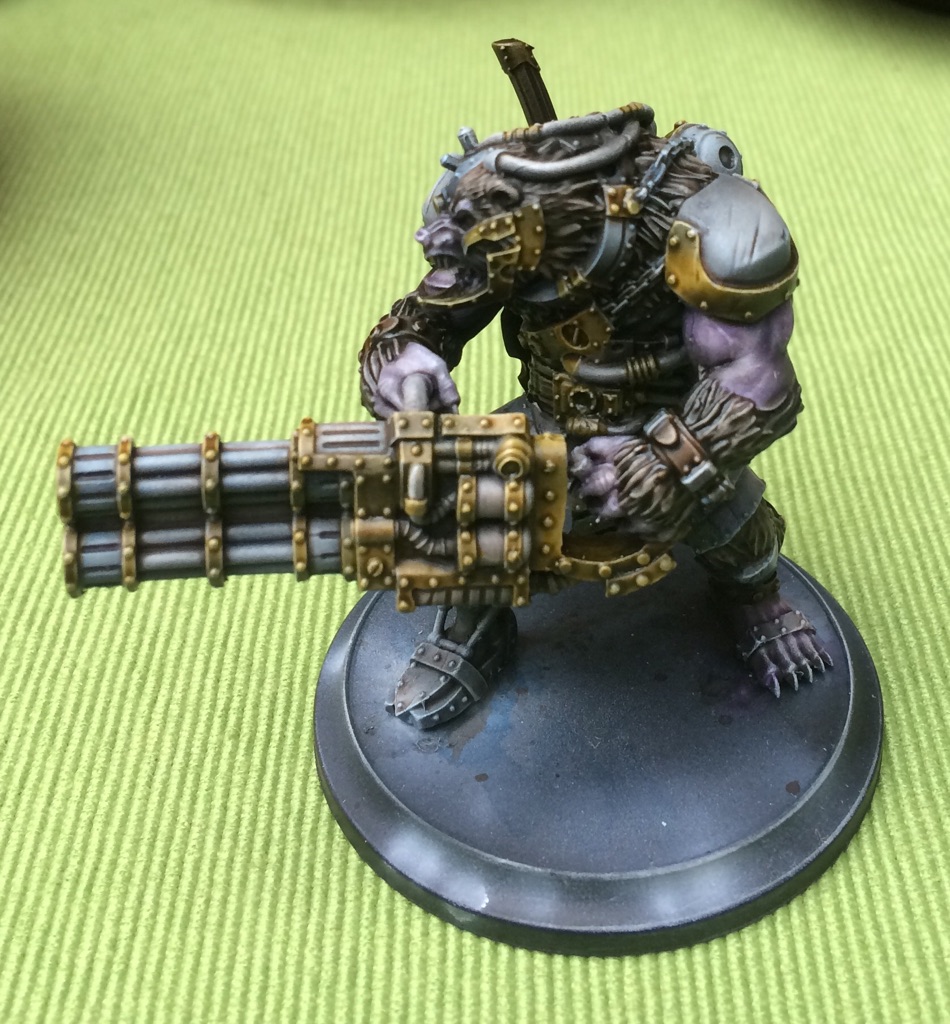
Stage 4 - Creating Contrast and Depth
Once again wash the entire model with Nuln Oil to bring further contrast, depth and separation to the miniature.

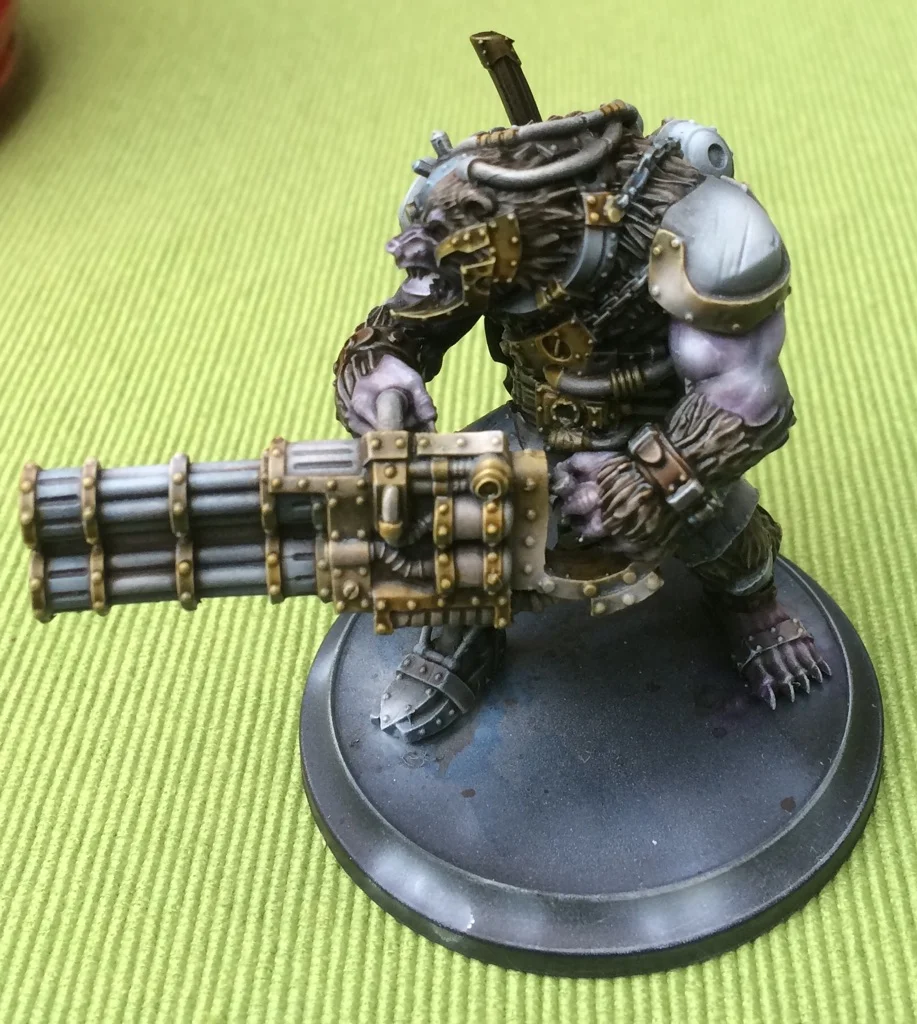
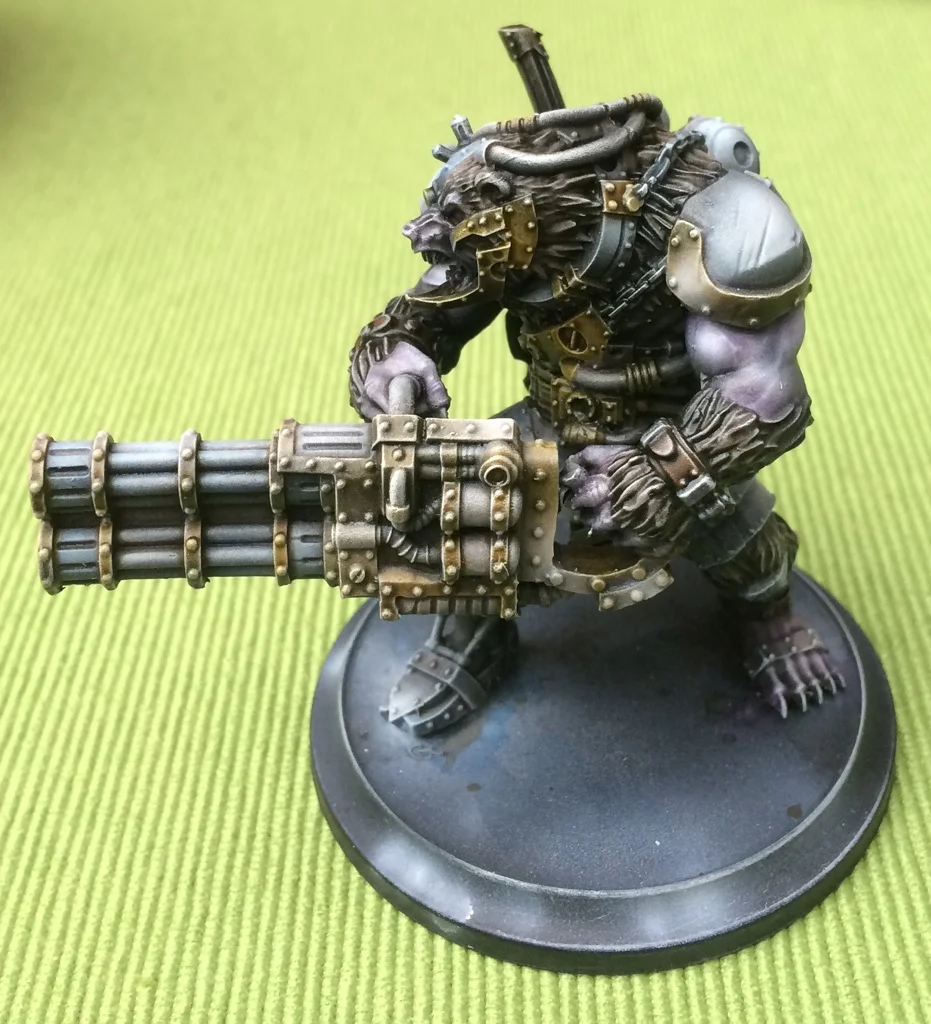
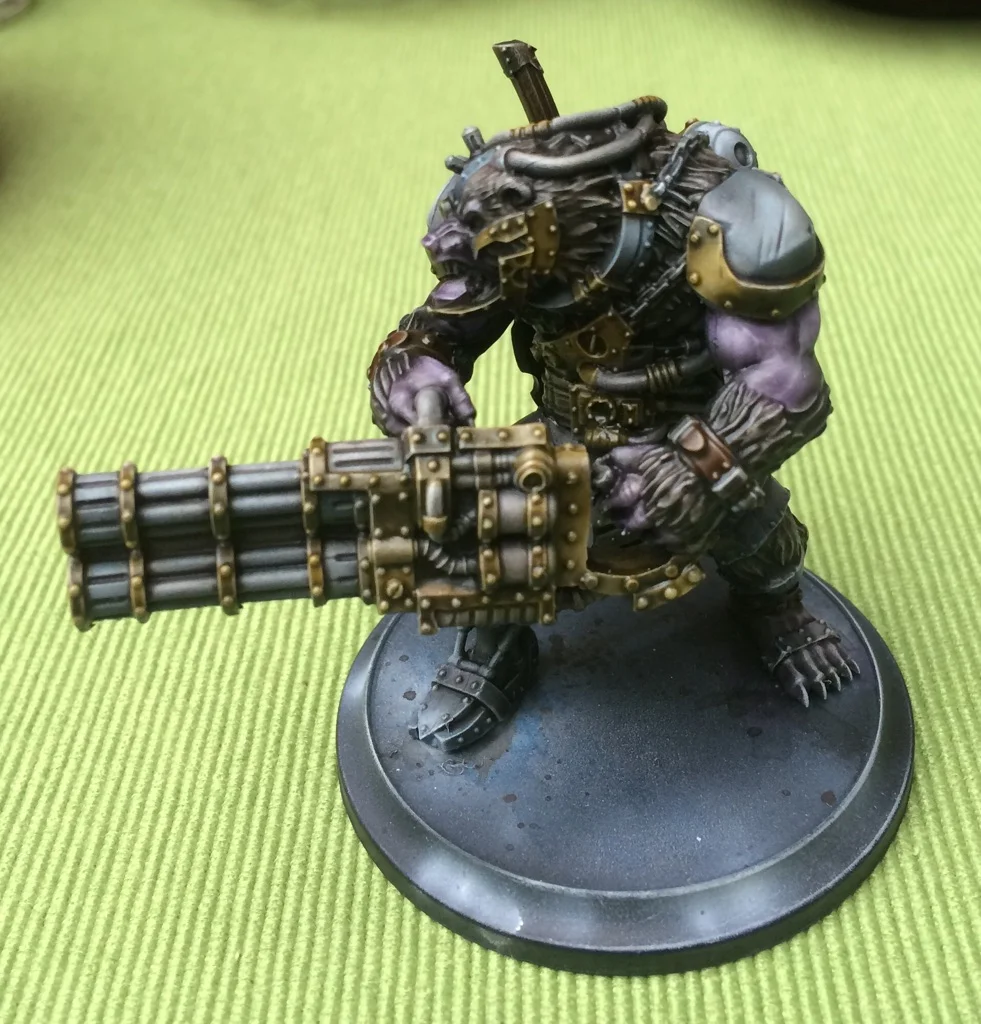
For the final stage all areas of skin, fur, steel, brass and leather should be glazed for a final time using the same mixes as before.
Now all colours should appear rich and vibrant with shining highlights and deep shadows that will look fantastic on the table top.
I hope this step by step miniature painting tutorial has been useful. Don't forget, this method can be used on any model with any colour and on any type of surface.
If you prefer less or more repetitions of stages then go for it - everyone has their own tastes and preferences!
Next time we're going to take our tabletop ready miniature and transform it into a display quality piece of art in no time; covering skin work, reflective surfaces, weathering and OSL - another tricky area for some painters.
So until then, let's be getting those Posses tabletop ready!