Spooktacular Sidestep DIY Halloween Card

Are you searching for a spooktacular way to celebrate Halloween this year? Get ready to get in the Halloween spirit by creating this fun and whimsical Spooktacular Sidestep DIY Halloween Card! Made using dies, stamps, and lots of spooky accents, this Halloween craft project is the perfect way to wish your loved ones a Happy Halloween this fall.
From the Designer: "Halloween cards are great fun to make, and I am going to show you how to make a sidestep Halloween card with the new Tim Holtz Tonic Studios Stamp Platform to wish 'Best Witches' to someone special on this 'spooktacular' holiday."
Estimated Cost$11-$20
Time to CompleteIn an evening
Primary TechniqueGeneral Paper Crafting
Project or Page SizeCard
Type of Paper UsedCardstock

SeasonFall
HolidayHalloween
Project TypeMake a Project
Materials List
- Tonic Spooktacular Die 1859E
- Tonic Witchy Bits Trio 1820e
- Tonic What’s Brewing 1858e
- Tonic Best Witches 1865e
- Cardstock in Orange, Black, and Lime Green
- Tim Holtz Stamp Platform 1707e
- Tonic Delicate Detail Henna Flourish Stamp Set 1340e
- Nuvo Pure Sheen Spiced Apricot Glitter
- Nuvo Deluxe Adhesive 200n
- Two sided tape in sheets or rolls
- Sewology Quilting Plastic Templates
- Black fun foam
- Black ink
- Mounting tape
- Scoring tool
- Finger dauber
Instructions:
-
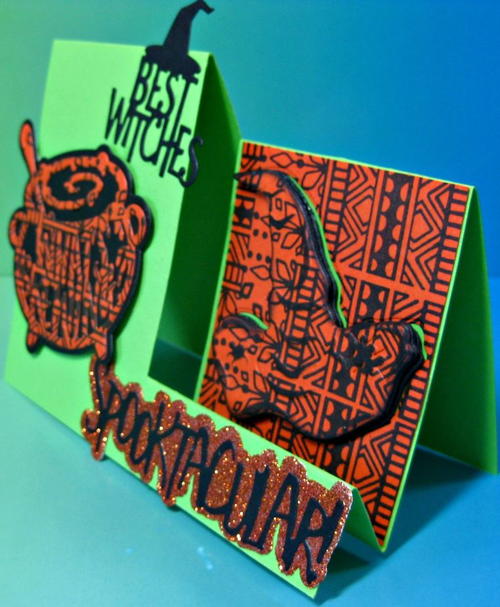
Cut and score a sidestep lime green card base (I used the template shown here on Pinterest.)
-
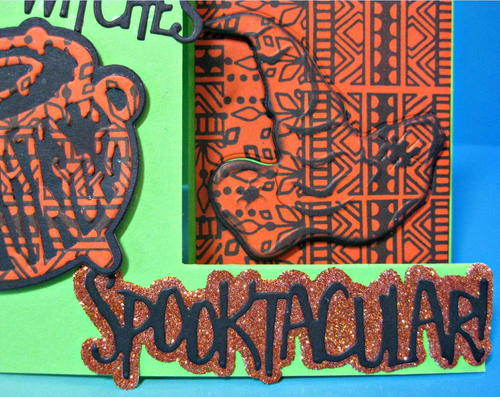
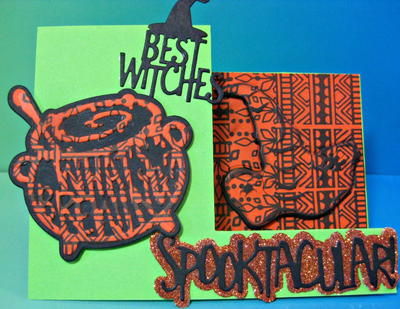
Die cut “Best Witches”, “Spooktacular”, and the back of the “What’s Brewing” cauldron out of black cardstock.
-
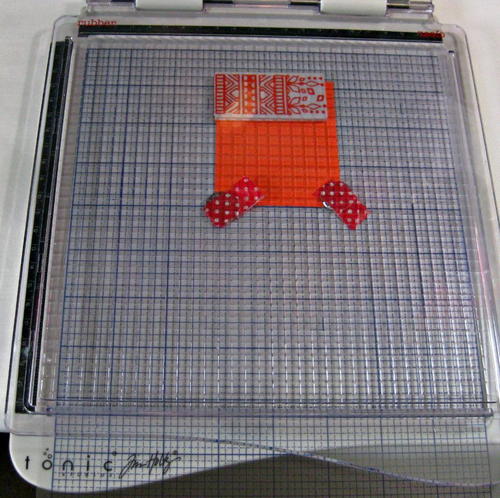
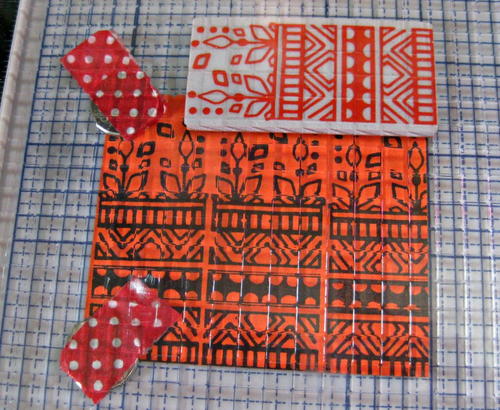
Cut a piece of orange cardstock 2 5/8” x 3 1/8” and place in the Tonic Tim Holtz Stamp Platform.
-
TIP: I cover the very strong magnets that come with Tim’s Stamp Platform with pieces of washi tape with a tail to make them easy to pull apart and handle on the magnetic platform. ALSO, I place a quilting plastic template in the stamp platform to protect the surface from ink and also to help line up pieces on the stamp platform. I found my quilting template at Hobby Lobby very inexpensively and they fit perfectly in the Tonic Studios Tim Holtz Stamp Platform.
-
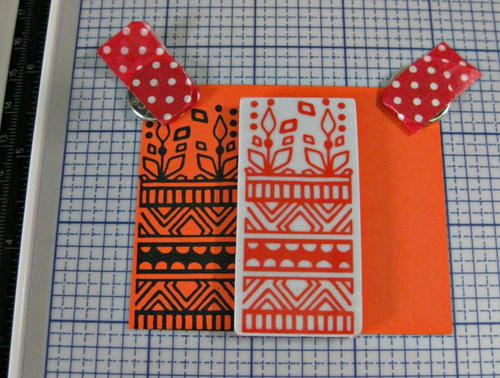
Choose the rubber side of the top of the stamp platform, and place the Henna Flourish stamp on the side of the orange piece. Close the platform so it picks up the stamp exactly where you want to stamp it and ink the stamp with black ink, then close the top of the stamp platform. If it is not stamped perfectly the first time, you can repeat this step as many times as necessary to get a perfect stamped image every time. Clean off the stamp, move it over and repeat. Cover the orange piece with the henna stamped lines, then die cut out the witch’s hat from the center top of the orange stamped piece.
-
While the orange hat piece is still in the die, flip it and emboss the hat using a rubber mat in your diecutting machine. Then using a finger dauber sponge, apply black ink through the openings in the witch hat die to emphasize the embossing. Remove the hat from the die and sponge black ink around the edges as well.
-
Attach the orange stamped frame piece to the side of the stairstep card. Glue the orange patterned witch’s hat to two hats die cut out of black fun foam, and then attach the finished hat inside the die cut hole it was cut out of. It is fun how the pattern continues from the hat to the background, but the hat stands out because of its dimension and sponging.
-
Using the stamp platform again, stamp another orange scrap with the Tonic Studios henna flourish stamp and die cut the “What’s Brewing” witch’s cauldron, then attach to the black die cut background. Attach that piece to the side of the card with mounting tape to raise it. Attach the “Best Witches” mini die with Nuvo Deluxe Adhesive.
-
Remove the top paper of the two sided tape die cut “Spooktacular” background and carefully place the word Spooktacular on it. Dump Nuvo Spiced Apricot glitter on the sticky background and burnish it in. Apply to the bottom right step with Nuvo Deluxe Adhesive Glue.
-
The last step is to send or give this fun stairstep Halloween card to a special person and have a Spooktacular Halloween!

What's your favorite holiday? Let us know below in the comments!
Read NextPrintable Minecraft Steve Head
Your Recently Viewed Projects
Thanks for your comment. Don't forget to share!
Princess Carolyn
Aug 25, 2017
What a cute Halloween card! It would be so fun to make this with my nieces.
Report Inappropriate Comment
Are you sure you would like to report this comment? It will be flagged for our moderators to take action.
Thank you for taking the time to improve the content on our site.