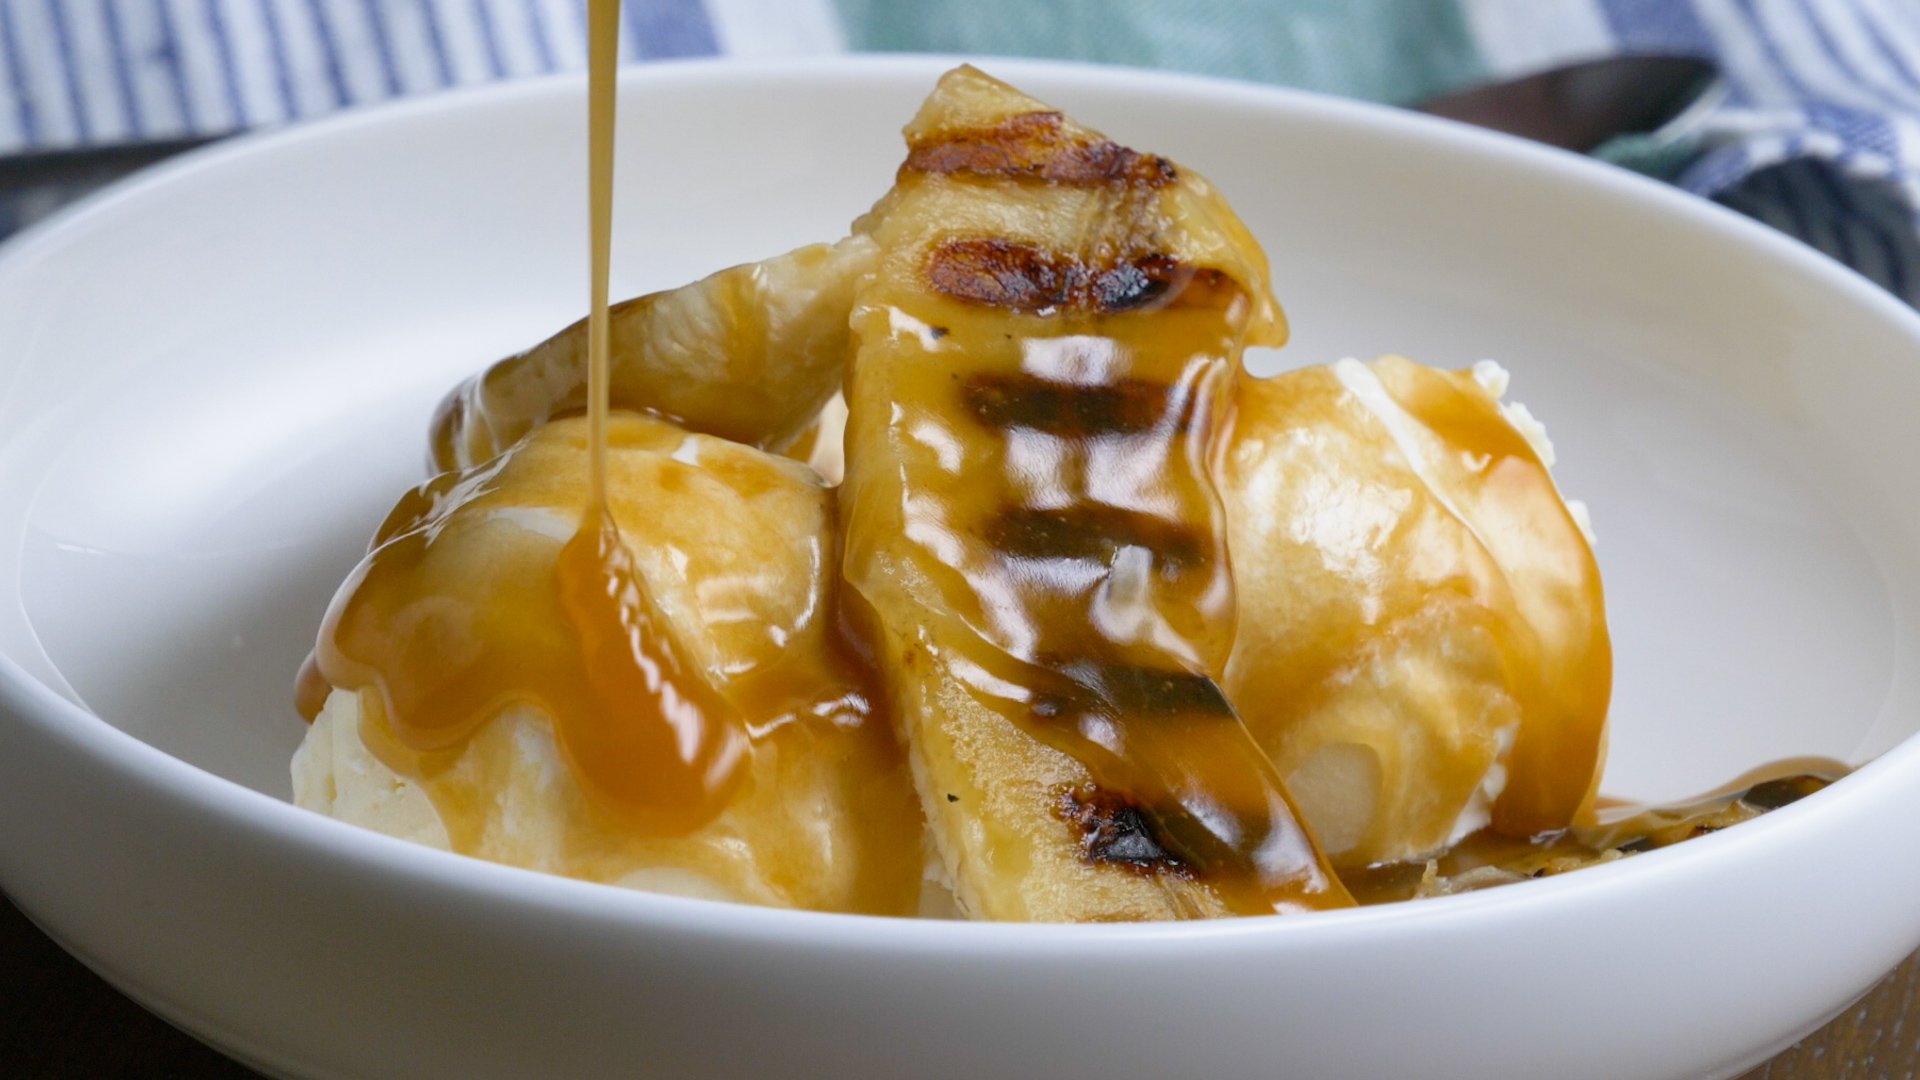
Bananas Foster on the Grill
Bananas Foster is my husband's favorite dessert, and this is one of the easiest recipes I have found. Not only is it delicious, it's a great way to use those bananas that are a little too ripe to just peel and eat. —Rebecca Clark, Warrior, Alabama
Get Recipe
Psst: Become a grill master with our
ultimate guide to grilling everything.
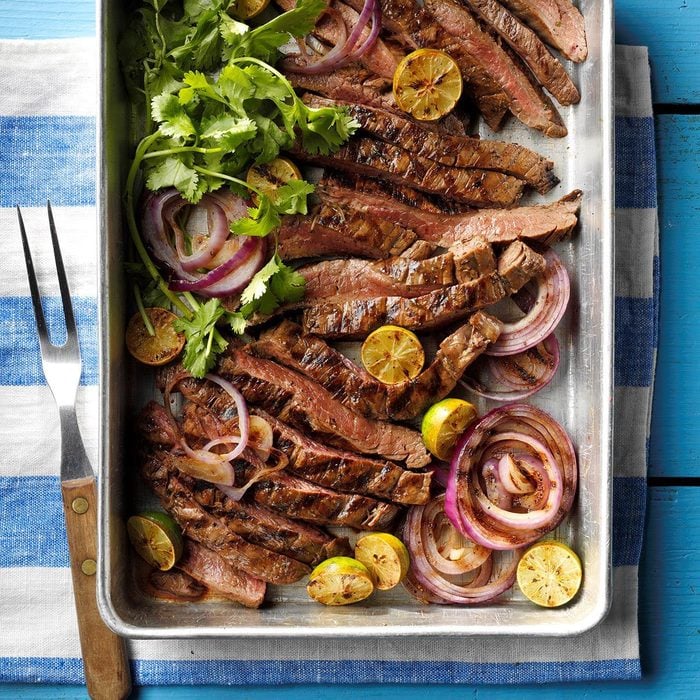
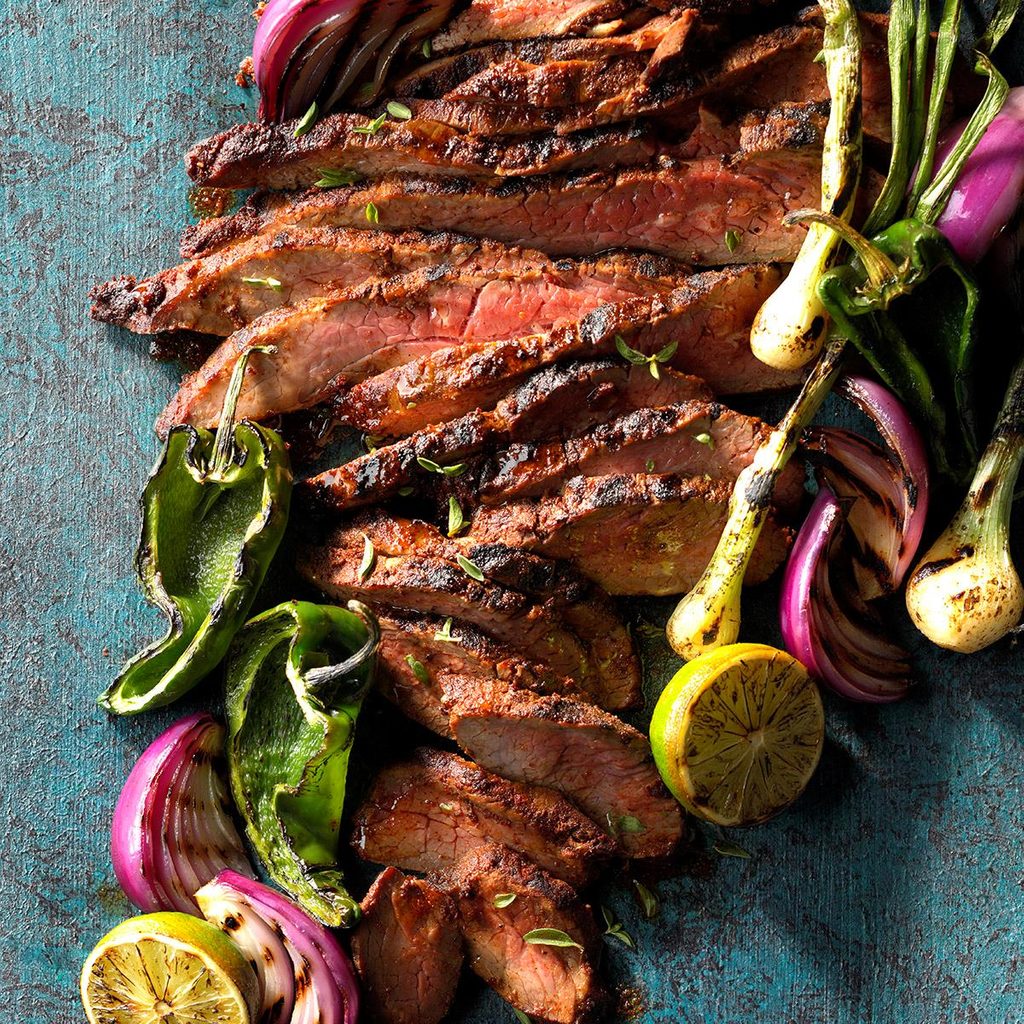
Key West Flank SteakMy husband, Jason, is the cook in our family. This is his recipe, inspired by his Colombian roots and our visits to Key West. Sometimes we grill extra lime and onion slices alongside. Serve with sides of rice and fried plantains. —Gretchen Ospina, Columbia Heights, Minnesota
Start off your meal with these
easy summer appetizers.
Grilled BruschettaThis is my go-to appetizer in the summer when tomatoes and basil are fresh from the garden. The balsamic glaze takes this bruschetta recipe over the top. I like to use a Tuscan herb- or basil-infused olive oil for this. But, it's great with just plain olive oil, too. —Brittany Allyn, Mesa, Arizona
At the start of summer, dig in to these
Memorial Day BBQ recipes.
Shrimp Cobb SaladThis shrimp cobb salad is quite healthy. I often use a grill pan, but you can simply saute, too. Feel free to use any greens you like. — Nicholas Monfre, Hudson, Florida
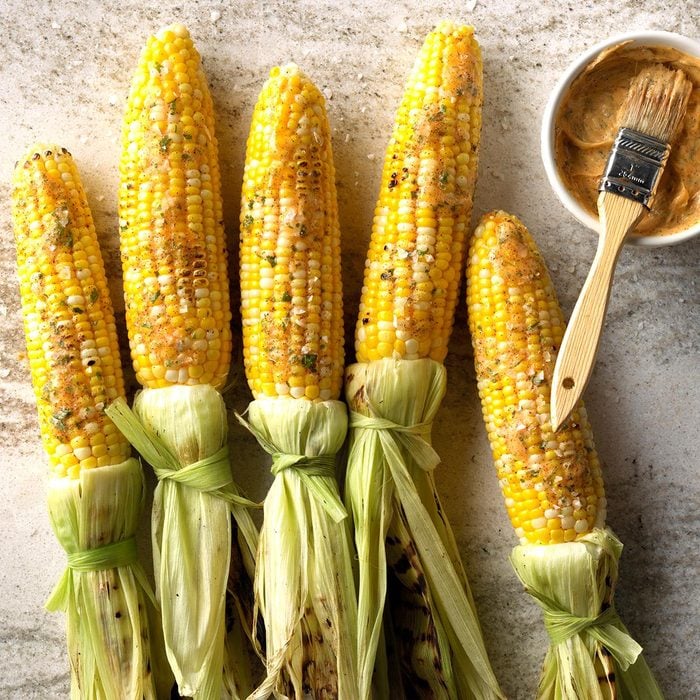
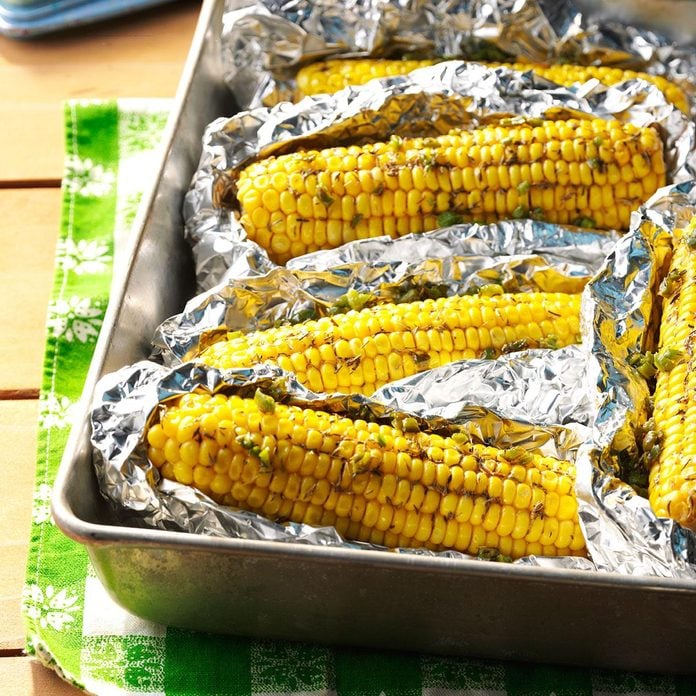
Easy Grilled Corn with Chipotle-Lime ButterGrilling corn in the husks is so easy. There's no need to remove the silk and tie the husk closed before grilling. Just soak, grill and add your favorite flavored butter. —Taste of Home Test Kitchen, Milwaukee, Wisconsin
Grilled Chicken Ranch BurgersThis is one of the most fantastic, flavorful burgers I've ever made. Ranch is a favorite in dips and dressings, and believe me, it doesn't disappoint in these burgers, either! —Kari Shifflett, Lake Mills, Iowa
California Burger WrapsI love the way these fresh flavors blend. It's a snap to throw these wraps together for a quick, healthy lunch. The burgers can also be served on buns if you like. —Rachelle McCalla, Atlantic, Iowa
Grilled Lobster TailsI had never tried grilling lobster tails at home until I tried this convenient and deliciously different recipe. It turned out amazing, and has left me with little reason to ever order grilled lobster tail at a restaurant again. Here's how to cook lobster tails on the grill. —Katie Rush, Kansas City, Missouri
Grilled GuacamoleIf you’re a guacamole lover, try this fun grilled version that has a smoky flavor. The veggies tend to darken a bit when heated, so stir it gently to prevent further discoloration. —Lindsay Sprunk, Noblesville, Indiana
Jalapeno-Lime Chicken DrumsticksBottled hot sauce isn't my thing, so I developed a fresh pepper glaze for grilled chicken. These drumsticks practically fly off the plate. —Kristeen DeVorss, Farmington, New Mexico
Blueberry-Cinnamon Campfire BreadA neighboring camper made a bread so tempting, I had to ask for the details. Here’s my version, best enjoyed with a steaming cup of coffee by the campfire. —Joan Hallford, North Richland Hills, Texas
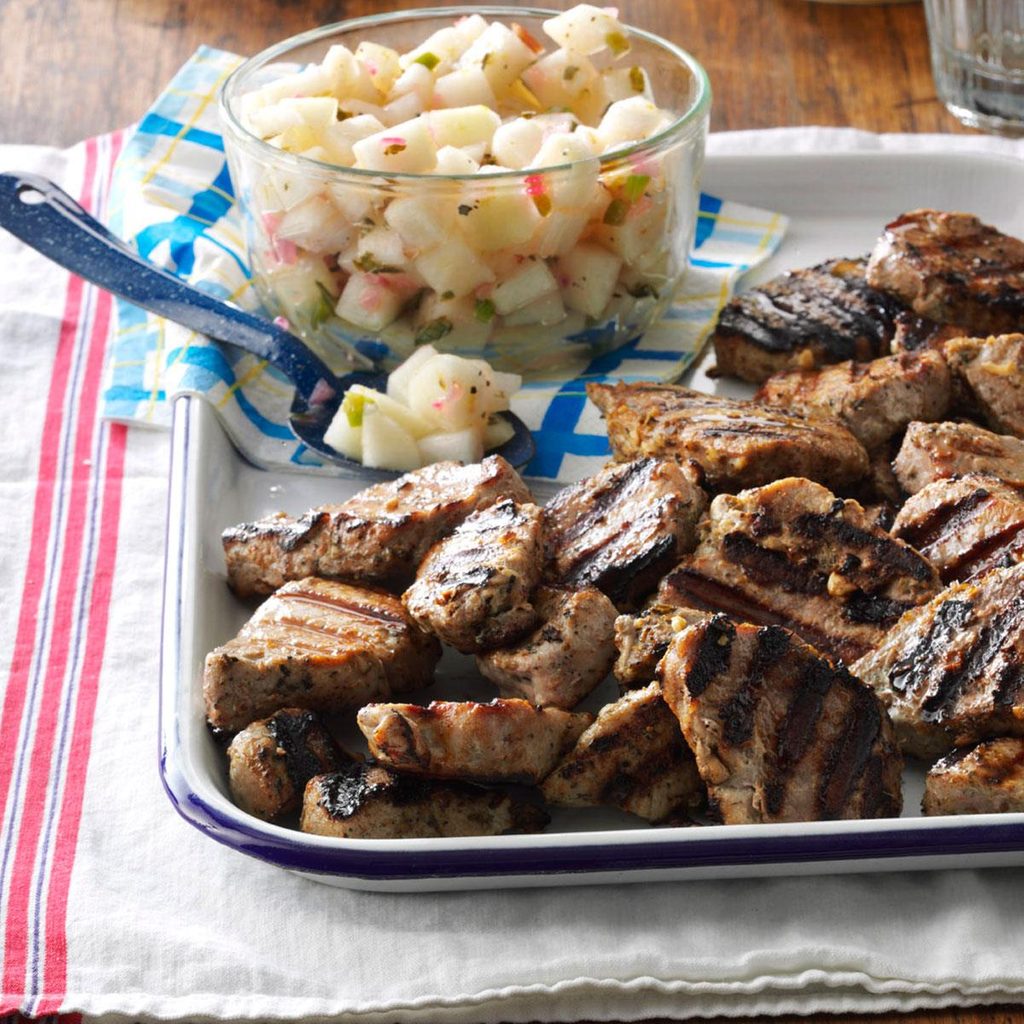
Grilled Pork with Pear SalsaMy husband, Dave, and I have been in a dinner group with three other couples for a few years. We often share our recipes. This grilled pork was served by one of the couples, and I decided to "pear" it with this fabulous salsa. —Suzan Ward, Coeur d'Alene, Idaho
Grilled Spicy Corn on the CobDuring a family picnic, we added jalapenos and hot pepper sauce to our homegrown corn. Now we spice up the ears every chance we get. —Bernadette Walker, Waco, Texas
Summertime Spaghetti with Grilled MeatballsAfter Hurricane Sandy, we were without power for two weeks. I learned what you can make on a grill, such as these smoky meatballs and tomato sauce. —Andrea Rivera, Westbury, New York
Grilled Pork Chops with Smokin' SauceWhile growing up, my husband always had pork chops that were pan-fried or baked, but he knew they could be better. So he combined his love of grilling with the desire to create his own signature sauce, and the result was this recipe. —Vicky Drnek, Rome, Georgia
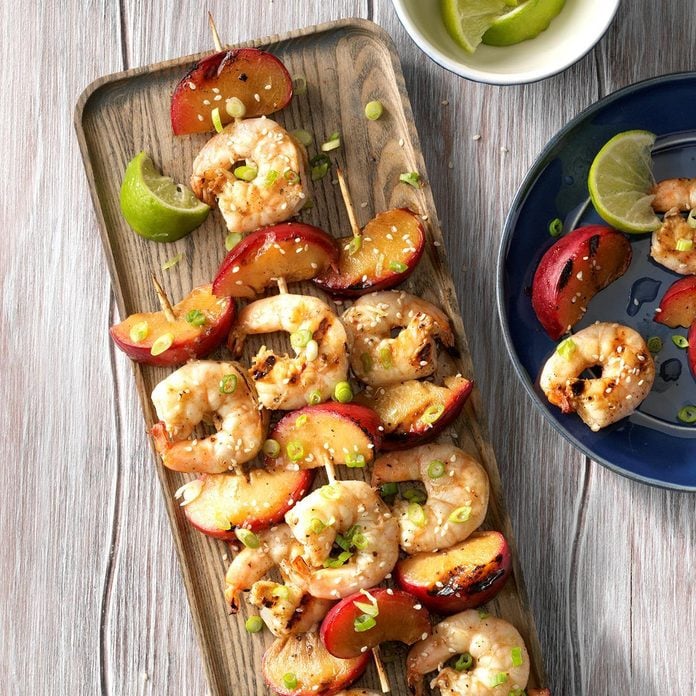
Skewered Ginger Shrimp with PlumsSweet, simple and sensational, these shrimp skewers boast loads of flavor with just four ingredients. Throw them on the grill for a quick dinner. —Taste of Home Test Kitchen, Milwaukee, Wisconsin
Grilled Garlic NaanIndian food is my all-time favorite, and no meal is complete without some naan. I like to brush grilled or baked naan with lots of butter and garlic. I sometimes add a little chopped cilantro.—Jerry Gulley, Pleasant Prairie, Wisconsin
Farmers Market Orzo SaladOrzo is a tiny pasta shaped like rice. We use it as a base for veggies, lemony vinaigrette and cheeses such as mozzarella, feta or smoked Gouda. —Heather Dezzutto, Raleigh, North Carolina
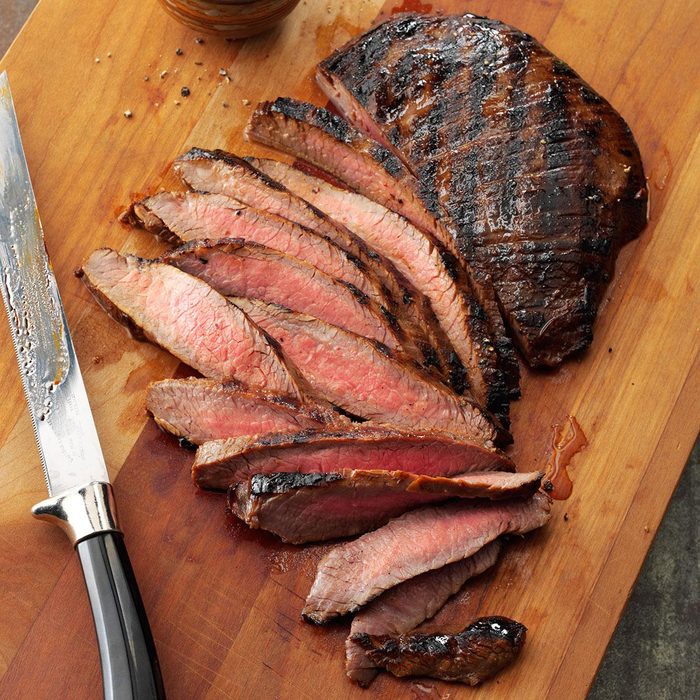
Grilled Tender Flank SteakHow to cook
flank steak? Easy! Marinate it and grill or broil it! This marinated steak is so moist that it will become one of your favorite ways to serve beef. —Heather Ahrens, Columbus, Ohio
Grilled Southwestern Potato SaladThis salad is perfect with a grilled steak for a Tex-Mex meal, and most of it can even be prepared out in the backyard. Poblanos and cayenne make it pop. —Johnna Johnson, Scottsdale, Arizona
Check out our other potato salad recipes that are
perfect for your summer barbecue.
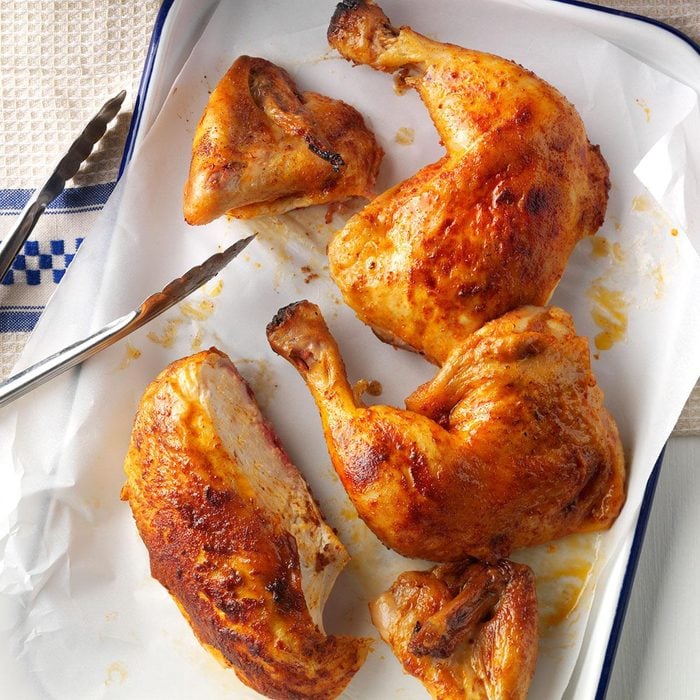
Can-Can ChickenHere's a tasty take on the popular beer-can chicken. Once the bird is on the grill, the work's basically done. And cleanup is a cinch—a must for a guy like me. —Steve Bath, Lincoln, Nebraska
Summer Garden Fish TacosI like to serve fish tacos with quinoa and black beans for a complete and satisfying meal. If you’ve got them, add colorful summer toppings like bright peppers, green onions or purple carrots. —Camille Parker, Chicago, Illinois
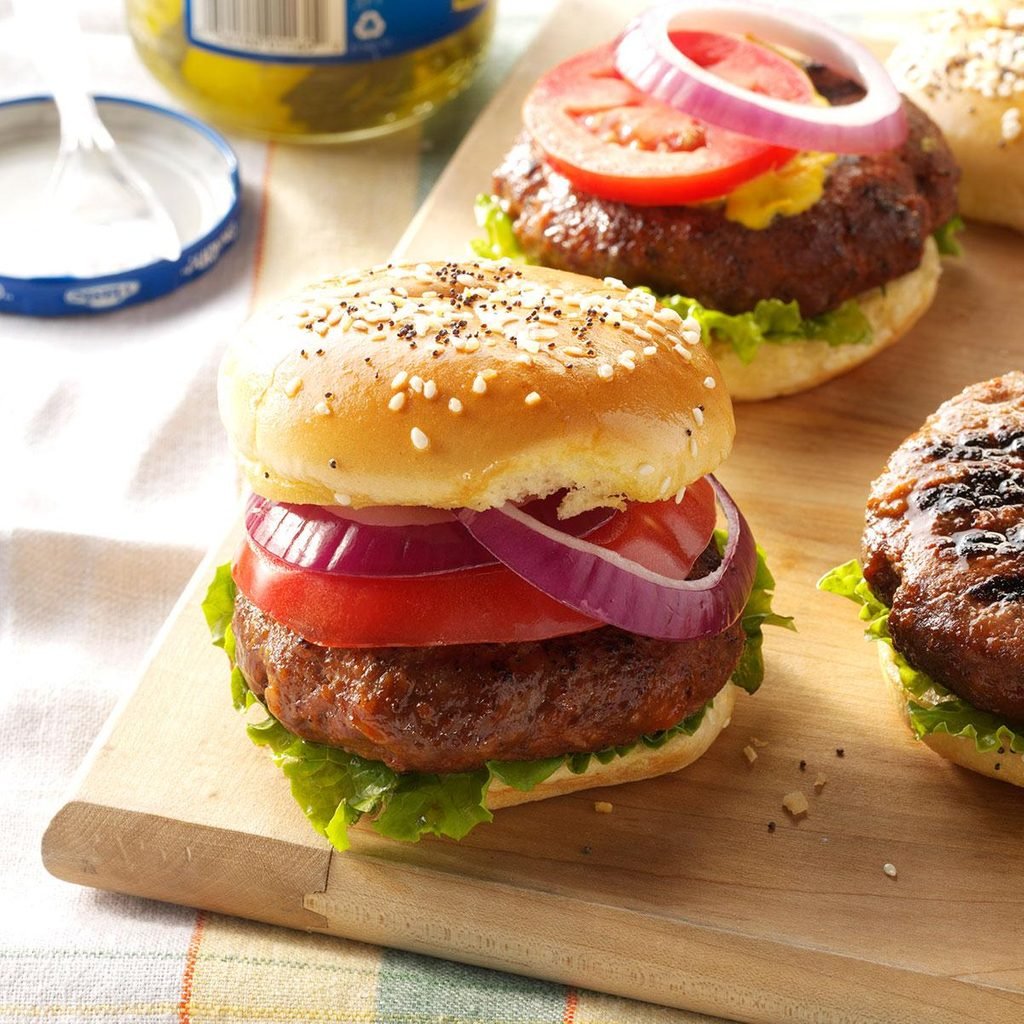
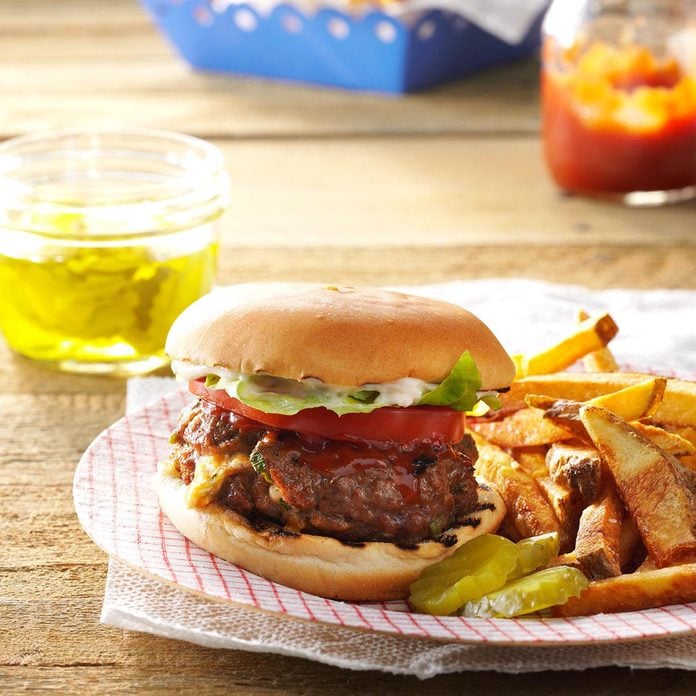
Dad’s Cola BurgersBefore you hand out the drinks, save a little soda to make these delectable burgers. Cola—used in the meat mixture and brushed on during cooking—really sparks the flavor and takes this favorite to a whole new level. —Emily Nelson, Green Bay, Wisconsin
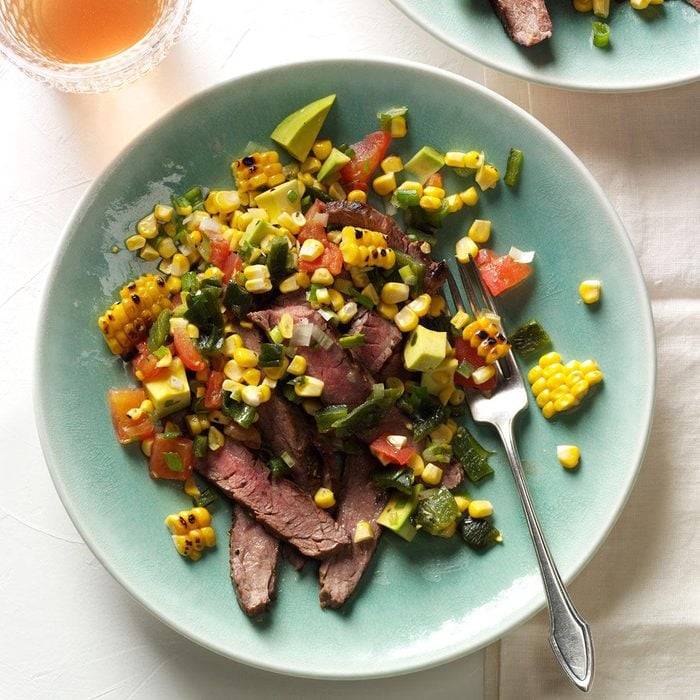
Fajita in a BowlPull out the skewers and take a stab at grilling peppers, onions and corn for an awesome steak salad that’s all summer and smoke. —Taste of Home Test Kitchen, Milwaukee, Wisconsin
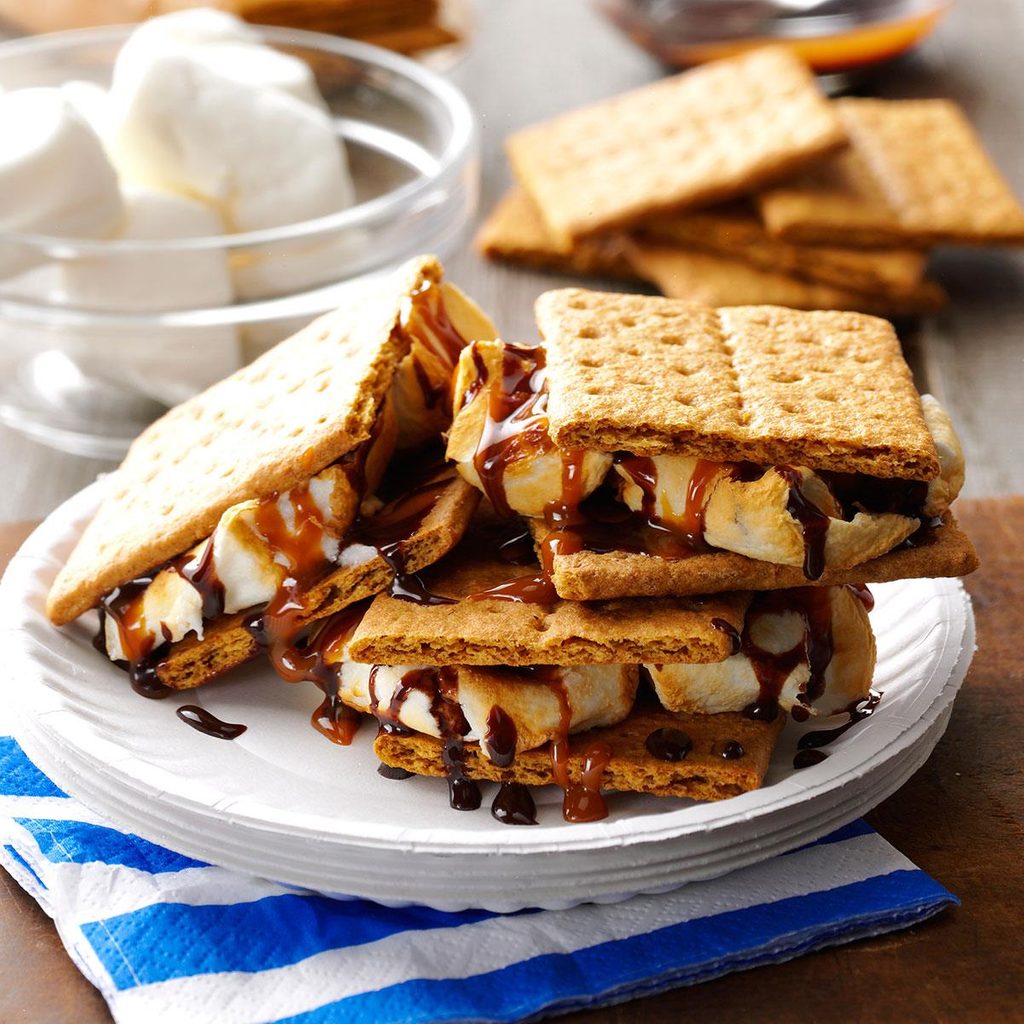
Cookout Caramel S'moresEasy delectable treats make a playful finish to an informal meal. Toasting the marshmallows extends our after-dinner time together, giving us something fun to do as a family. —Martha Haseman, Hinckley, Illinois
Santa Maria Roast BeefA simple dry rub is enough to turn roast beef into a real crowd-pleaser. The slightly spicy meat is scrumptious piled on top of fresh crusty bread. —Allison Ector, Ardmore, Pennsylvania
Spicy Corn KabobsCorn on the cob becomes a tangy delight when grilled, dotted with sour cream and cheese, and zinged with a splash of lime. —Leah Lenz, Los Angeles, California
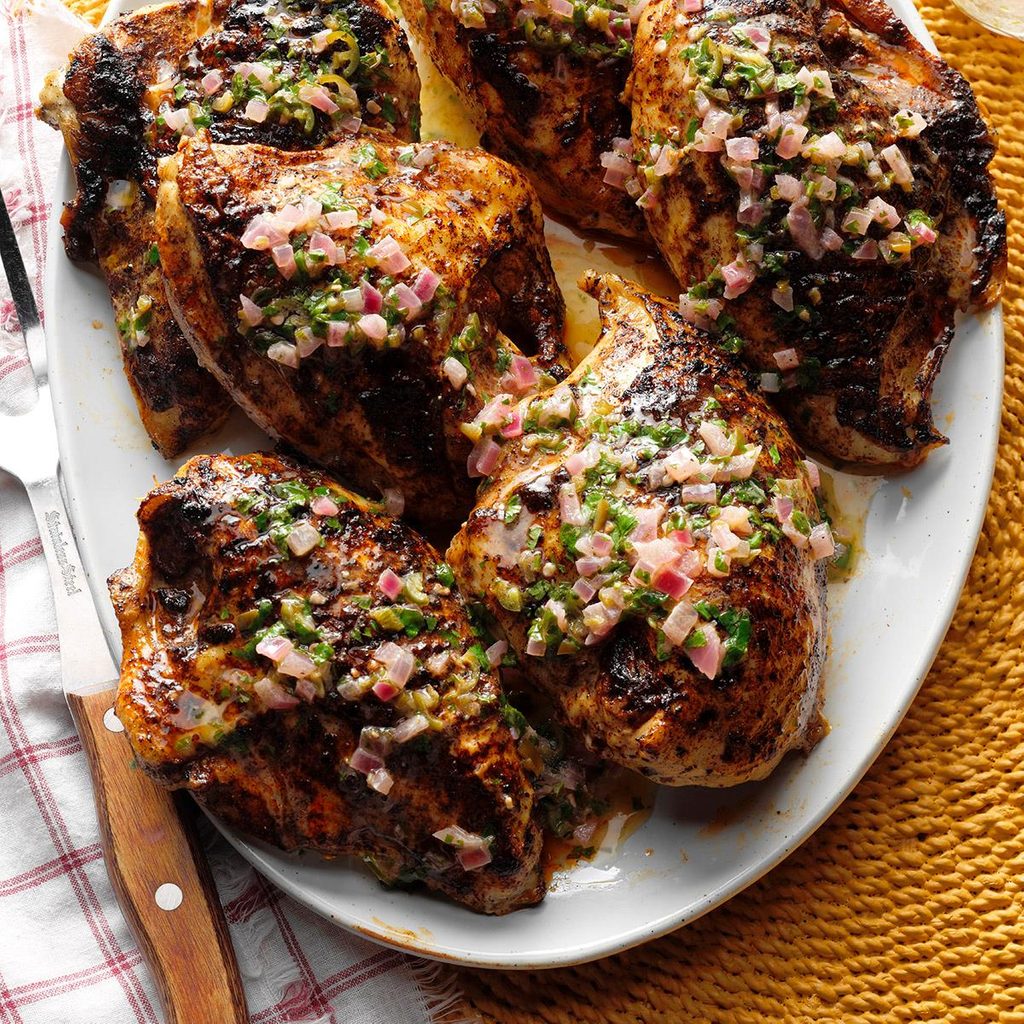
Spiced Grilled Chicken with Cilantro Lime ButterThis grilled chicken gets a lovely pop of color and flavor from the lime butter—don't skip it! —Diane Halferty, Corpus Christi, Texas
Grilled Tomato-Peach PizzaThis delicious pizza is unique, healthy and easy to make. The fresh flavors make it the perfect summer appetizer. —Scarlett Elrod, Newnan, Georgia
Grilled Pork Noodle SaladThe only complex thing about this easy salad is the flavor! With smoky barbecued pork and a variety of fresh herbs and vegetables, this is a comforting and tasty home-cooked meal. —Rosalyn Nguyen, Astoria, New York
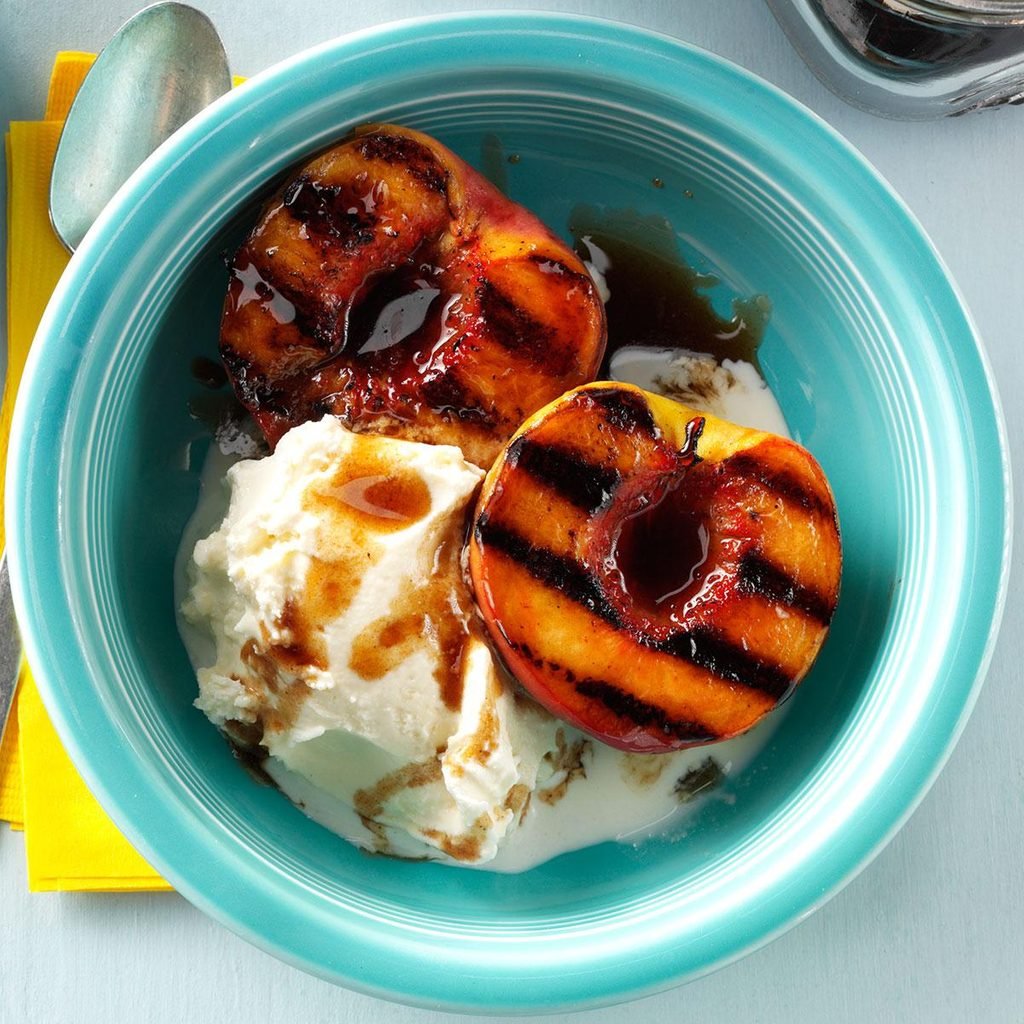
Grilled Peach SundaesThese peaches with a hint of grill flavor are sweet and juicy. We serve them in a waffle bowl with ice cream. That’s jackpot at our house. —Nancy Dentler, Greensboro, North Carolina
Grilled Flank Steak with Summer RelishMy garden produces a nice harvest of tomatoes, scallions, corn, garlic and poblanos, so that's what I use to make relish for this tasty steak. —Brenda Washnock, Negaunee, Michigan
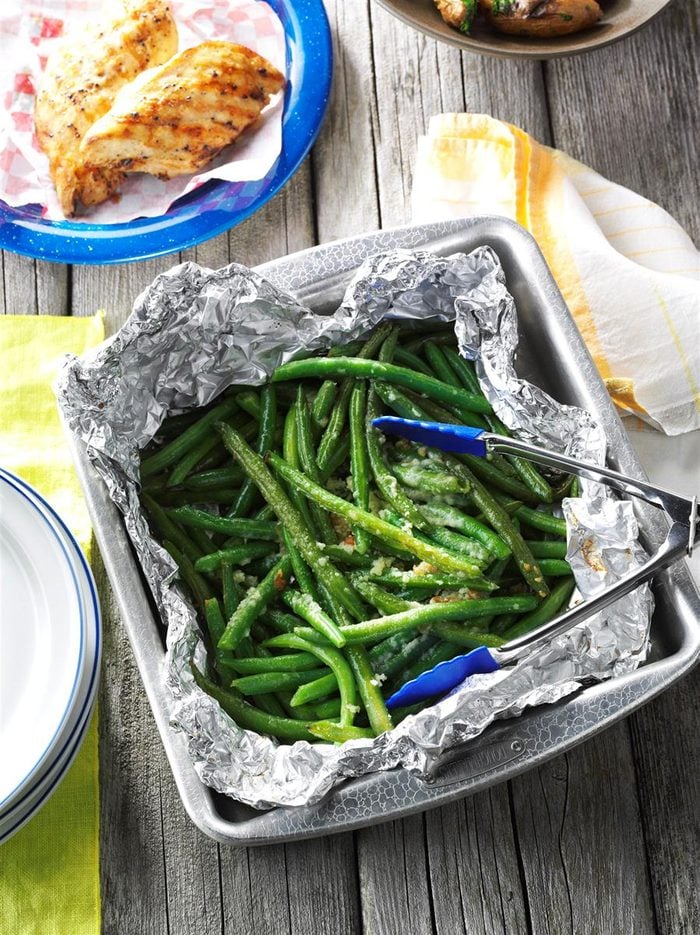
Grilled Green BeansI cook almost everything outdoors, including grilled green beans. I prepare this snappy side dish while the entree is cooking. The recipe has won over my picky eaters. —Carol Traupman-Carr, Breinigsville, Pennsylvania
Blackout Peach Bread PuddingI bake several times a week so my kids have homemade desserts. We lost power in a storm, so I used the grill to invent “blackout” pudding. —Augustina Zaccardi, Eastchester, New York
Cuban Sandwich BurgersMy mom would make these Cuban burgers when we would visit her in Florida. They are a take on the real Cuban sandwich. My kids love them. My boys could eat two of these monsters in one sitting. —Marina Castle Kelley, Canyon Country, California
Bacon-Wrapped AsparagusMy husband and I grill dinner almost every night, and I love grilling veggies for a side dish. I serve this grilled bacon-wrapped asparagus recipe with meat and sliced fresh tomatoes for a wonderful meal. —Trisha Kitts, Dickinson, Texas
Herb & Cheese-Stuffed BurgersTired of the same old
ground beef recipes? This quick-fix burger alternative, with its creamy cheese filling, will wake up your taste buds. —Sherri Cox, Lucasville, Ohio
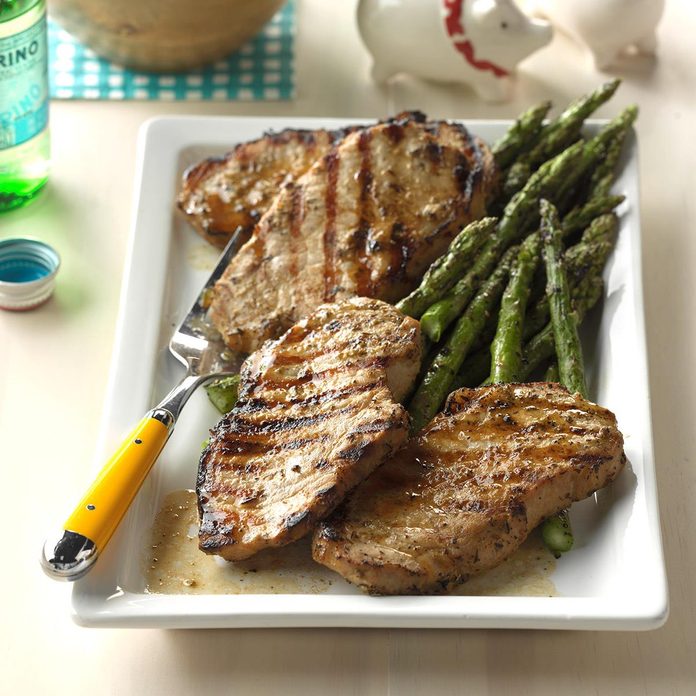
Greek Pork ChopsMy in-laws taught me a lot about cooking, so any time I come across a great new recipe, I enjoy making it for them. These bright, lemony chops quickly became a favorite. —Geri Lipczynski, Oak Lawn, Illinois
Honey-Glazed Chicken KabobsThis is my husband’s favorite "special day" meal. I serve it with rice pilaf, salad and grilled garlic bread. —Tracey Miller, Aiken, South Carolina
Grilled Jerk Shrimp Orzo SaladThe heat, seasonings and appearance of this colorful main-dish salad are perfect for summer—or any time of year that you want to summon memories of sunshine. —Eileen Budnyk, Palm Beach Gardens, Florida
Pot of S'moresMom’s easy Dutch-oven version of the popular campout treat is so good and gooey. The hardest part is waiting for this to cool so you can devour it. Yum! —June Dress, Meridian, Idaho
Grilled Potato PacketsPotatoes require a little extra time on the grill, so remember to give these pouches first dibs on the flames. —Anna Bjornn, Rexburg, Idaho
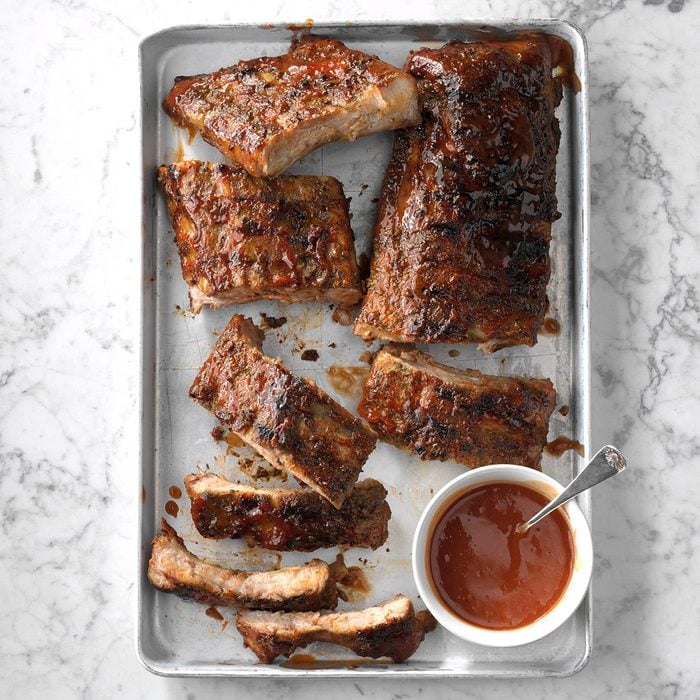
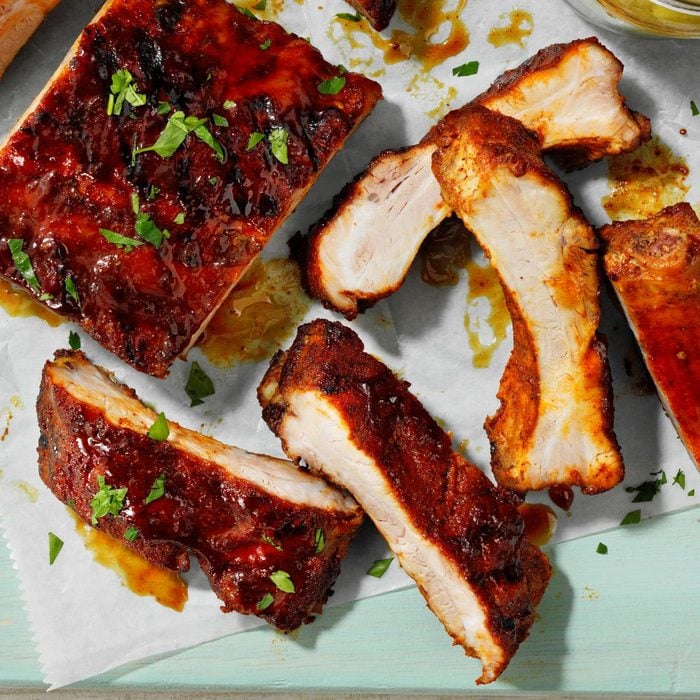
Jim's Secret Family Recipe RibsFor more than 30 years, my brother-in-law Jim kept his famous rib recipe a secret. When he finally shared it, we just had to pass it along because we loved it so much. This one's for you, Jim! —Vicki Young, Brighton, Colorado
Buttery Grilled ShrimpThis grilled shrimp recipe is easy and delicious! These shrimp are great with steak, but for a special occasion, brush the sauce on lobster tails and grill. —Sheryl Shenberger, Albuquerque, New Mexico
Grilled Apple Tossed SaladThe grilled apples in this salad combine so well with the blue cheese, walnuts and balsamic dressing. I like to serve it on pink Depression glass dessert plates from my great-grandmother. —Paul Soska, Toledo, Ohio
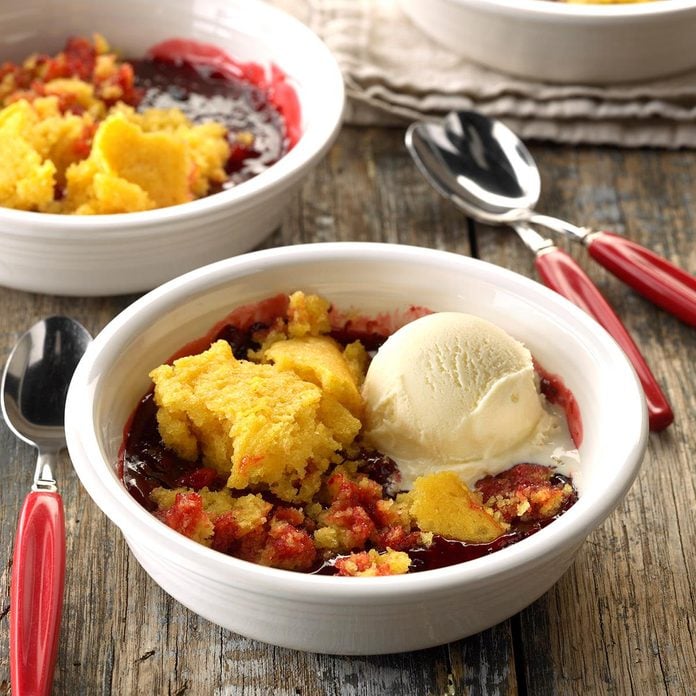
Cake & Berry Campfire CobblerThis warm Dutch oven cobbler is one of our favorite ways to end a busy day of fishing, hiking, swimming or rafting. It's yummy with ice cream—and so easy to make! —June Dress, Boise, Idaho
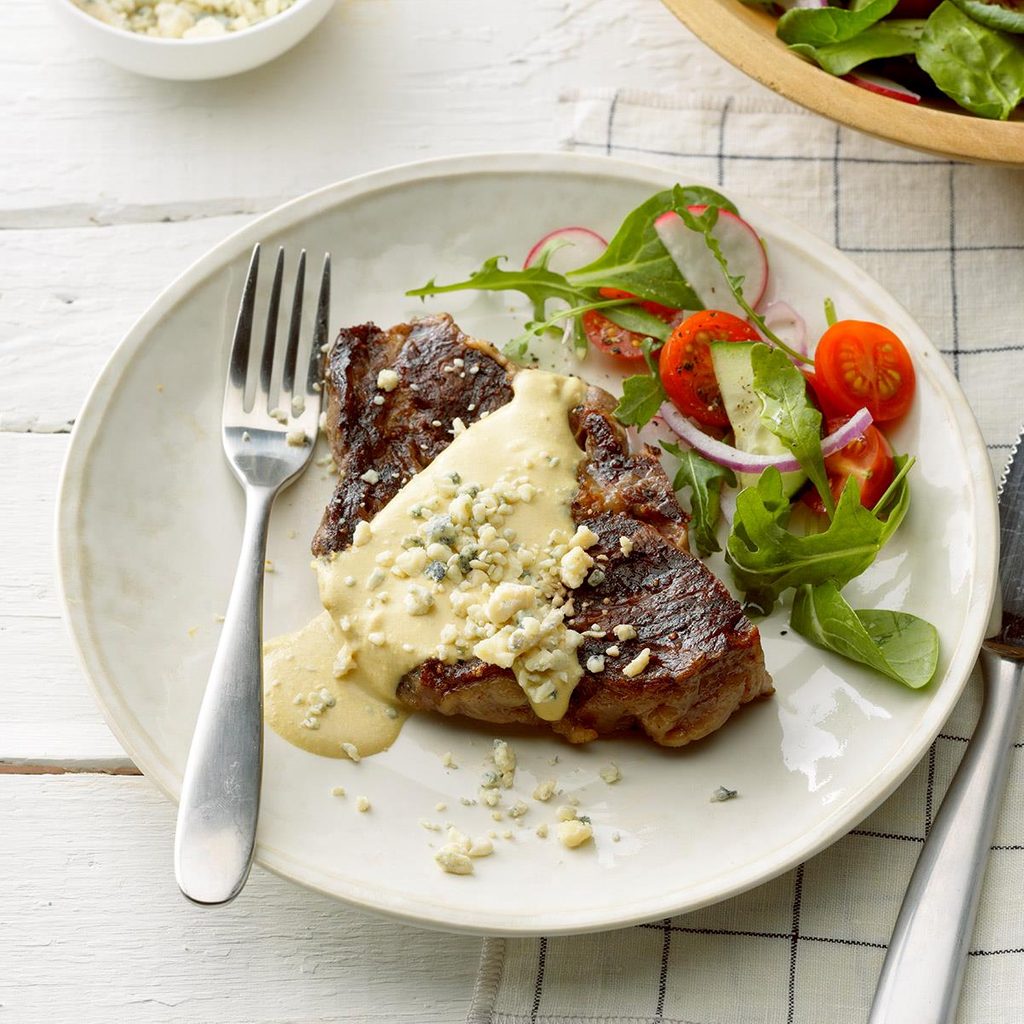
Grilled Ribeye with Garlic Blue Cheese Mustard SauceThis simple steak gets a big flavor boost from two of my favorites: mustard and blue cheese. My husband and I make this recipe to celebrate our anniversary each year! —Ashley Lecker, Green Bay, Wisconsin
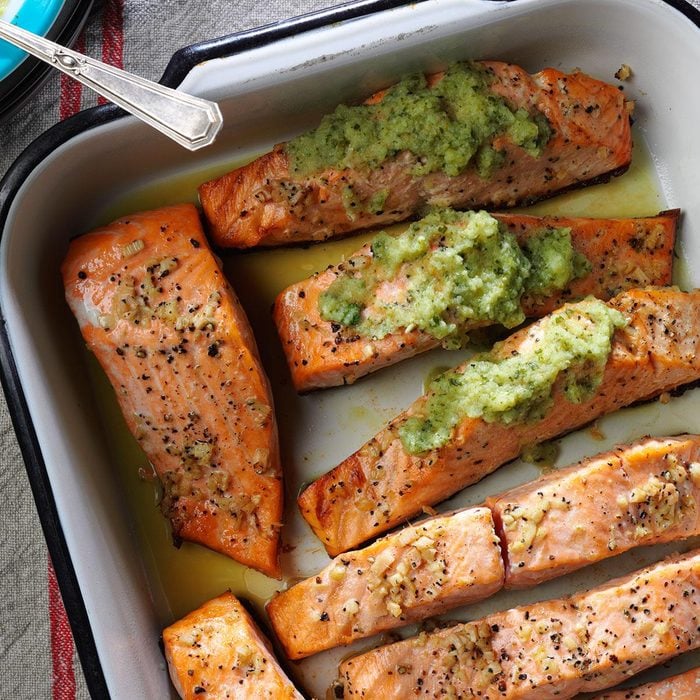
Ginger Salmon with Cucumber Lime SauceLime with ginger is a favorite flavor combo for me, especially with grilled salmon. So good. Even with the cucumber sauce, this recipe is easy, too. —Noelle Myers, Grand Forks, North Dakota
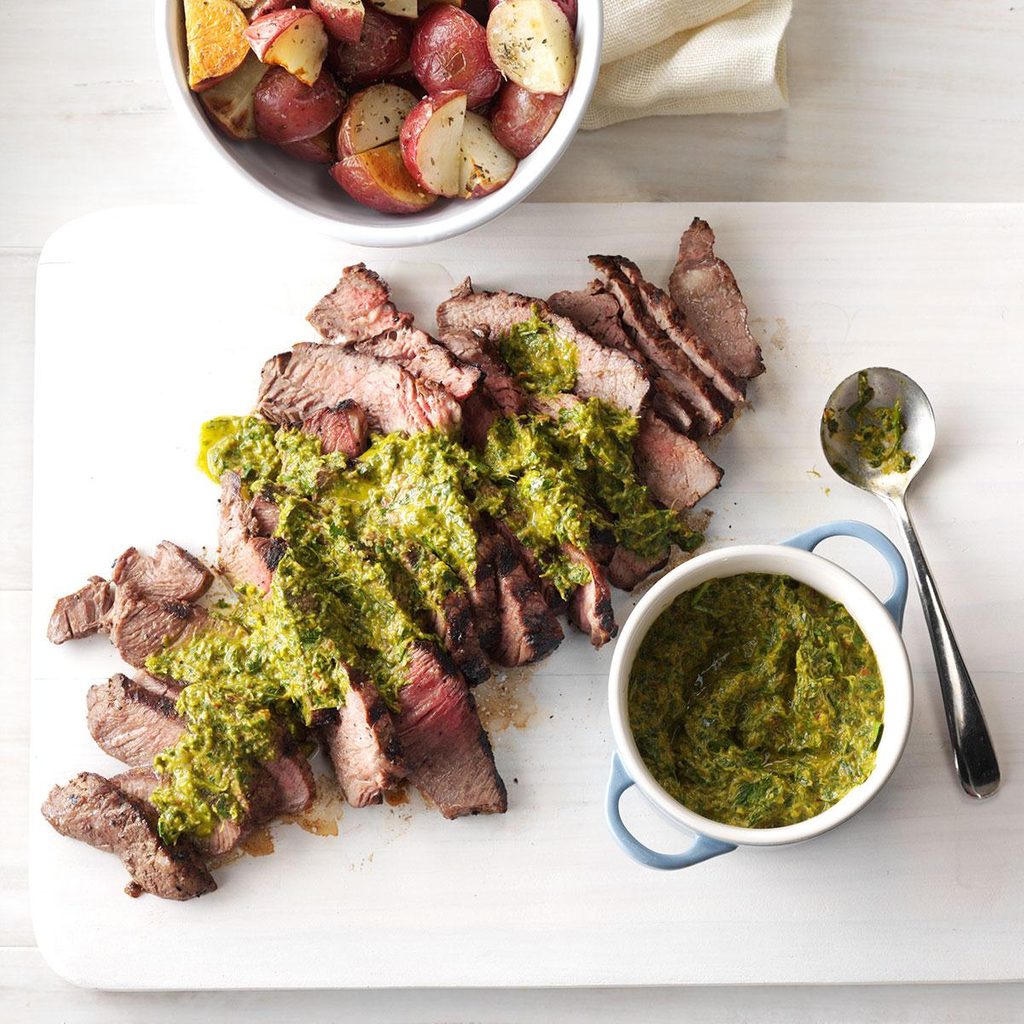
Steak with Chipotle-Lime ChimichurriSteak gets a flavor kick from chimichurri. This piquant, all-purpose herb sauce is so versatile, it complements most any grilled meat, poultry or fish. —Laureen Pittman, Riverside, California
Grilled Sausage-Basil PizzasWe love
basil recipes, and these easy little pizzas are a wonderful change of pace from the classic cookout menu. Let everybody go crazy with the toppings. —Lisa Speer, Palm Beach, Florida
Honey-Mustard BratsOur honey mustard glaze gives every bite of these brats a sweet and punchy flavor. Everyone who tries them agrees they're delicious. —Lily Julow, Lawrenceville, Georgia
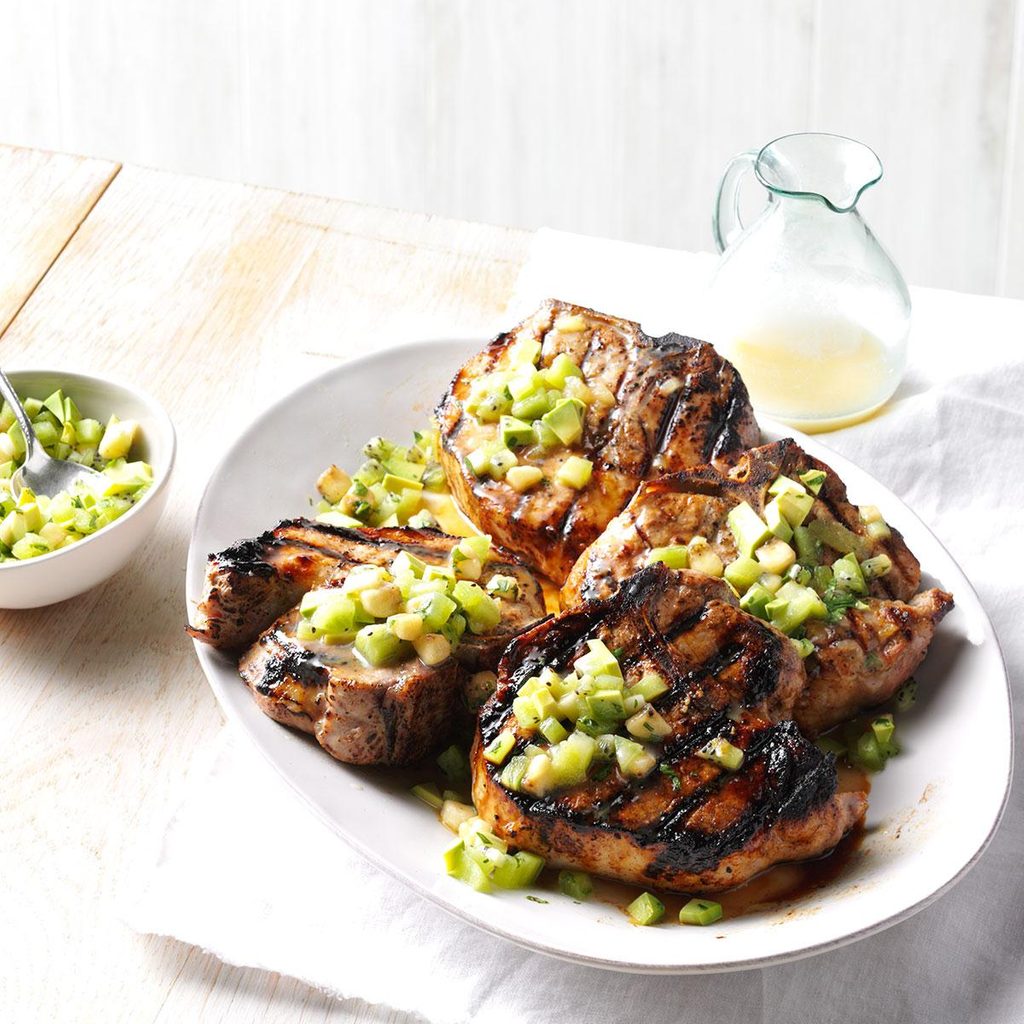
Grilled Pork with Avocado SalsaI love the zesty taste of this moist grilled tenderloin. The cumin, avocado and jalapeno give it southwestern flair. It's an easy, elegant way to prepare pork. —Josephine Devereaux Piro, Easton, Pennsylvania
Best Italian Sausage SandwichesNeed a different type of Italian dinner? This rich tomato sauce simmers all afternoon in the slow cooker, ready to top freshly grilled Italian sausages. It's a fantastic combination with lots of crowd appeal! —
Taste of Home Test Kitchen
Pina Colada Pork Chops with Tropical Fruit SalsaThese zesty chops with kiwi, banana and avocado salsa are a one-way ticket to the tropics. The grilled pork and fruit make a perfect pair. —Jenn Tidwell, Fair Oaks, California
Chicken with Peach-Cucumber SalsaTo keep our kitchen cool, we grill chicken outdoors and serve it with a minty peach salsa that can easily be made ahead. —Janie Colle, Hutchinson, Kansas
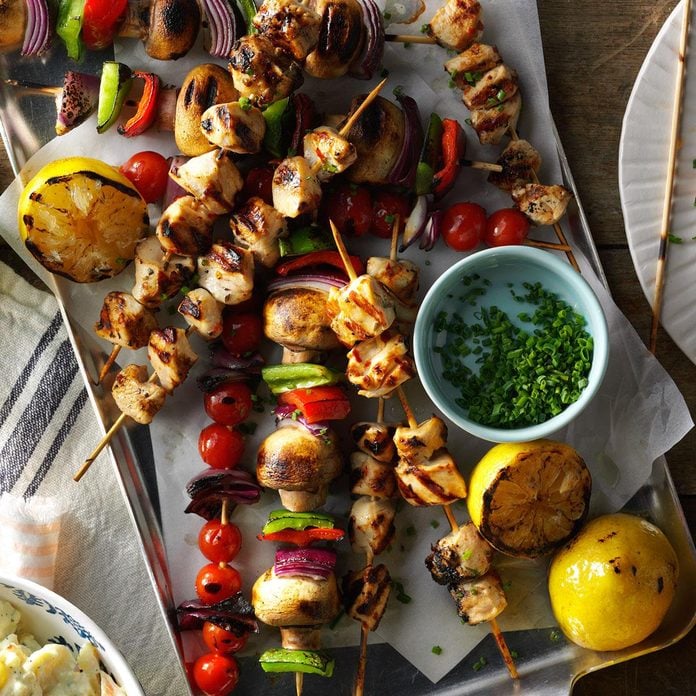
Spicy Lemon Chicken KabobsWhen I see Meyer lemons in the store, it must be spring. I like using them for these easy chicken kabobs, but regular grilled lemons still add the signature smoky tang. —Terri Crandall, Gardnerville, Nevada
Eclairs on the GrillMy best camping treat is an easy eclair on a stick. This is the one that makes people watch what you’re doing and beg to be included. —Bonnie Hawkins, Elkhorn, Wisconsin
Crab & Shrimp Stuffed SoleThe most casual cookout will seem elegant when it stars this delicate fish combined with seafood stuffing and a lemony sauce. Just add a salad and baguette. —Bryn Namavari, Chicago, Illinois
Jalapeno Popper Mexican Street CornOne of the best things about summer is fresh sweet corn, and this recipe is a definite standout. We love its creamy dressing, crunchy panko coating and spicy jalapeno kick. If you're really feeling wild, sprinkle these with a bit of cooked and crumbled bacon! —Crystal Schlueter, Northglenn, Colorado
Big John's Chili-Rubbed RibsWhen my family thinks of summer grilling, it's ribs all the way. Our Asian-inspired recipe is a welcome change from the usual barbecue-sauce versions. —Ginger Sullivan, Cutler Bay, Florida
Lemon-Dill Salmon PacketsGrilling in foil is an easy technique I use with foods that cook quickly, like fish, shrimp, bite-sized meats and fresh veggies. The options are endless—and the cleanup is easy. —A.J. Weinhold, McArthur, California
Mexican Hot DogsMy stepmom was born in Mexico and introduced us to hot dogs with avocado and bacon. We were instantly hooked. Now our whole family makes them. —Amanda Brandenburg, Hamilton, Ohio
Grilled Sausages with Summer VegetablesAfter 30 years of camping, we've come up with an arsenal of surefire recipes. Our grilled sausage with veggies would be a superstar on the table. —Nancy Daugherty, Cortland, Ohio
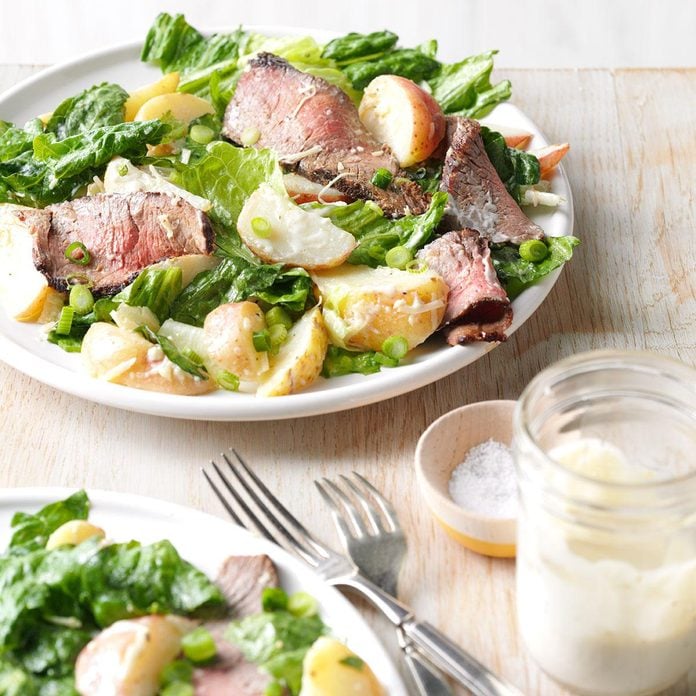
Caesar Salad with Grilled Steak and PotatoesWe get our grill on for this sizzling steak and potatoes baked in foil. It’s a quick and easy main dish we like to take outdoors. —Edie DeSpain, Logan, Utah
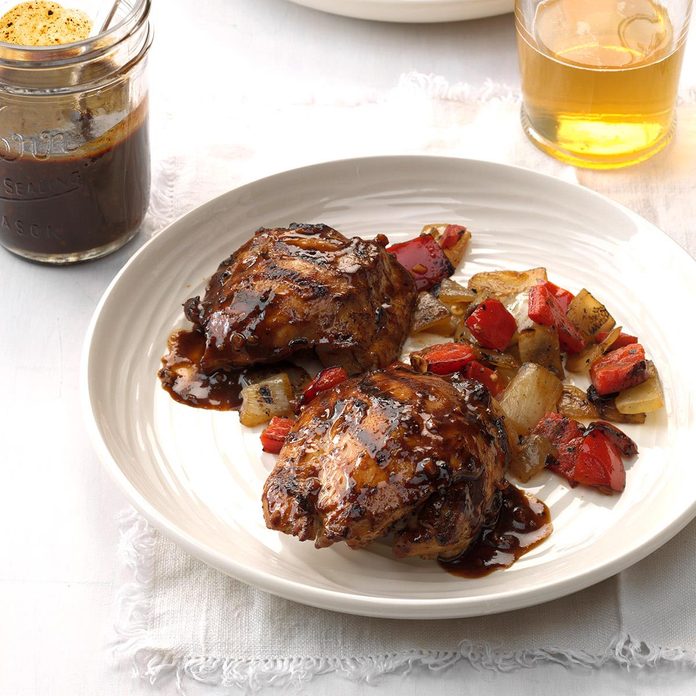
Balsamic-Glazed Fig & Pork TenderloinI have a huge fig tree that produces an abundance of figs. One year I tried drying some and developed this sweet and smoky recipe as a result. Now it's a regular at family gatherings. —Greg Fontenot, The Woodlands, Texas
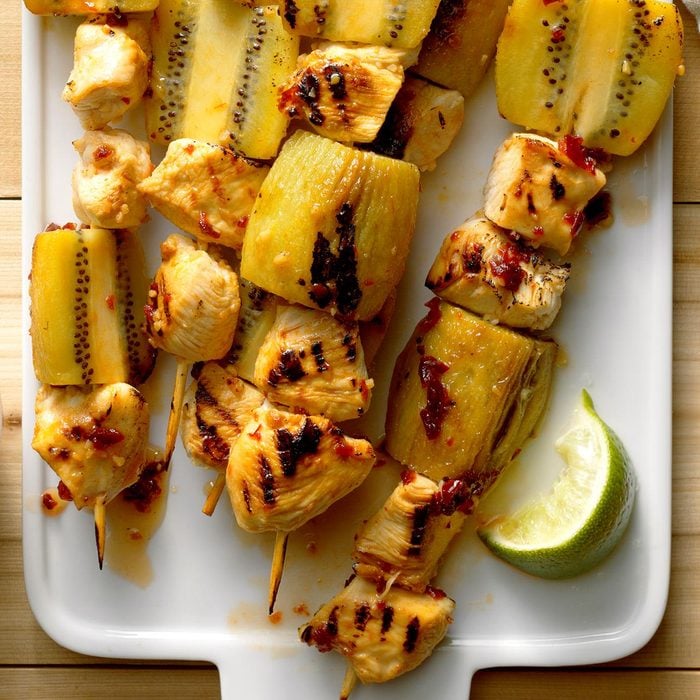
Grilled Kiwi-Chicken Kabobs with Honey-Chipotle GlazeWhen guests bite into these juicy grilled kabobs, their eyes always widen with satisfaction. Our four kids are crazy about the spicy-sweet sauce. —Joni Hilton, Rocklin, California
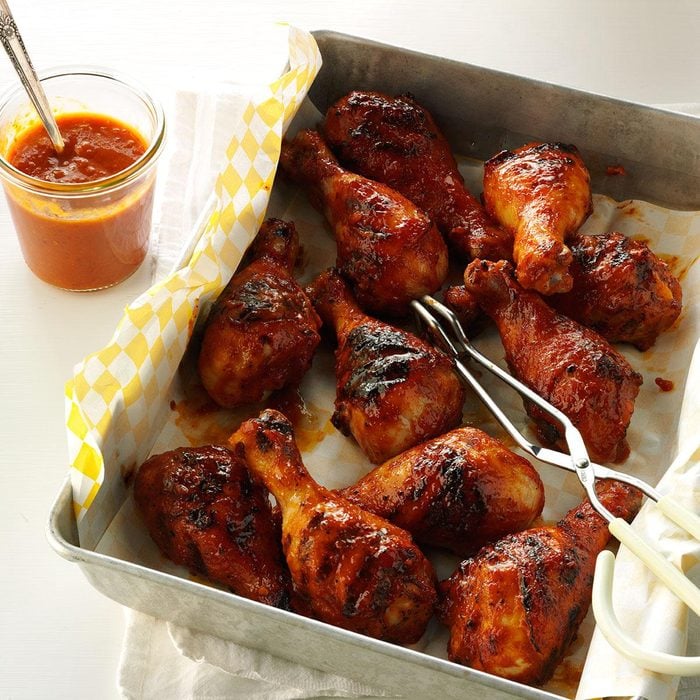
Rhubarb-Apricot Barbecued ChickenSpringtime brings back memories of the rhubarb that grew beside my childhood home. When I found ruby red stalks in the store, I created this recipe for them. My family gives this a big thumbs up. —Laurie Hudson, Westville, Florida
Lime and Sesame Grilled EggplantWhen I lived in Greece, I fell in love with eggplant. My recipe's seasonings have an Asian theme, but the dish still makes me think Greek. —Allyson Meyler, Greensboro, North Carolina
The Ultimate Fish TacosThis recipe is my favorite meal to prepare. Adding my own personal touch to the marinade makes my fish tacos pop with flavor. I warm corn tortillas on the grill and add salsa, cilantro, purple cabbage and fresh squeezed lime. —Yvonne Molina, Moreno Valley, California
Whiskey Pineapple ChickenEveryone in my family loves this recipe and its sweet marinade made with ginger, pineapple and a splash of whiskey. Want even more intense flavor? Let the chicken marinate for two full days. Wow! —Jodi Taffel, Altadena, California
Tarragon AsparagusI grow purple asparagus, so I'm always looking for new ways to prepare it. Recently, my husband and I discovered how wonderful any color of asparagus tastes when it's grilled. —Sue Gronholz, Beaver Dam, Wisconsin
Grilled Honey-Balsamic Glazed FruitOne summer my mother-in-law made us grilled peaches basted with a sweet and tangy sauce. These are so good I'm always tempted to eat the whole batch. —Kristin Van Dyken, West Richland, Washington
Grilled Peach, Rice & Arugula SaladThis hearty salad was created when I needed to clear out some leftovers from the fridge—and it became an instant hit! The grilled peaches are the ultimate "tastes like summer" salad booster. —Lauren Wyler, Dripping Springs, Texas
Grilled Brats with Sriracha MayoI am a Sriracha fanatic, so that’s what inspired this dish. You can boil the brats in your favorite beer to reduce the fat and give them flavor before grilling, or spread garlic butter on lightly toasted buns. —Quincie Ball, Olympia, Washington
Grilled Ham BurgersMy family loves my ham loaf, so I decided to make the ham loaf mixture into patties and grill them—it was an instant hit. Adding the arugula gives these burgers a peppery bite and honey mustard dressing adds just the right sweet and sour flavor. —Susan Bickta, Kutztown, Pennsylvania
Grilled Pears with Mascarpone CheeseFor a light dessert after a big barbecue, we stuff pears with mascarpone cheese and gingersnap cookies. Add a drizzle of caramel sauce for a sweet touch. —Faith Cromwell, San Francisco, California
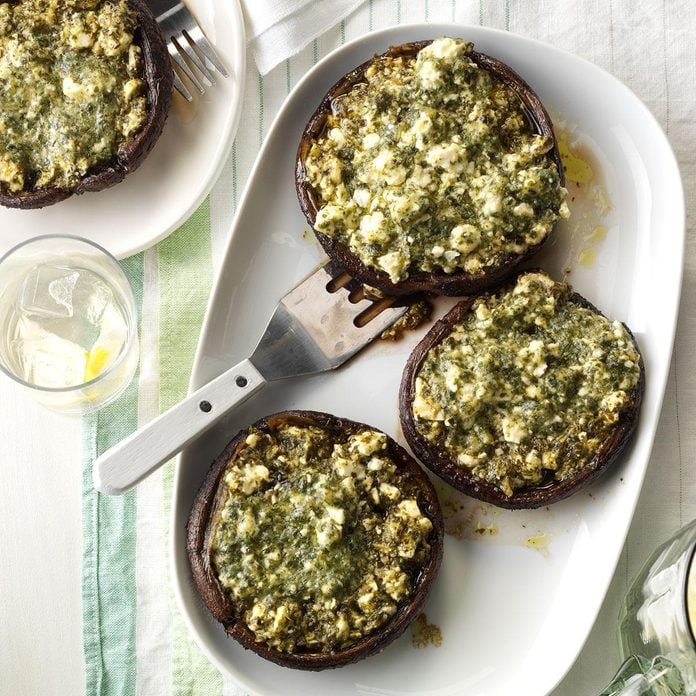
Feta-Stuffed Portobello MushroomsMy husband adores mushrooms, and portobello mushrooms have loads of room for stuffing with feta cheese and pesto. Plan on one mushroom per person. —Amy Martell, Canton, Pennsylvania
Grilled Angel Food Cake with Fruit SalsaWhen I need dessert fast, I go with angel food cake. Mix fruit salsa ahead of time, and pop the cake on the grill. —Glorimar Jimenez, Indianapolis, Indiana
Tomato, Avocado and Grilled Corn SaladWith ripe tomatoes, fresh basil and grilled corn, this bright salad tastes just like summertime! —Angela Spengler, Tampa, Florida
Chicken Ole Foil SupperThese Tex Mex–style chicken packets can be assembled ahead and frozen if you like. Just thaw them overnight in the fridge, then grill as directed. I like to serve them with warm tortillas and fresh fruit on the side. —Mary Peck, Salina, Kansas
Cilantro Lime ShrimpA quick garlicky lime marinade works magic on these juicy shrimp. They come off the grill with huge flavors perfect for your next cookout. —Melissa Rodriguez, Van Nuys, California
Bacon Cheeseburgers with Fry SauceIn Utah, fry sauce is a beloved condiment. We use it not just as a dip for fries, but also as a spread for hamburgers. Utah is known as the Beehive State, so I added honey as a special touch to my fry sauce. —Elisabeth Larsen, Pleasant Grove, Utah
Banana Butter Pecan KabobsDesserts with bananas remind me of Grandma. She and my mom taught me to cook. I rarely measure. For this dish, I set out pecans and butterscotch with kabobs so everyone can customize. —Crystal Schlueter, Northglenn, Colorado
Garlic-Grilled Chicken with Pesto Zucchini RibbonsThe first time I substituted zucchini noodles for regular pasta, it was because I was trying to reduce carbohydrates and calories. Now I make them because we love the flavor and texture they bring to dishes. This dish is just as delicious if you substitute shrimp for the chicken. —Suzanne Banfield, Basking Ridge, New Jersey
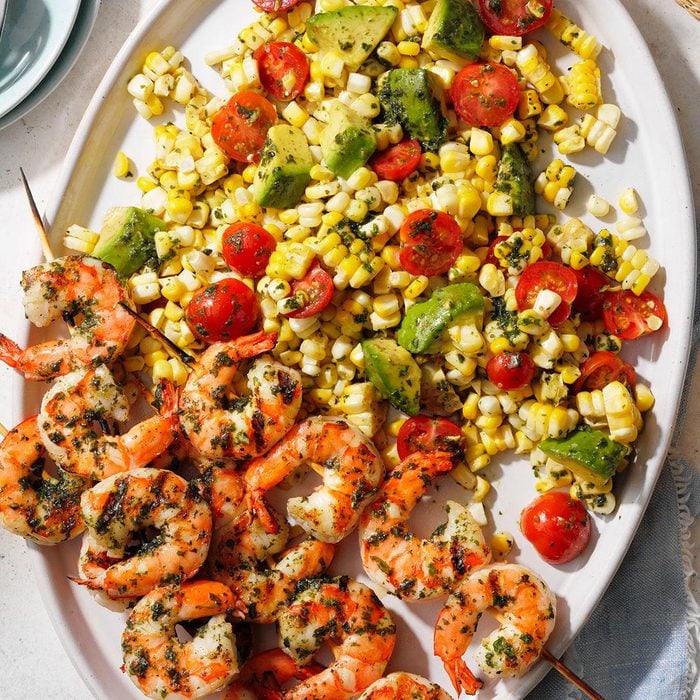
Pesto Corn Salad with ShrimpThis recipe showcases the beautiful bounty of summer with its fresh corn, tomatoes and delicious basil. Prevent browning by spritzing the salad with lemon juice. —Deena Bowen, Chico, California
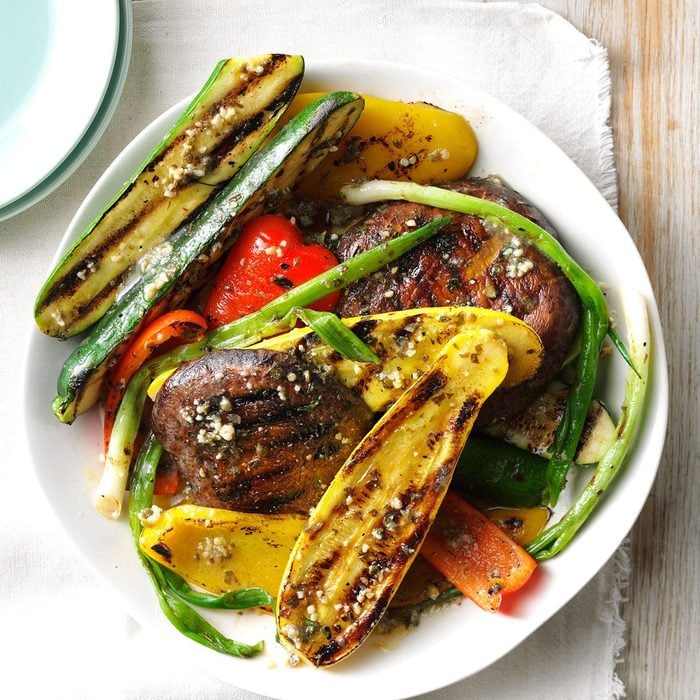
Grilled Veggies with Caper ButterWe enjoy the tart, peppery taste of capers. No one likes a bland veggie, and caper butter helps peppers, squash and zucchini shine. —Danyelle Crum, Indian Trail, North Carolina
Grilled Fig and Honey PizzaI had figs I needed to use up, so I made a batch of dough, tossed the figs on the grill and created a scrumptious dessert pizza. —Aaron Reynolds, Fox River Grove, Illinois
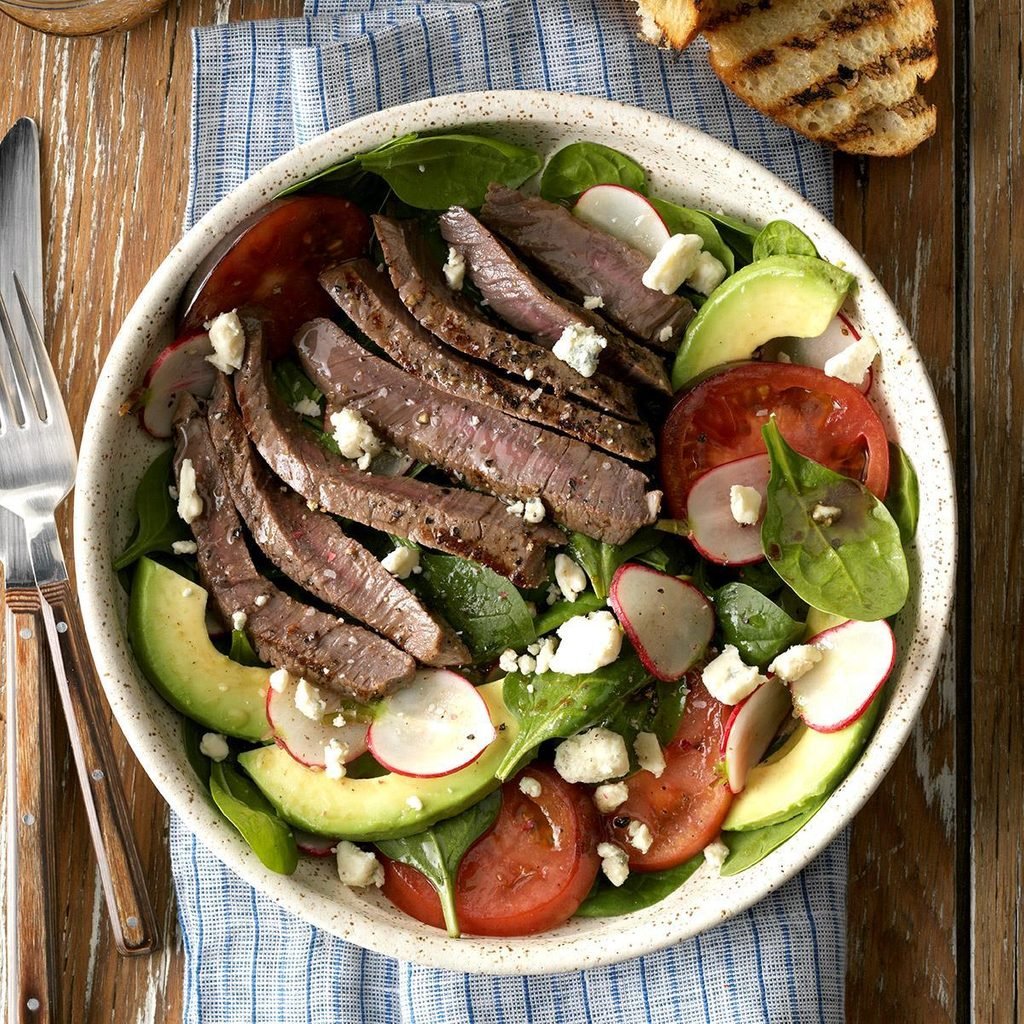
Flat Iron Steak SaladMy steak salad with avocado and radishes is a big plate of summer deliciousness. I sometimes add dried cranberries and cherry tomatoes, but you can customize it to suit your tastes. —Marla Clark, Albuquerque, New Mexico
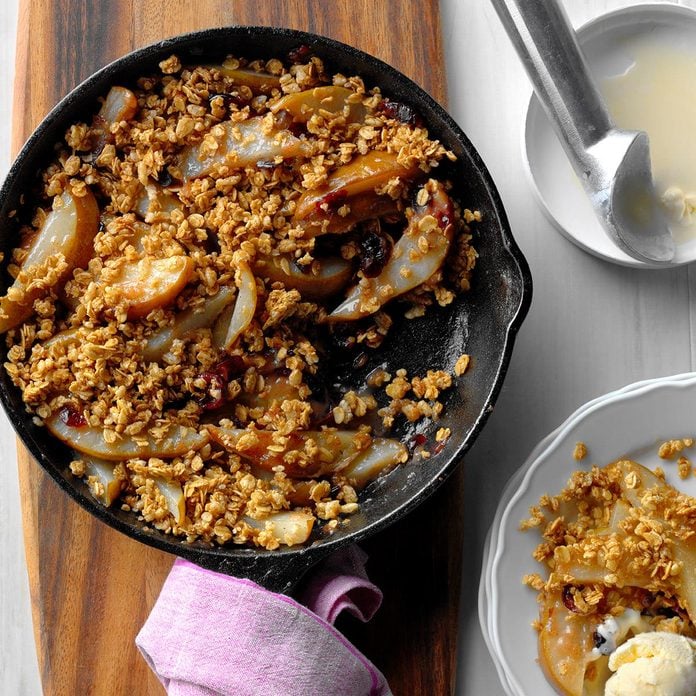
Grilled Cranberry Pear CrumbleMy husband loves it when I make dessert. Fruit crisps are easy and quick to prepare, so I make them often! I created this fall-flavored grilled version with fresh pears and items I had on hand. We loved it. —Ronna Farley, Rockville, Maryland
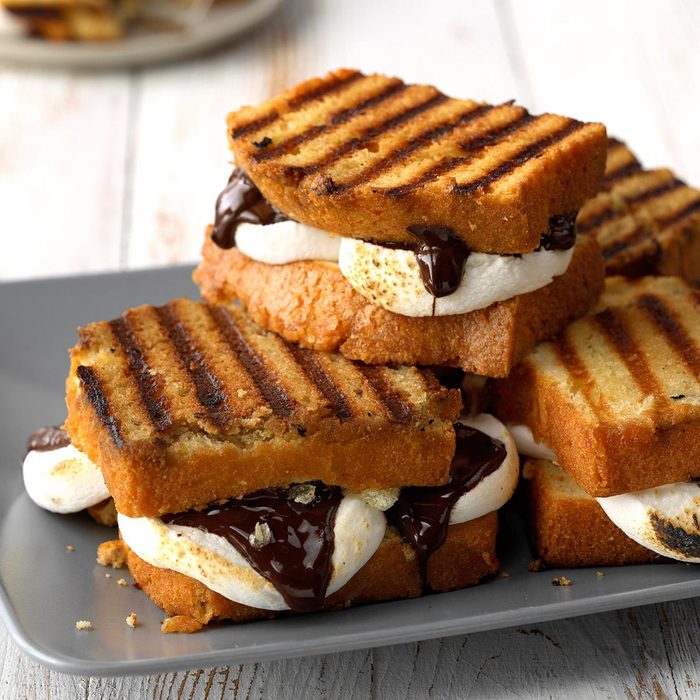
Ginger Pound Cake S'moresKids and adults won't be able to resist this fun spin on campfire S'mores. Pound cake replaces the traditional graham cracker while crystallized ginger adds a unique flavor twist. —Peter Halferty, Corpus Christi, Texas
Grilled Cauliflower WedgesThis side is incredibly easy, yet is packed with flavor and looks like a dish from a five-star restaurant. The grill leaves the cauliflower cooked but crisp, and the red pepper flakes add bite. —Carmel Hall, San Francisco, California
Grilled Chicken and Mango SkewersThe inspiration for this recipe came from the charbroiled chicken skewers I used to enjoy while strolling along Calle Ocho in Miami on Sunday afternoons. Feel free to garnish them with sesame seeds or spritz them with fresh lime juice. —Wolfgang Hanau, West Palm Beach, Florida
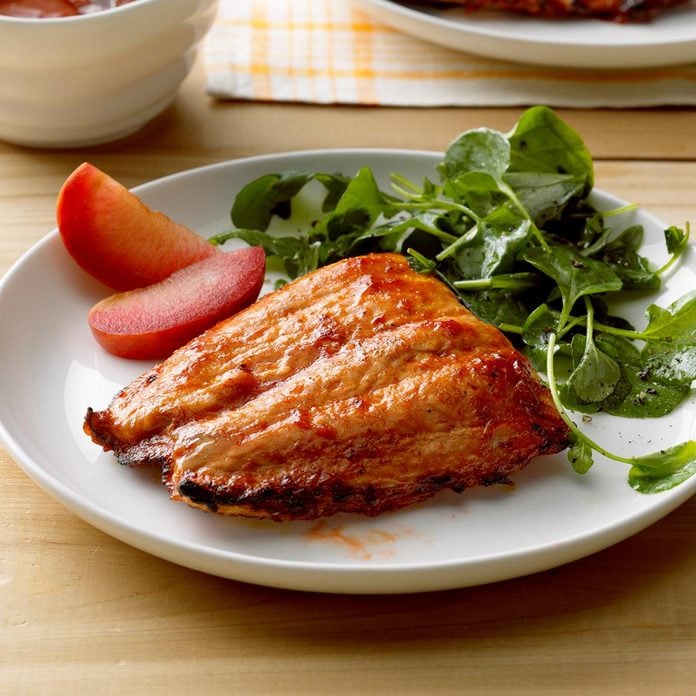
Spicy Plum SalmonI created this sweet and spicy salmon after being challenged to use healthier ingredients. The fresh plum sauce really complements the smoky grilled fish. —Cheryl Hochstettler, Richmond, Texas
Grilled Nectarine & Cheese CrostiniAt our house, we love the summer tastes of sweet grilled nectarines and fresh basil over goat cheese. I can usually find all the ingredients at the farmers market. —Brandy Hollingshead, Grass Valley, California
Grilled Corn Hummus TostadasThis recipe is a combo of Mediterranean and Mexican cuisines, giving it a unique taste. Avocado and hummus may sound like a weird mix, but they really go together well. —Lauren McAnelly, Des Moines, Iowa
Tomato-Herb Grilled TilapiaThis super tilapia with ginger and lemon takes dinner over the top with minimal prep. Grilling the fish in foil is about as easy as it gets. —Trisha Kruse, Eagle, Idaho
Pina Colada Grilled PineappleDuring a cookout with friends, I forgot about dessert. I had a fresh pineapple and coconut, so I improvised. Now I grill pineapple at every cookout. —Josee Lanzi, New Port Richey, Florida
Tandoori-Style Chicken with Cucumber Melon RelishWe all need a quick meal that's deliciously healthy. I marinate the chicken before I leave for work, and when I get home, I grill the chicken and make the relish. My husband loves the spicy flavor. To amp up the heat, add more crushed red pepper flakes. —Naylet LaRochelle, Miami, Florida
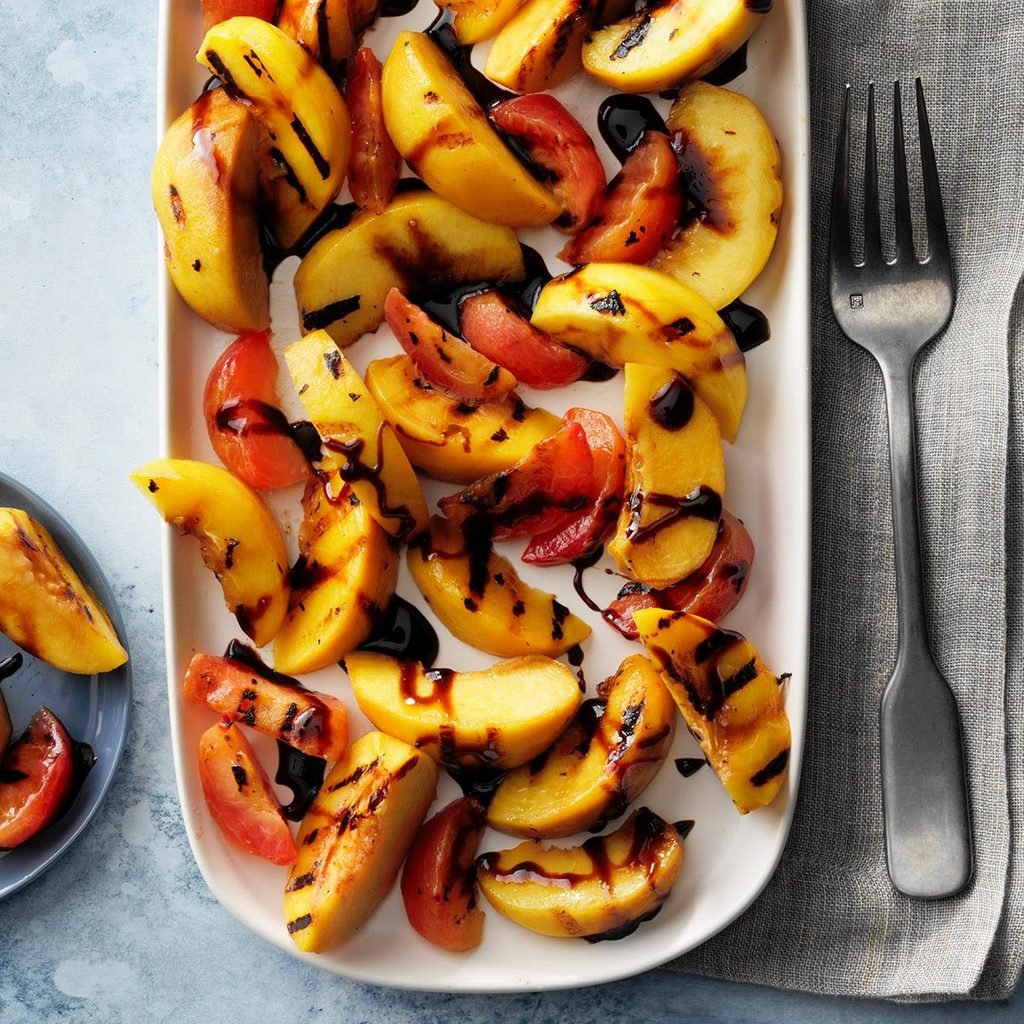
Grilled Stone Fruits with Balsamic SyrupGet ready to experience another side of stone fruits. Hot off the rack, these grilled nectarines practically melt in your mouth. —Sonya Labbe, West Hollywood, California
Lime-Rosemary Shrimp SkewersI had a big bunch of rosemary, so I turned the stems into skewers for grilling shrimp. Serve with rice or couscous and lime wedges. —Leah Lenz, Los Angeles, California
Grilled Watermelon GazpachoThis is the perfect starter for a summer dinner or a lunch meal. It's cool and tangy with a whole lot of great grilled flavor. If you like a little more spice, just add more jalapenos. —George Levinthal, Goleta, California
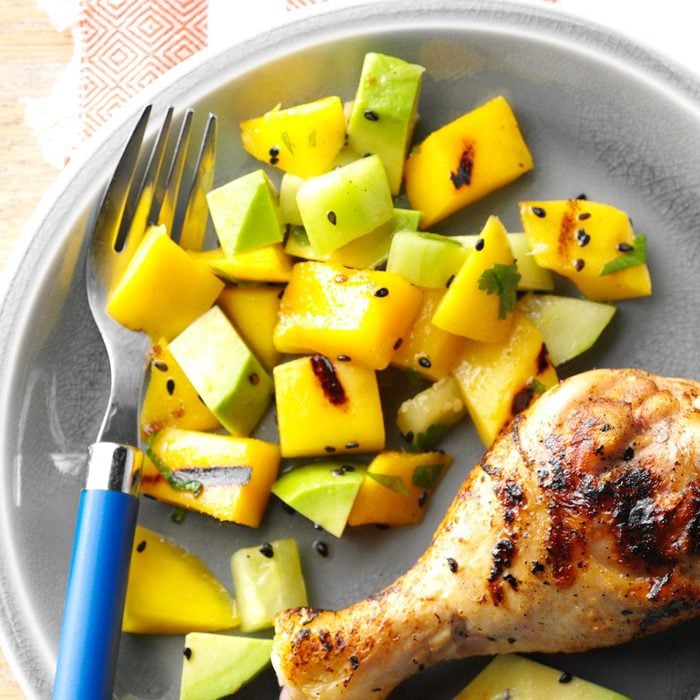
Grilled Mango & Avocado SaladA big hit with my family, this light salad is so easy to make! The healthy option of mango and avocado is simply the best combination you could serve. —Amy Liesemeyer, Tucson, Arizona
Zucchini & Cheese RouladesMy husband enjoys this recipe so much that he even helps me roll up the roulades! You can change the filling any way you like—I have used feta instead of Parmesan, or sun-dried tomatoes in the place of the olives. —April McKinney, Murfreesboro, Tennessee
Grilled Caprese QuesadillasHere's a quick and easy
summer lunch that makes great use of garden-grown tomatoes. Feel free to make your quesadillas heartier by adding grilled chicken. —Amy Mongiovi, Lititz, Pennsylvania
Grilled Banana Brownie SundaesMy niece Amanda Jean and I have a lot of fun in the kitchen creating different dishes. One of us will start with a recipe idea and it just grows from there—and so does the mess. In this case, the happy result was our Grilled Banana Brownie Sundae. —Carol Farnsworth, Greenwood, Indiana
Fingerling Potatoes with Fresh Parsley and ChivesWe use seasonings like adobo, Sazon, fresh parsley and minced chives when we grill potatoes. We have even smoked the potatoes in our portable smoker before grilling. —Teri Rasey, Cadillac, Michigan
Glazed Spatchcocked ChickenA few pantry items, such as mustard and preserves, inspired this recipe. And since then it has been the successful centerpiece for both small weeknight meals and big parties. —James Schend, Pleasant Prairie, Wisconsin
Lime and Dill Chimichurri ShrimpChimichurri is a very popular condiment in Argentina and Uruguay and is most often used as a dipping sauce or a marinade for meats. My chimichurri shrimp version incorporates dill and lime, which give it a brighter flavor, making it ideal for spring and summer entertaining. —Bonnie Landy, Castro Valley, California
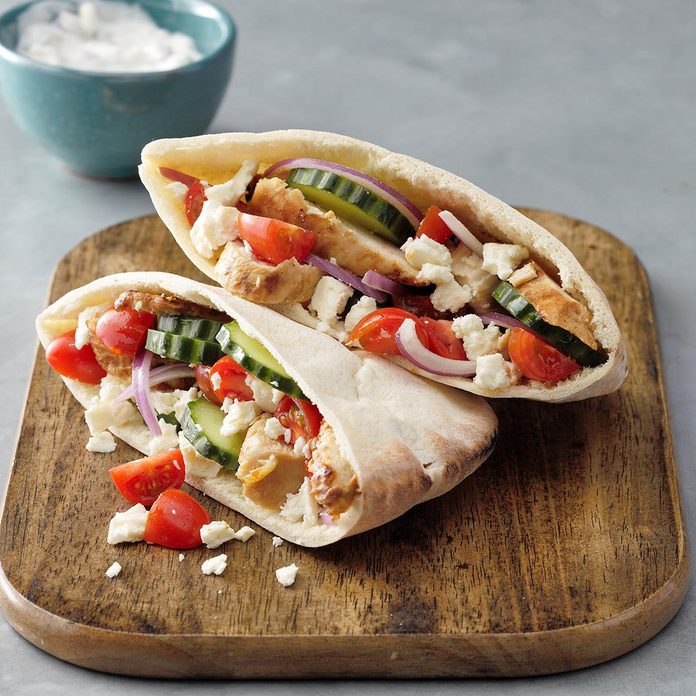
Greek Grilled Chicken PitasI switched up my mom’s recipe to create this tasty pita pocket variation. It’s one of our favorite
grilled chicken recipes and is perfect for warm days. The creamy cucumber sauce goes great with the fresh, crunchy veggies. —Blair Lonergan, Rochelle, Virginia
Grilled Eggplant Parmesan StacksWe love eggplant Parmesan, but when it’s hot outside, the dish feels too heavy. Grilled eggplant slices topped with tomato, mozzarella and Parm satisfy everyone. —Joann Parlin, Little Egg Harbor, New Jersey

