In this example we are going to see how to use Android ScrollView component. This is a layout container that can host multiple component and views and can is scrollable.
For this tutorial, we will use the following tools in a Windows 64-bit platform:
- JDK 1.7
- Eclipse 4.2 Juno
- Android SDK 4.2
1. Create a new Android Project
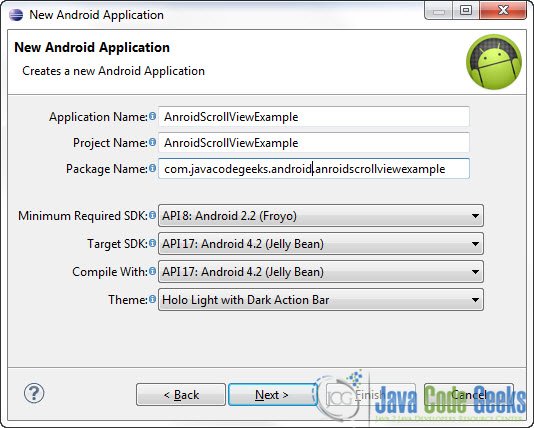
Open Eclipse IDE and go to File -> New -> Project -> Android -> Android Application Project. You have to specify the Application Name, the Project Name and the Package name in the appropriate text fields and then click Next.
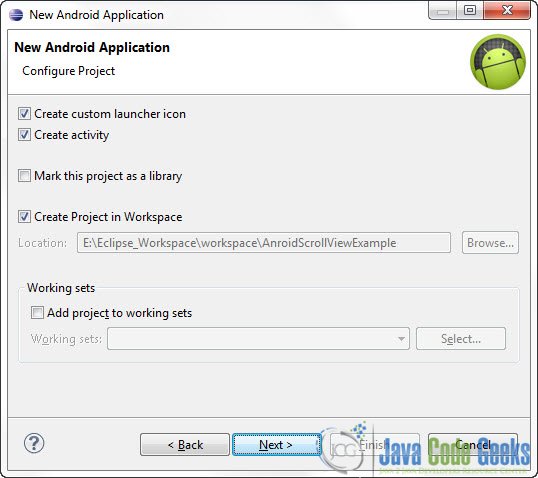
In the next window make sure the “Create activity” option is selected in order to create a new activity for your project, and click Next. This is optional as you can create a new activity after creating the project, but you can do it all in one step.
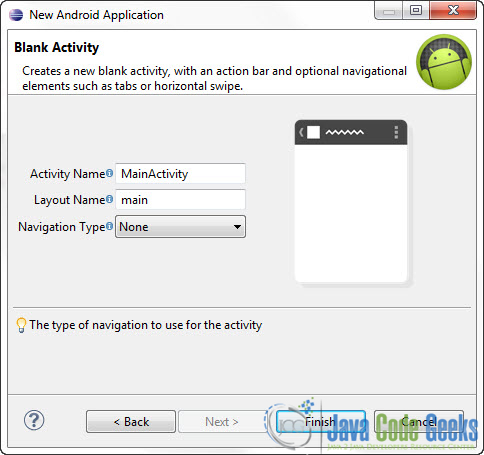
Select “BlankActivity” and click Next.

You will be asked to specify some information about the new activity. In the Layout Name text field you have to specify the name of the file that will contain the layout description of your app. In our case the file res/layout/main.xml will be created. Then, click Finish.
2. Create the main layout of the Application
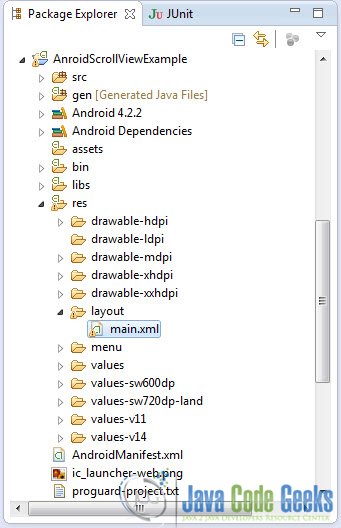
Open res/layout/main.xml file :
And paste the following code :
<?xml version="1.0" encoding="utf-8"?>
<ScrollView xmlns:android="http://schemas.android.com/apk/res/android"
android:layout_width="fill_parent"
android:layout_height="wrap_content" >
<LinearLayout
android:layout_width="fill_parent"
android:layout_height="fill_parent"
android:orientation="vertical" >
<Button
android:layout_width="fill_parent"
android:layout_height="wrap_content"
android:text="Button 1" />
<Button
android:layout_width="fill_parent"
android:layout_height="wrap_content"
android:text="Button 2" />
<Button
android:layout_width="fill_parent"
android:layout_height="wrap_content"
android:text="Button 3" />
<Button
android:layout_width="fill_parent"
android:layout_height="wrap_content"
android:text="Button 4" />
<Button
android:layout_width="fill_parent"
android:layout_height="wrap_content"
android:text="Button 5" />
<ProgressBar
android:id="@+id/progressBar1"
style="?android:attr/progressBarStyleHorizontal"
android:layout_width="match_parent"
android:layout_height="wrap_content" />
<RadioButton
android:id="@+id/radioButton2"
android:layout_width="wrap_content"
android:layout_height="wrap_content"
android:text="RadioButton 1" />
<RadioButton
android:id="@+id/radioButton1"
android:layout_width="wrap_content"
android:layout_height="wrap_content"
android:text="RadioButton 2" />
<ToggleButton
android:id="@+id/toggleButton1"
android:layout_width="match_parent"
android:layout_height="wrap_content"
android:text="ToggleButton" />
<Button
android:layout_width="fill_parent"
android:layout_height="wrap_content"
android:text="Button 6" />
<SeekBar
android:id="@+id/seekBar1"
android:layout_width="match_parent"
android:layout_height="wrap_content" />
<Button
android:id="@+id/button3"
android:layout_width="match_parent"
android:layout_height="wrap_content"
android:text="Button 7" />
<Button
android:id="@+id/button4"
android:layout_width="match_parent"
android:layout_height="wrap_content"
android:text="Button 8" />
<CheckBox
android:id="@+id/checkBox1"
android:layout_width="wrap_content"
android:layout_height="wrap_content"
android:text="CheckBox" />
<Button
android:id="@+id/button2"
android:layout_width="match_parent"
android:layout_height="wrap_content"
android:text="Button 9" />
<Button
android:id="@+id/button1"
android:layout_width="match_parent"
android:layout_height="wrap_content"
android:text="Button 10" />
<Button
android:layout_width="fill_parent"
android:layout_height="wrap_content"
android:text="Button 11" />
</LinearLayout>
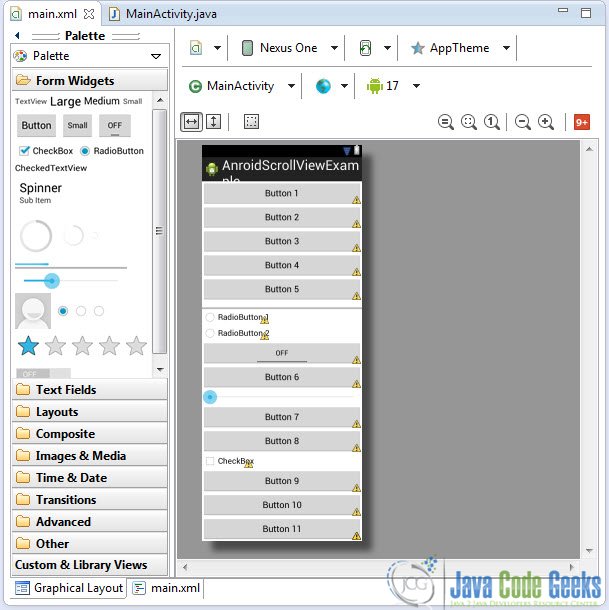
</ScrollView>Now you may open the Graphical layout editor to preview the User Interface you created:

4. Run the application
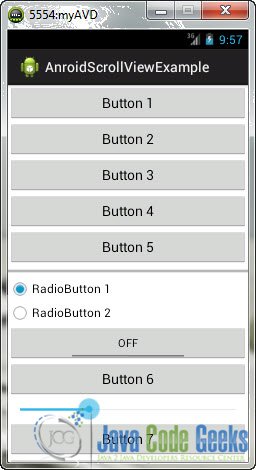
This is the main screen of our Application:
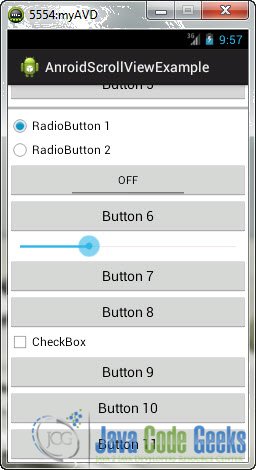
Now, when you scroll down you can see the rest of the components:
Download Eclipse Project
This was an Android ScrollViewExample. Download the Eclipse Project of this tutorial: AndroidScrollViewExample.zip

how can i scroll the activity using class but not using xml?