

How to Bulk Upload And Schedule Posts to Buffer WITH IMAGES Using BulkPublish
/
How to Bulk Upload And Schedule Posts to Buffer WITH IMAGES Using BulkPublish
Do you use Buffer to schedule your social media posts? Would you like to bulk upload your content to post text AND images at the same time? In this post, I will show you how.
Using BulkPublish to upload text and images to Buffer
At the time of writing, the official Buffer website does not allow you to bulk upload with images (just text), but the third party tool BulkPublish - which sends a prepared file of your content to your official Buffer account - does.
BulkPublish is in beta and quite bare bones, but the process is fairly straightforward. In this blog post I will show you, step-by-step, how to do it. Let's go!
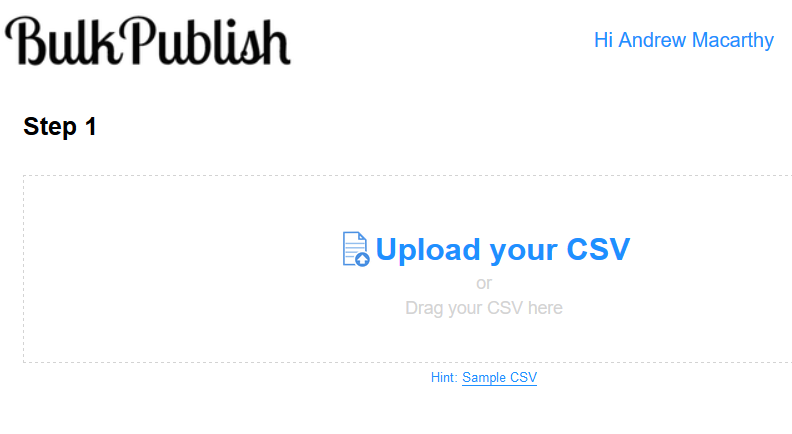
Step 1: Visit BulkPublish.com and sign up for free

Sign up is free. Check your email to confirm your details and sign in.
Step 2: Prepare your content file
BulkPublish requires you to prepare a .csv or .txt file (using Google Docs or Excel), in order to upload and send your scheduled content to Buffer. BulkPublish offers a sample CSV file to download (the link to it is in the image above).
The CSV setup is simple, however. Column A with your content (tweet, Facebook post, etc.), and Column B with the image you want to use. Here's an example of my own file:

My text column (Column A) has copy that is deliberately short, so that it will upload painlessly to all social networks I chose to share to via Buffer (Twitter, I'm looking at you... restricting the copy to well below 140 characters to accommodate the 20 or so characters used up by an image attached to a tweet, but not including most of the characters used in each link, which is shortened automatically when live on Twitter).

Do note that you will need to add URLs that point directly to where your image is hosted. My host (Squarespace) doesn't make finding this direct link easy, so I uploaded my images to imgur.com, which does. See above, for where I grab the direct URL once I have uploaded an image to imgur.
Step 3: Upload your file and send it to Buffer
Back at BulkPubilsh, click to upload your CSV or drag the file into your browser. If the .CSV upload fails, try saving your file in a Text (Tab delimited) (*.txt) format instead, then retry.

Once your file has been processed, the content will be displayed as above. You can make any final changes here if you like - delete or edit content. Give everything one last check, then hit Next.
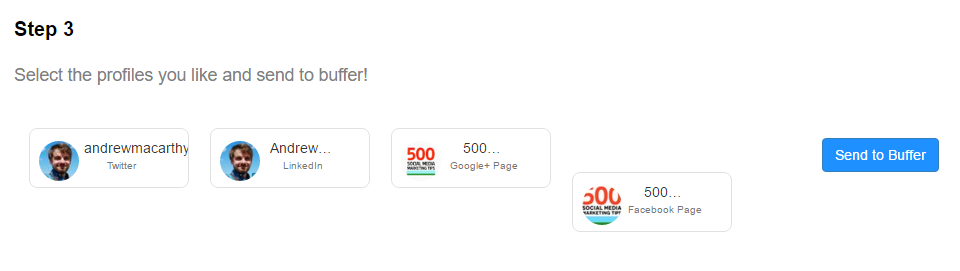
Lastly, select the profiles you have connected on Buffer to which you would like the content to be scheduled. When you're done, hit Send to Buffer and the sending process will begin. It will take a little while depending on how much content you have scheduled.
Step 4: Check your Buffer.com account
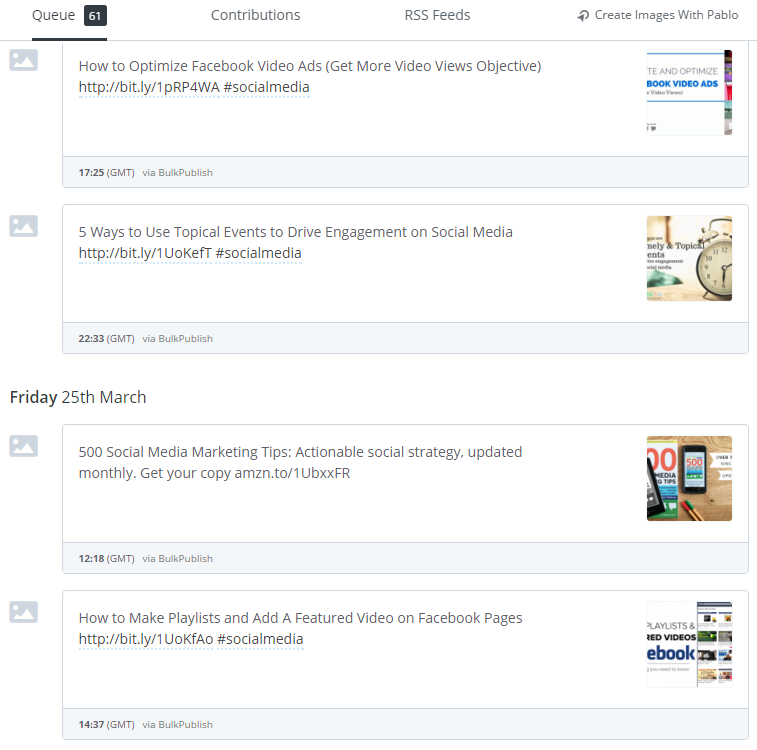
To ensure everything has gone smoothly, head over to your Buffer.com account and inspect your queues. As you can see from the above screenshot, both the text and images from my content file have loaded and are scheduled according to my Buffer preferences. And that's it, you're done!
Over to you
I hope this post has been useful! Will you be using BulkPublish to improve the content you share via Buffer? Do you use any other tools to support your efforts? Let me know in the comments below!