How to Create a Facebook Business Account: 4 Easy Steps

Facebook is the largest social network in the world, with an estimated 1.39 billion monthly users and at least 1.5 million companies – including print-on-demand stores – using the platform to do business and advertise products. A new Facebook Business Page can become a potential customer’s first point of contact with your brand.
A Facebook business account is a free way to use the social media network to add a new eCommerce channel, expand your reach, and create ad campaigns.
In this article, you’ll learn how to create a Facebook business account, from formatting your profile picture to creating an ad account.
Table of Contents
What Is a Facebook Business Account?
A Facebook business account manages a social media profile and pages for commercial institutions or personal accounts willing to engage with eCommerce. It lets companies and individuals brand themselves, promote products or services, and even make sales and transactions through Facebook shops and Instagram pages.
The Facebook Business Manager configures Business Pages and accounts, as well as ad accounts. It also sets up permissions and accesses for team members or partners.
Business accounts also create, manage, track Facebook ads, audience and Page visitors, and connect apps.
4 Steps to Set up a Facebook Business Account
Next, we’ll see how to create a business Facebook account in four straightforward steps.Next, we’ll see how to create a business Facebook account in four straightforward steps.
1. Create a Facebook Page for Business
First, you must own a personal Facebook account. Your personal profile will remain separate from the new Facebook Business Page, and your information will remain private.
Expert’s Tip
“The most important part of the page creation process is giving full admin access only to those people in the organization who need it. Giving admin access to the wrong person creates a wide set of problems from an inability to perform even the simplest marketing tasks to the possibility of losing assets permanently.
Create every asset thoroughly – from choosing the ad account currency to adding business details. These things are not too exciting, but not paying enough attention can create a set of unnecessary and avoidable problems down the line.”

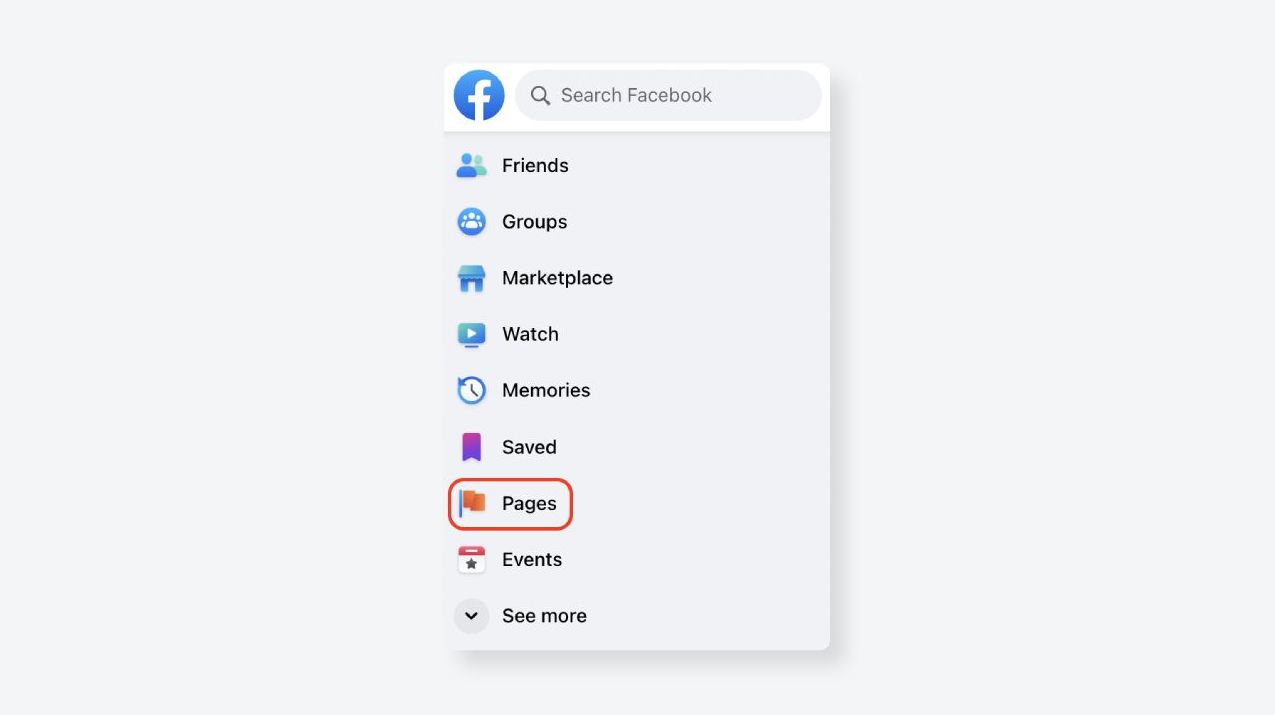
To create a Business Page, log into your Facebook account and go to the Pages section in the left-hand menu.
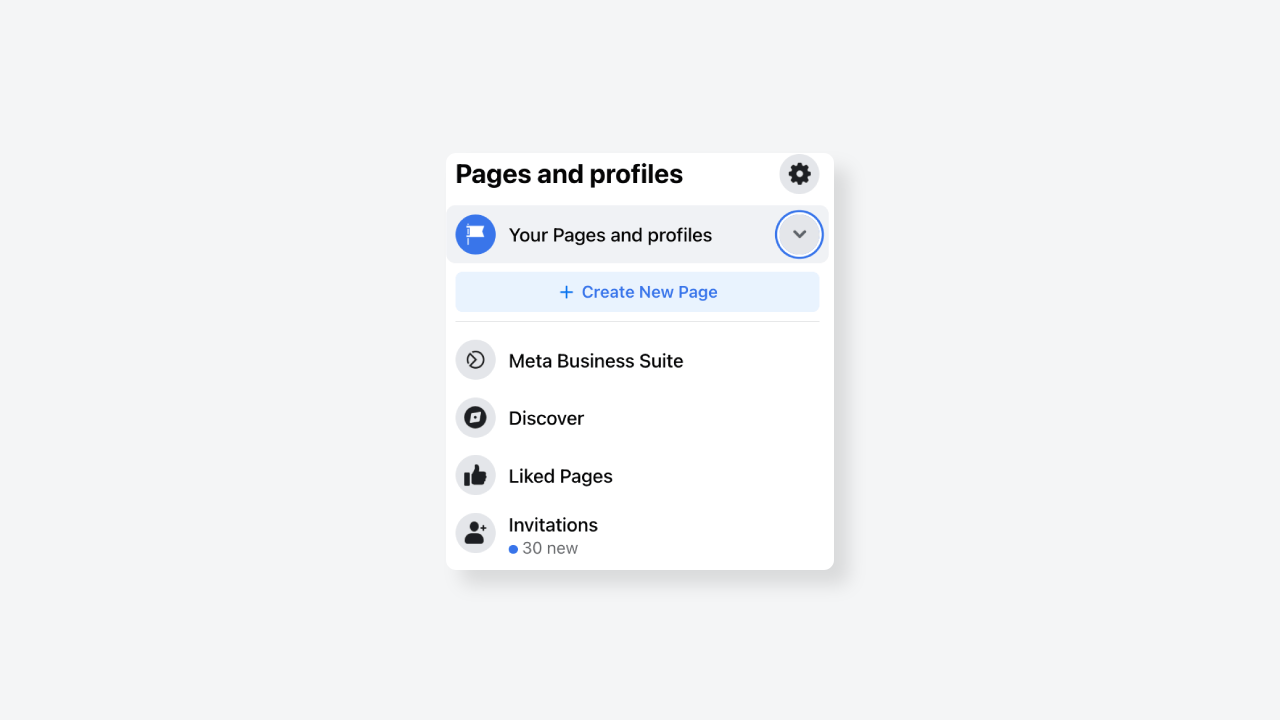
In the Pages and profiles menu, click Create new page:
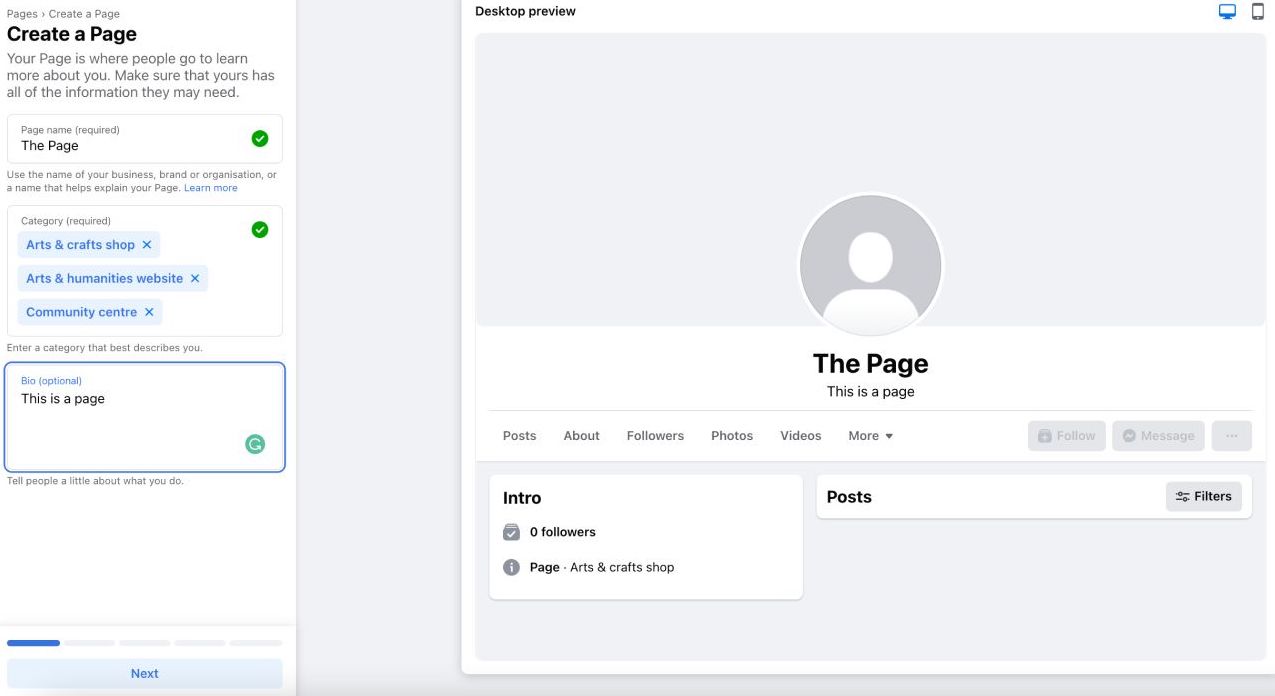
Add a business name, category, and bio, and click Create Page.
- Your Facebook Page name should match other brand channels, such as a website, online store, or blog. If you don’t have it yet, go for a short name – catchy if possible and brandable.
Use a business name generator if necessary – type keywords related to the business and pick an AI-generated suggestion. Search for it in Hostinger, GoDaddy, or other host providers, see if it’s taken, and trademark it.
- The category should be selected from predetermined options. Facebook lets you choose up to three categories, which can be modified anytime.
Pick all the categories that describe your business, as that will increase your visibility inside the Facebook search results and expose the brand to multiple people.
- The bio space tells readers what your brand and public figure are. Adding it is optional, but don’t skip this step, and have the business information prepared beforehand.
The description should be short, up to two sentences. Use keywords directly connected to your unique selling propositions.
2. Fill in All the Necessary Information
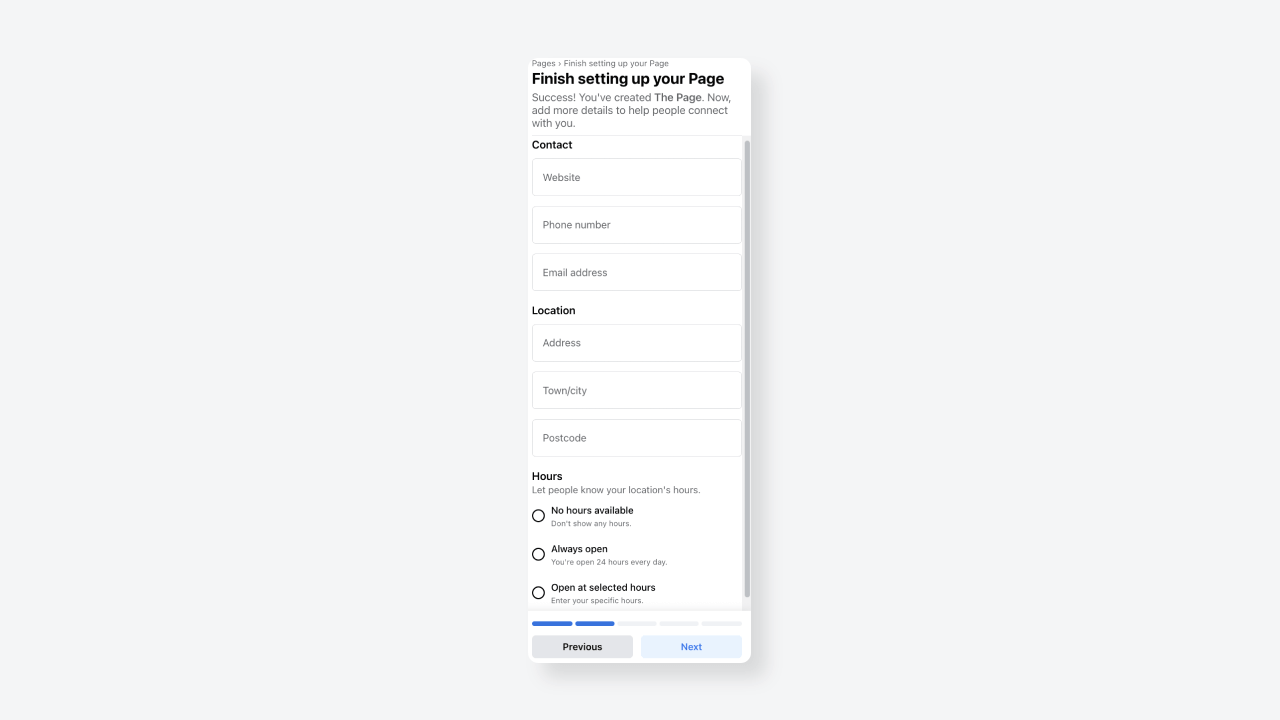
Fill out business details like location, contact, and work hours. This step is optional. However, try to be as complete as possible, as providing thorough information to a new business page increases reliability and trust.
Use Facebook’s resources to provide a customer-centric experience – if your business has a physical store, add the location and business hours. If your store ships products, inform of the areas serviced.
Input information such as a business email, website, phone number, and any other convenient way to contact the Facebook shop to make it easier for potential customers to find your Facebook business.
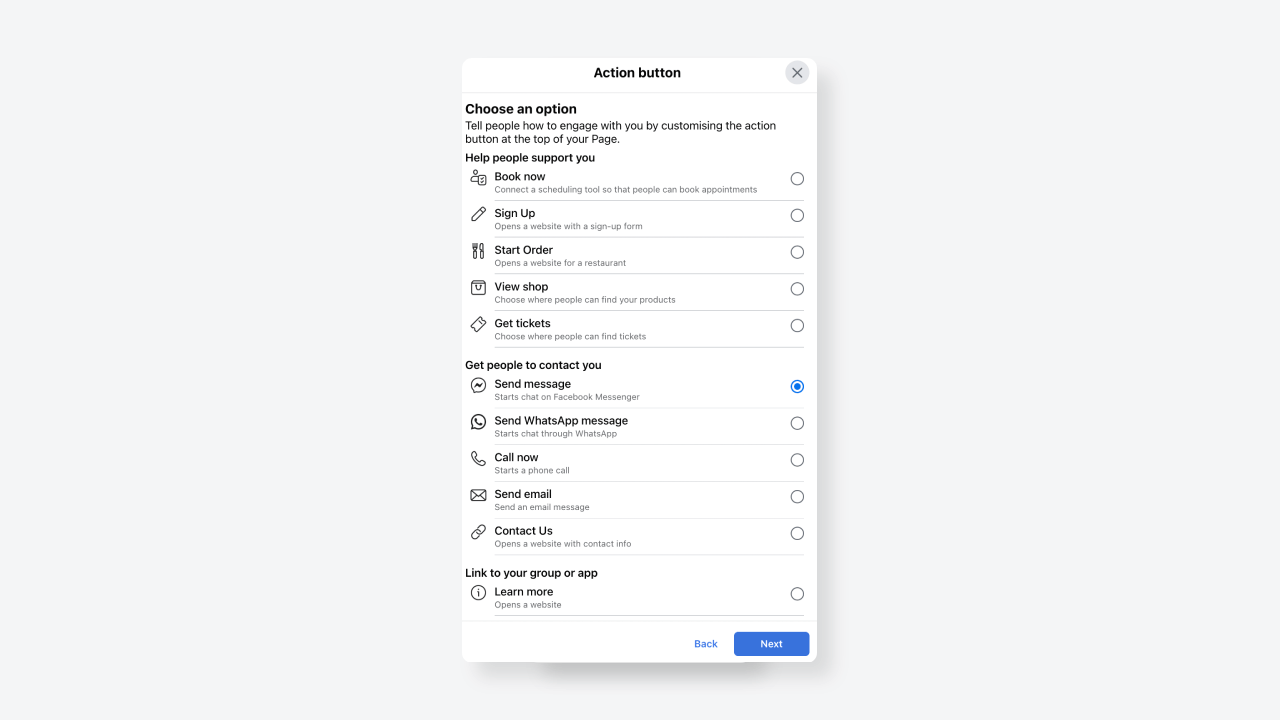
Add a profile photo, a cover image, and an Action button. These steps are also optional, but adding at least a quality profile picture is highly recommended. An attractive cover image will catch potential customers’ attention, engage followers, and increase trust.
The Action button adds pre-determined macros for contact options like sending an email or a WhatsApp message. In addition, Facebook offers options to order food or a ticket, promote events, or sign-up with a form. An action button can also trigger actions like playing a game or buying in an online store.
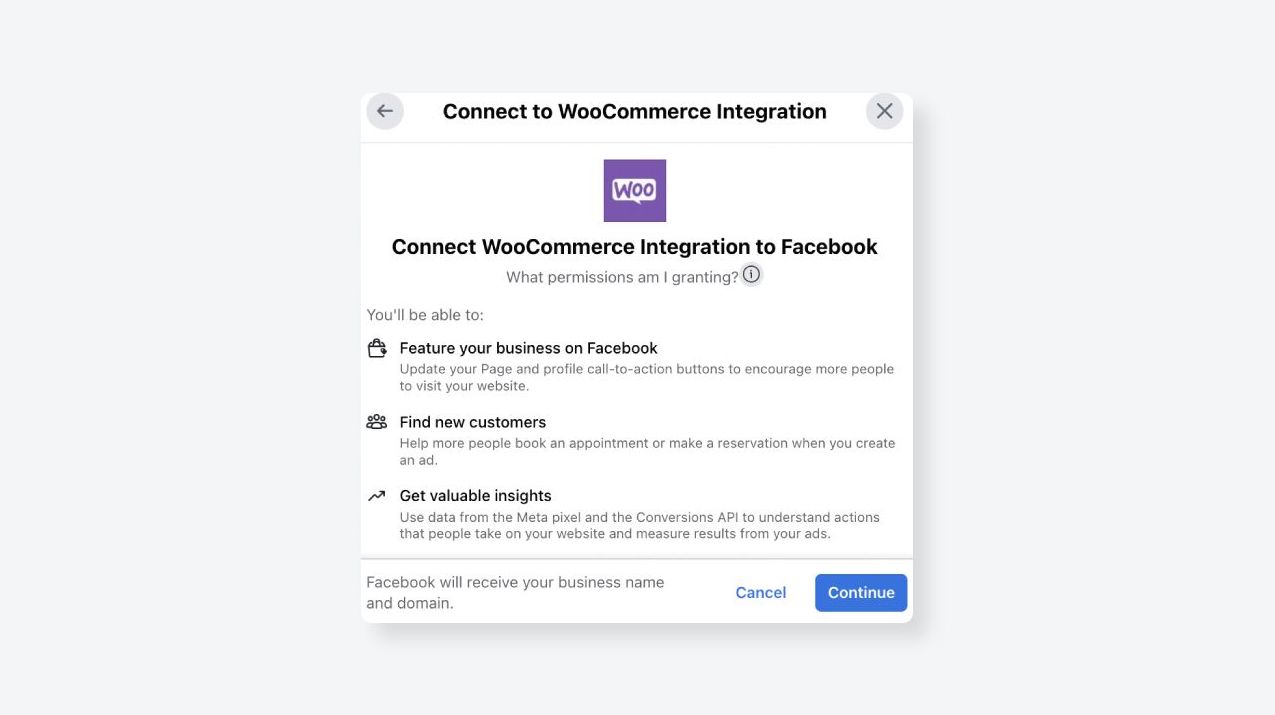
It’s possible, for instance, to connect the button to a WooCommerce or BigCommerce store:
Unfortunately, only one action button can be chosen.
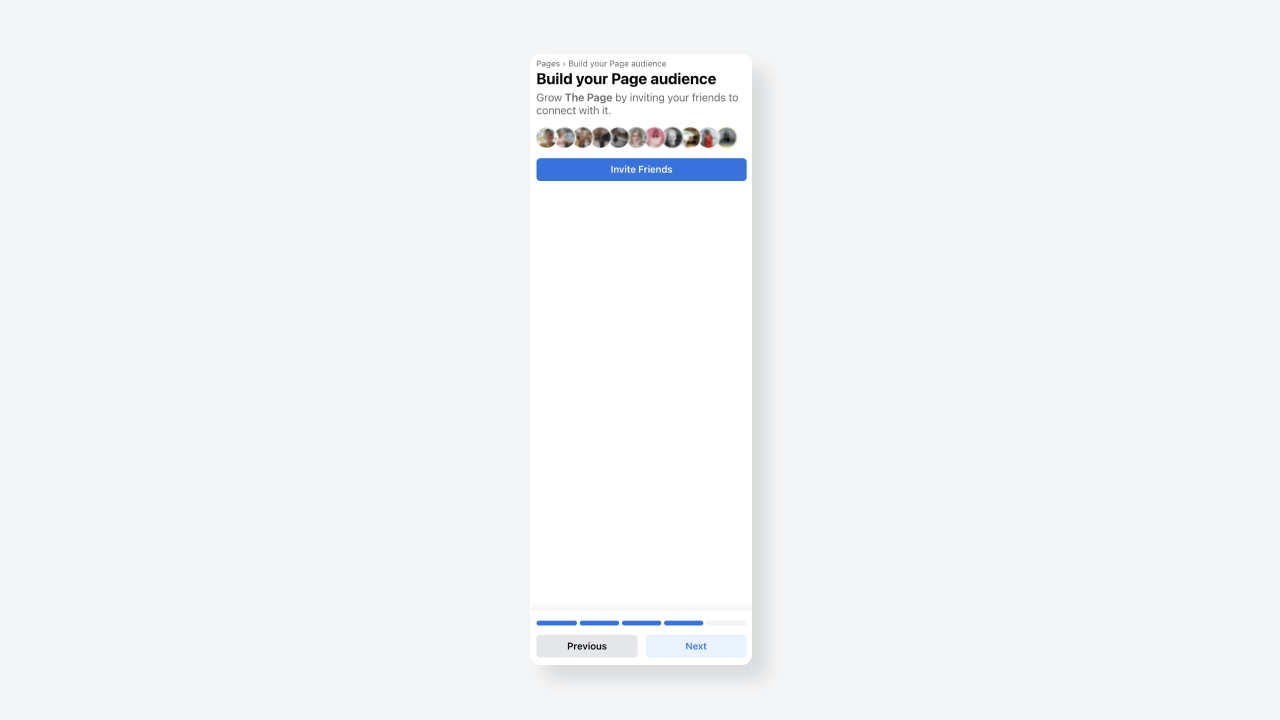
Next, invite existing Facebook friends to like and follow the Page and proceed.
Facebook will offer options for getting notifications on your profile and receiving promotional emails from Meta. Pick what’s convenient, click Done, and your first Facebook Business Page is ready.
Pro Tips
- Creating a Facebook Page is only the first step. Actively participate, post regularly, and update your cover photo and other Page info as necessary – for instance, due to seasonal offers.
- Interact with your personal Facebook friends to add an initial attendance, market the Page in Facebook groups, and follow other Pages. Finding the relevant groups can increase the number of your potential customers.
- Monitor the performance of your Facebook Business Pages with Facebook Insights. Pay special attention to Page views, likes, and reach. Observe demographics and posts with more interaction.
Make It Happen Today!
3. Set Up Facebook Business Manager
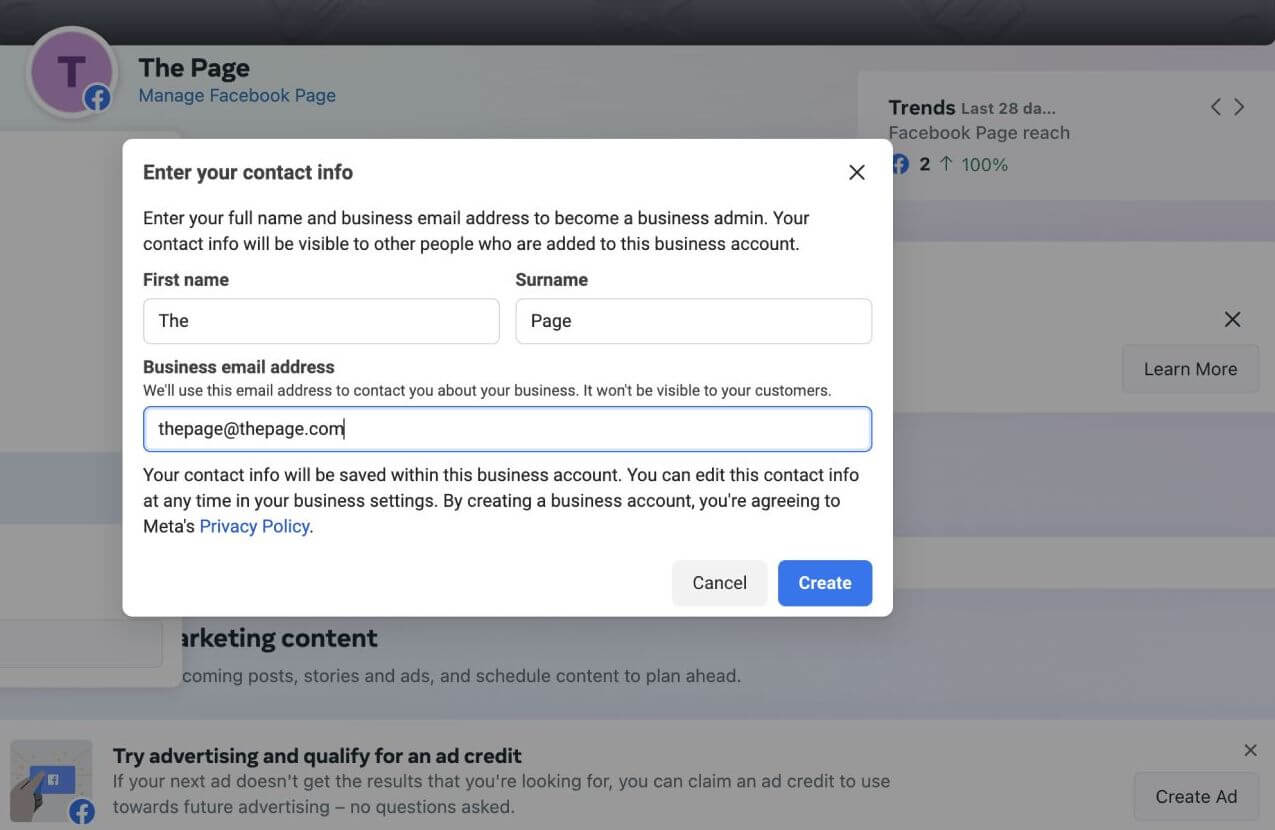
After creating a Page for your business, it’s time to make a business profile. For that, click Meta Business Suite on the left-hand side. Click the drop-down menu in your Page profile, and choose Create a Business Account.
After that, observe the following steps for setting up the Facebook Business Manager:
- Add data such as the business account owner’s name, last name, and email address. Don’t forget to check your email inbox and confirm the address.
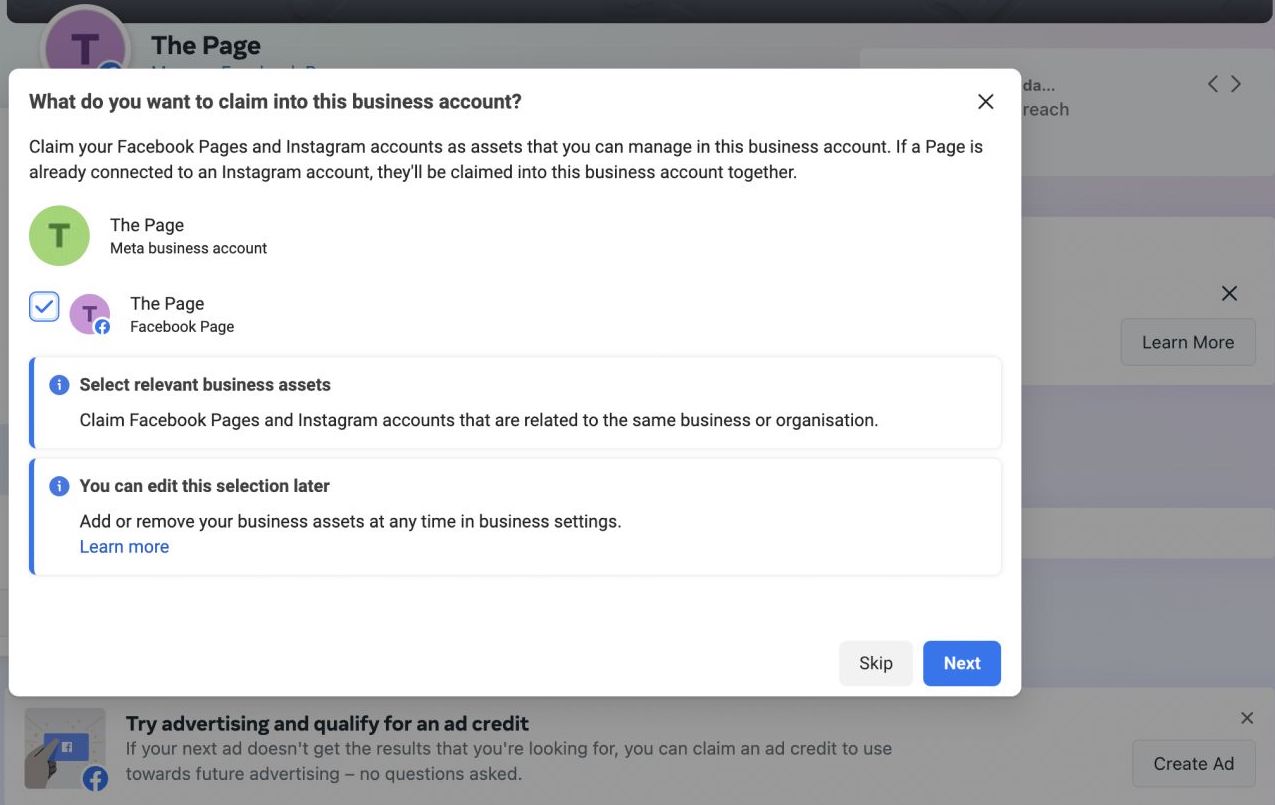
- Claim assets and connect them to the business account. That can include business Pages or an Instagram account.
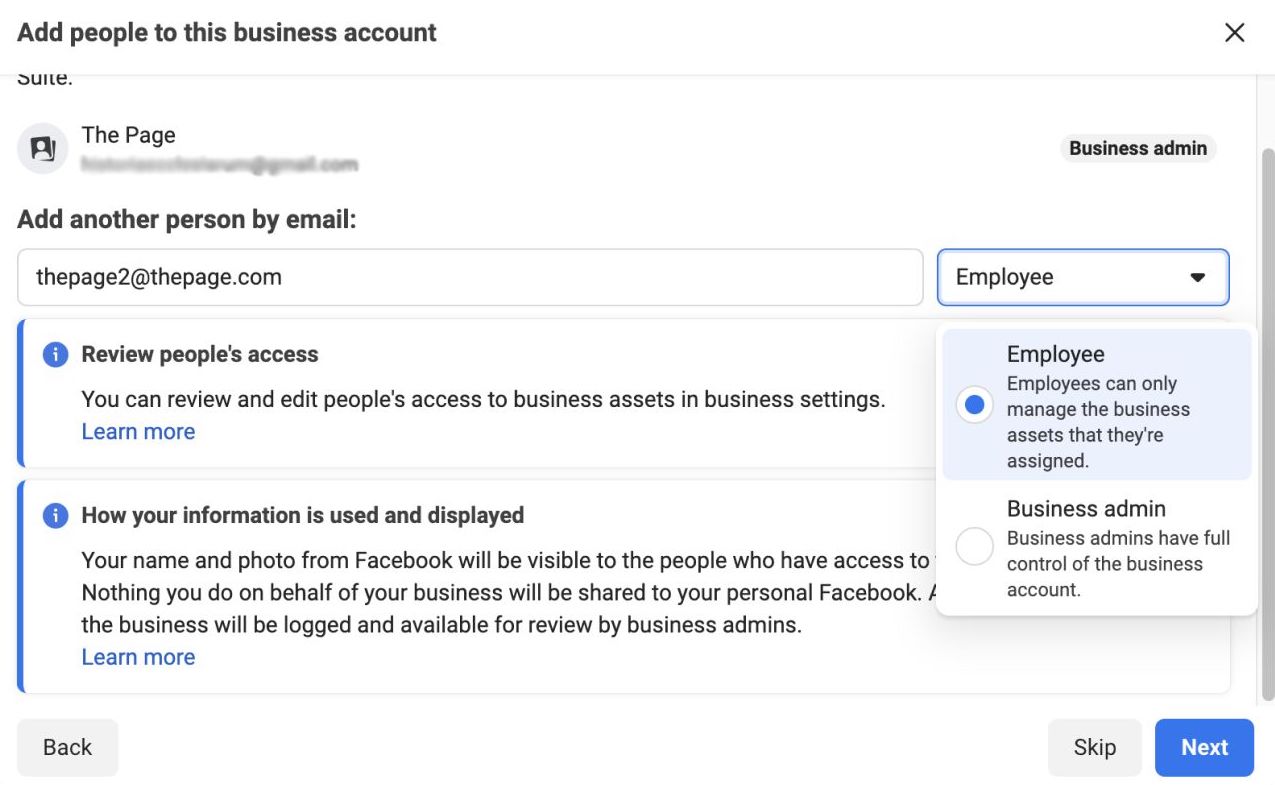
- Add more people to manage the account by adding their email addresses and defining their roles, such as employee or admin.
Review the information and, if necessary, click Back to correct anything.
After completing these steps, click Confirm, and the business account is ready.
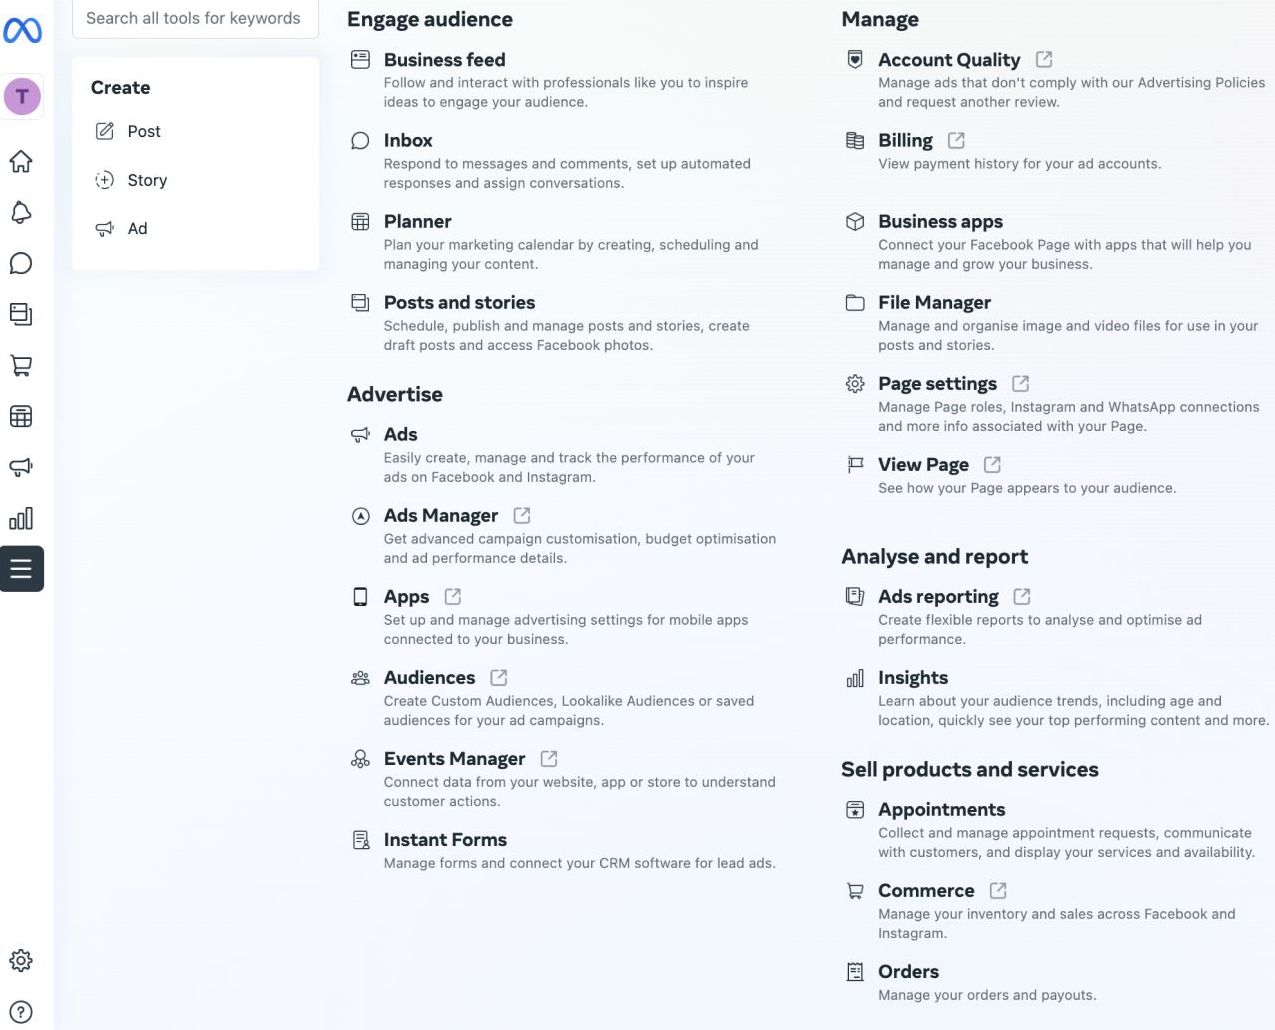
Every business account feature is available from the dashboard. That includes managing and setting up eCommerce stores across Facebook and Instagram, creating ads, or scheduling posts.
Expert’s Tip
“Anyone with full admin access to the business manager can completely take over a Facebook Business Account. I can’t stress this enough – pay attention to who has what kind of access to your assets.”

- There are different ways to set up payment methods, but they could be more intuitive, and the process requires some wandering. First, you need to look for the Settings page. It can be found in the main dashboard by scrolling down until the gear button.
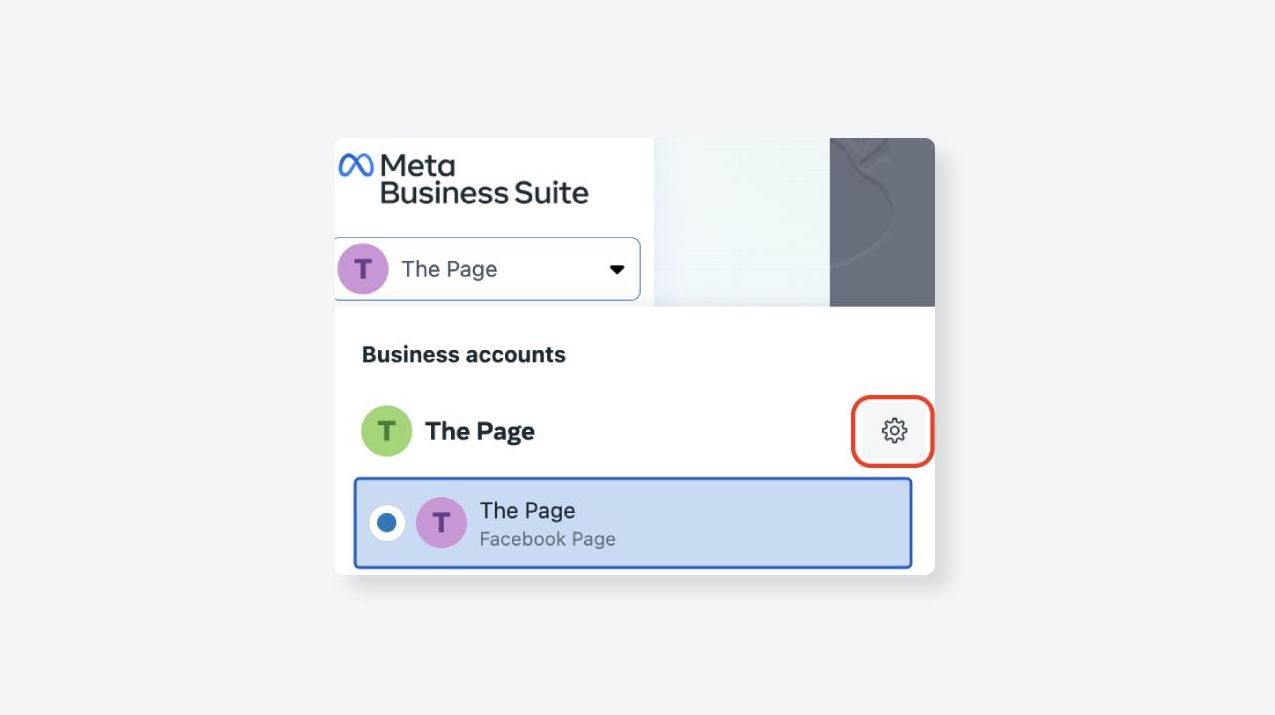
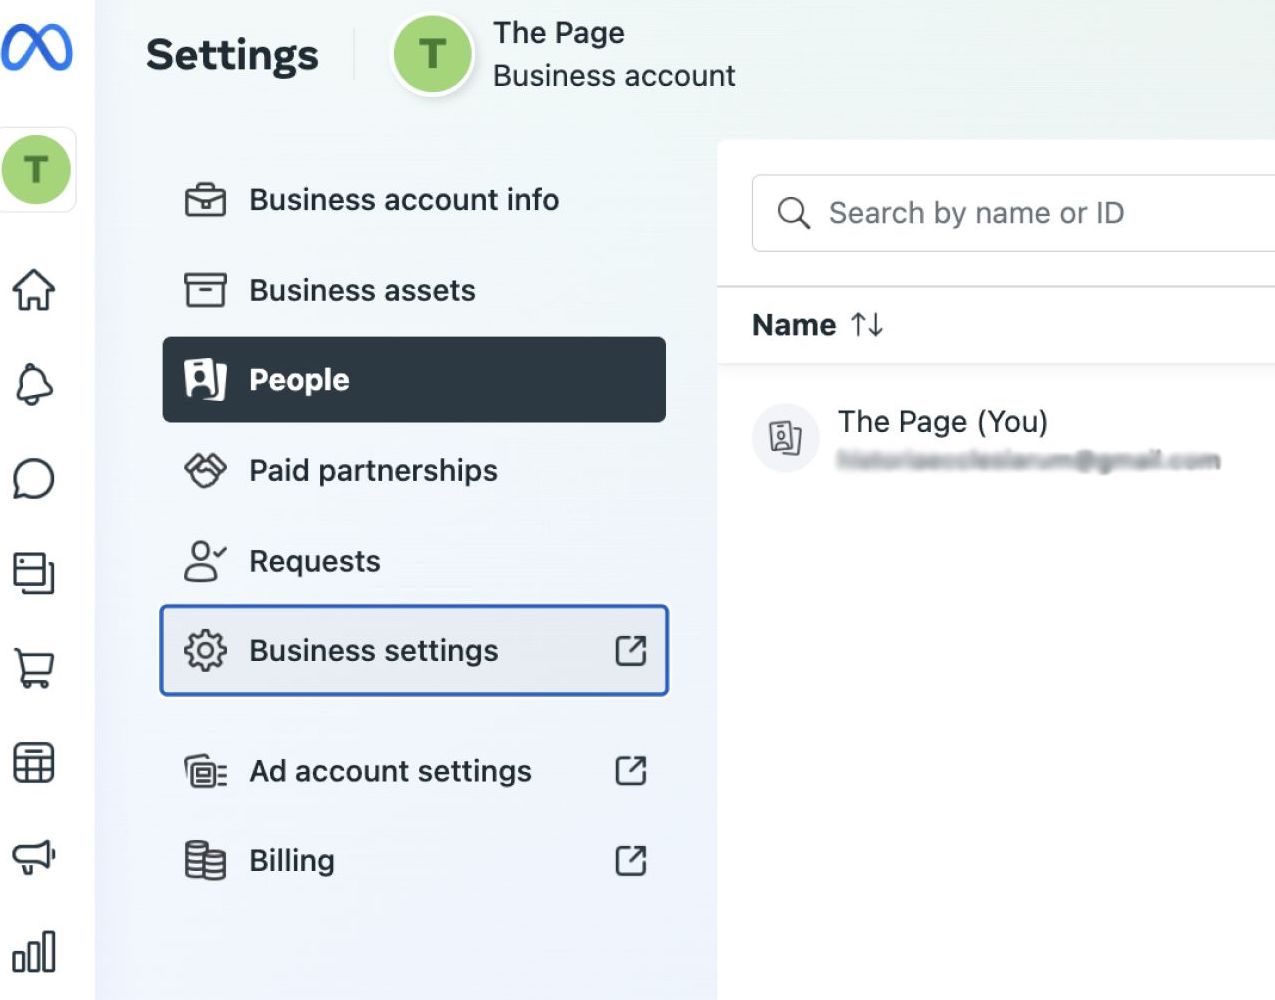
To execute that from the Meta Business Suite page, choose your business account in the left-hand menu, click on the drop-down list, and the gear button. That will open the Settings page:
Once you open the Settings page, choose Business settings.
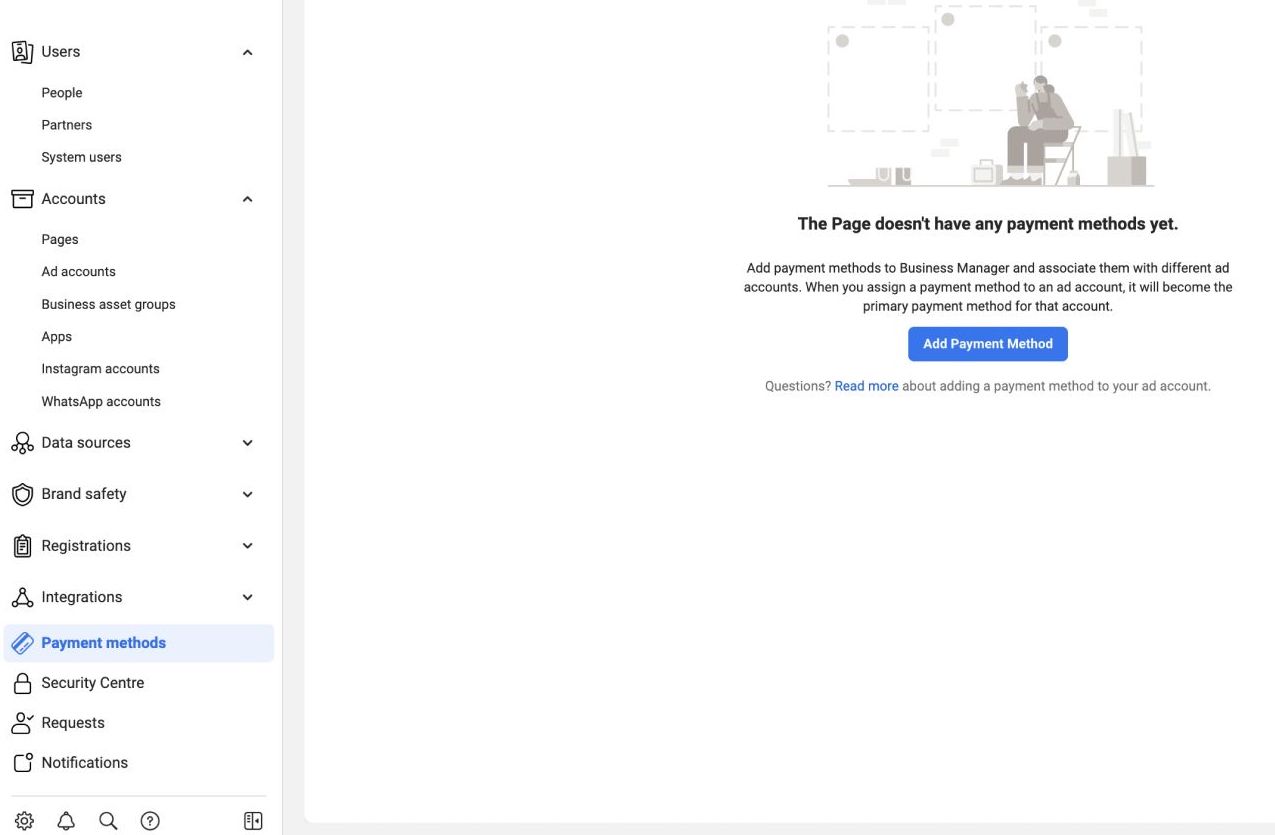
Scroll down to Payment methods, then, on the main page, click the Add Payment Method button.
A pop-up window will appear, asking you to define a “Finance editor.” If multiple people are authorized to manage the page, they will appear in a list. Choose one person or click Assign to myself.
Finally, it will be possible to choose a country and currency and add a credit or debit card or choose online banking. The options will vary depending on the country and currency.
4. Create an Ad Account
To start ad campaigns, creating another account is necessary – a Facebook ad account.
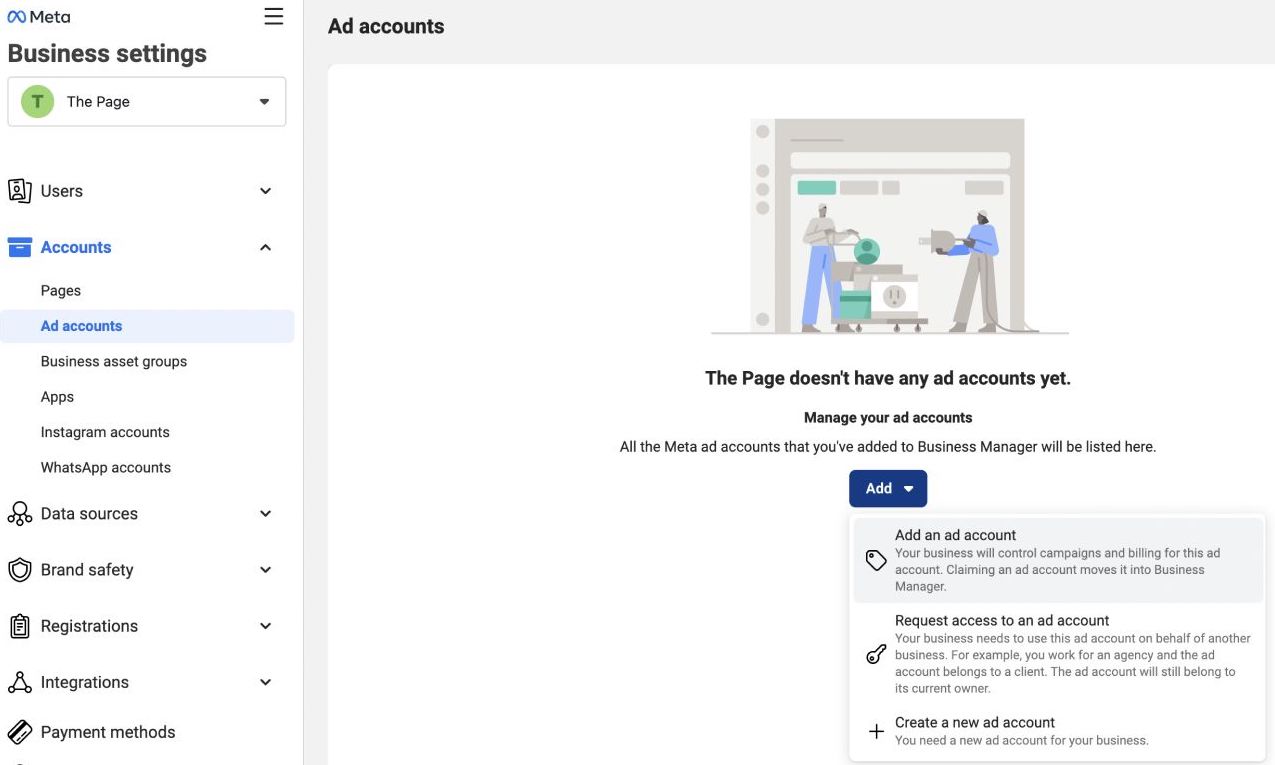
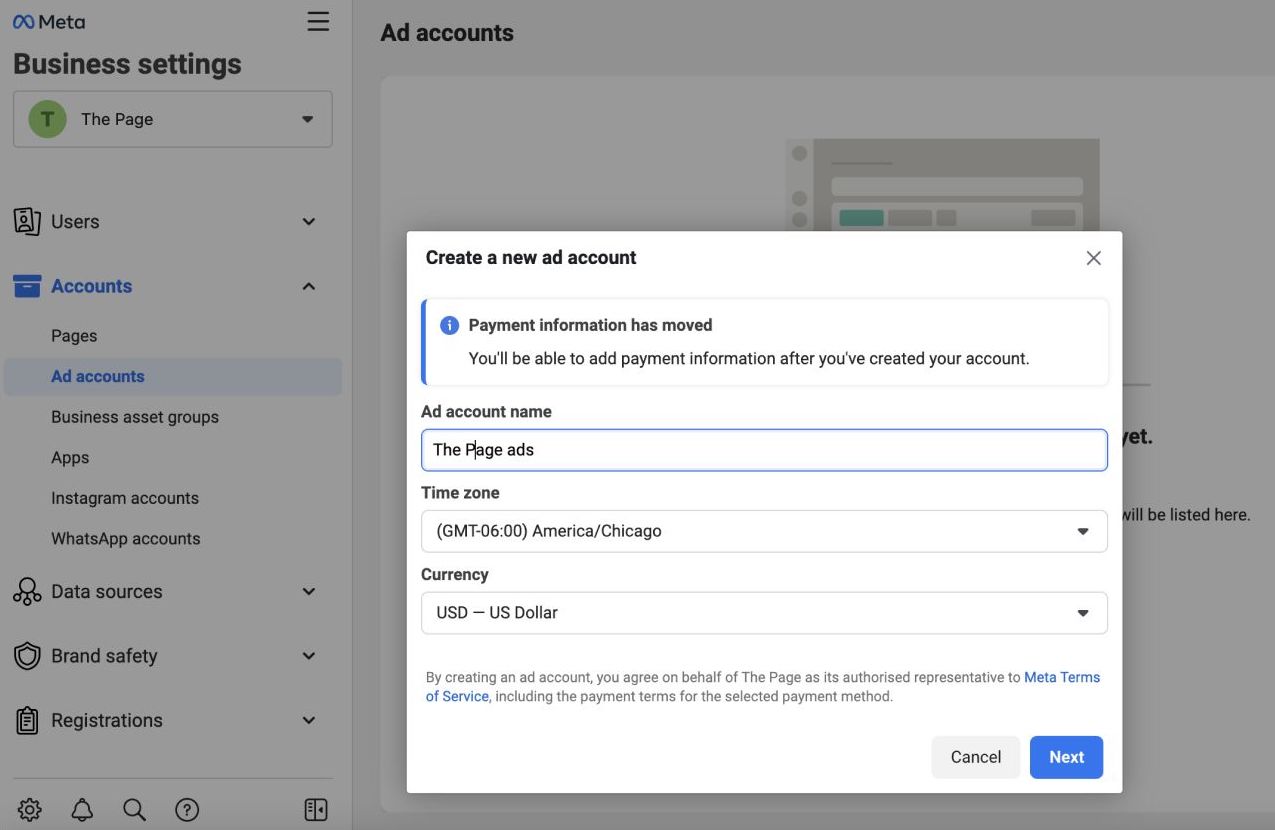
On the Business Settings page, find the Accounts section on the left-hand menu. In the drop-down list, click Ad Accounts. After that, it’s possible to add or create a new ad account or request access to old accounts.
After that, configure the following settings:
- Type a name for the ad account and select the time zone and currency.
- Specify if the ad account will be used for your business or a third party, and click Create.
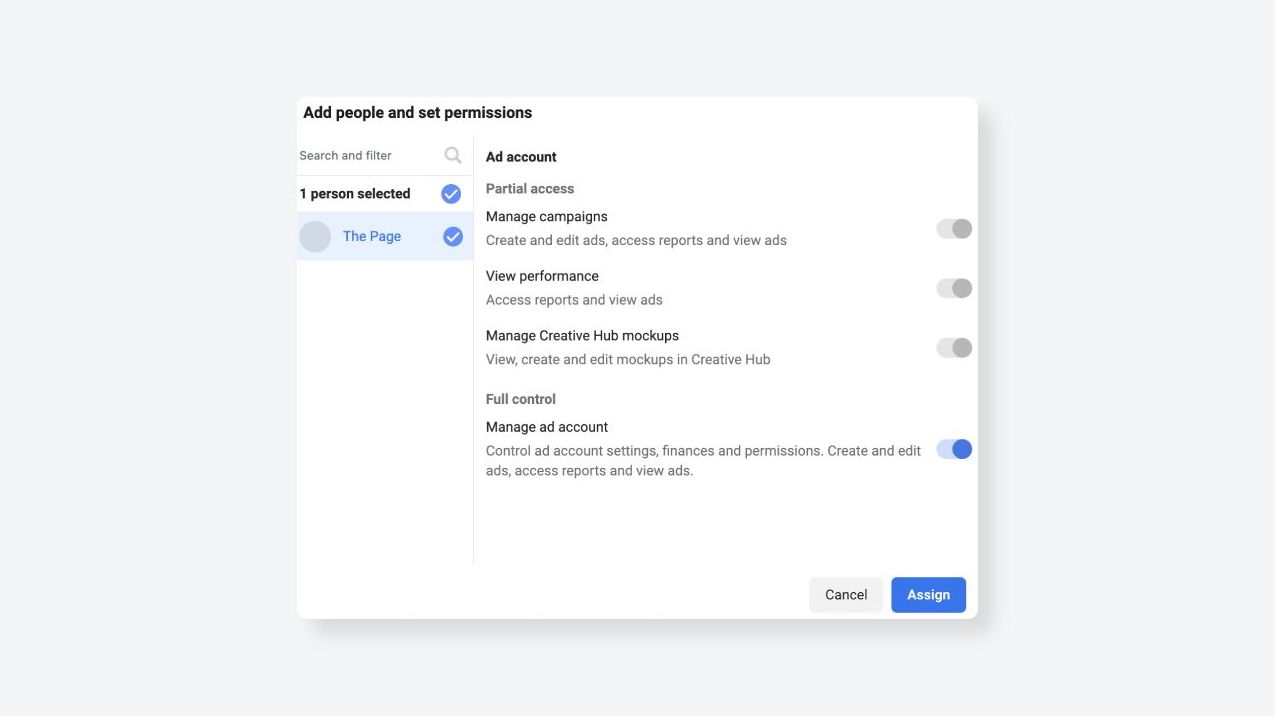
- Define roles and admin accesses. Choose the Full Control option for managing the account and ad campaigns, or specify partial access to specific users.
- Click Manage ad account to assign admin access to yourself or another user. Choose the person and the access level, and click Assign.
Payment Methods in a Facebook Ad Account
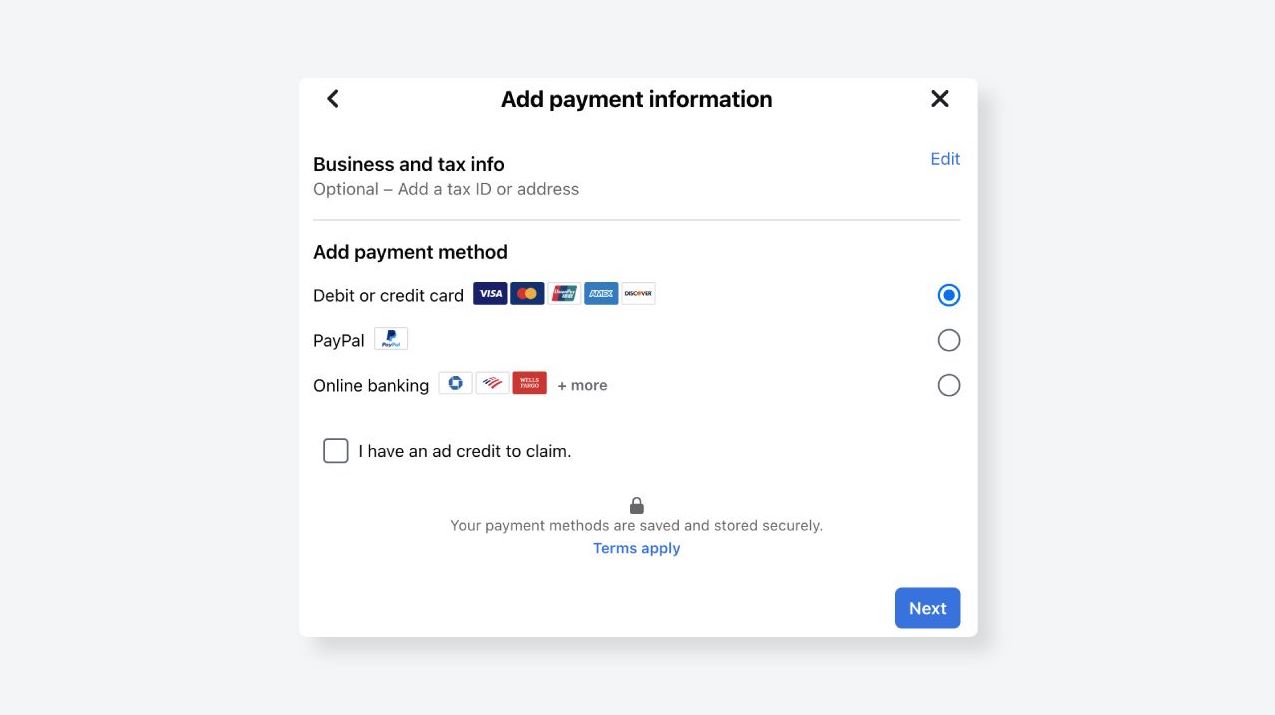
Next, Facebook will require setting up the payment info. Add the country, currency, and time zone. Location and currency can’t be edited later.
Payment methods can be modified after, but you must save a valid payment method first before you can conclude the creation of an ad account. You can return later and complete the configuration if something goes wrong during this phase.
In that case, you’ll have to re-enter the information. Log in as the admin of the ad account. Go to the Ads Manager, Billing section, and choose Payment settings. Users without admin access will receive the “Invalid parameter” notification.
Choose Add payment method, and select country and currency.
Facebook accepts credit and debit cards, PayPal, and, depending on the country and currency, wire transfers and local payment methods. Check out the complete list of payment methods by country.
After selecting the chosen payment method:
- Click Next.
- Check the billing information.
- Update it if necessary.
- Click Next once more.
Choose Pause ads or Keep ads running in Confirm Updates, then click Confirm. Click Done.
It’s also possible to save multiple payment methods, define a default payment method, and use different processors depending on the ad campaigns.
Add a payment method or set up an account for prepaid funds. In that case, a manual payment method will be used, varying according to the country, and PayPal won’t be available.
Make It Happen Today!
Don’t Stop There, Create a Facebook Ad
You’ve made it this far. Now it’s time to create your first Facebook ad.
You can start an Ad campaign from more than one place:
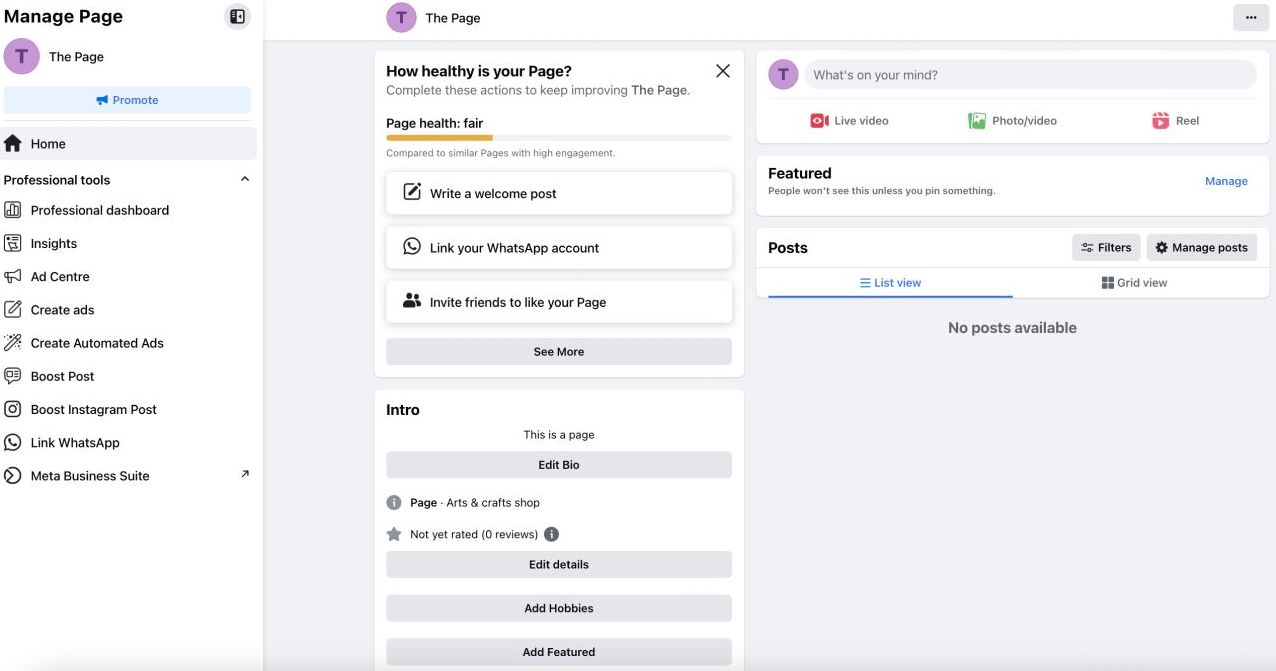
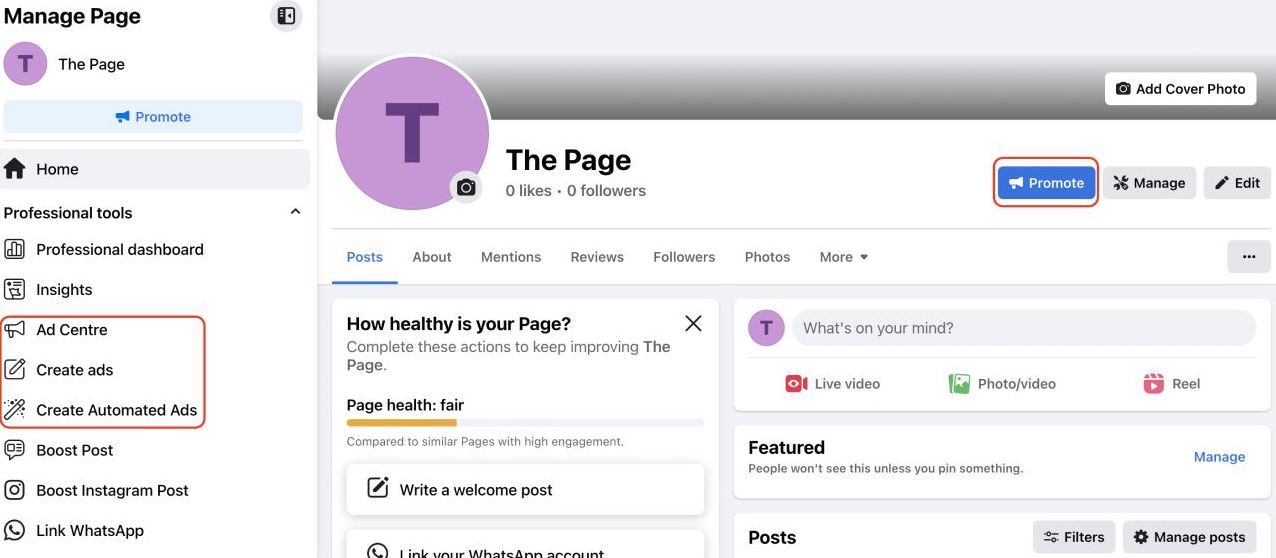
- There are several links to do it directly from the Facebook business page – use one of the options on the menu – Ad center, Create ads, or Create automated ads – or click the button Promote, located at the upper right side of the page. In any case, after that, click Create new ad or Get started with automated ads.
- Use the Ads Manager, a dedicated tool for creating, automatizing, managing, and monitoring ad campaigns. Access it from the Store page by clicking More Tools, then Ads Manager.
- Facebook often offers to transform a post into an ad, with suggestions on formatting and goals.
Expert’s Tip
“From eCommerce data we see quite often – video works better for branding, but images drive the better cost per action (CPA). If your offer is simple and straightforward – no need to overcomplicate it by creating a video when everything can be said in a few words.
Video works better for more expensive brands and products, where the customer pays for something more than the utility of the product. In these cases, it’s important to tell a story.”

The Right Ad
Facebook offers a variety of ads: Image, video, carousel, poll, collection, slideshow, augmented reality, instant experience, messenger, dynamic, lead, or stories. Detailing every single one of them is beyond the scope of this article, but you can take a deep dive into them with our ultimate guide to Facebook ads.
These are the general steps to create Facebook ads:
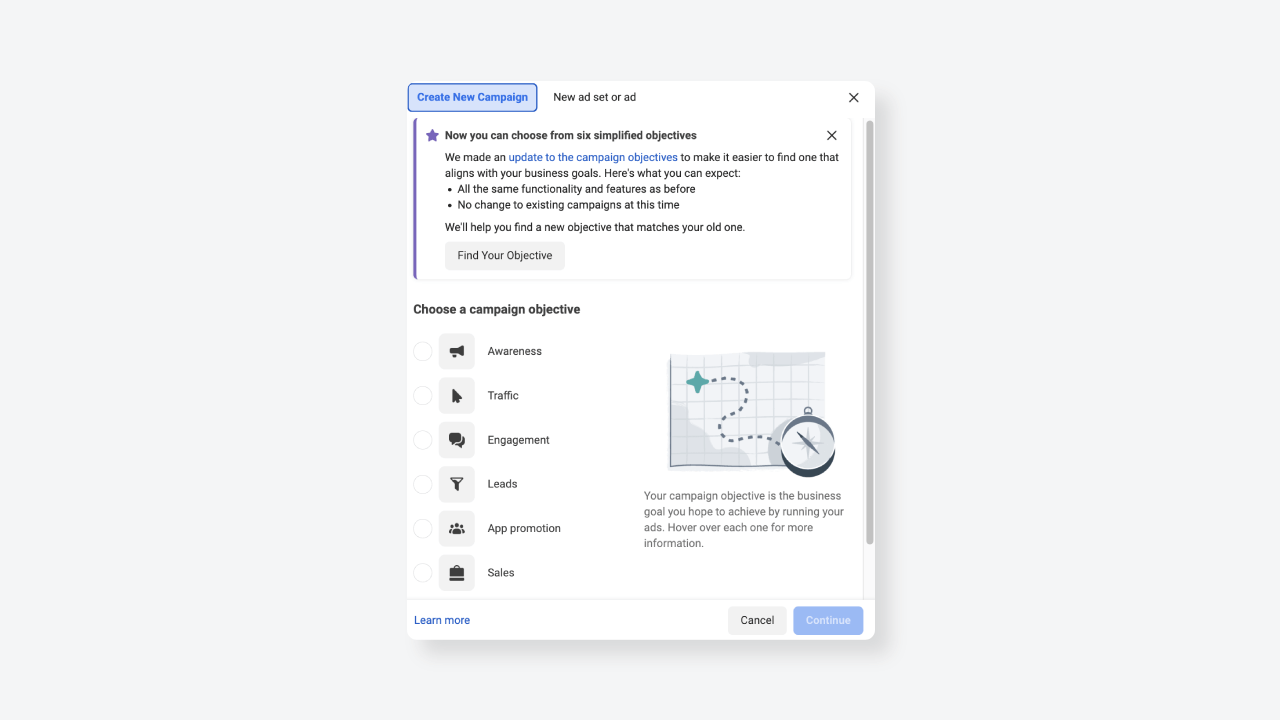
- Once you open the Ads Manager, click on the + Create button in the left corner.
- In the following screen, define the campaign objectives – to increase brand awareness, bring traffic, create engagement, collect more leads, promote an app, or get conversions and increase sales.
- Format the ads – choose a predetermined setup according to the ad’s goals or create an ad from scratch.
- Fill in the campaign’s basic information – name the ad campaign, choose a category, and fill in other details accordingly with the goals. Define a comprehensive system to name your ad campaigns, especially if you create many. Preferably, make some listing system within spreadsheets for keeping track.
At this point, it’s also possible to opt for creating an A/B test.
- Define the Ad spend & Schedule, Target audience, and Ad placement – define when the ad campaign starts and ends and the budget. Customize demographics, location, language, and interests – that include or exclude certain groups.
Finally, specify where the ads will be displayed. It’s possible to advertise within Facebook Messenger and on Facebook Searches, Feed, Stories, Reels, or Streams. It’s also possible to specify where the conversion should occur – from a website to phone calls.
- Add engaging Content, Review, and Publish – insert text and media, define macros like URLs and CTA buttons, review everything and click Publish. You may also create a template from the ad and reutilize it for similar products or services.
Facebook will review the ad and publish it, usually within 24 hours. Make sure to follow Facebook policies to avoid blocking.
- Monitor and analyze – observe the columns Performance, Breakdown, and Reports to get insights on the performance and reach of the ads. Repeat or extend what’s working, and change what needs to be improved.
Watch our video on getting started with Facebook ads for additional insights:
FAQ
How to set up a business Facebook Page?
- Create a Facebook personal account.
- Go to the Pages section on the left side.
- Fill in the business name, category, and bio/about, then click Create Page.
- Add location, contact, and work hours.
- Upload a cover and profile photo, and add an Action button.
- Invite friends to like the Facebook Page.
How to create a Facebook business account?
(To create a Facebook Business Manager account, you first need to have a personal Facebook account and a Facebook Business Page).
- Click on Meta Business Suite, then choose Create a Business Account on the left-hand side.
- Add the business account owner’s name, last name, and email address. Access the email inbox and confirm the address.
- Connect other Meta assets with the business account.
- Add and manage employees and admins.
- Click Confirm.
- Set up payment methods.
How to create a Facebook ad?
- Click on Promote or Create Ads on the Facebook Business Page, the Ads Manager, or the Ad Centre.
- Set the ad objectives – awareness, traffic, engagement, leads, app promotion, or conversion.
- Format the ad according to a template or start from scratch.
- Name the campaign.
- Set the ad spend and schedule.
- Set the target audience and ad placement.
- Insert valuable content such as text and media.
- Publish.
Check our ultimate guide on how to run Facebook ads for more details of the process.
To Summarize
You’ve been acquainted with all the necessary steps to create a Facebook business account and start advertising on the world’s largest social network.
Now, make your business account, add a visually appealing cover photo, invite friends, start an ad campaign and advertise your POD store.
Create a Print-On-Demand Store With Printify and Advertise It on Facebook!
Keep Exploring Our Blog
Written by

Andris Mucenieks
Share the article
Topics
