


OctoPi Setup: How to Install OctoPrint on Raspberry Pi
With increasingly affordable 3D printer options, getting started with 3D printing is an accessible practice. Aside from a quality 3D printer and the proper 3D printing accessories such as filament, adhesive, and wire cutters, you'll also need software. A top choice for leveling up your 3D printing game is OctoPrint. Learn all about the correct OcroPrint setup, and how to install OcroPrint on Raspberry Pi.
What is OctoPrint?
OctoPrint provides a responsive web user interface (UI) for 3D printing. With OctoPrint, you'll benefit from remote 3D printer control and monitoring of your print jobs straight from a browser. There's a robust system of plugins for increasing the capabilities of OcroPrint, and it's completely open-source.
Onboard, you'll find an embedded webcam feed so you're able to watch your printer in action from afar. The GCODE visualizer presents a render of the currently printing GCODE. Since 3D printers can get pretty toasty, OcroPrint lets you view temperatures and even manage your print bed and hotend temps. You can use OctoPrint to start, pause, and stop prints on the fly. Moreover, it's possible to move the print head, extract, and extrude. With plugins, you can configure push notifications via Pushover and Pushbullet, integrate with the likes of Slack and Telegram, plus aggregate stats for print history.
Why Should You Use OctoPrint?
Most printers feature software, and there are loads of different options to download. My Elegoo Neptune came complete with its own software on a flash drive. OctoPrint boasts a massive feature set. Notably, it's ideal for controlling and monitoring print jobs from afar, a quality the vast majority of standard 3D printing software options lack. Especially since even a moderately sized 3D print can take a few hours, it's super handy to be able to control and watch everything remotely.
OctoPrint comes with the ability to cobble together timelapse recording of prints and slice STL files straight from OctoPrint. As such, it's a comprehensive open-source 3D printing software suite.
How to Install OctoPrint on Raspberry Pi
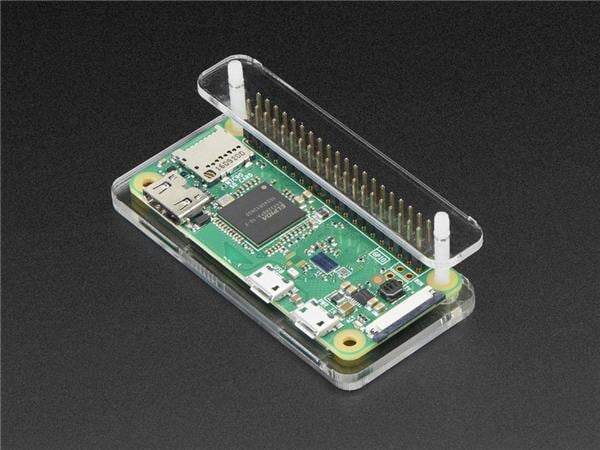
Since there's a Raspbian-based image of OctoPrint, OctoPi, installing OctoPrint on the Raspberry Pi is pretty easy. You'll need a Raspberry Pi board, a microSD card, and 2.5A micro USB power supply. Plus, you'll need the OctoPi image, a few peripherals such as a keyboard and mouse, and image mounting software like Etcher.
What you'll need for an OcroPi set up:
- Raspberry Pi board (Raspberry Pi 4 recommended)
- MicroSD card
- Power supply
- OctoPi
- Image mounting software (i.e. Etcher)
- Raspberry Pi case (optional, recommended)
- 3D printer
Total cost: $35+ USD. While the Raspberry Pi 4 clocks in around $35, you'll need a few goodies such as a power supply, microSD card, and a case. It's possible you'll have a few of these lying around, but I suggest purchasing a complete kit for about $50.
How to Install OctoPi on Raspberry Pi
First, download the latest version of OctoPi. It's a zipped image file, so unzip it and you're left with an IMG file. Using a program such as Etcher, mount the OctoPi image to your microSD card.
Once that process finishes, you're ready to use OctoPi, But if you're using Wi-Fi, you'll need to add your network details before popping your microSD card into your Raspberry Pi. For Ethernet, this isn't necessary. Navigate to the file octopi-wpa-supplicant.txt on the root of your microSD card. It's highly recommended to use a text editor such as Notepad++, VSCode, or Atom instead of TextEdit and WordPad. To set up Wi-Fi in OctoPrint open octopi-wpa-supplicant.txt with a proper text editor, and find the section labeled:
## WPA/WPA2 secured
#network={
# ssid="put SSID here"
# psk="put password here"
#}
Replace "put SSID here" with your Wi-Fi ID, and the password where it says "put password here." Then, uncomment the last four lines, so your code block looks like this:
## WPA/WPA2 secured
network={
   ssid="MoesWifi"
   psk="Password"
}
Now, save and close that file. However, if your Wi-Fi is hidden, you'll need to add an extra step. Add the line scan_ssid=1 under your password.
## WPA/WPA2 secured
network={
   ssid="MoesWifi"
   psk="Password"
   scan_ssid=1
}
Now, pop your microSD card into your Raspberry Pi and power it on. You'll need to SSH into your Raspberry Pi using a terminal, or a program such as BitVise. To locate your IP address, run ifconfig. Alternatively, hook up your Raspberry Pi to a keyboard, mouse and monitor and power up. Once booted the IP address of the Pi should be visible on the command line.
The default username is pi, and the password is raspberry. After logging in, run:
sudo raspi-config
Then, select Change User Password. Enter a new password for OctoPi. You may wish to pick a different timezone under Localization Options > Timezone. Additionally, you can select a different hostname with Network Options > Hostname. However, altering your hostname means your OctoPi build won't be available under octopi.local, and instead under [hostname].local.
Once that's finished, you can access OctoPrint via http://octopi.local or optionally via http://[Raspberry Pi IP address].
Alternate OctoPi Setup: Install OctoPi Within Linux
Alternatively, you may opt for a roll-your-own installation of OctoPrint within a Linux distribution (distro) such as Debian, Ubuntu, or Raspbian. This assumes a Raspberry Pi Linux OS installed. Open a terminal (CTRL + ALT + T) and enter:
sudo apt-get install gawk util-linux realpath qemu-user-static git p7zip-full python3

git clone https://github.com/guysoft/CustomPiOS.git
git clone https://github.com/guysoft/OctoPi.git
cd OctoPi/src/image
wget -c --trust-server-names 'https://downloads.raspberrypi.org/raspbian_lite_latest'
cd ..
../../CustomPiOS/src/update-custompios-paths
sudo modprobe loop
sudo bash -x ./build_dist
Now, OctoPrint should be loaded from inside your Linux distro. As such, you can utilize graphical user interface (GUI) applications for desktop applications, a smart home hub, or a pretty, informative dashboard.
Using OctoPrint on the Raspberry Pi for Remote Control and Monitoring of 3D Print Jobs
If you've got a 3D printer, I highly suggest using OctoPrint. Because it runs on a Raspberry Pi, you can create a tiny, headless, power-sipping, OctoPi installation. Chances are, OctoPrint boasts a bevy of features absent in your vanilla 3D printing software. I appreciate the ability to monitor printing status and temperature from afar. It's a fantastic way to use a Raspberry Pi board. Once you've spun up OctoPi, pick out a neat 3D printable project such as an automatic smart plant pot, Star Wars BB8 remote controlled Droid, or other awesome creation.
What 3D printing software are you using?

Moe Long is an editor, writer, and tech buff with a particular appreciation for Linux, Raspberry Pis, and retro gaming. Writing online since 2013, Moe has bylines at MakeUseOf, TechBeacon, DZone, SmartHomeBeginner, DEV.to, DVD Netflix, and Electropages. You can read his writings on film and pop culture at Cup of Moe, check out his tech reviews, guides, and tutorials at Tech Up Your Life, and hear his thoughts on movies on the Celluloid Fiends podcast. Aside from writing and editing, Moe has an online course, the Beginner's Guide to Affiliate Blogging From Scratch. When he's not hammering away at his keyboard, he enjoys running, reading, watching cinema, listening to vinyl, and playing with his dog Sebastian.


Leave your feedback...