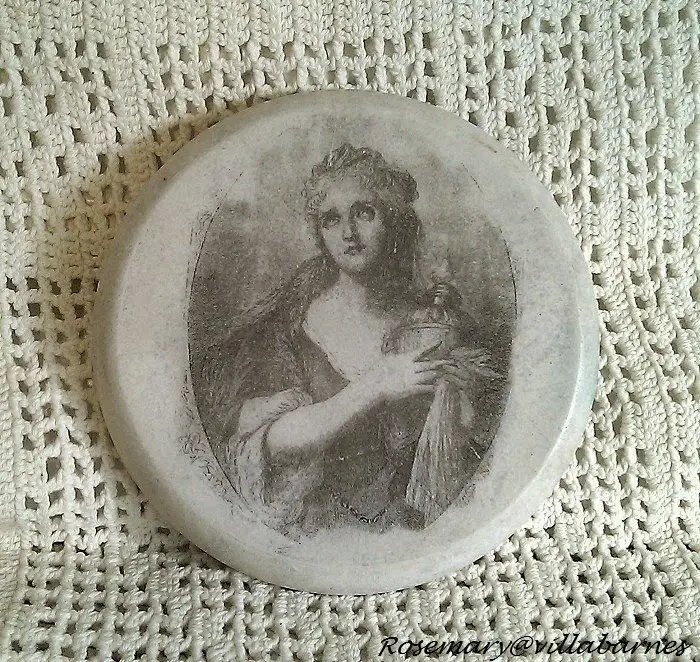
If you’re into framed prints or just want to add drama and nostalgia to your interiors, then here’s a novel way of displaying them instead of the usual framed ones – transfer an image to a rock!
Think it’s difficult to do? It would be if you did it the traditional way, but there are so many ways to transfer an image to rock and we have one that you just might want to try! We’re talking about the photo transfer technique, which means you don’t need to have the talent to draw to be able to produce an image set on a rock.
This photo transfer technique uses a blender pen instead of the more common Mod Podge, although the entire process is almost identical. Also, when printing your image, you must use a laser printer, not an inkjet. If you don’t have a laser printer, another option would be to have your image photocopied.

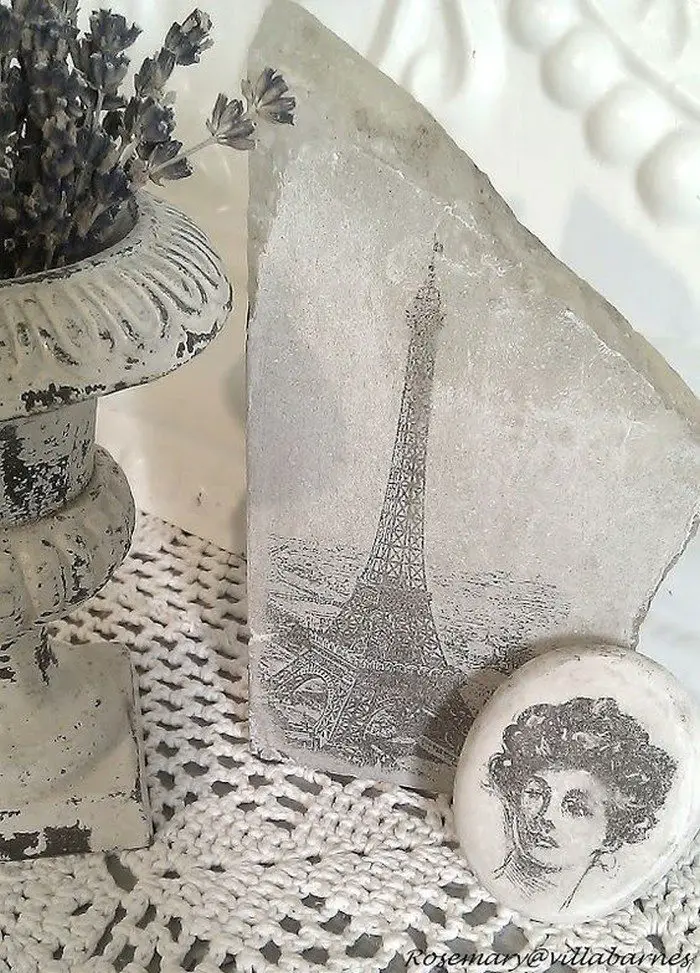
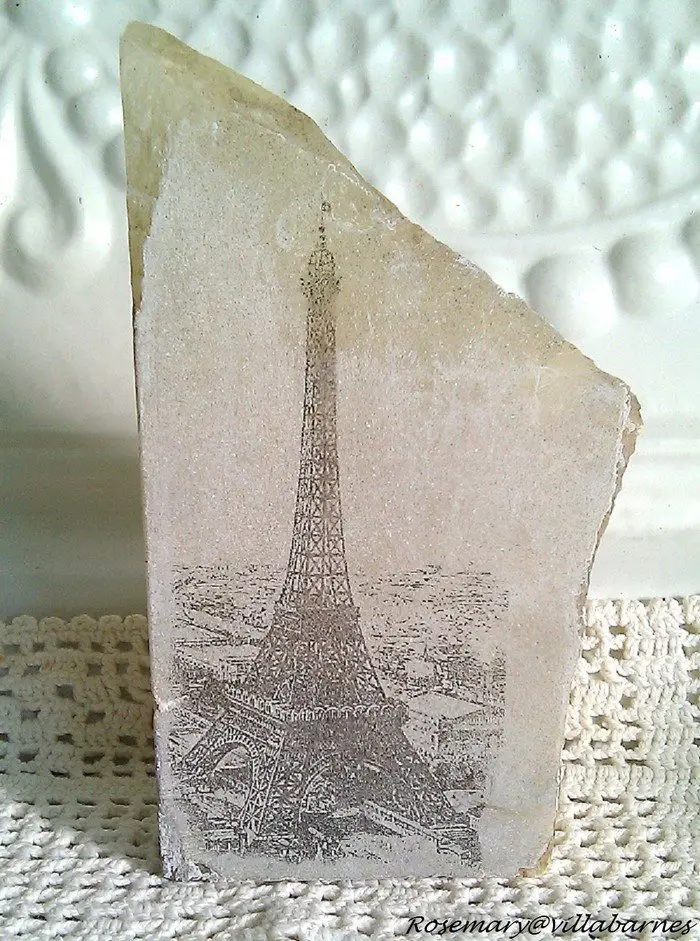
The stones used in this project came from broken pieces of marble, but you can also try other types of smooth stones or rocks that are easier for you to get.
When you have successfully transfer an image to a rock, seal and protect them with acrylic varnish! And voila, you have your favorite image looking like it’s been hand-painted or etched in stone!
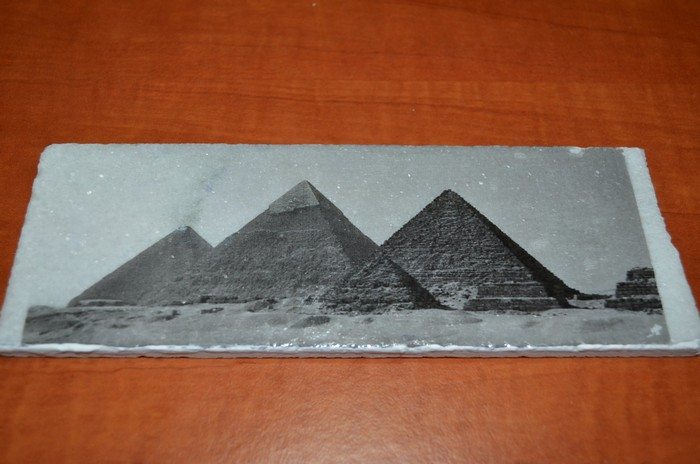
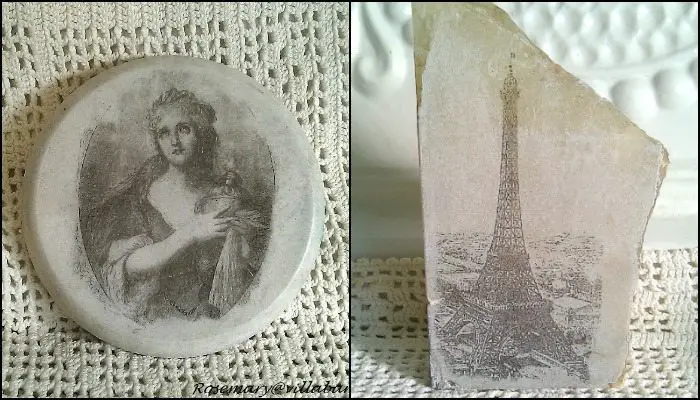
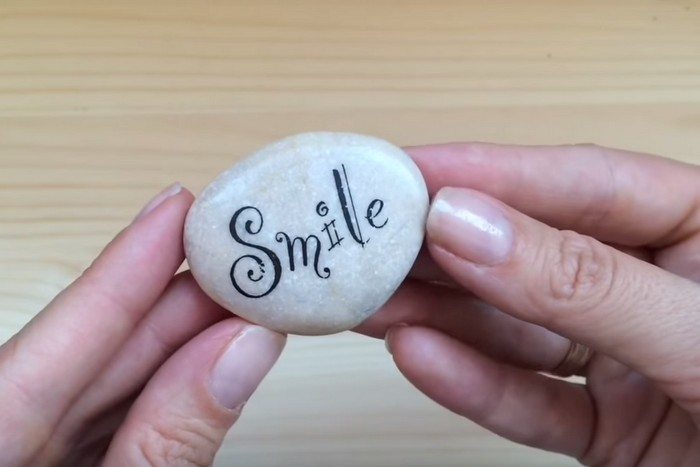
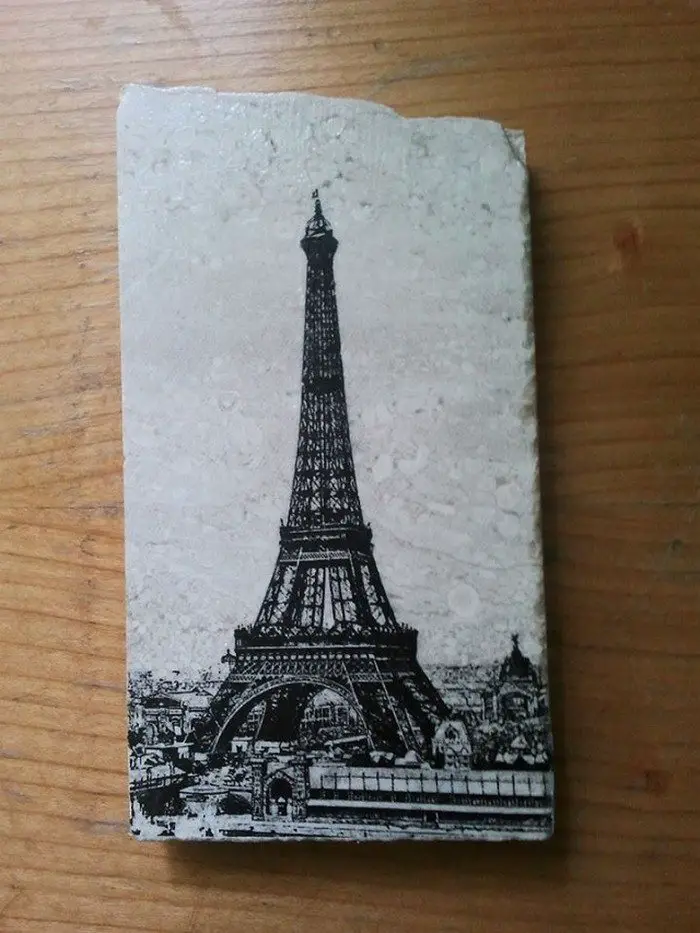
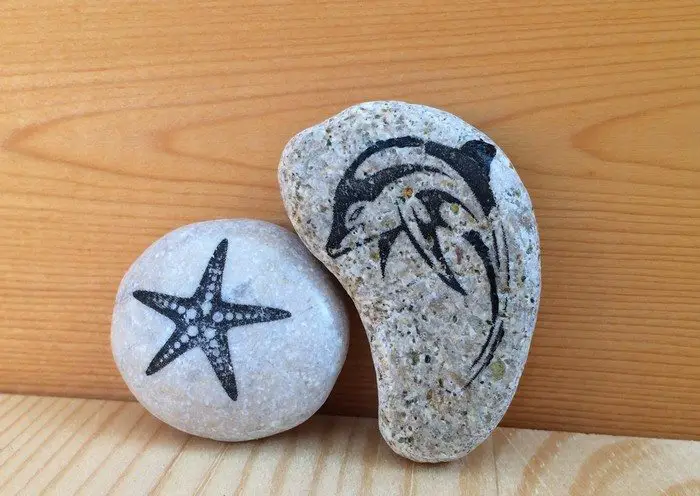
You can use iconic images around the world, family pictures, nature, or some inspirational message as your subject to be printed on a rock. It also makes a great gift. :)
Is this going to be your next craft project?
Contents
Guide to Transfer an Image to a Rock
Materials
- Smooth Rocks / Stones
- Bond Paper
Tools
- Chartpak Splendid Blender Pen
- Laser Printer
Instructions
Preparation
- Select Your Rock: Choose a smooth, flat rock or stone that best fits the size of the image you want to transfer.
- Find and Print Your Image: Select the image you wish to transfer. Using a laser printer, print the image onto bond paper. Ensure the image is mirrored if it includes text or needs to be oriented in a specific way.
Image Transfer Process
- Clean the Rock: Wash your rock with soap and water to remove any dirt or grease. Dry it thoroughly.
- Trim Your Image: Cut out your printed image, leaving a small margin around the edges.
- Position the Image: Place your image face down on the rock. Make sure it’s positioned exactly where you want the transfer.
- Secure the Image: You can use a piece of tape to hold the paper in place, ensuring it doesn’t shift during the transfer process.
- Apply the Blender Pen: Open your Chartpak Blender Pen. Begin to gently color over the back of your paper, applying an even coat of the blender solution. The chemicals in the pen will react with the toner from the laser print, transferring the ink onto the rock.
- Press and Rub: Use a spoon or your finger to rub the back of the paper firmly. This helps in transferring the toner onto the rock surface. Focus on one section at a time to ensure even transfer.
- Peel and Check: Carefully lift a corner of the paper to check if the image has transferred to your satisfaction. If it appears light, you can reapply the blender pen to the area and rub again.
- Remove the Paper: Once satisfied with the transfer, gently remove the paper from the rock.
Finishing Touches
- Dry and Set: Allow the rock to dry for at least 15 minutes. The transferred image should be crisp and clear.
- Seal the Image (Optional): For added protection and longevity, you can seal the image with a clear acrylic sealer. Spray a light coat over the rock and let it dry according to the sealer’s instructions.
Detailed Comparison of Transfer Techniques
Transferring images to rocks is a unique and creative way to decorate and personalize your space. Two popular methods for achieving this are using a Chartpak Splendid Blender Pen and Mod Podge. Each technique offers distinct advantages and considerations, affecting the outcome and durability of your transferred image.
Lets look at the two methods to transfer an image to a rock below.
Blender Pen Method
The blender pen method uses a solvent-based marker to transfer an image to a rock. This technique is appreciated for its precision and clarity in transferring detailed images.
Pros:
Precision in Detail: The Chartpak Splendid Blender Pen is excellent for transferring intricate designs, resulting in a sharp and clear image on the rock.
Quick Drying Time: Unlike Mod Podge, the solvent dries quickly, allowing for a faster overall process.
Ease of Use: The process is straightforward—apply the pen over the back of the printed image pressed against the rock.
Cons:
Requires Laser-Printed Images: This method only works with laser-printed images, which might not be accessible to everyone.
Ventilation Needed: The solvent in the blender pen emits strong fumes, requiring good ventilation.
Durability: The transferred image may not be as durable as the Mod Podge method and might require a sealant to protect it over time.
Mod Podge Method
Mod Podge is a decoupage method involving water-based sealer, glue, and finish used in crafts. To transfer an image to a rock, an image is coated with Mod Podge and then pressed onto the rock, allowing it to dry before removing the paper.
Pros:
Versatility: Mod Podge can be used with both inkjet and laser prints when you want to transfer an image to a rock, making it a more versatile option.
Durability: Once sealed, the Mod Podge layer protects the image from wear and tear, making it more durable than the blender pen method.
No Fumes: Mod Podge is water-based and does not emit harmful fumes, making it safer to use indoors without strong ventilation.
Cons:
Longer Drying Time: The drying process can take several hours or overnight, significantly longer than the blender pen method when you transfer an image to a rock.
Potential for Smearing: Care must be taken to apply Mod Podge evenly to avoid smearing the image.
Technique Sensitivity: The success of the transfer can depend on the technique, such as the thickness of the Mod Podge layer and the pressure applied during the transfer.
When deciding to transfer an image to a rock, the choice between using a Chartpak Splendid Blender Pen and Mod Podge depends on the specific needs and preferences of the project. The blender pen method is ideal for those seeking quick, detailed transfers and have access to laser-printed images.
On the other hand, the Mod Podge method offers versatility and durability, suitable for a wide range of images and long-lasting results. Each technique has unique benefits, allowing crafters to choose the best project method.
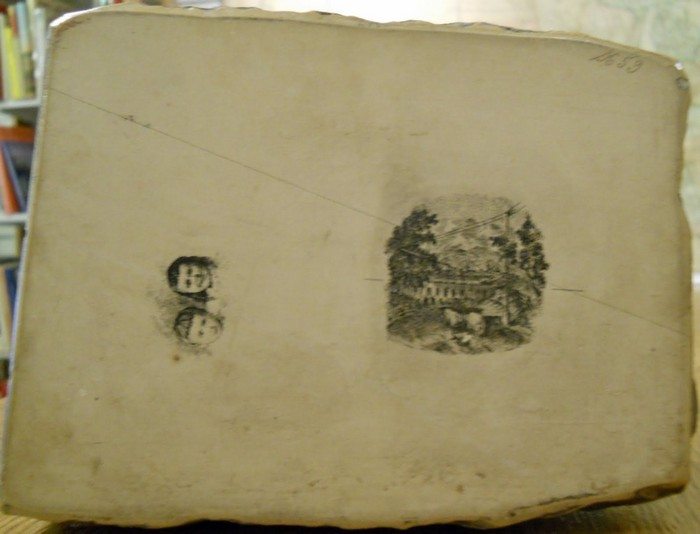
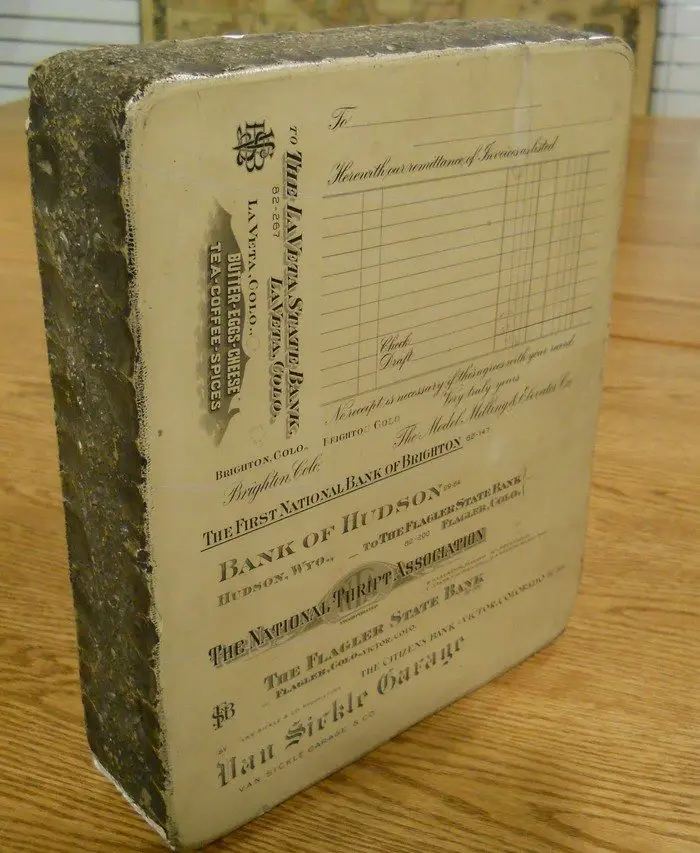
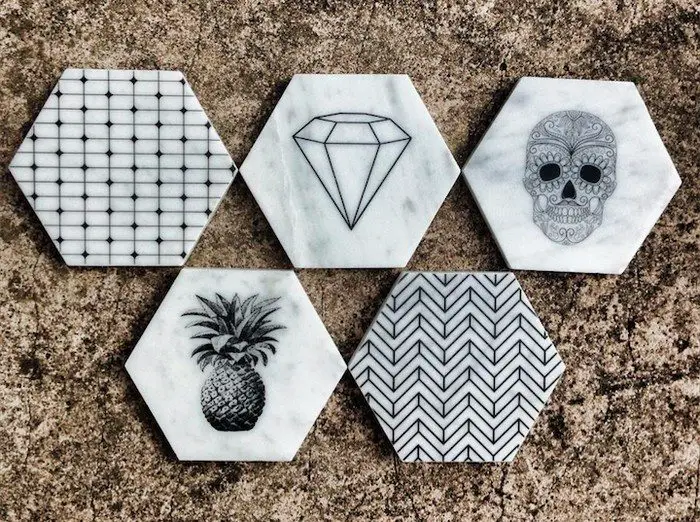
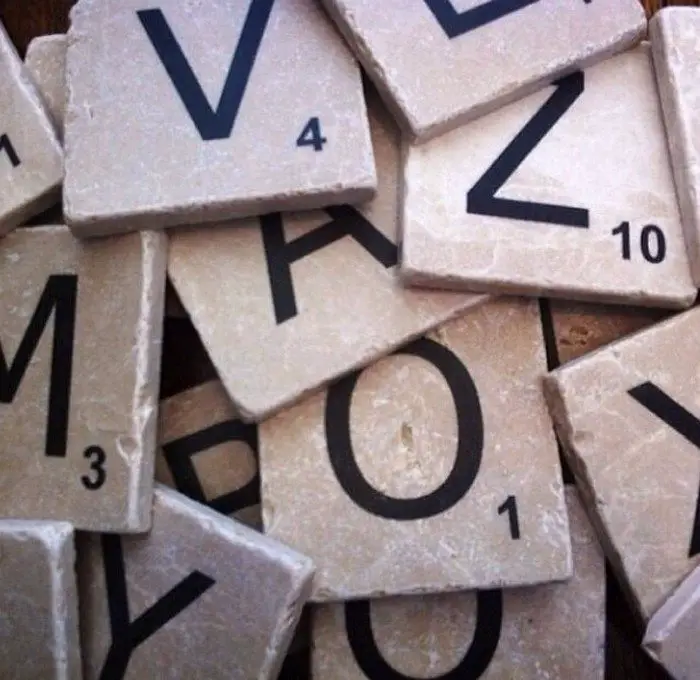
Gallery of Projects That Transfer An Image to a Rock
Click on any image to start the lightbox display. Use your Esc key to close the lightbox.![]()

Troubleshooting Common Problems
Transferring an image to a rock is a unique and creative way to personalize and decorate stones for various uses, from home decor to thoughtful gifts. However, as with any craft, you might encounter some challenges. Understanding how to troubleshoot common problems can ensure your project turns out perfectly.
Here, we address some frequent issues faced as you transfer an image to a rock, providing solutions to help you achieve the best results.
Image Not Transferring Completely
One common problem is finding that parts of the image did not transfer to the rock as expected. This can result from uneven pressure as you transfer an image to a rock.
Solution
Before you transfer an image to a rock, ensure the surface is as smooth and flat as possible. When applying pressure with the Chartpak Splendid Blender Pen, do so evenly across the entire image. Consider using a spoon or a similar object to rub over the paper, ensuring all parts of the image are equally pressed onto the rock’s surface.
Image Smearing
Image smearing can occur if the rock moves during the transfer process or the blender pen is overused in one area, causing the ink to bleed.
Solution
To prevent smearing when you transfer an image to a rock, secure the rock using a non-slip surface or hold it firmly with one hand while applying the blender pen with the other. Apply the blender pen in even strokes and avoid going over the same area multiple times unnecessarily.
Ink Not Drying Properly
Sometimes, the ink might not dry properly after you transfer an image to a rock. The ink can remain tacky or smudging when touched.
Solution:
To ensure success, the rock and the image you’ve transferred onto it must be totally dry before you handle them. Sometimes, this drying phase might stretch out a bit longer than you’d anticipate when you transfer an image to a rock. This delay can be due to the kind of ink your laser printer uses and the humidity and temperature in your workspace.
If you’re looking to hasten the drying, consider moving the rock to a spot with plenty of air moving around. Alternatively, a hair dryer could do the trick—just keep it on a gentle heat setting and hold it a good distance away from the rock. You want to avoid blasting it with too much heat, which could harm the image you’ve worked hard to transfer.
Image Appears Faded
If the transferred image looks faded, it might be due to the quality of the original print or the type of rock used.
Solution
Always use a high-quality, high-contrast image from a laser printer to transfer an image to a rock. If the image still appears faded, you can enhance its appearance by going over the transfer with a fine-tip permanent marker or thin paintbrush and acrylic paint, carefully tracing the lines and details to bring them back to life.
Varnish Reacting with the Image
Applying a sealant or varnish is essential when you transfer an image to a rock. However, some varnishes may react with the ink, causing it to smear or discolor.
Solution
Test the varnish on a small, inconspicuous area of the rock or on a separate sample rock where you’ve transferred a similar image. Allow it to dry completely before assessing the result. If the varnish reacts poorly with the ink, try a different brand or type of sealant compatible with inkjet inks, such as a spray varnish designed for acrylic paintings.
Uneven Ink Application
If you notice that some parts of the image appear darker than others, it might be due to uneven application of the blender pen. This is a common issue among beginners when they transfer an image to a rock.
Solution
Work in small sections and maintain consistent pressure with the blender pen to ensure uniform ink application when transferring an image to a rock. It helps to start from one corner and gradually move to the other side, ensuring you cover every part evenly.
Paper Sticking to the Rock
After transferring the image, you might find that the paper sticks to the rock, making it difficult to remove without damaging the image.
Solution
To prevent the paper from sticking, allow the ink to dry slightly before attempting to remove the paper. If the paper does stick when you transfer an image to a rock, dampen it slightly with water using a spray bottle or a damp cloth. Wait a few seconds, then gently rub the paper off with your fingers. Be careful not to soak the paper or the rock, as this could cause the transferred image to blur or wash away.
Blurry Images
A blurred image can occur when you transfer an image to a rock and have moved the paper while applying pressure or if the surface was not properly prepared.
Solution
To avoid blurry images when transferring an image to a rock, ensure the rock is completely dry and smooth before starting. Place the paper down carefully and avoid shifting it once you begin applying the blender pen. Use tape to secure the paper edges to the rock if necessary, providing extra stability during the transfer process.
Color Distortion
Sometimes, the colors of the transferred image may not look as vibrant as the original, or they may appear distorted.
Solution
Adjust the image before printing to enhance color accuracy and vibrancy. Increase the contrast and saturation slightly to compensate for any loss of vibrancy during the transfer process. Additionally, experimenting with different types of laser printers may yield better results, as some printers produce richer colors than others.
Rock Absorbs Too Much Ink
In some cases, especially with porous rocks, the ink may bleed into the rock, spreading beyond the intended image boundaries.
Solution
To mitigate ink absorption when you transfer an image to a rock, apply a thin layer of clear acrylic sealer on the rock before transferring the image. This barrier can help control ink absorption and spread. Allow the sealer to dry completely before proceeding with the image transfer.
By anticipating and knowing how to solve these common problems, you can enhance your success rate and enjoyment when transferring images to rocks. Each rock you complete will refine your technique, add a unique, personal touch to your space, or serve as a heartfelt gift.
Conclusion
The project where you transfer an image to a rock is a creative and personalized way to bring a piece of art into the natural beauty of the stone. With the right technique and materials, anyone can immortalize their favorite images on a durable, unique canvas. This method adds a touch of personal flair to any space and offers a meaningful way to preserve memories and moments in an extraordinarily lasting form.


