People remember 80% of what they see and 20% of what they read. Images make a huge impact your store’s traction, and making the most of that impact is vital.
You can get great images even with modest equipment by following a few golden rules. Let’s take a look at what good photos bring to the table and how to produce them.
Why Product Photography is Important
First Impressions Matter
When someone visits your website, their attention gravitates to your images first. Buyers want to grasp information quickly, using visuals to decide if they’re going to stick around. So the quality of your photos determines if your customers stay on your site and eventually make a purchase.
In fact, 37% of marketers say that visual marketing is their most important form of content. Eye-tracking studies show that visitors play closer attention to information with images “that show content that’s relevant to the task at hand”.
They Represent the Quality of Your Brand
The quality of your photos is also linked to the perceived value of your product and your brand’s image. Good photos boost your image and promote trust, which increases conversion and retention rates. So by making your customers remember you with a good picture, you set your store up for steady growth.
Quality photos, especially when your product is in context, can create an emotional connection. Images of your product being used tell a story are memorable and boost trust. With quality context images, you are also selling an experience and crafting lasting relationships with your buyers.
Let’s take a look at a few simple tools and rules to follow to get great product images even with a limited budget.
What Basics Will Make Your Photos Look Professional
Product photography can be challenging, but if you follow these simple guidelines you can make it work in-house and not overspend your budget. Here are the basics:
Pick Your Camera
Your camera doesn’t have to be fancy or boast expensive lenses to get good results. If you get your background, lights, stabilization, and post-processing right, almost any camera will work.
If it is your first round of product photos, use the camera you have. Even an iPhone (any model above 5) can do a decent job. Once you get the process down and your store gains some momentum, get a better camera if it makes sense for your operation. When you’re ready to shop, check out our all-you-need-to-know post on buying cameras for product photography.
The quality of your images rests on how well you use your camera and a few key decision points, not necessarily on what camera you have.

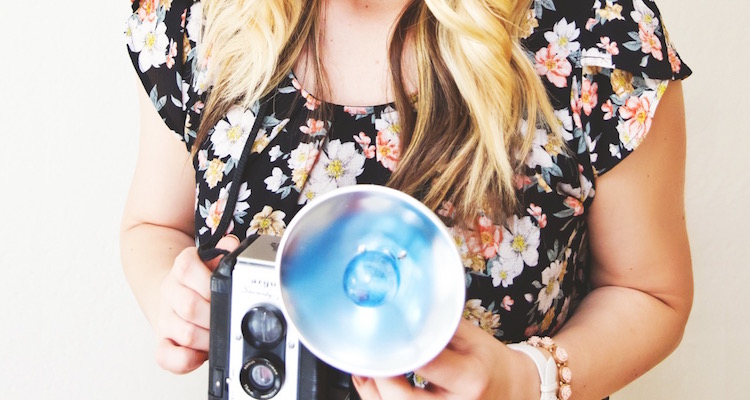
Source: Callie Morgan on Unsplash
Keep a Neutral Background
A consistent background helps greatly in post-processing if you want to clean up your images. You can buy a white, off-white or a gray sweep, or you can improvise and get some craft paper and tape it to the wall over a table, or even get a poster board. A homogeneous light-color background is the first step to good images not just for editing; it also provides clear uniformity, which is pleasing to the viewer’s eye.
Mind the Lighting
Lighting can be the trickiest bit and will take a basic understanding of physics – mostly reflection and shadows – to master. If you can use natural lighting, that is nearly always best. A good setup is placing a table against the wall close to a large window. This gives you a good amount of soft light with a soft shadow. If the shadow is too sharp, you can place a whiteboard or a screen on the inside to soften it.
Keep in mind that direct sunlight is usually too harsh, and a sharp backlight can cast too dark a shadow. If you are using artificial lights, two identical softbox setups for under $50 can do the trick. Luckily, there are also ways you can improvise and build these handy tools – here is a great post on DIY lights.
Use Tripods to Master Focus, and Consistency
First, if your camera allows you, set it to a small aperture for wide depth of field that brings your entire product into focus and makes it look sharp. A small aperture calls for high f/stop and the slowest shutter speed to balance the exposure.
That is where your tripod comes in. While taking longer exposures at slow shutter speed, if your camera is not fixed you will easily get blurry images. The tripod also helps you duplicate the shot and keep the angle consistent if you are shooting multiple products.
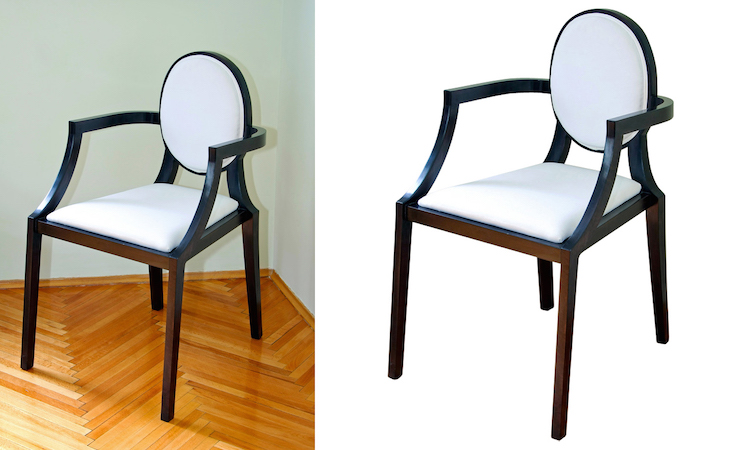
Remove the Background
Post-processing is vital to getting well-polished, final images that give your store a professional look. Sometimes the background has imperfections or the lighting is too poor to post a photo as-is on your site.
Removing the background, or even adding shadows for more realistic look, can be a good idea. For a one-stop-shop solution to your background removal and retouching needs, check out Pixc – you can submit your photos and get them back within 24 hours. You can test drive it with a free trial.
How to Photograph Any Product Well
There are a few key decision points in product photography, and once you master them, taking photos gets a lot easier. It comes down to choosing your background, picking good lighting, keeping a steady hand, and using just the right amount of editing.
Commit to Your Method
If you are outsourcing, it is vital to hire the right photographer who understands the needs of eCommerce.
If you take the DIY route, be diligent at every step until you learn the ins and outs of taking good photos. Do not underestimate the amount of time it takes to achieve quality retouching and background removal. They can make the difference between a sloppy and professional look.
Learn the Tricks for Photographing Your Specific Product
When you’re ready to go deeper, learn the tricks to photographing specific product categories like shoes or activewear.
Include In-Context Photos
To further boost your store’s appeal, consider taking some in-context photos of your products, so they can better resonate with customers. Go guerilla style and then polish them up in post-processing. You can also use user-generated photos, retouch them and add testimonials. These are great for social media and engaging content.

Source: Patrick Hendry on Unsplash
Edit and Optimize Consistently
Editing is vital for consistency and adding that extra shine that makes you look like pro. Keep your platform guidelines in mind and create an editing theme or template (also called a “style guide”) so you have a uniform look across your product line.
Editing can mean just removing the background, cropping, or adding text. But more serious post-processing can include adding a shadow, color correction, color variations, and removing a mannequin. Whatever your editing might entail, it is always worth the time and effort to stand out from the competition.
But you don’t have to go at it alone. There is a world of photo editing of apps out there that can help you achieve good results.

Streamline Your Photo Shoots
Once you have the process down to a science, put it on paper so you can delegate the task as you grow your store. Even if you already have basic DIY equipment, having a streamlined process will save you and your team a lot of time and hassle.
Teach your team basic camera and lighting skills, the importance of a tripod, and how to create a good backdrop. Share editing tips and online tools to remove backgrounds or bulk-resize your photos.
Record your process, including exact distances and angles, and post it on the wall. This will help you automate your photo shoot and editing and get good images in no time.
Conclusion
Your photos dictate your product’s perceived value and drive brand loyalty and trust. Your customers judge your product and brand based on those images so you should put every effort to make them look good.
Product photography comes down to a few basic principles and if you put the legwork you can get good results, even with a limited budget.
Would you like Pixc to take a look at your photos?
Try us out for free.
Share on social: