This article is part of our Academy Course titled VirtualBox Tutorial: Virtualization Essentials.
In this course, we provide a compilation of VirtualBox tutorials that will help you get started with this virtualization platform. We cover a wide range of topics, from installing the software and performing a basic configuration, to cloning, exporting, importing, and removing virtual machines. With our straightforward tutorials, you will be able to get your own Virtual Machines up and running in minimum time. Check it out here!
In the first part of this series, you learned how to create and start a virtual machine after installing VirtualBox on your system.
As you will recall from that article, starting and stopping a virtual machine is analogous to pressing the Power button in a computer and shutting it down using the corresponding operating system menu, respectively.

VirtualBox, as a virtualization manager interface, allows us to perform other operations as well: cloning, exporting, importing, and removing virtual machines, as shown in Fig. 1.
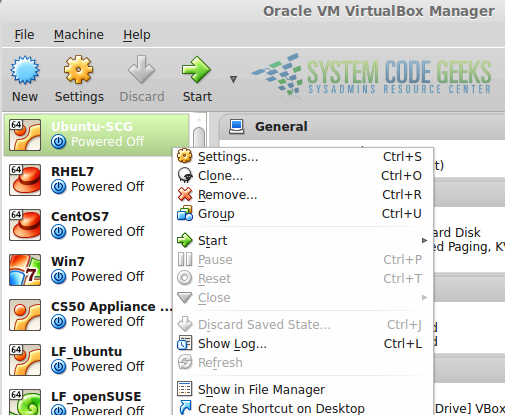
In addition, we can also create shortcuts to virtual machines on our desktop for our convenience (click on Create Shortcut on Desktop). Let us explore each of these operations in the following sections.
Cloning virtual machines
Having been introduced in VirtualBox 4.1, the process of cloning a virtual machine, as its name suggests, will result in an exact copy of such virtual machine. This feature is highly useful when you need to setup / configure a system and install further programs in it and then make exact copies that should work just like the original (for example, while installing nodes for a cluster setup). Cloning a virtual machine saves the time that would otherwise be spent in doing all of this from scratch.
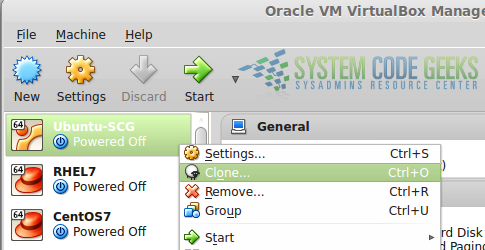
To clone a virtual machine, right click on it and choose Clone (see Fig. 2):
You will then be prompted to choose a name for the clone and asked whether you want to reinitialize the MAC of the network card(s) included with the machine. If the clone will be part of the same network as the original virtual machine, make sure the checkbox next to Reinitialize MAC address of all network cards is checked, as seen in Fig. 3:
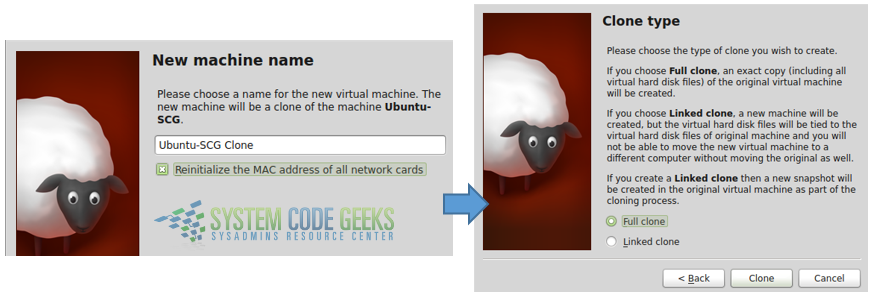
You can choose either a full clone or a linked one. As indicated in Fig. 3, a full clone guarantees that each virtual will have its own disk(s) and will make moving resources around much easier. When the process completes, the clone will show up as a separate virtual machine on the list.
Exporting virtual machines
If you are backing up your virtual machines or want to pack up one for distribution (provided that you have the appropriate license to do so), you can export it to a single, bundled .ova file that can be imported into a separate VirtualBox installation.
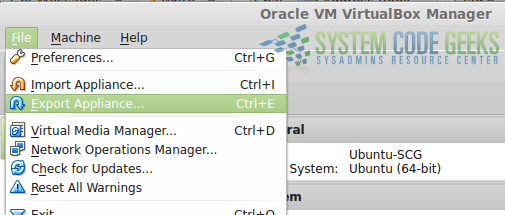
To export a virtual machine, click on the File menu and go to Export Appliance (by the way, you can use the words appliance and virtual machine interchangeably in this context) as shown in Fig. 4:
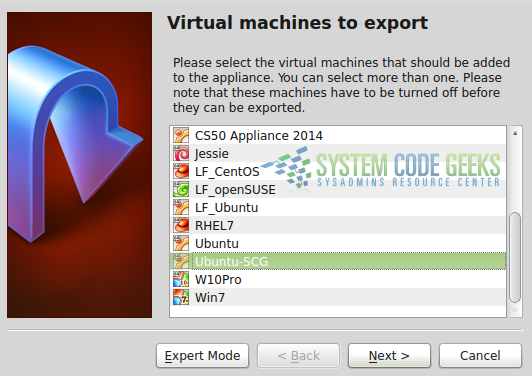
Next, you will be presented with the list of virtual machines where you will be able to select one (or more, by pressing Ctrl + click), as shown in Fig. 5.
When you press Next in the above screen, you can skip over the appliance and storage settings, and the export process will begin (refer to Fig. 6).
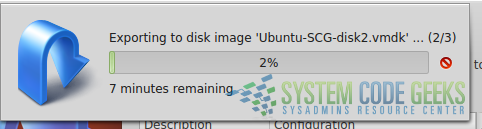
The export process should not take more than a few minutes to complete. Once done, you can find the associated .ova file in your Documents folder. This is the file that you want to back up or use for distribution.
Importing virtual machines
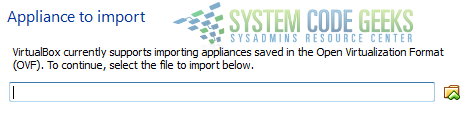
In the previous section you learned how to export a virtual machine. That process bundled all of the virtual machine resources into a single .ova file. To import the virtual machine, go to File and choose Import Appliance. You will then be prompted to browse your system to look for the .ova file, as shown in Fig. 7:
Once you selected the .ova file, follow the indications provided by the Next and Import buttons. As in the export process, importing a virtual machine may take a few minutes to complete, and will result in a separate virtual machine with the same name as the original one, plus a numbered suffix that identifies this as a different appliance.
We will now discuss how to remove virtual machines once they have served their purpose.
Removing virtual machines
If you set up one or more virtual machines just for testing, or for another temporary purpose, you may want to remove it once you are done. To do this, right click on the virtual machine in the list and choose Remove, as shown in Fig. 8. You will asked if you want to remove all the virtual storage files (which were created along with the appliance in the previous tutorial) associated with the virtual machine or just delete it from the list. For most cases, deleting all files is the way to go (unless a virtual disk is part of a RAID array or a logical volume that you want to keep for future use).
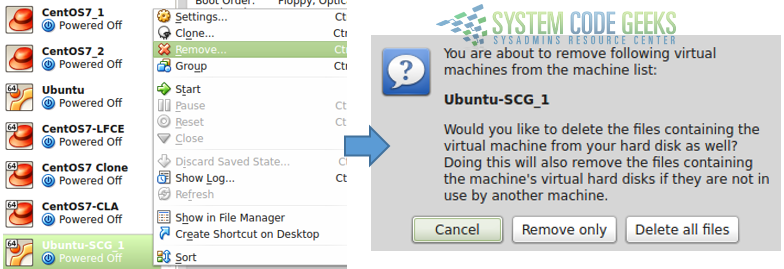
Please note that the Remove button remains disabled while a virtual machine is running, so you will need to shut it down before being able to delete it.
Inspecting logs
When you right click on a virtual machine, there are other options you may want to look at in the menu that pops up. For example, Show Log will open a separate VirtualBox window where you will be able to inspect the log of that machine. This will serve as a debugging tool should something go wrong while starting up or operating the appliance.
For example, the following lines describe a Windows 7 virtual machine running on a host which only has 939 MB of RAM available (output has been truncated for the sake of brevity):
VirtualBox VM 5.0.14 r105127 win.x86 (Jan 19 2016 17:01:13) release log
00:00:01.593500 Log opened 2016-04-11T17:59:13.526233700Z
00:00:01.593501 Build Type: release
00:00:01.593504 OS Product: Windows 7
00:00:01.593506 OS Release: 6.1.7601
00:00:01.593507 OS Service Pack: 1
00:00:01.701203 DMI Product Name: HP ProBook 6450b
00:00:01.706539 DMI Product Version:
00:00:01.706563 Host RAM: 2991MB total, 939MB available
00:00:01.706566 Executable: C:\Program Files\Oracle\VirtualBox\VirtualBox.exe
...
That amount of available RAM is not enough to launch a virtual machine that has been configured with 1 GB of memory. This leads to “HostMemoryLow” error preventing it boot, also present in the log:
00:00:19.696789 VM: Raising runtime error 'HostMemoryLow' (fFlags=0x2)
00:00:19.758101 Changing the VM state from 'RUNNING' to 'SUSPENDING'
Make inspecting the logs a habit. That will help you ensure that your virtual machines operate without issues.
Summary
In this article we have explained how to clone, export, import, and remove virtual machines in VirtualBox. In addition, we have shown how the operation of a virtual machine is kept in logs from the time it boots until the time it is shutdown. The logs will be a great troubleshooting resource when you experience issues.
