

We have code now it's time to wire it into Visual Studio Team Services for builds and releases and even our tests and show how easy it is. We'll pull our code from Github, work with different triggers and get under the hood of Visual Studio Team Services
Visual Studio Team Services
Visual Studio Team Services is the next version of Team foundation but don't let that put you off. It is so much more under the hood. Microsoft have built a powerful solution with Team services that allow us to store our code, pull code from other places and build anything check out this from Donovan Brown - From 0 to DevOps
Wire up some code
While Visual Studio Team Services offers code repository it also allows you to pull code from a Github project.
It's also Free there are limits of course but it's free to get started so go sign up and come back here Visual Studio Team services
So lets get started in Visual Studio Team Services create a new team project.
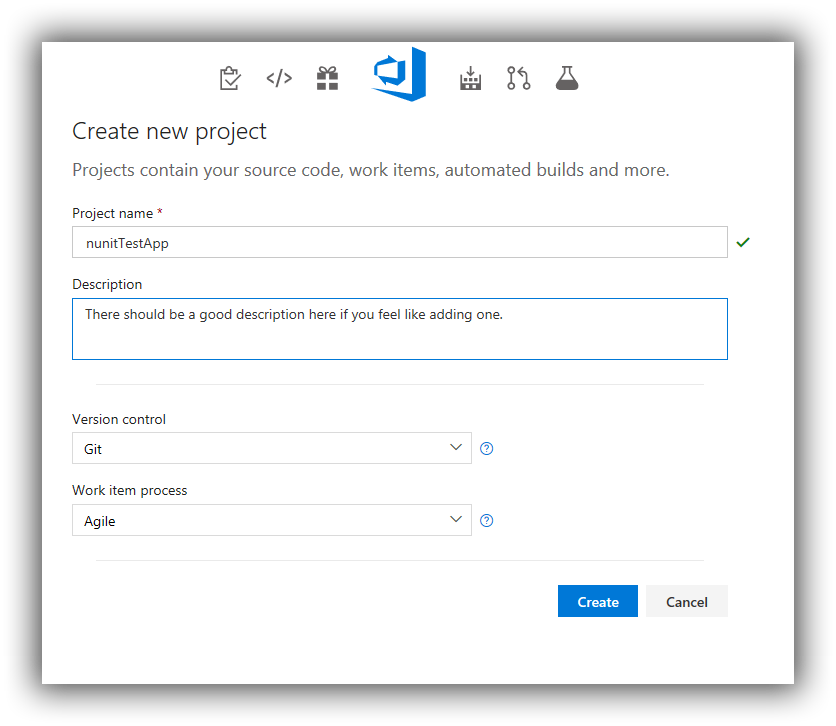
It takes a minute or so to get everything in place once you create your new project.
Once your project is created you will see a landing page with all the information for submitting code. But since we are here for a build lets go make our first build definition. See build and release on the menu bar at the top. (I added the red box to highlight it you won't see that on the site.. I hope)
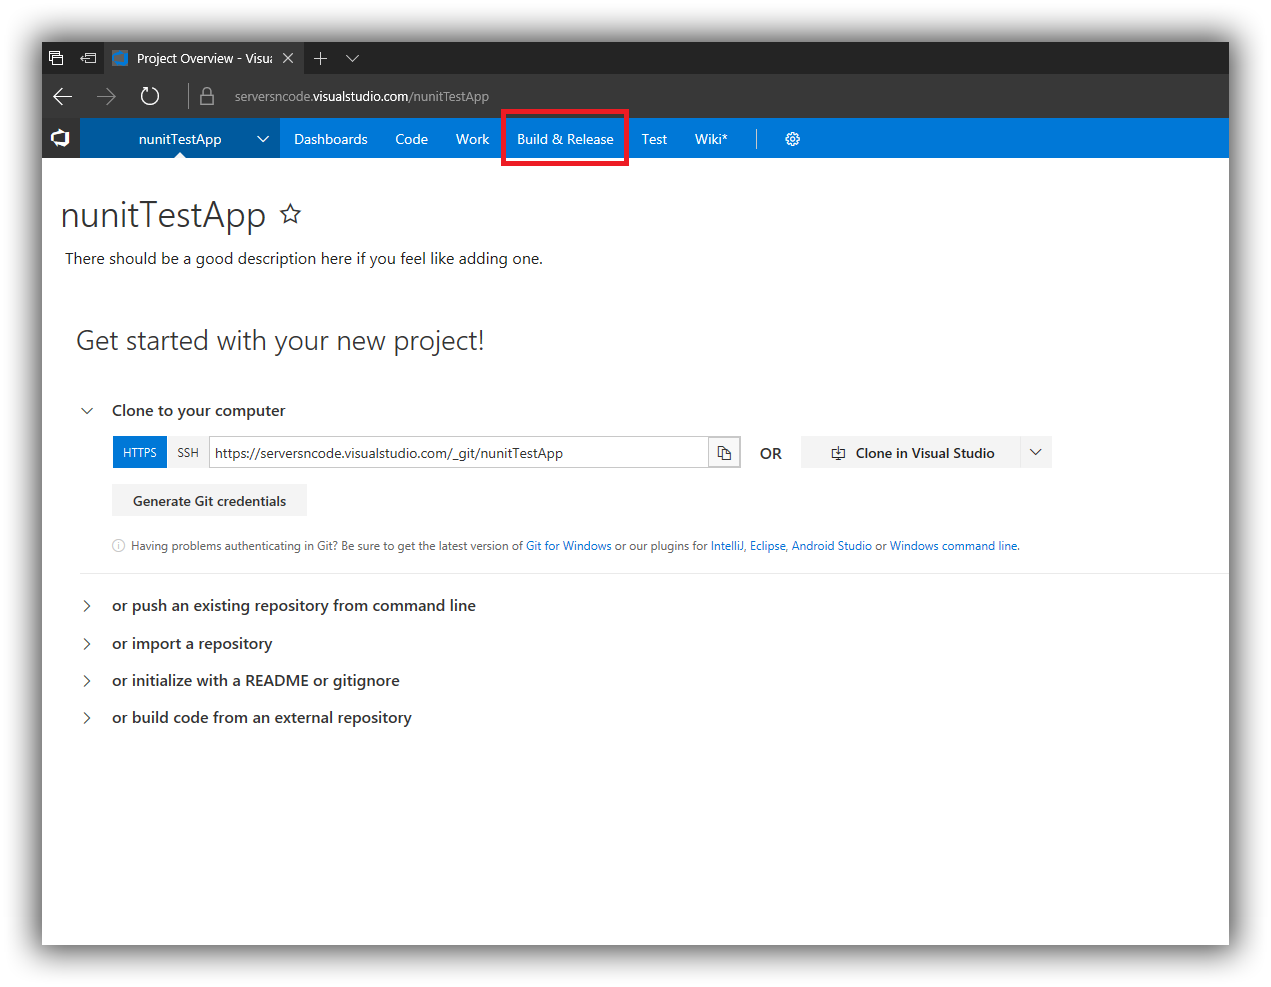
When you open the Build and releases option you will see the "New Definition" button. This is the Build Definition where we will get our code from Github and set our triggers and the process of building our project.
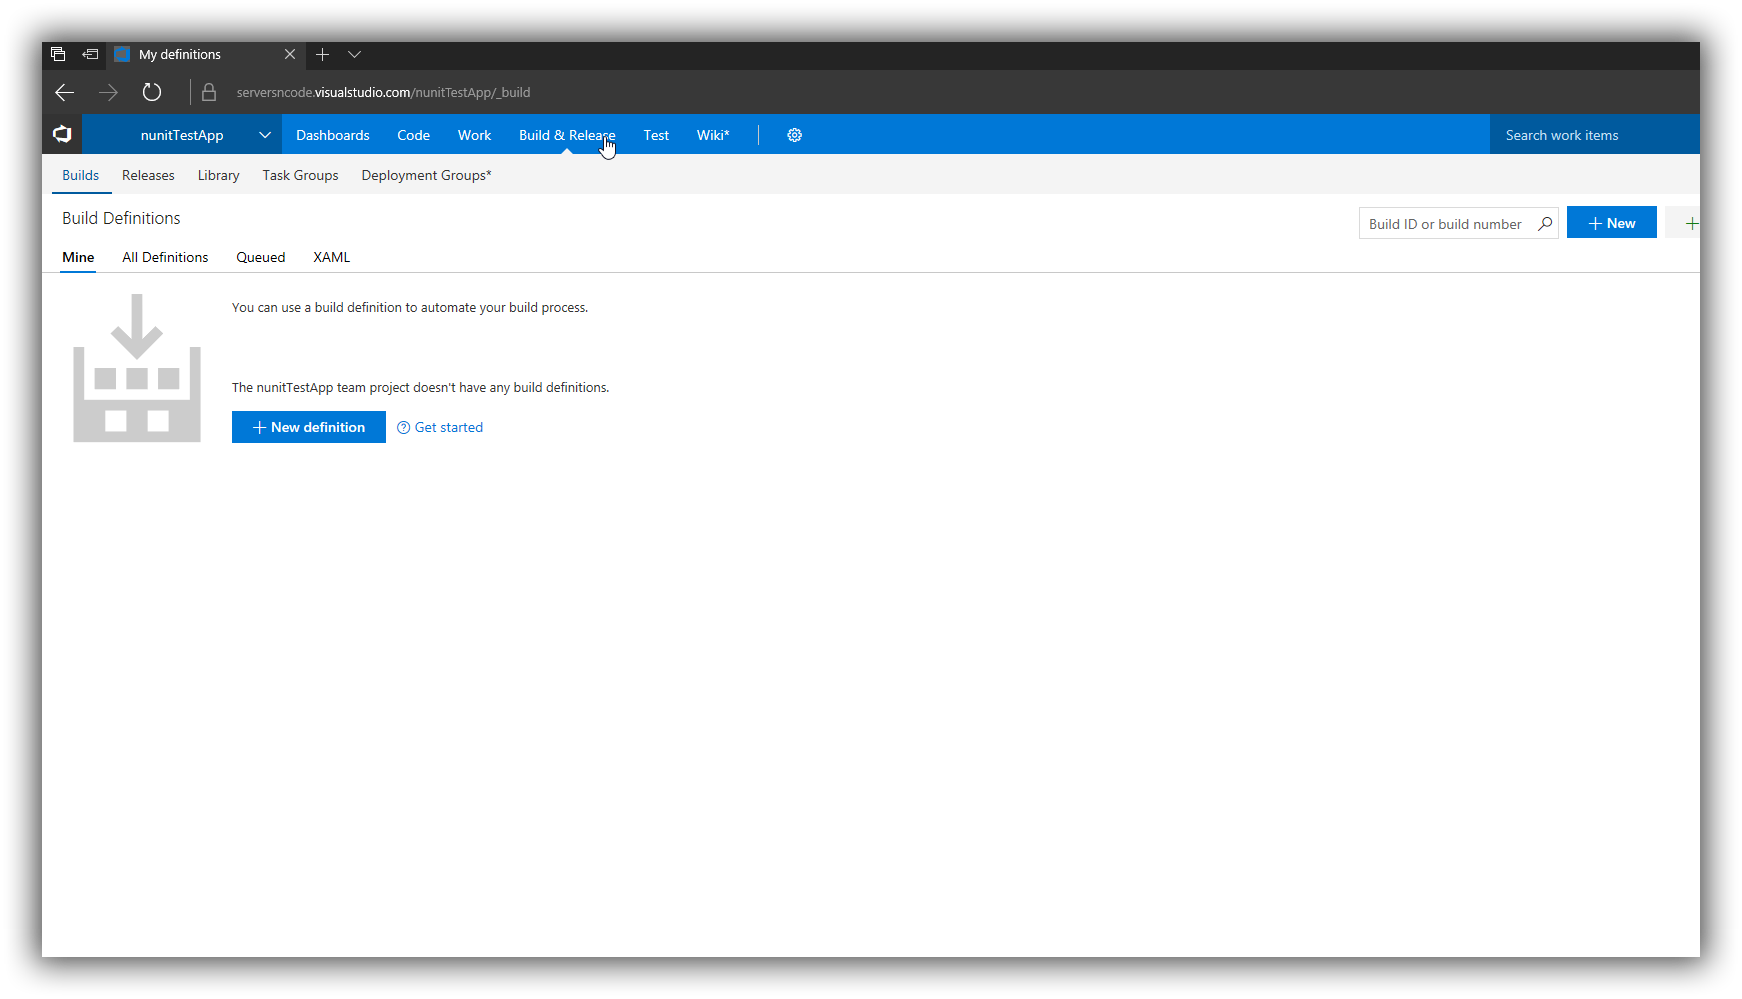
Go on hit the new definition button
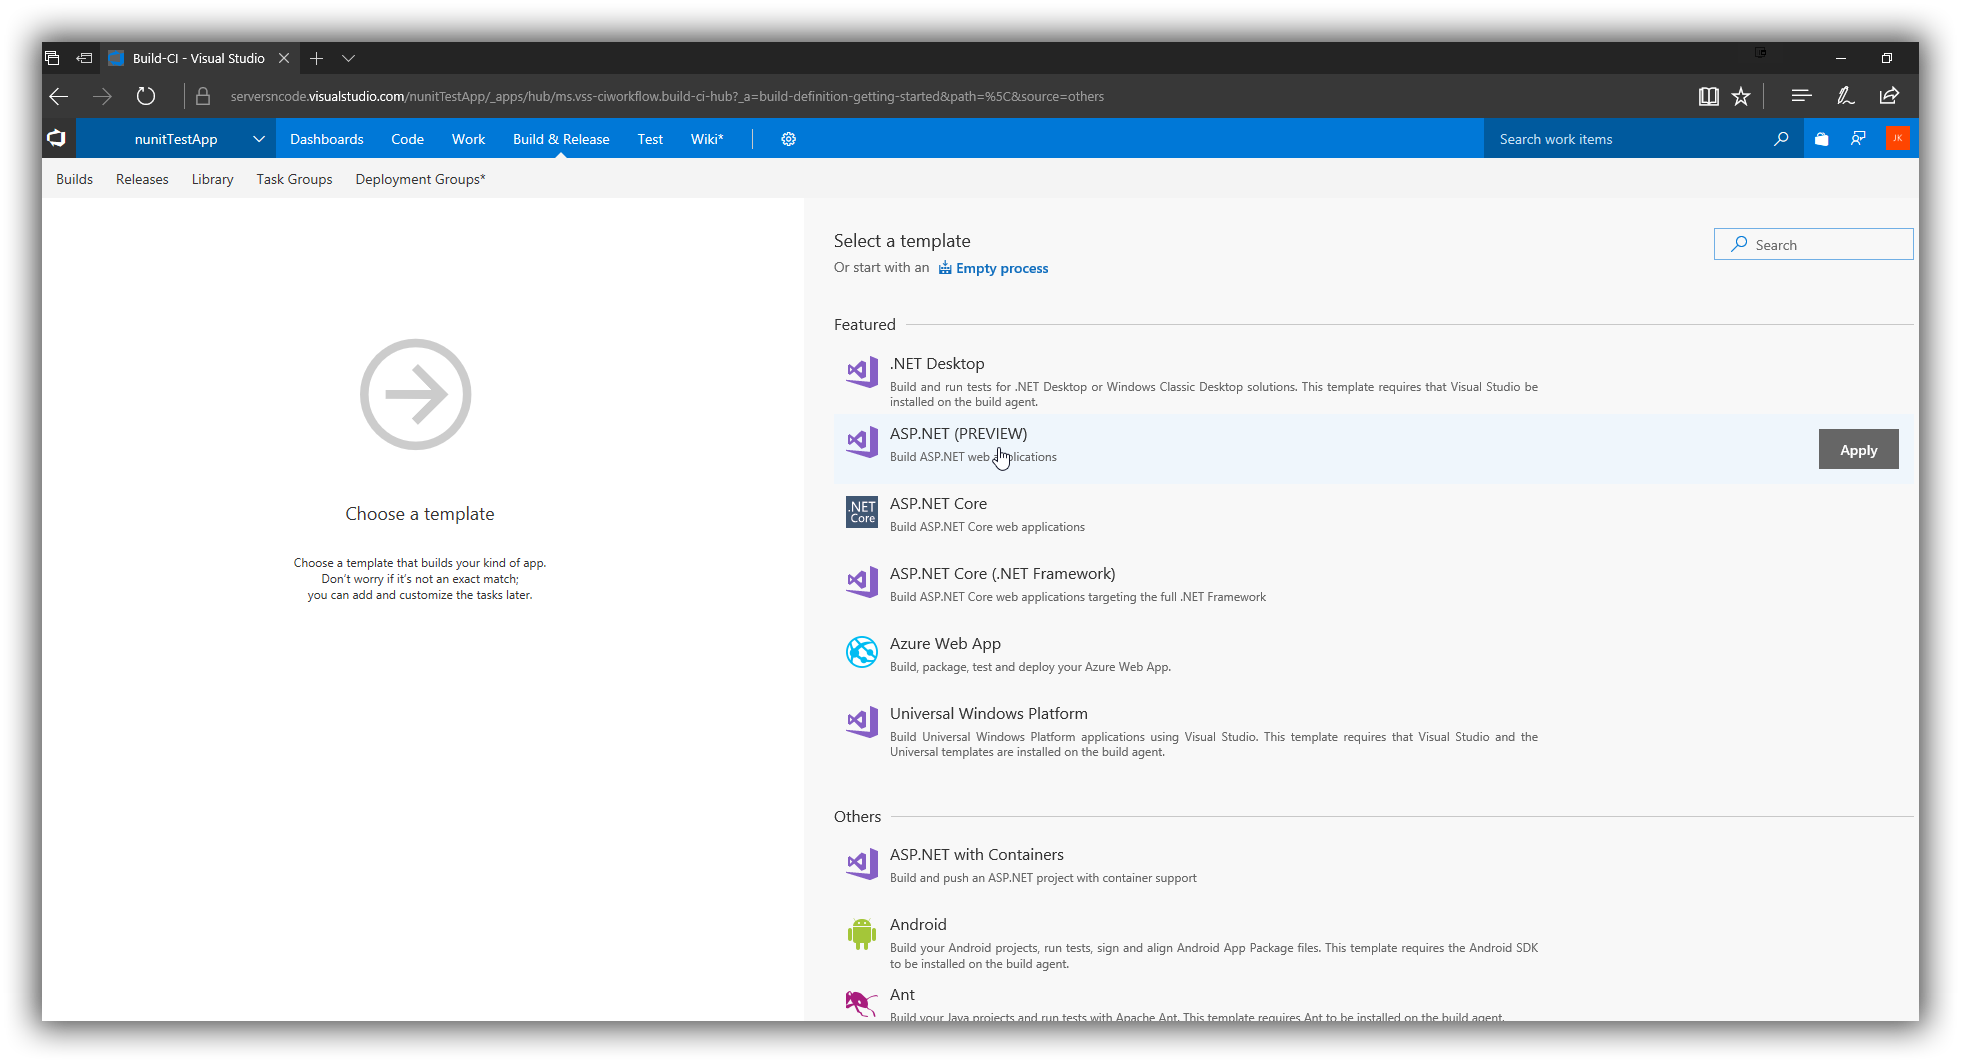
Ok now we see on the right a list of different types of projects,
These are templates to help make it easy. You can do it all manually if you want, just hit "Empty Process" at the top.
But to help they have a bunch of different templates that will allow us to make our project easier. These are common templates and for my project it's an ASP.NET application so we have a ready template available.
My code for this project is here It's my Nunit demo app I used for some other blog posts to show off unit testing. Go ahead and fork it if you want to code along.
So I'm going to select the ASP.NET (Preview).
When we do that we get a build with a number of tasks already loaded. These are the basics we need to build and test our ASP NET Project.

- Name - Is already set for you.
- Default Agent queue - This is the agent that will build our project. I'll go into more details on this in another post for today, I've selected "Hosted2017"
Because we are doing a straight ASP net application we don't have anything fancy so the default settings all work for us.
Get Sources
When you open the Get Sources task we get to set up where our code will come from.
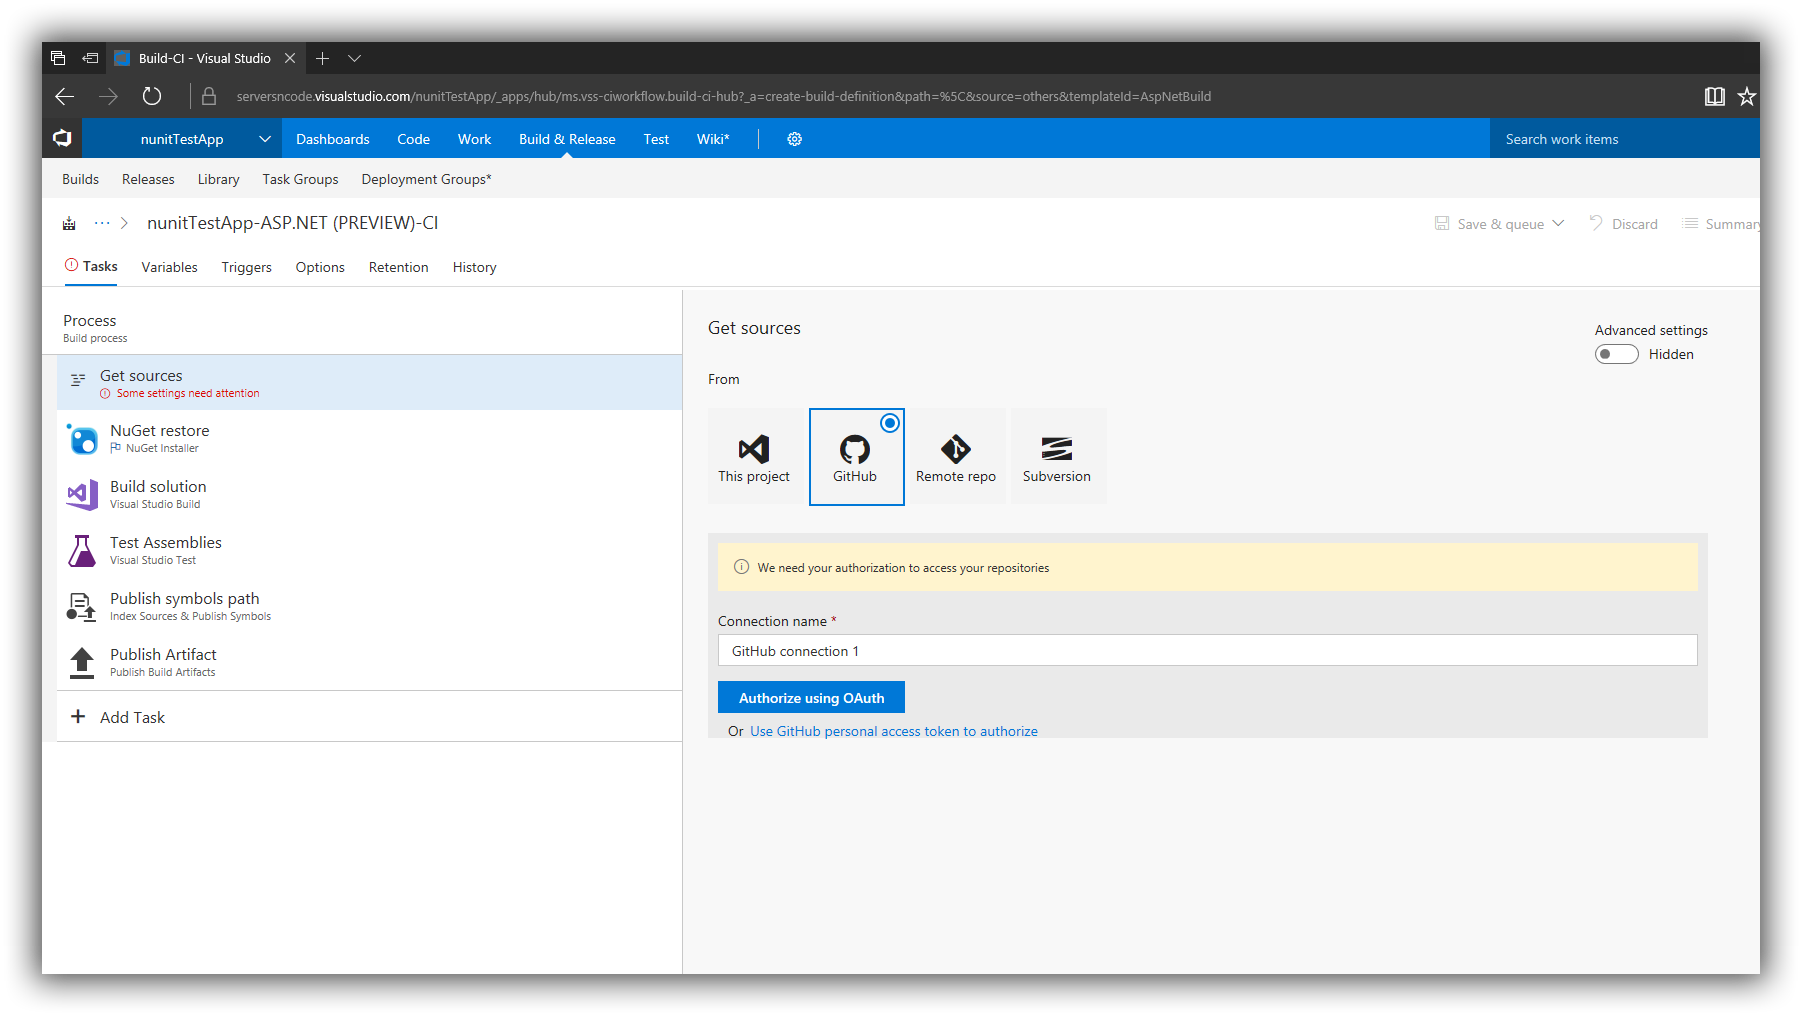
- This Project - Visual Studio Team Services also has code repo's so you can store code there aswell.
- Github - We can pull a project from GitHub and load it in.
- Remote Repo - If the code is somewhere else, maybe in house or on Bitbucket.
- Subversion - Yes it is still out there.
So we're using GitHub so I will select it and then Authorize GitHub to my account.
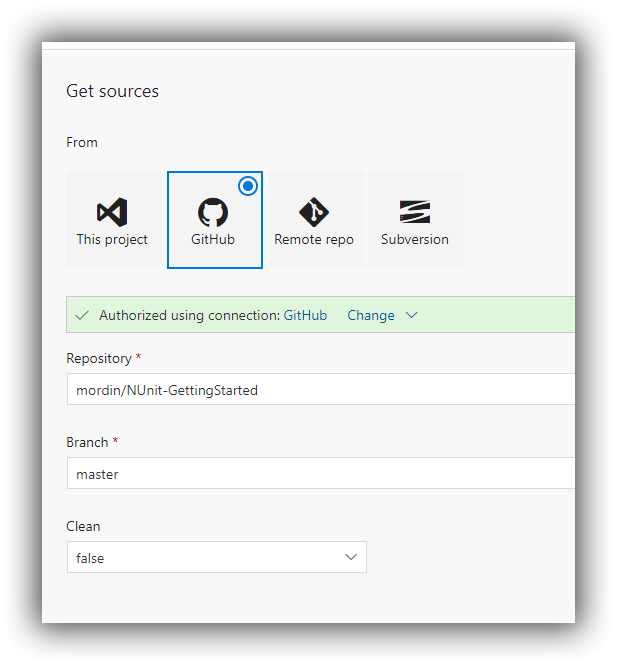
Once I've done that I can select the repository I want it to look at and the branch.
Tests
The Template we picked has a task for testing our build. This task will look for the test.dll if it is there it will run the tests. If not it will pass and just carry on. It won't fail just because there are no tests there.
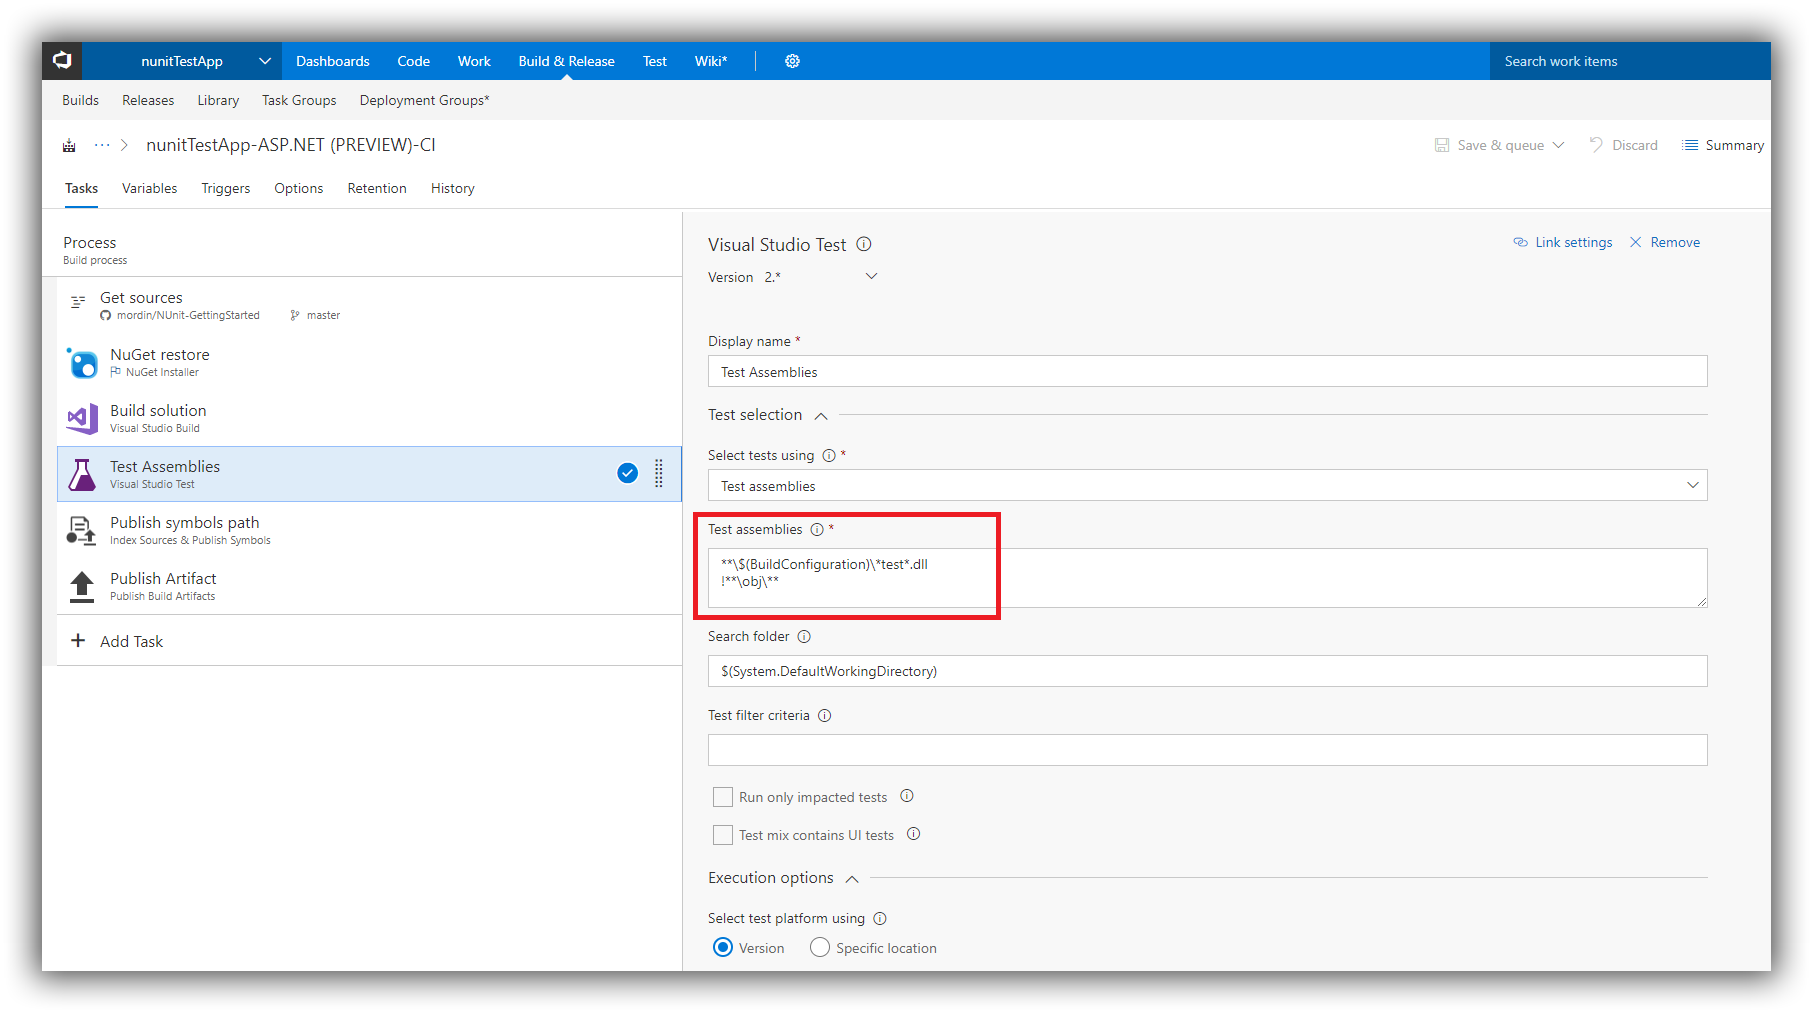
The project I'm using for this post has Tests, in a project NUnit_Demo.Test so it will be selected and run.
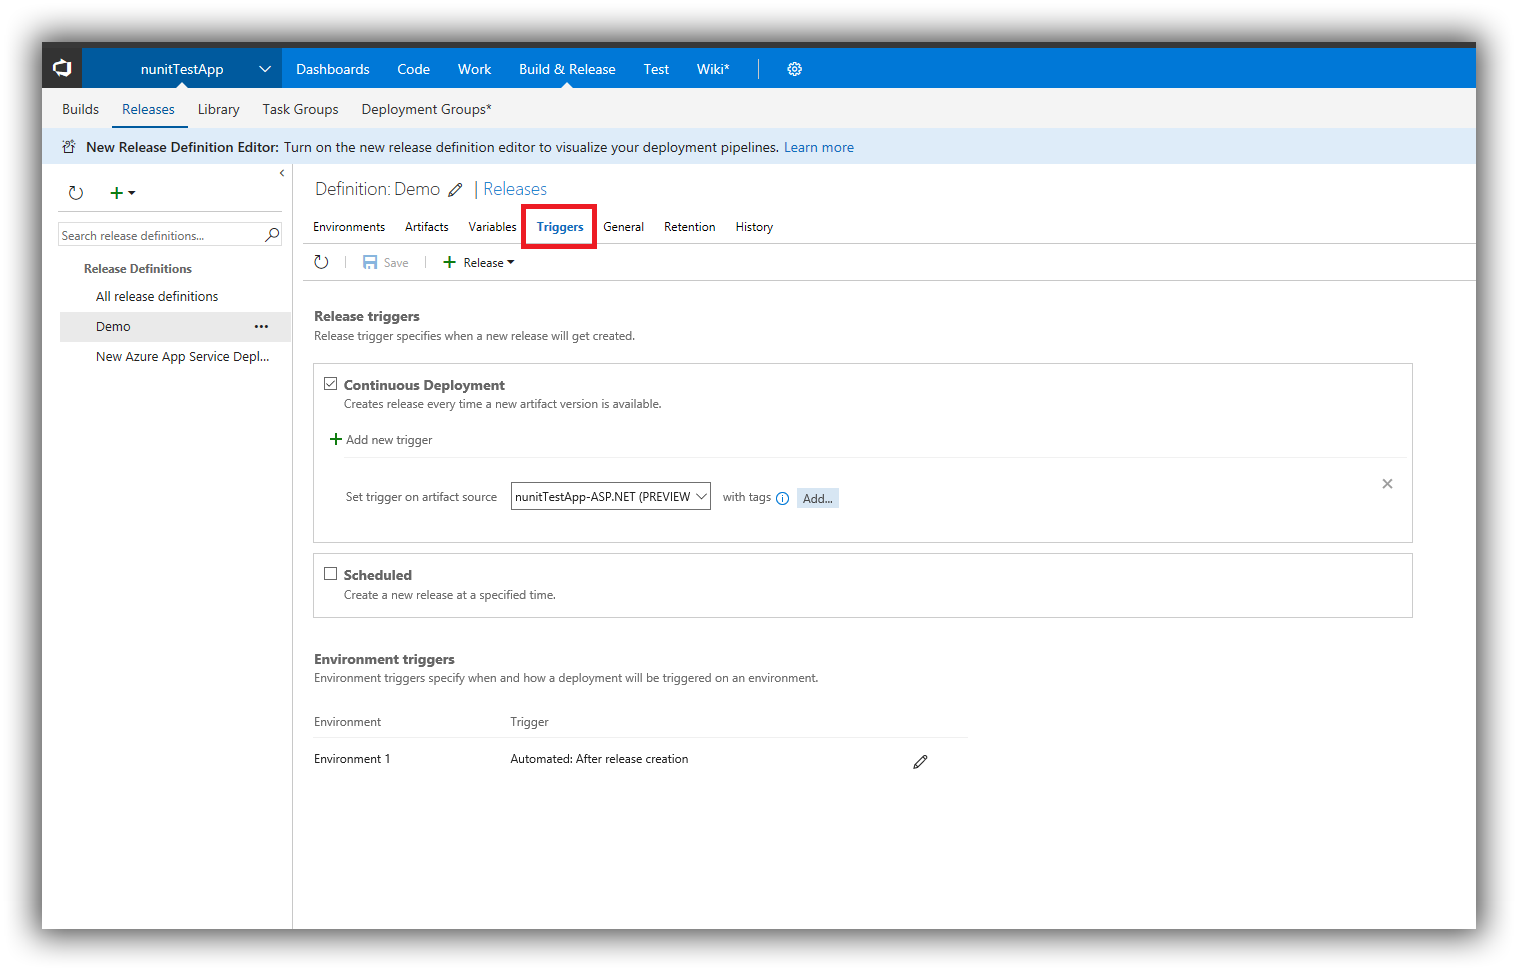
Triggers
Triggers will allow our build to happen when something changes. As it is set by default a build is manual.
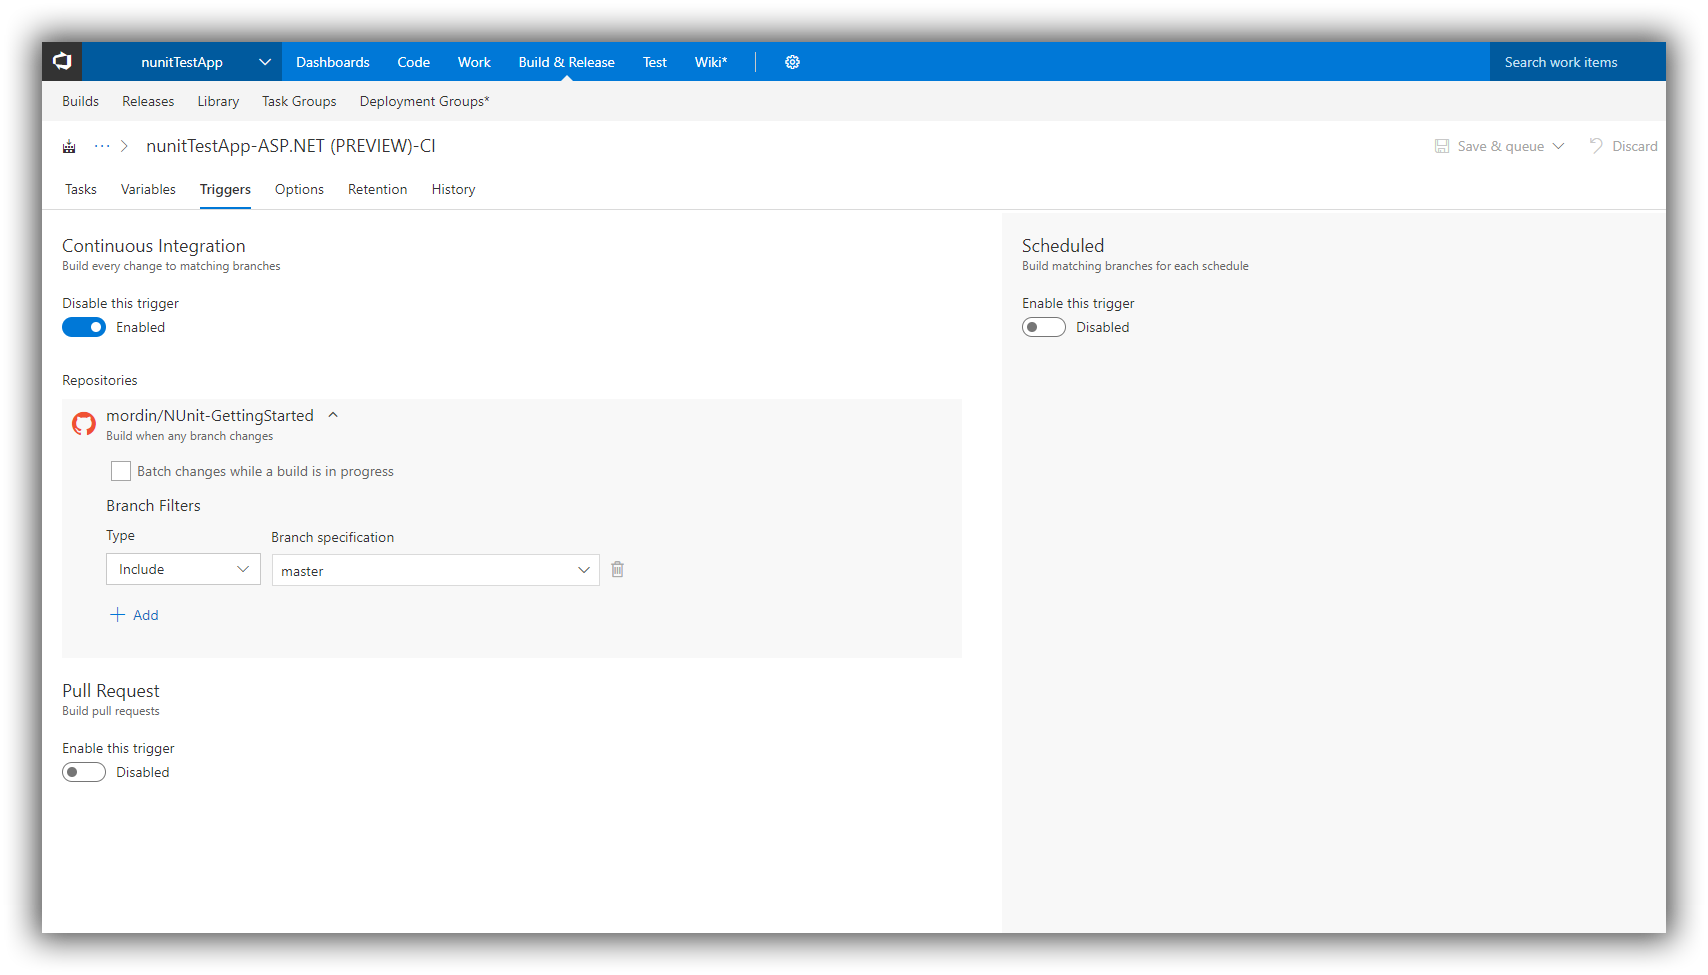
- Continuous Integration - This will trigger our build when ever there is a change to the branch.
- Scheduled - Run the build on a time or day of week.
- Pull Request - When a pull request is submitted run the build.
These are very useful triggers. We can watch for different things and run the build. Our you can actually have different build definitions triggered for different things.
For us I've selected Continuous Integration on the master branch.

Now we select "Save and Queue" this will save our changes run our first build.
Summary and History
Once your build is ready it will be listed on the builds page.

This will list all your build definations, you can see the latest status, triggered by and 7 day history.
The Triggered by will show the commit message that was loaded in. You can also click the commit ID and that will take you to the commit in the code.
As you can see I've failed my builds a few times all for a good cause.
If you read my earlier blog post on unit testing Building real unit tests you will know I have a habit of failing tests on purpose to see what happens. I blame watching too much mythbusters.
So lets look at what happens when my test fails.
If you click on the build definition for me it's "nunitTestApp-ASP.NET (PREVIEW)-CI"
We see a detailed break down of the history and summary.
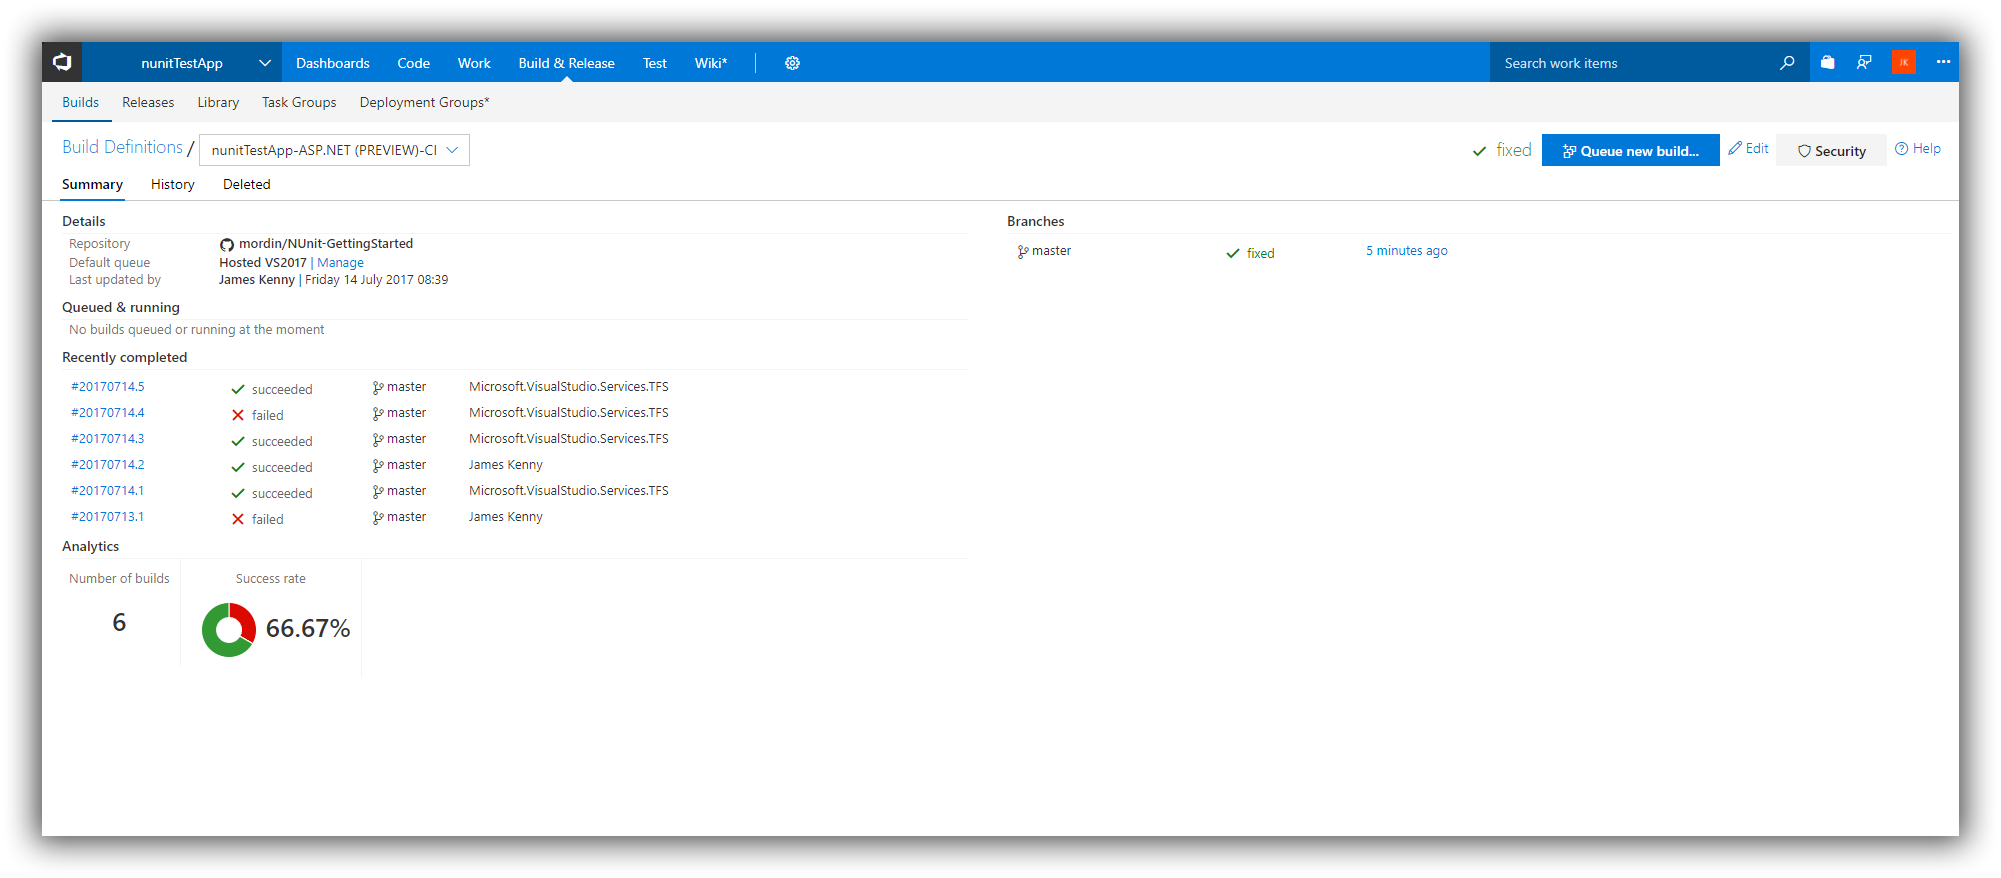
This is my summary after a few runs of the build as you can see I have a good breakdown of the builds and the results. If they failed or succeeded,
Just the summary of the recent builds I can see the triggers too, where it says my name is a manual queue. When it says Microsoft.VisualStudio.Services.TFS that was a trigger from check in.
If we select "History", we see the builds. Each build has it's own name.
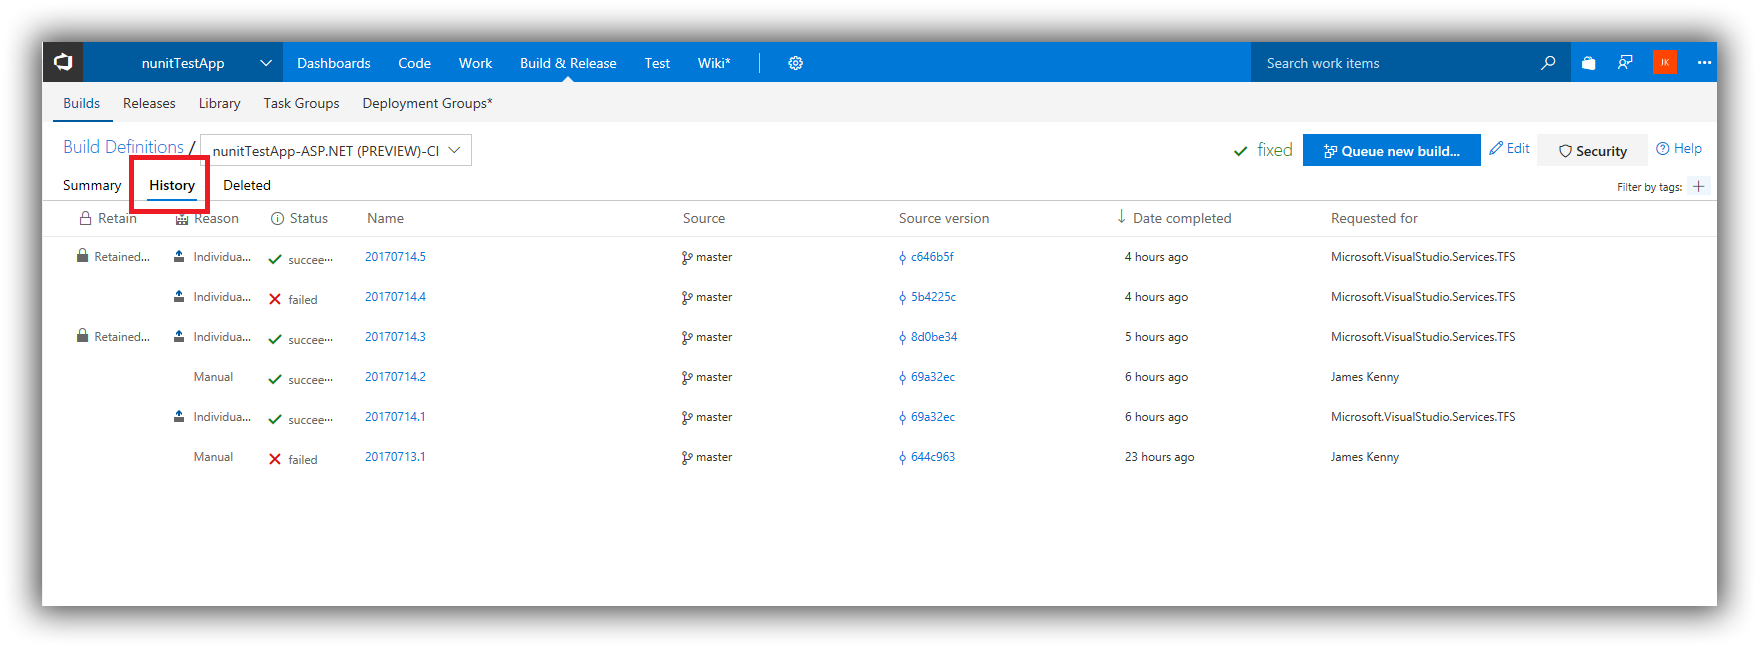
We can see more details, we can also see the source Version, this link will bring us right to the code we committed.
So what happens with a failed build well apart from the big red X and failed.
If you click the build we want to see, we get a detailed summary of the build.
Build 20170714.4 has failed so if we click it we will see the reason fail.
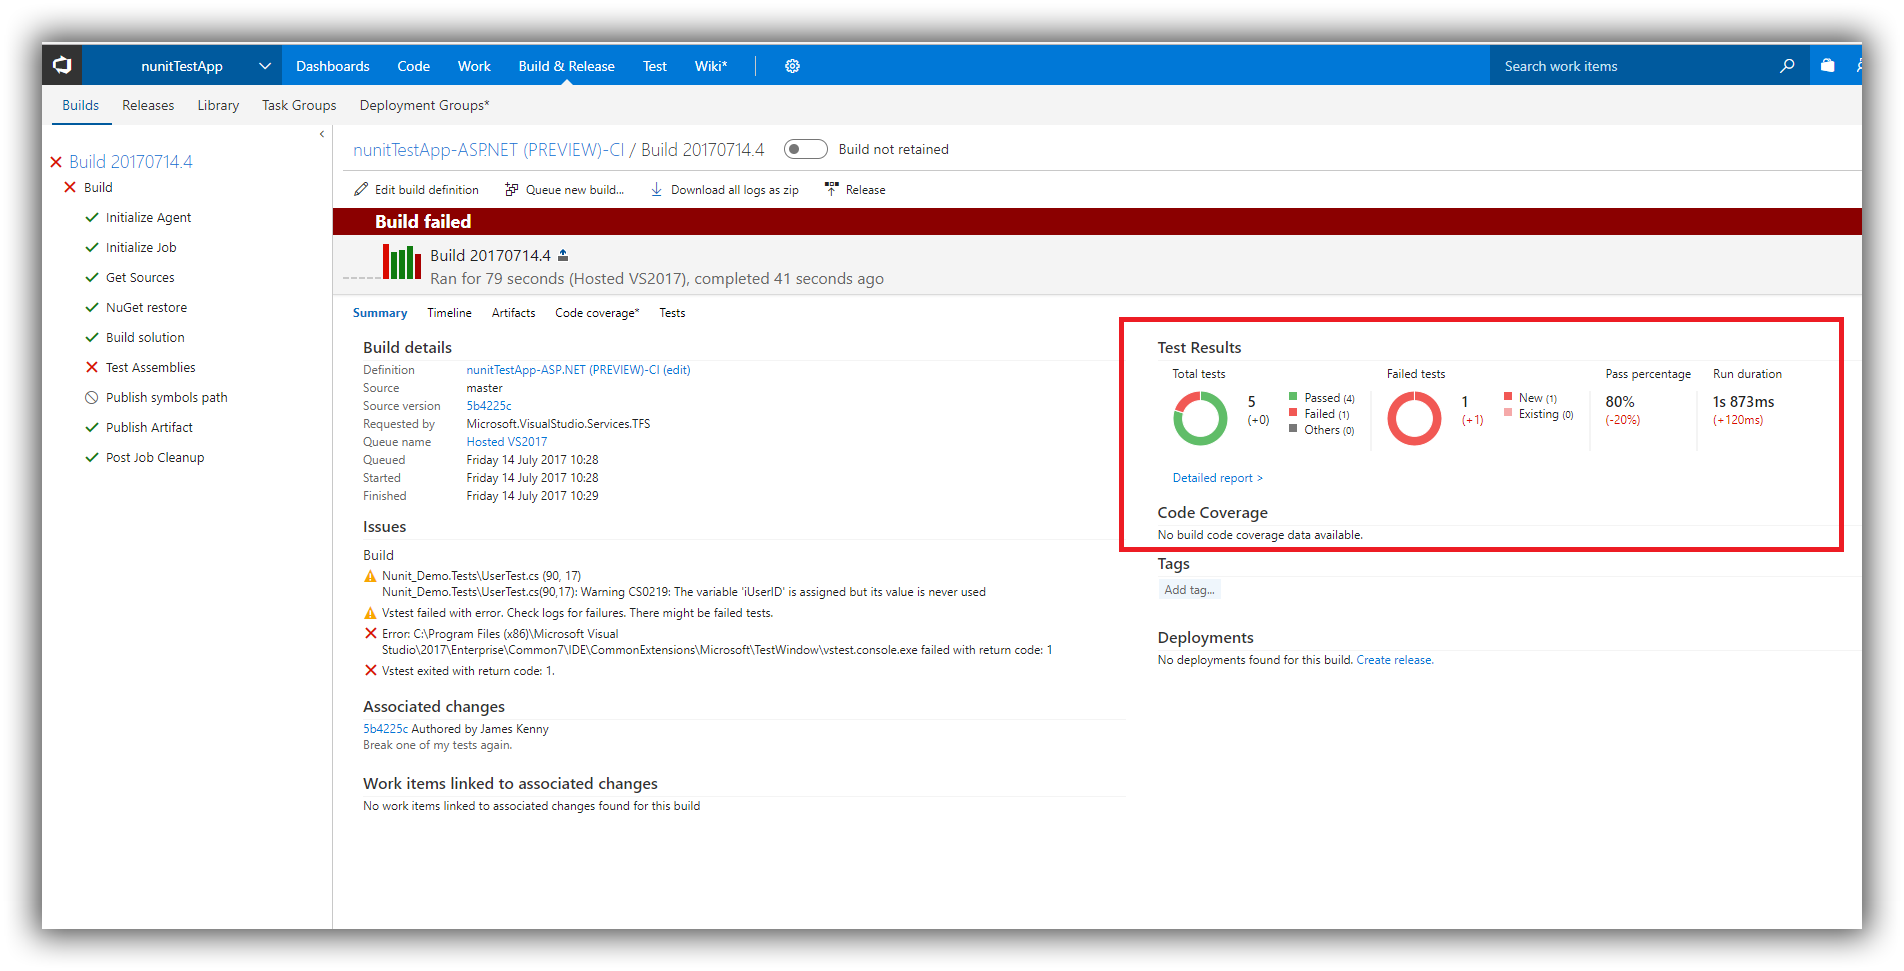
As we can see the Test results, found 5 tests. 4 pass and 1 failed.
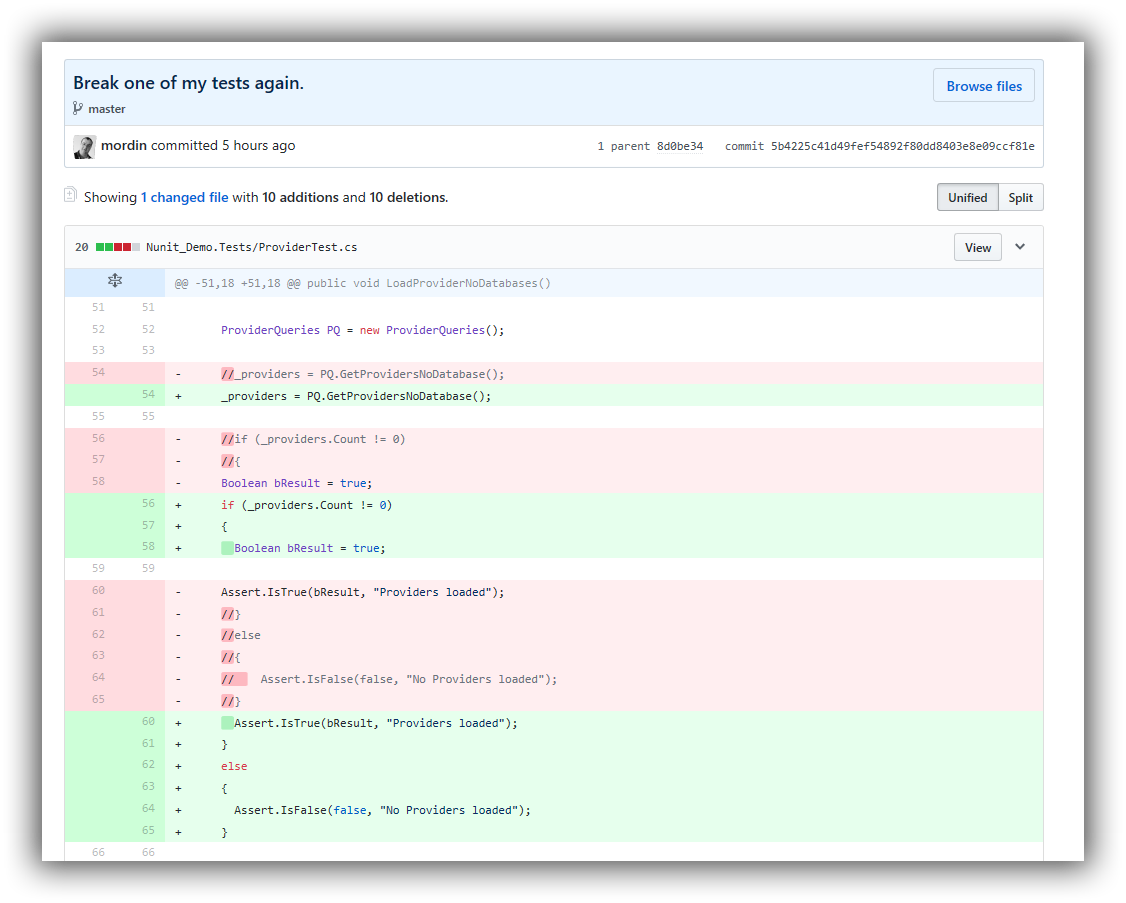
We get a bunch of information, we can see from the "associated changes" that the commit was authored by me with a commit of "Break one of my tests again" so I was kinda asking for it.
If we click that link of a commit code though we can see the details in GitHub that where submitted.
So lets fix it, If I open the code in visual studio I can set that test to pass. I then commit it and it will pick it up and create build 201714.5 this time it passes all tests.
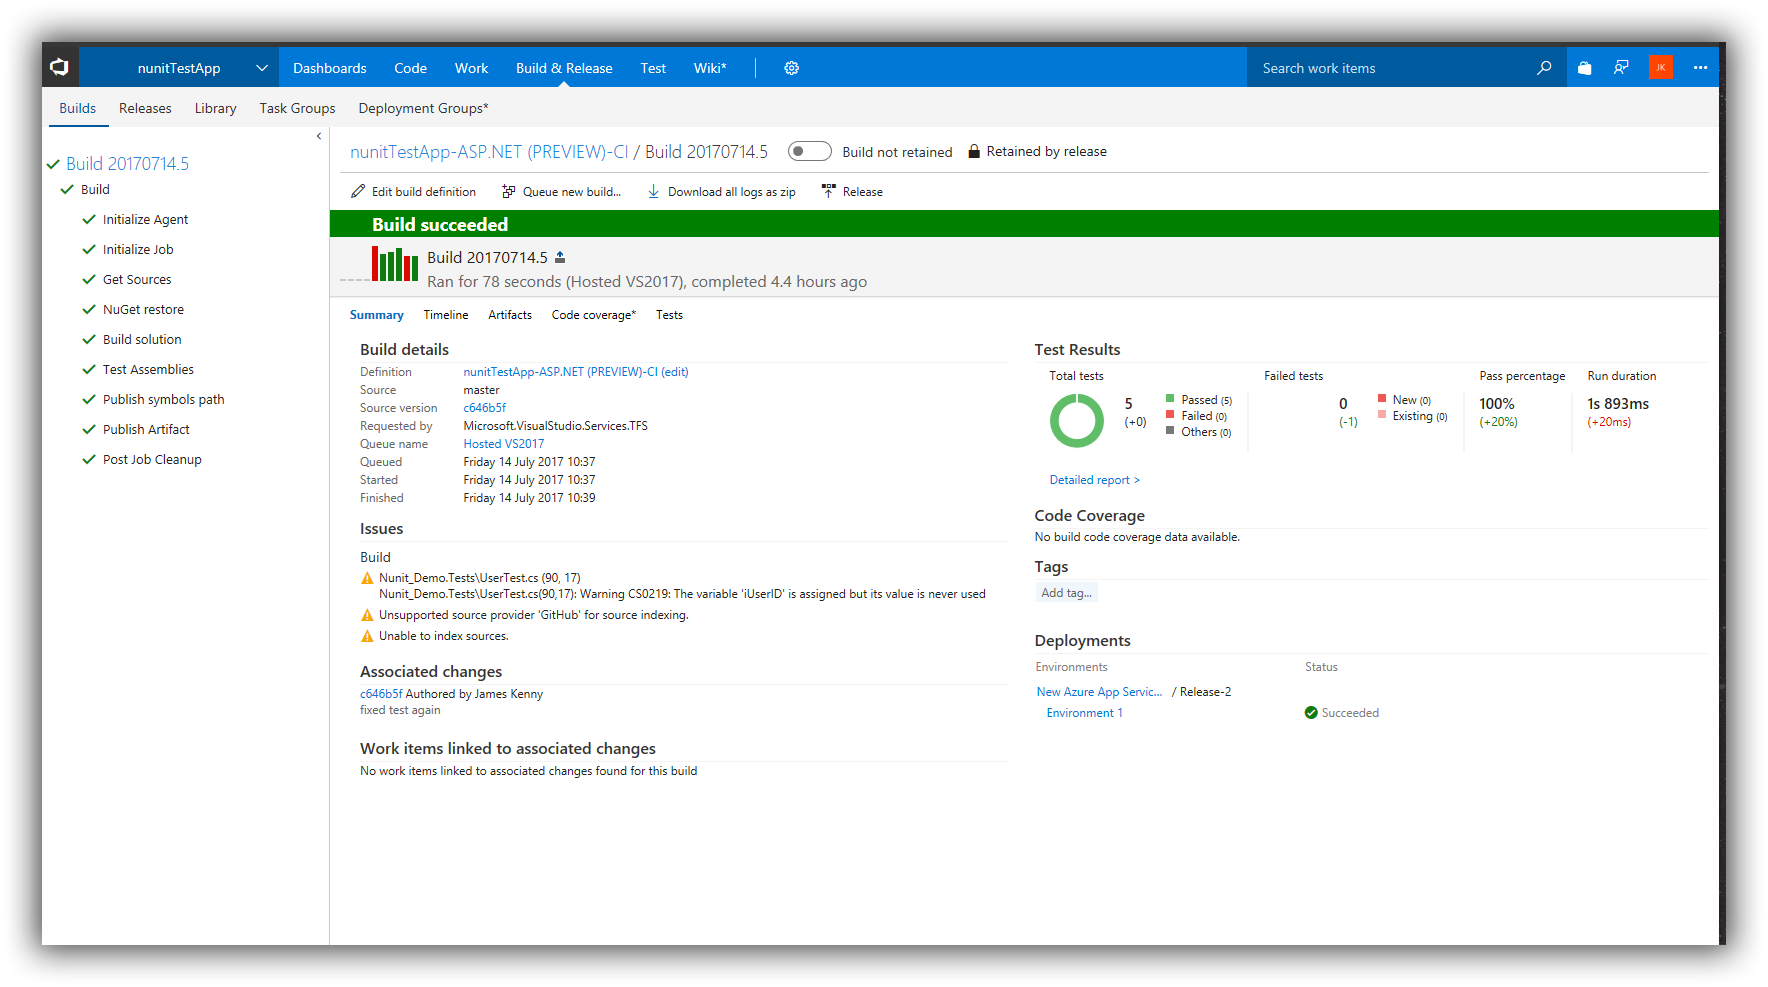
We can now see that our test passed successfully.
A failed test will fail the build and the sheer volume of data available is huge, we'll go into that in more detail later.
Now you see how easy it is to get a build run in Visual Studio Team Services and use our Unit tests.
Create a Release
Now we have our build working, lets set up a release pipeline into Azure.
So I will do a more detailed post on Azure later for now I have an app service running on Azure. I want to wire my Code to the app service and each time a build is successful then deploy my project.
Seriously this is really easy to do.
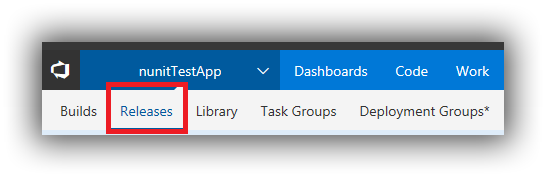
Click on the Releases Option.
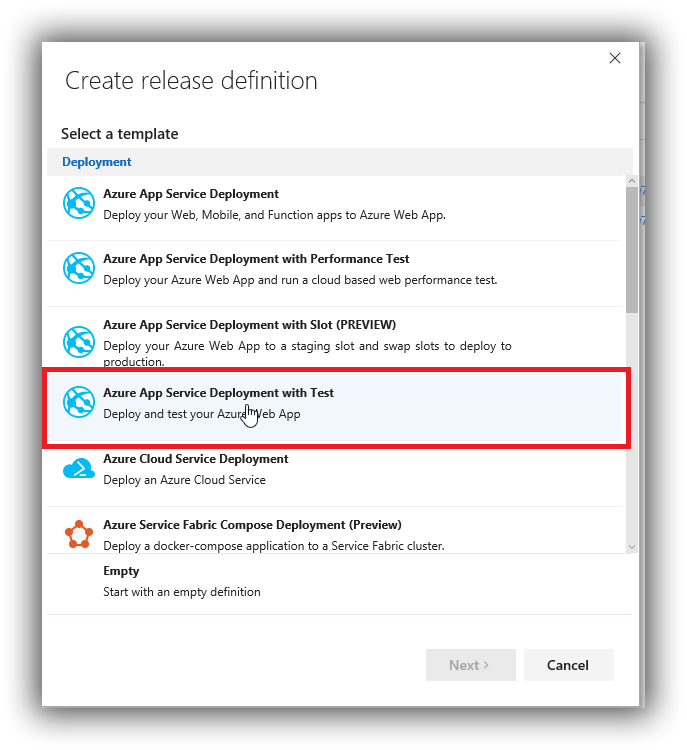
And select "Create Release Definition"
We're given a choice again of some templates. Empty is allowed or for what we want "Azure App Service Deployment with Test"
Next we tie it to our build.
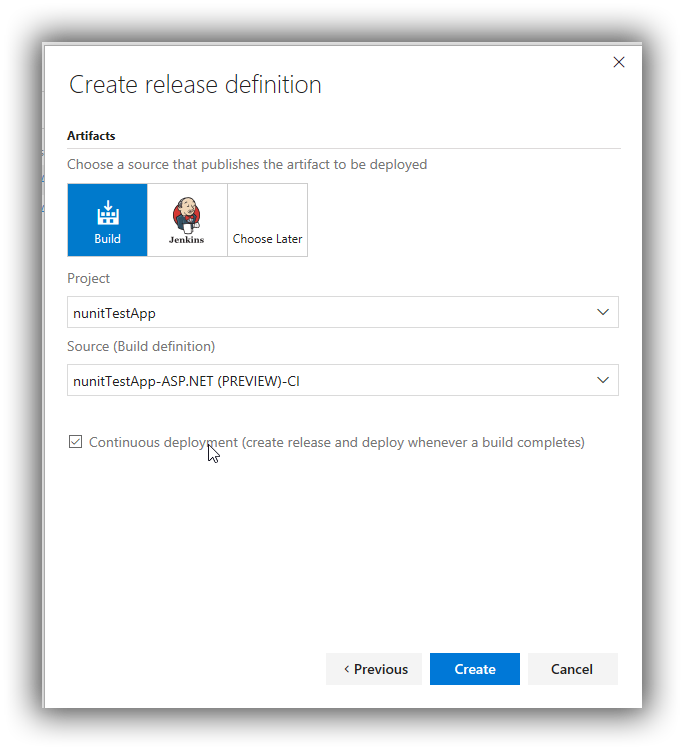
We select our Project and the build we've just been setting up, and also tick the "Continuous Deployment" this will trigger a release on a successful build.
Click create.
Defining our release is easy, we've wired it onto our build so now we select the Azure Subscription and authorise access.

Once you select the Azure Subscription select the "App Service Name" we want to deploy too.
And then hit save and your done. Really it's that easy!
A quick note on Triggers, I'll cover these in more detail later
But you can see the different types of triggers e have available, for the builds we can also set tags. So if builds with some tags succeed we only release these.
Code and release
Really that's it, now go check in a change, and watch the magic happen.
Because we are using hosted agents it can take a minute to queue up a build but once it does you can see the details and watch the build.
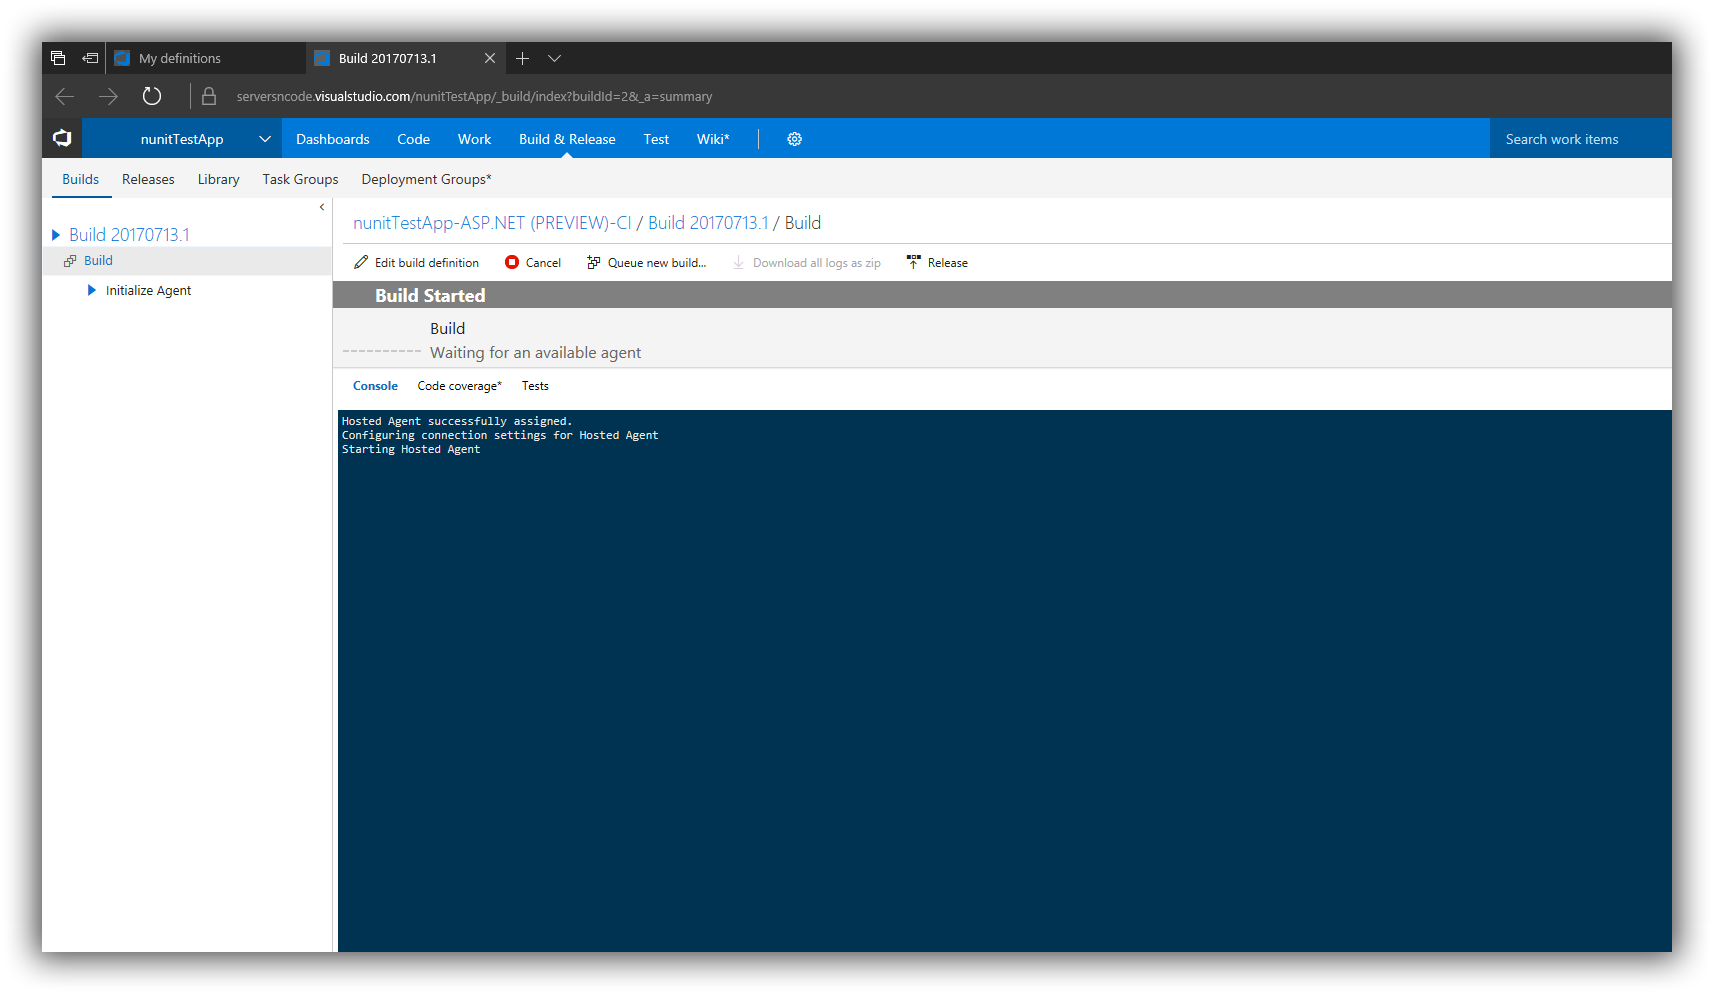
Once it releases it will be displayed under Releases, and you will see if it deploys ok or fails. If the build fails it doesn't even try and do a release.

You can see which build was successful. And if you go to the site serversncodedemo it will be live.
Comments