Have you ever zoomed in on a photo and noticed a white outline around people, the horizon, or trees? That’s called fringing, and it happens because of a simple mistake when editing. A lot of the time, people try to drop the blues in a blown out sky by adjusting the luminance in Lightroom. While it creates a more dramatic sky, it also introduces fringing. Here, Tony Northrup demonstrates how you can eliminate fringing with a big graduated filter and a brush:
What Causes Fringing?
There are a couple of things that cause fringing. One of them is chromatic aberration. Different frequencies of light—like red, blue, and green—travel at slightly different paths through the lens. So in areas of contrast where different brightnesses or different colors intersect, chromatic aberration can occur.
It’s a common technique—most people automatically go to luminance and just drop the blues to give the sky a more dramatic appearance. But, take a look at the pictire here; when you zoom in, you see this white line around everything.
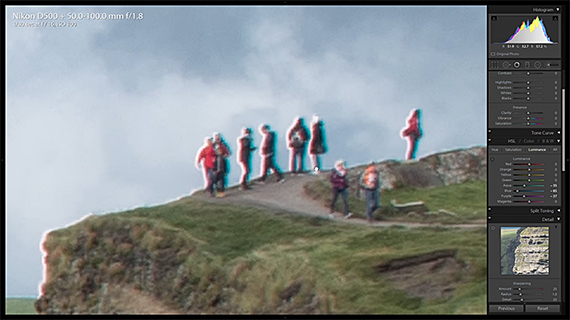
An example of fringing
If you’re noticing fringing after dropping the blues in luminance, you can remove it in post-production. In Lightroom, go down to the Lens Corrections panel and select Remove Chromatic Aberrations. You can also turn on Profile Corrections while you’re at it. Most of the white lines around everything will be removed, but this won’t get them all.
Enhance Skies Without Creating Fringe
Lowering the blues in luminance is a quick fix but an unnatural one. The pixels along the horizon are split; they’re half sky and half land—so they don’t match that blue color filter that you applied. So, basically, they don’t get their luminance dropped. Plus, since there isn’t a feathering option when you’re dropping luminance levels for individual colors in Lightroom, you’re going to get harsh lines.
There’s a better way to enhance the sky for a dramatic look.
Leave the Lens Corrections on. Now, you can use a big graduated filter, which will apply changes to just part of the picture, as smoothly or as harshly as you want.
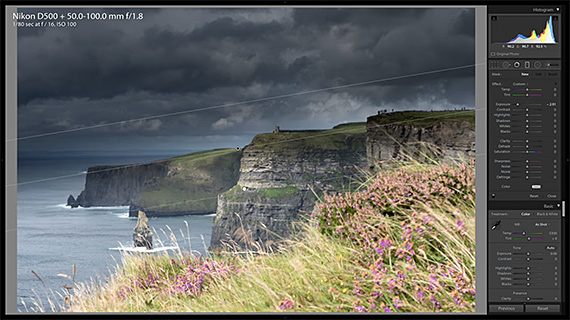
Pull it way down and move it up. Notice how the transition changes. The smaller the filter is, the harsher and more noticeable the transition will be. So, make it bigger to get a more natural look. Adjust your exposure to get the dramatic look you’re going for.
Now, zoom in. No fringing!
Editing the Graduated Filter with a Brush
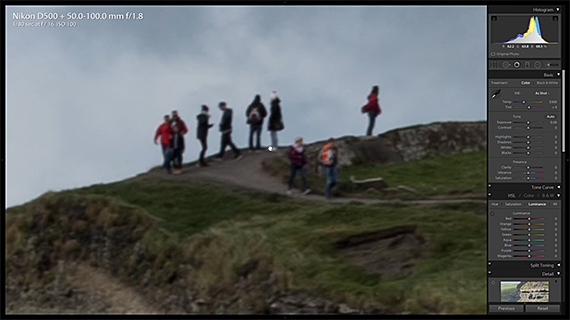
If you’ve matched the graduated filter to the horizon, you’ve likely applied it over some key elements in the photo—things that shouldn’t be darkened. To edit this, simply click on brush and you can select the areas where you want to add or remove the filter. Brush the areas to add a darker exposure. Or remove the graduated filter in areas by holding down the Alt key and painting there.

Remember to use a big brush with lots of feathering applied. With the feathering at 100, you can paint smoothly and make gradual adjustments. But if you bring it down to zero, you’ll get really harsh lines.
If the feather is too harsh, just make an even bigger brush to make the feather bigger. Then just work the edges until the transition looks smooth.
You can use this technique for different scenarios where you want to bring the blues down in the sky. Give it a try instead of dropping the luminance, and let us know how it goes.
Like This Article?
Don't Miss The Next One!
Join over 100,000 photographers of all experience levels who receive our free photography tips and articles to stay current:


Leave a Reply