Multi – language sites are (mostly) standard in current days. This was and still is a strength of TYPO3. In this article I will explain the different concepts and will show you the how to configure and work in the backend. The second part of this series is about how to configure the frontend output of a multi-language site with TYPO3 8(LTS).
Single tree vs. multi tree
Basically there are two competing concepts for running a multi language site with TYPO3: One is using a separate page tree for each language. The other one uses only one page tree and translates each page and its contents to another language.
With the multi tree approach there is definitely no relation between pages and contents of the languages. The page tree and thus the menu can / will be completely different. IMHO this makes sense for websites
- which have “full blown” content in one language and want to provide some basic information in other languages
- that need totally different contents for various regions. In this case you might want to think about using separate (sub-)domains.
The single tree approach uses one page tree for all languages. Each page and its contents can be translated to a target language. The TypoScript configuration for the frontend finally defines what will be displayed in which language.
In the rest of the post is focused on the single tree approach and is about the configuration and handling of multiple languages in the backend. The next sections show the procedure, how to get a page translated.
Create a website language
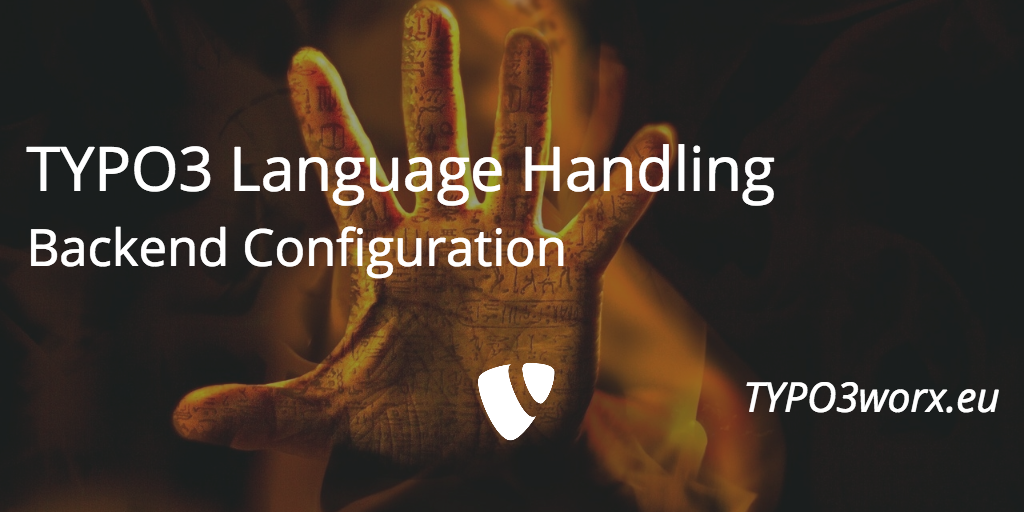
The very first step is to create an new website language on root level. If you are not yet there, activate the module “List” and click on the very first page of the page tree. It has the uid “0”.
There is no need to create the default language, as it is always there. It has the uid “0” by default. The string “Default” can be changed in the backend via Page-TSconfig: Adding the following snippet in page properties of the website root, will show the british flag and the string “English” instead of “Default”.
mod.SHARED {
	defaultLanguageFlag = gb
	defaultLanguageLabel = english
}
This can be changed to any combination of language and label.
![]()
Before diving into the actual translation process, two important terms about translation modes must be explained.
Translation modes
There are two translation modes available: The “Translate” mode and the “Copy” mode. The “Copy” mode just copies the existing content elements from the source language to the target language. Afterwards all contents can be translated and changed.
The “Translate” mode is much more restrictive. It creates a direct connection between the column and its contents in the source language and in the target language. Adding other content elements than those in the source language is not possible.
Furthermore the translation mode can be different on each page and for each language. Even this is technically possible, I recommend to stick to one mode for all languages and all pages. AFAIK there is no means to enforce one or the other for the complete site. (Please, proof me, if I am wrong :-) )
Content elements can be translated via the modules “Page” and “List”.
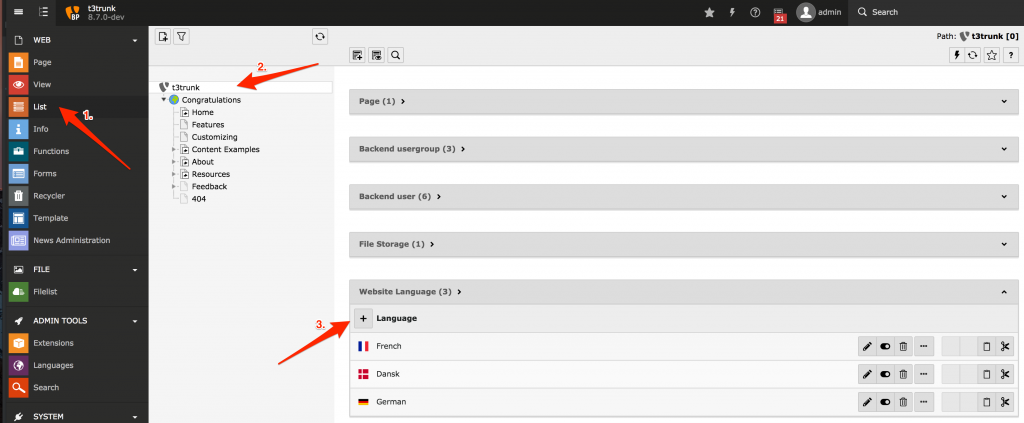
Module “Page”: Column vs. language view
The default mode in the page module is the “Column”, where all contents are displayed according to the current backend layout and the selected language. It is possible to switch between the available languages, but it is not possible to create a translation of the page in this mode.
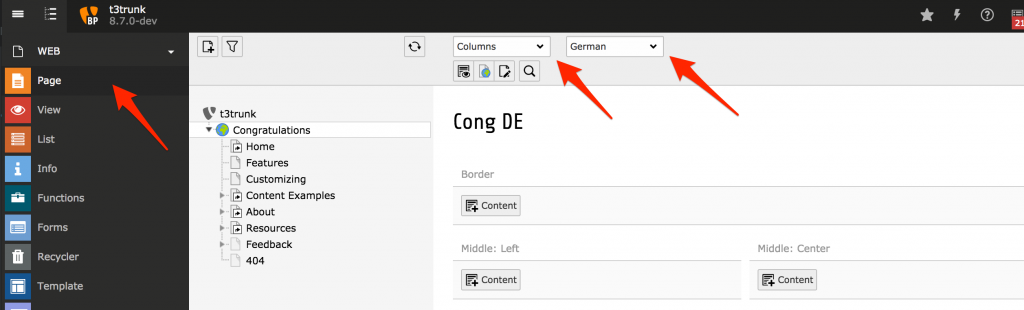
The alternative to the “Column” display is the mode “Language”. It shows the content elements of one or more languages side by side. If the default language is selected all active translations are shown. Otherwise only the default language and the selected one are displayed side by side.
As long as this page is not translated at all or there is a translation missing, the option “Make a new translation of this page” and a drop-down are displayed at the top of the editing area.
![]()
Selecting a language in the drop-down will reload the form and provide the page properties of the selected language. Which fields are editable depends on the configuration of the installation.
![]()
Module “Page”: Translating the content
The next step to take is to translate the content. If no or not each content element is translated, there is the button “Translate”. A click on it opens a dialog, which will guide you through the translations of content elements. This must be done for each “column” or area of a backend layout separately.
![]()
Clicking that button starts the first of up to four sequential dialogs creating the translation.
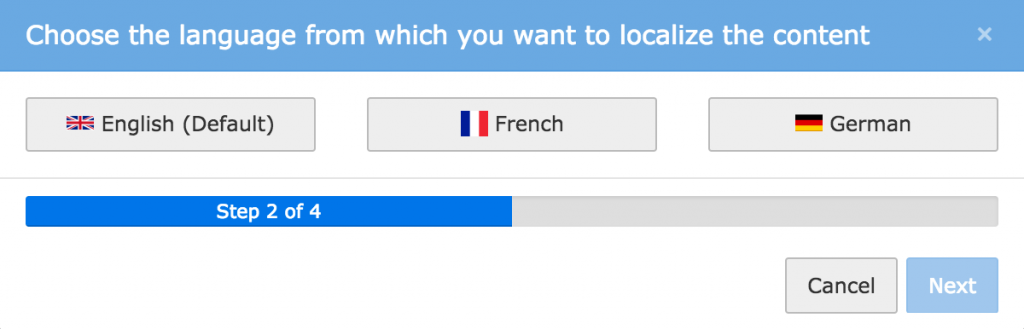
The first step is about the decision whether to copy or translate from the “original” language.
![]()
The “Translate” mode leads to a direct connection between each content element in the original language and the target language on this page. The copy mode creates copies of the content elements. (See above for details).
The second step is to choose the original language. There is no classical “default” language any more, as in previous TYPO3 versions. Every (even already translated) content can serve as a source for your translation.
The the third step shows a summary of the translated records. There is nothing to decide, you can only proceed with “Next” or return to the previous step.
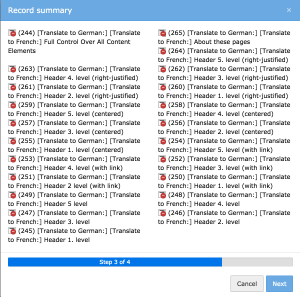
The fourth step processes the translation and reloads the current page in the backend. Now you are done for this “colPos”. If there are other areas in the backend layouts, you must repeat these steps for each of them.
Module “List”: Translating extension records
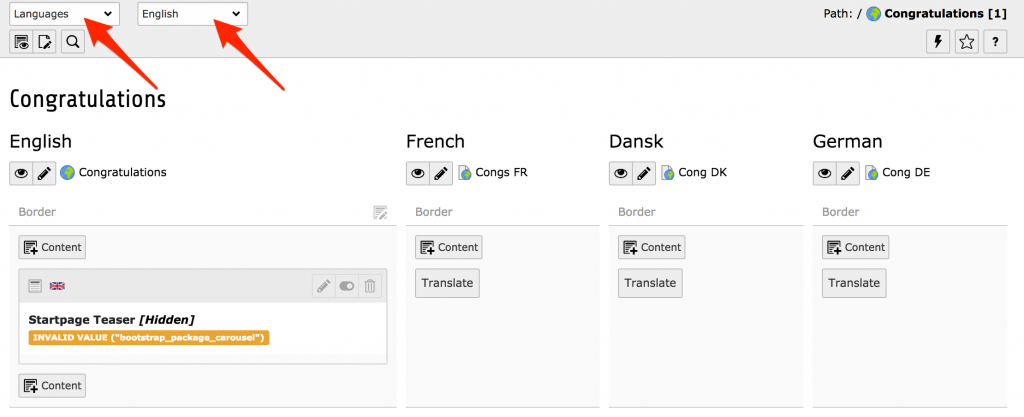
You can also translate records in the module “List”. In order to use it, you must activate the view: Tick the checkbox “Localization view” at the end of the page (see screenshot arrow no. 1). This will reload the content area and display all current and possible translations.
![]()
Records that do not have already a translation show the flag of the missing target languages in the column “Localize to:”. (see screenshot arrow no. 2). Existing translations of records are indicated by a slightly indented record next to the original one and a flag behind the translations (see screenshot arrow no. 3).
If you are using the mechanism of the list module, you should know, that it always creates a direct connection between the record in the default language and the translation. Especially regarding content elements this may lead to quite confusing situations and warnings. If you created a translation in “copy” mode, the list module still allows you to create an additional translation in the “Translate” mode. If you then return back to the page module, it will give you a warning about “Inconstistent content”.
The next section is about how to avoid these inconsistencies and warnings and how to deal with them, if some occur in your installation. The very first step is to create a translation policy.
Create a translation policy
The key to a easy to handle language management it to create a decent language policy. My recommendations are the following:
- Use the same translation mode for each language throughout the complete website (no different translation mode per page)
- Use the same translation mode for all available languages (no different translation mode per language)
- Use the module “Page” for translating content elements
- Use the module “List” for translating all other records (and not content elements)
- Train your editors to follow these rules strictly, otherwise you will get warnings on each and every page (BTW: If you have some editors, who do not follow your policy, you might consider to restrict the available languages for them)
Even if you train your editor very well, you will get a warning warning about inconsistent content in the page module.
Deal with inconsistencies
There are just a few steps, you should follow to recreate consistency in your translations:
Recall your translation policy
Recall your translation policy AND stick to it. A quick change, in order to get rid of the warnings, does not make any sense. Don’t let yourself or your editors run at a long rope, you will regret it later on.
Find the records causing the warning
This is basically easy as the page module marks the records which may make problems. But the warning in the page module may “set you on the wrong track”.
The reason for the “wrong track” is, that content elements, which are directly translated, set the mode for the complete page.
![]()
The screenshot above shows such an example. The german translation was originally translated with the mode “Copy”. Afterwards a direct translation in the module “List” of the first content element was created and leading to this warning.
But: The intended mode was the copy mode. Now all elements created in this mode are marked red, but not the one causing the issue. This is due to the fact, that directly translated content elements set the modus of the page.
Treat the faulty records
After you have identified the real faulty records, there are two possibilities to fix it:
- Delete the faulty record(s). That would be appropriate in the case above.
- Fix the faulty record in tab “Language”. If there should be no relation to an existing record, change the field “Transl.Orig.” to the empty value. Otherwise choose the content element, which is the translation parent, from the drop-down.
![]()
Conclusion
Especially, if you were using TYPO3 for a longer time, you might notice several changes, how to deal with languages. These changes are steps to get rid of the well known “default” language. The most eviteable change in this regard is, that you may select the source language of your translation. It it not the “default” language any more.
The second part of this series will focus on how to configure the frontend output and some “helpers”, which ease the access for frontend users to the correct language.
The third part of this series will be about preparing your extension for multilanguage usage.
I hope that this post was helpful for you. If so, or if you know somebody who can profit from it, please share this post via your favorite social network(s). For your convenience I added some share buttons at the end of this page.
I found the blog post image on pixabay . It was published by smilingpixell under the CC0 public domain license. It was modified by myself using pablo on buffer.


«AFAIK there is no means to enforce one or the other for the complete site. »
That will change in 9: https://github.com/TYPO3/TYPO3.CMS/commit/9e01773ce29f2372f91aa26e3044156337236abd
Pingback: Language Handling in TYPO3 - Part 2: Frontend - TYPO3worx
5
Hi,
I accidently chose translation mode “connected” for a page.
Is it possible to switch back to “free mode” somehow?
Even if I delete the translation and all connected content elements and start a new translation of that page, the translation wizard does not come up and a translation in “connected mode” is created again immediately
Arrrgh.. any hints?
You’re able to edit the “Translation Origin” (l10n_parent) of every content element on the page and set it to empty. This can be done via the list module very fast. And now TYPO3 thinks you are in free mode.