When you read that, it means that thanks to the optical stabilization of that particular lens, you can expect that you will need 4 less stops of shutter speed to get a sharp image, compared to what you would need without a VR.
 |
| VR can be the difference between a sharp image and a blurry one |
It's easier to see with an example.
Let's assume that I'm using a focal length of 300mm on an FX camera. According to a long-standing guideline, you then need about 1/focal length as a minumun shutter speed to get a sharp image if you're shooting hand-held. In this case, then, you need 1/300 or faster (the closest actual setting on the camera is 1/320). This is where VR comes into play. Count 4 stops slower: 1/160, 1/80, 1/40, 1/20. Therefore, with VR on you should be able to get a sharp image at 1/20. Of course, this isn't an exact science - some hands are more shaky than others. This is only an average.
Sounds good, in any case, right? Would it not sound even better if I told you a trick with which you can get an extra stop? If so, then read on!
This is a trick I've mentioned before, but this time I decided to talk with more details about it, using actual examples.
There is one caveat: It works best with stationary subjects, as we will need a 2-sec timer to make it work. In any case, when we're talking about such slow speeds, chances are you wouldn't be photographing something that is moving anyway.
So, here's how it works:
- Select a 2-sec countdown on the timer
- Half-press shutter button. Focus is acquired, VR kicks in
- Fully press shutter button. The 2-sec timer is triggered.
- HALF-depress the shutter button, so that your finger remains on the half-press position. Keep it there, so that the VR remains active
- The shutter opens and closes, and the photo is taken.You can now remove your finger from the button.
It's simple, but remarkably efficient. What it does, in case you didn't realize, is that it removes the additional shake introduced by your pressing of the shutter button. Here's an example. It's taken with a Nikon Nikkor AF-S VR 18-105mm lens (which, by the way, is a screaming deal for DX users, I highly recommend it. Get it new here, and look for awesome used and refurbished deals here)
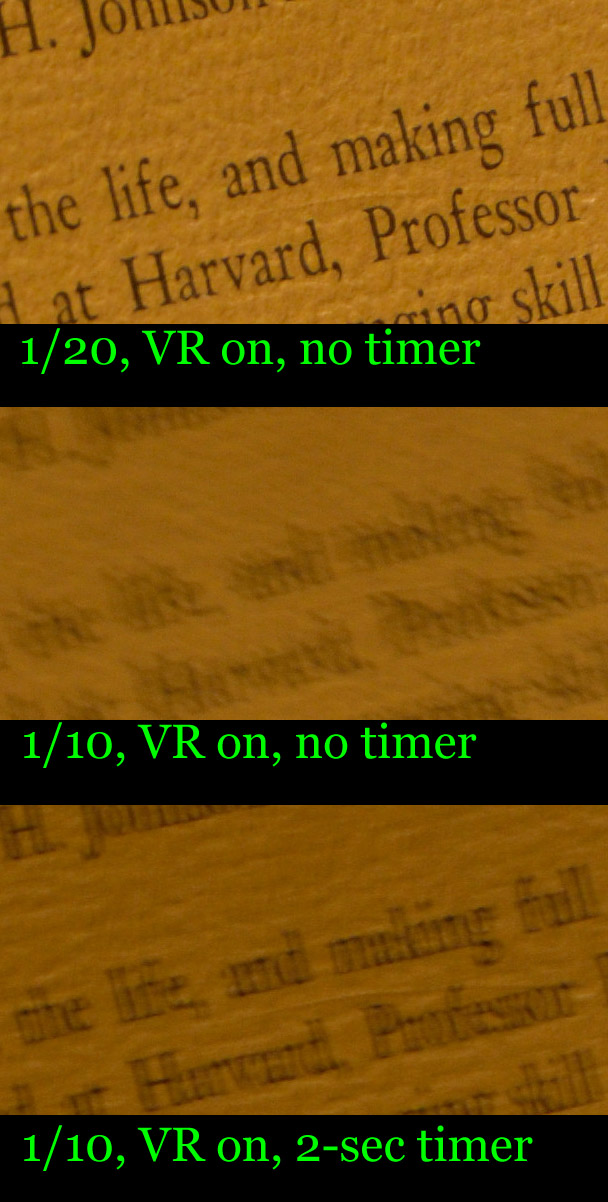
We're at 105mm. 1/20 was the threshold where I could get a sharp photo, though I must admit that what you see is a best-case scenario; there were quite a few less sharp 1/20 images, so I'd put the reliable threshold at 1/40 instead - which coincides with the 3-stop rating of this lens (remember: when we're using DX, you need to get the crop factor into consideration. In other words, you would need a 1/160 shutter speed without the VR).
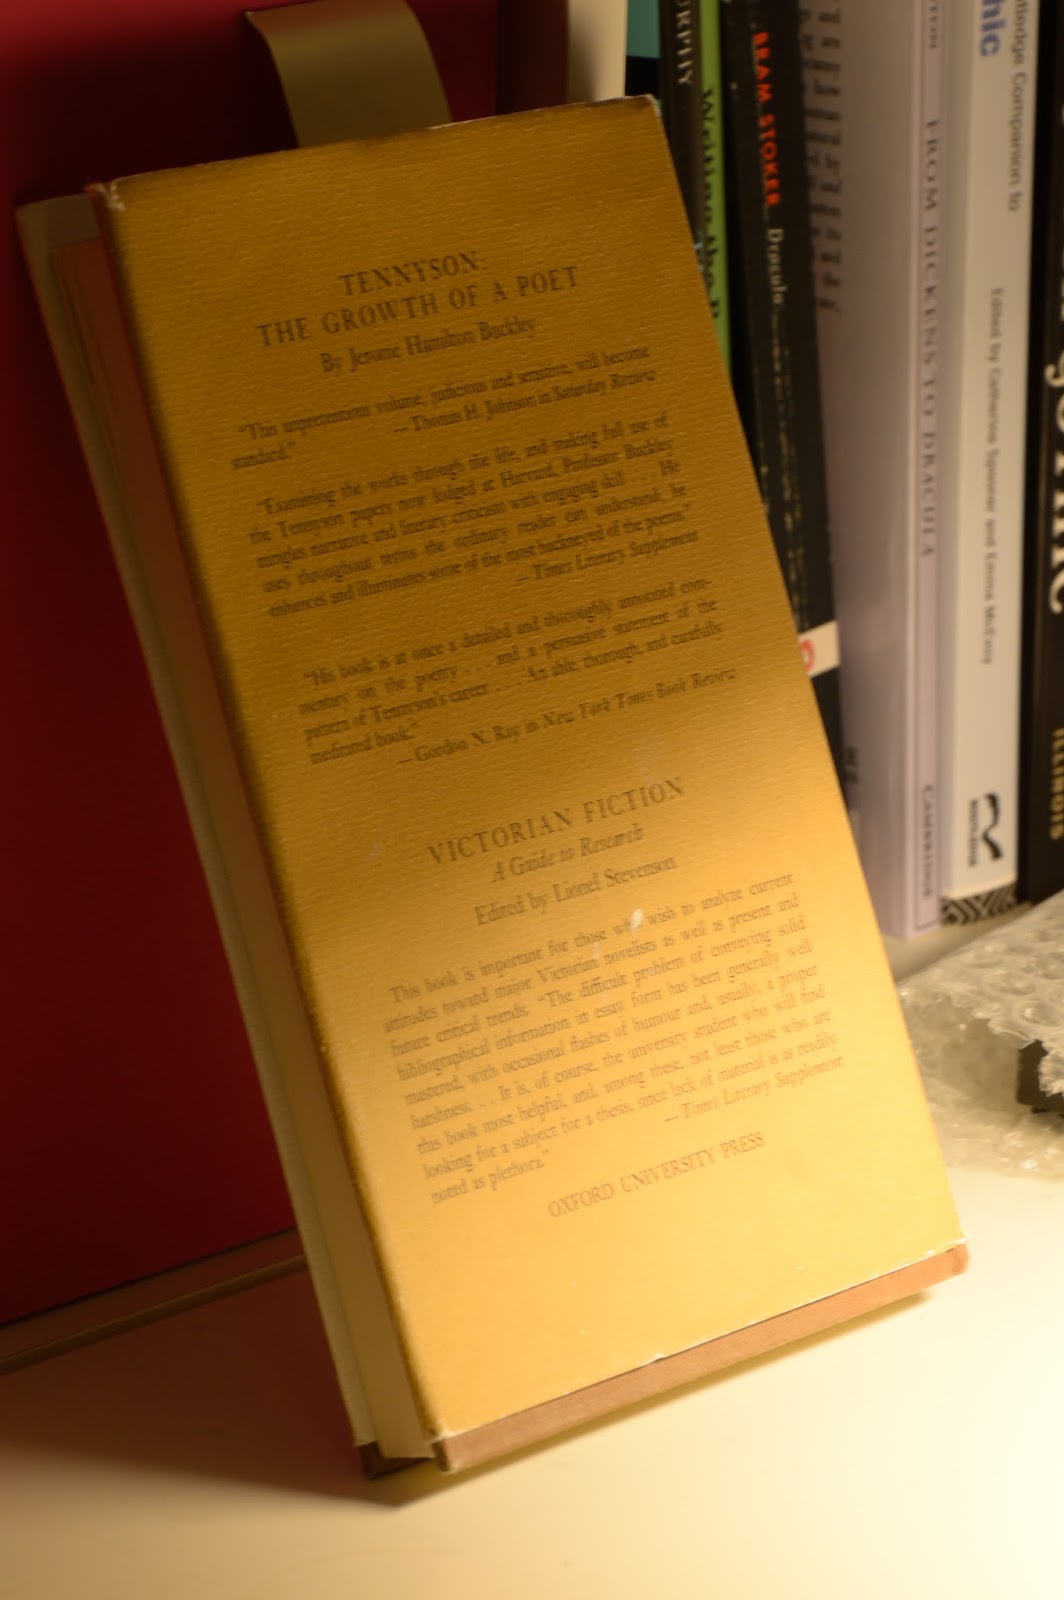
There is an obvious improvement in the image when the 2-sec timer is used. Some of you might think it's still blurry, but remember that this is a 100% crop of a 24-MP image. Here's how the full-size, uncropped image looks like (i.e. the bottom one, with the 2-sec timer):
 |
I have also noticed the difference becomes even more pronounced when used with longer focal lengths at longer focus distances. Try it for yourself!

No comments:
Post a Comment