Embroidery Stem Stitch Tutorial
If you want to turn your embroidery pieces into works of art even the Louvre would be proud to display, then you need to learn how to stem stitch.
As one of the most common, simple, and professional-looking embroidery stitches at a sewists disposal, the stem stitch is something every sewist should know. If you’re wondering, “What is a stem stitch?” chances are you’ve unknowingly seen it in your favorite embroidery patterns.
A stem stitch is an embroidery technique that uses slightly overlapped stitches to create a thicker thread line on your fabric. Unlike a traditional running stitch, the stem stitch gives your thread a rope-like pattern with overlapping diagonal threads.
It’s practically an optical illusion! Using the stem stitch a universal skill that can turn what would otherwise be a dull running stitch into a 3-dimensional, textured, and mesmerizing design.
Bold yet subtle, thick yet delicate, there is no stitch quite as bewitching as the stem stitch. Though other stitches, like the lazy daisy stitch and the blanket stitch, are perfect for adding both floral and geometric designs to a piece, no technique comes as close to the simple elegance of the hand embroidery stem stitch.
Not only is the stem stitch stunning, but it’s also versatile. Stem stitches can easily be sewn in on any line, be it curvy, straight, zig-zag, or loopy. It’s the perfect way to turn a simply outlined design into an image that will have people stopping to stare. Want to add lettering to your sewing project? The stem stitch is good for that, too!
So what are you waiting for? In 5 simple steps, you could become an expert in stem stitches; it’s as simple as that!
This quick guide on how to stem stitch will have you sewing everything from your favorite characters to abstract shapes to lovely script in no time! Watch the video above or follow along with the written instructions below to master this popular stitch.
Sign Up For More Free Patterns >>>
Stem Stitch Instructions:
Materials
- Needle
- Embroidery floss
- Fabric
- Optional: embroidery hoop
-
Thread your needle and tie a knot at the end.
-
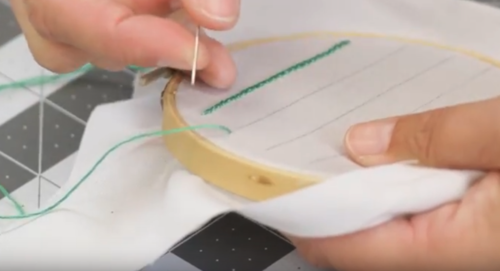
Bring your thread through the fabric from the back to the front. Pull until the knot you tied in Step 1 hits the back of your fabric. The position of this puncture should fall along the main line of your sewing.
-
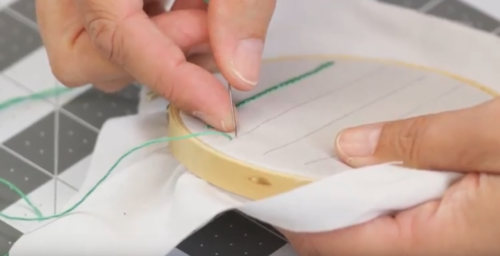
Just above the main line of your sewing, position the needle one stitch’s length away from the first puncture. Push the needle from the front to the back of the fabric.
-
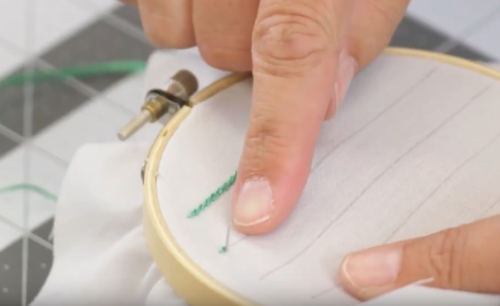
From the back of the fabric, position your needle in the center of your last stitch but on the main line of your sewing. In other words, the needle will be just barely beneath the center point of your last stitch. The needle should be touching but not piercing the thread of the last stitch. Push the needle from the back to the front of the fabric.
-
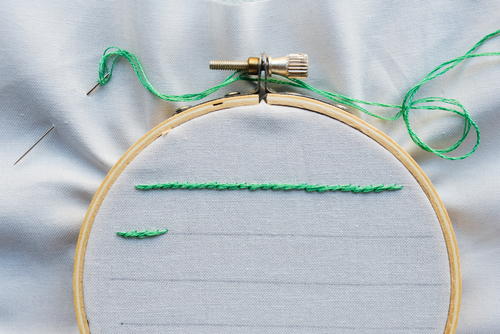
Repeat Steps 3-4 until you have completed the desired length of your stem stitch.
Free Stem Stitch Embroidery Patterns:
Now that you've gone through our stem stitch tutorial, put it to use by embroidering more. Looking for creative inspiration to kick-start your stem stitching skill? This gorgeous collection of free embroidery patterns will have you stitching yourself in loops and making projects your friends would be proud to receive! Try adding the stem stitch in these simple embroidery tutorials, and you'll fall in love with each project, from laundry bags to TV-inspired wall decor!

Doing your laundry won't be a chore when it's using this adorable hand-embroidered bag! Perfect for when you're traveling and need a place for your dirty clothes, this handy laundry bag will get you stoked for laundry day, every day.

A biscornu is a pincushion made from a quirky, folded shape, and there's a 100% you'll like it infinitely more than any standard pincushion! Embroider your own designs to make this already unique pattern even more personal.

Are you a Stranger Things fanatic? Now you can deck the halls (and your walls) with this festively inspired embroidery hoop pattern. Though we can't guarantee you'll be contacted from the Upside Down, you're sure to fall in love with this adorable design.

Whether you sew it for the bookworm in your life or use it for your own best reads, you'll love this personalized Embroidery Book Mark. Sew on your favorite quote or an image of your favorite character to make this hip pattern uniquely yours.

There's no need to fear a rainstorm when there's a rainbow as cute as this one waiting around the corner. Give your walls a brilliant, color-packed update with this impossibly sunny Rainbow and Clouds Embroidery Design.

Are you looking for handmade gift ideas for a sewist? They'll love this Sew Fun Needlebook, a handy-dandy tool for storing pins and needles. This sewing project is similar to a pincushion but flat with no points sticking out.
Your Recently Viewed Projects

Thanks for your comment. Don't forget to share!
KLC
Jul 27, 2018
Love the stem stitch but I have yet to try it myself. Now that I see how it's done, I am going to give it a try.
IreneMachine
Jul 24, 2018
As someone who loves to use embroidery to outline kooky designs, like characters and flowers, I am obsessed with the stem stitch! It keeps my perimeter line thick and bold without being dull or overly simplistic. I love how this guide puts this stitch into such easy-to-follow steps.
Report Inappropriate Comment
Are you sure you would like to report this comment? It will be flagged for our moderators to take action.
Thank you for taking the time to improve the content on our site.