
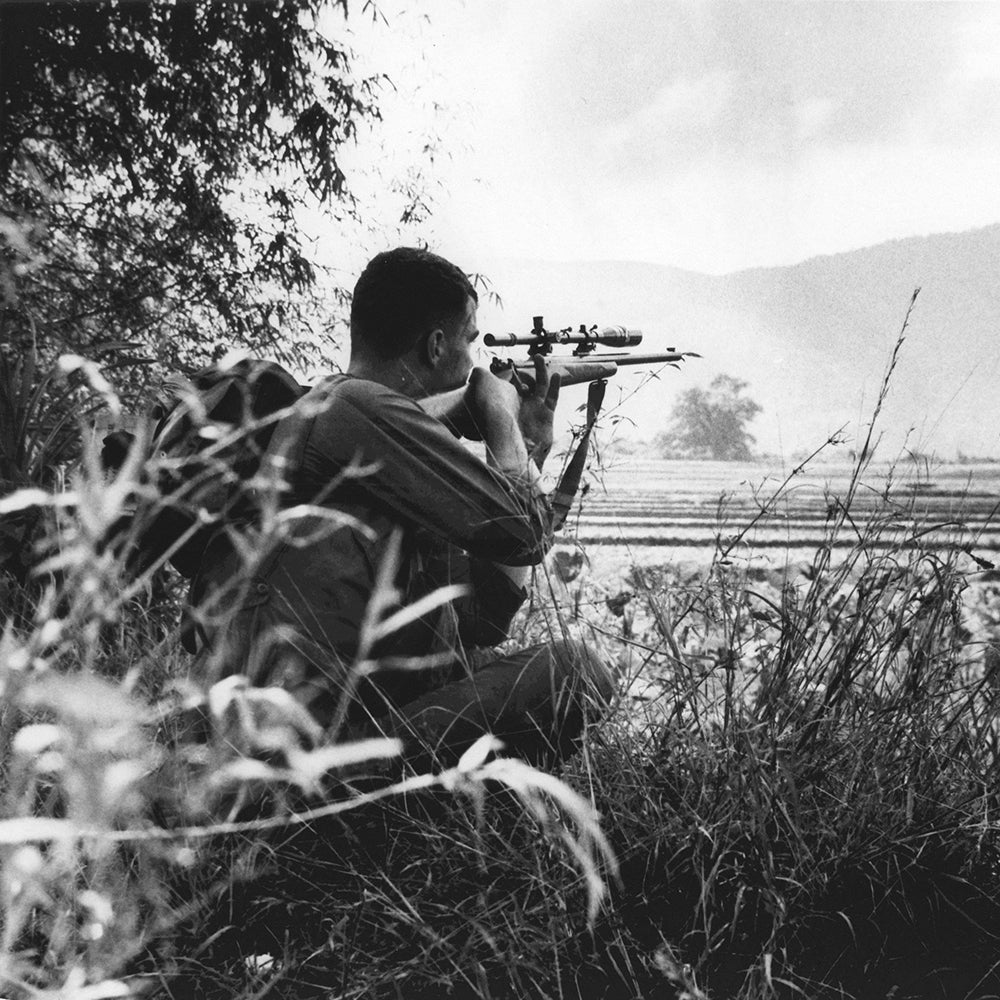
Being able to hit stuff with a rifle has always been considered an essential skill for any outdoors person. But the activity has an increasingly negative image, with all the discussion about gun control, and as interest in the outdoors shifts to purely recreational pursuits, firearms training is increasingly neglected. Let’s remove the stigmas, answer the embarrassing questions, and break down the barriers that stand between someone who’s never shot a rifle and competent, safe, useful shooting.
Why Learn to Shoot a Rifle?
A rifle will put food on your plate and give you a fun hobby you can share with others. And it’ll do that cheaper, more effectively, and be more versatile than any handgun, shotgun, or bow can ever hope to be. Millions of American families are, to this day, fed healthy, virtually free meat by simple, easy-to-shoot, durable rifles like the Ruger you see us using here.
I’ve written about this at length before, but many of us are guilty of replacing genuinely useful outdoors skills with the fantasy of “survival,” largely because most of us don’t actually spend that much time outdoors any more, even though we wish we did. Want to learn a skill or buy a gadget that really can allow you to thrive indefinitely in the wilderness? Buy a rifle and learn to shoot it. If shit every really does hit the fan, that’s what will genuinely enable you to live off the land. I’ve also written extensively about the ethics of hunting, which is something anyone who loves healthy food, who cares about their own own impact on the environment, and who wants to improve the way the animals they consume are treated should consider becoming involved with.
What Type of Rifle Do I Need?
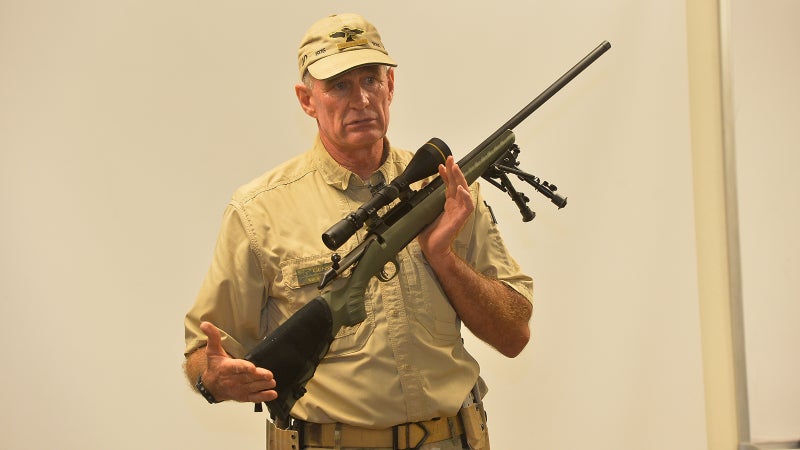
Traditionally, kids learn to shoot on .22s. That’s a small, affordable caliber with very low recoil and many cheap rifles available in it, both new and used. But, you can’t legally use one to take deer-sized animals in many states, their effectiveness as a self-defense round is very limited, and their range is short. If you’re just looking for a single-gun solution for learning, practicing, defense and hunting, then it’s hard to do better than Ruger’s new American Predator in 6.5 Creedmoor. MSRP for that rifle is $530, but they can commonly be found for around $100 cheaper than that. Made in the U.S., the Ruger is MOA accurate (we’ll get to that in a bit), its plastic stock is extremely durable yet light, and the 6.5 Creedmoor is versatile enough to tackle any game in North America—from prairie dogs to elk. For such a flat-shooting (we’ll get to that too) round that makes long-range accuracy easy, it’s also surprisingly affordable. We’ve been using high-quality Prime Ammo, but even that rings in at just $1.33 a round.
The thing with a rifle, at least if you want the ability to use it at ranges of over 100 yards (you do), is that you’ll also need a scope. There are cheaper options out there, and your mileage will vary with them, depending on how far you want to shoot, and in what light conditions, but we use Leupold glass. Again made in the U.S., they justify their premium with bright images, quality construction, and, for something that you can and will damage in the field, a lifetime guarantee; this is something you’ll only ever need to buy once. A 14 power VX3i complements the Ruger’s abilities well, but will set you back more than rifle itself, at $750. This rifle and scope is the one-and-done setup I just purchased for myself.
Combining Rifle and Scope
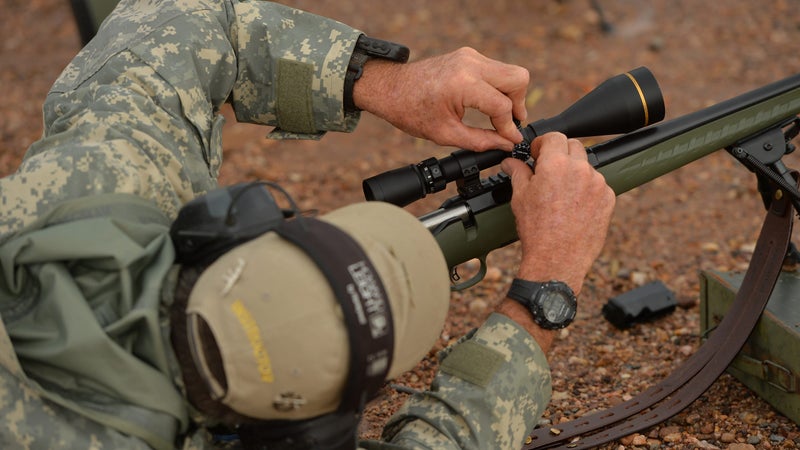
Unless you’re buying a rifle/scope package (Weatherby offers a great one that comes pre-sighted and is similarly priced), you’ll need to mount your scope to the rifle, adjust the scope so you can see through it, then spend a day on the range adjusting the scope so it points where you want your bullet to hit.
If you’re not buying a package, then you’ll need to have the scope boresighted. That’s a simple process in which a boresight is inserted in the barrel, and the markings on it are used to get the sight pointed in mostly the same direction as the barrel. Save yourself the money on buying one, and just have your local gun shop do this for you. It’s a five-minute job for them.
Once boresighted, you’ll need to get into shooting position with your gun, loosen the sight rings (the mounts that connect it to the rifle) and slide the scope body forward and rearward until you achieve a crisp, clear picture through it, without any black “donut” around the edges. This is how you determine the correct distance from eye to scope. You’ll also need to adjust the scope’s focus, which can be done by pointing it at something far away, and adjusting it until that picture becomes clear.
The real work comes on the range, where you’ll need to shoot multi-round groups at 100 yards, determine the center point of the group, then measure how far off you are from the center of the bullseye, and adjust the scope’s windage and elevation to suit. We’ll explain how to do this below.
Accuracy (the rounds are on-target), and precision (the group of shots is tight together). This target is marked in 1 MOA squares, making sight adjustments easy.
Shooting Basics
Let’s start with some definitions. Accuracy is how close you are to the target. Precision is how close your shots are to each other. Accuracy is the job of the rifle and scope. Precision is up to you: precision is what you need to learn to shoot well.
The key to precision is consistency. So, when using a rifle, you’re trying to consistently hold, manipulate, and fire it the same way.
First, you’ll need to determine which of your eyes is dominant. To do this, choose an object in the distance (10 or 20 yards is plenty), and with both eyes open, make a circle with your hands, aligning the object in the center of the circle. Now take turns closing one eye, then the other. In one, the object will noticeably shift to the side—the eye where the object stays in the center of your hand circle is your dominant eye. That’s the side you’ll be shooting on, and the eye you should use to look through the scope. You can look through the scope with the other eye closed, but it’s generally considered better practice to leave both eyes open. Doing so allows you to maintain good situational awareness, and maximizes vision; it’s impossible to close one eye without squinting the other a bit.
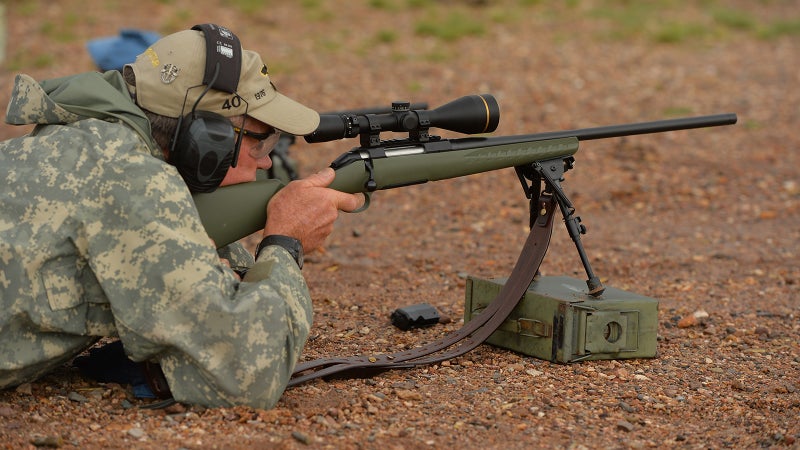
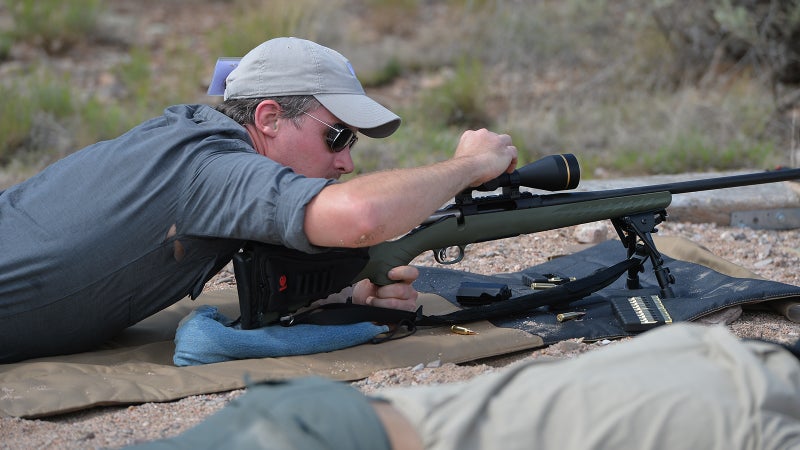
Many ranges provide (and require you to use) shooting tables. Those are easy and comfortable, but don’t replicate real world conditions. Because the whole point of practicing is to achieve real world effectiveness, it’s better to practice shooting from the same position you’ll use in the field. And the most consistent way to shoot in the field is to lay prone behind the rifle. To maximize accuracy in this position you’ll need a support for the front of the rifle’s stock. Using your off hand to do this introduces variability, and dragging a sandbag around the woods would be dumb, so a folding bipod is generally considered best. They mount to the front sling point.
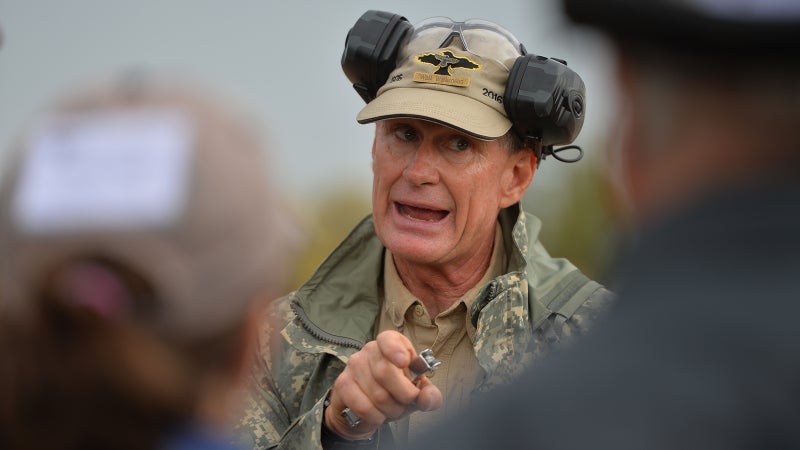
That’s the method taught by the legendary Gunsite Academy, where I recently spent a week refreshing my long range rifle, and pistol shooting skills. There, former special forces sniper Walt Wilkinson teaches students to align their spine with the gun’s barrel, and lay flat with feet spread at shoulder width. This directs the force of the gun’s recoil through your body’s structure in the most effective way for it to be absorbed, minimizing its effect and maximizing your ability to hold the gun steadily.
Once there, you pull the gun’s butt into your shoulder pocket, rest your cheek on the comb, and grip the rifle with the hand on your dominant side. You don’t want the other hand or arm contacting the rifle, so you can just fold that out of the way, and lean on it. There’s no need to grip the gun tightly, just wrap your fingers around it, keep your trigger finger pointed forward, on the trigger guard, until you’re ready to shoot, and point your thumb forward as well.
Manipulating the trigger is best done slowly, and again with consistency. Any unnecessary movement, jerking, or side-to-side force can throw off your precision. When you’re ready to shoot, first take up the trigger’s slack, then slowly squeeze it backwards until the rifle fires. Keep the trigger there for a second, before you return it to its forward position, move your finger back outside the guard, and cycle the bolt. Keep your eye on target, through the scope, as you do that.
Breathing is the final way to maintain consistency and precision. You should be breathing calmly, rather than holding your breath. But, the up and down of your lungs inflating is enough to move the crosshairs off target. You’ll need to find the point in your breathing cycle at which those remain stable; Walt taught us to fire in the gap between exhale and inhale.
There’s plenty more to shooting form you’ll have to learn as you practice, but this is enough to get you started and, if you’re able to practice all this on the range, be precise enough to consistently hit that 1,000 yard target.
Gun Safety
It just so happens that Gunsite was founded by Jeff Cooper, who literally wrote the book on gun safety. He created four rules that, if you adhere to them, are totally capable of preventing gun accidents:
- All guns are always loaded.
- Never let the muzzle cover anything you are not willing to destroy.
- Keep your finger off the trigger until you are ready to shoot.
- Be sure of your target, and what is behind it.
Learning what those rules mean, and how to apply them to the real world is best done in a class. Enquire at your local range.
Hitting Stuff
Once you’re shooting consistently, with precision, it’s time to work with your scope to achieve accuracy.
The adjustment of a scope is measured in minute of angle, an angular measurement that expands forward of the rifle at 1/60th of a degree. At 100 yards, this corresponds to one inch. (Well, it’s actually 1.064 inches, but I’m trying to keep this guide as simple, and easy to follow as possible.)
A rifle that is “MOA accurate,” like this Ruger, is able to reliably place rounds into a one-inch circle at 100 yards. A “sub-MOA” rifle, like the slightly more expensive Weatherby Vanguard, can do it in half that diameter, or less. Again, accuracy is the rifle/scope’s job, precision is yours.
To sight in the scope, you’ll need to use a 100-yard range, shoot groups of bullets (Gunsite teaches 10 round groups, some people simply fire their magazine’s capacity, four rounds on this Ruger), determine the center point of that shot cluster, then move your scope’s elevation up or down, and its windage left or right by however many MOAs (or inches, at 100 yards) that you’re off. Do that until your groups are clustered around the center of the target. Most scopes will have MOA markings on their adjustment knobs, with hash marks for 1/4 MOAs between them. Again, 1/4 inch at 100 yards will correspond to 1/4 MOA on your knobs. You add elevation on your scope to move the area the bullets are hitting on the target upwards; you adjust the windage left to move that area left. Easy.
Every scope’s adjustments work a little differently. Once you’re on target at 100 yards, consult its instructions to determine how to set your adjustment knobs to zero at that point.
Now you’re ready to work up to shooting at distance, which is essentially just a process of creating data. You progressively work up through distances—200 yards, 250, 300, 350, and so on—noting the elevation adjustments necessary to reach each. Write these numbers down, you’ll need to reference them to adjust for those distances in the future. On the range, those distances will be marked. In the field, you'll need to guess them, or use a laser range finder to determine them.
Gravity acts consistently on a bullet, regardless of its speed. So, the time it takes for the bullet to fall from muzzle level to the ground at rest, is the same as it takes for the bullet to fall from muzzle level to the ground as it travels forward. This comes into play as you shoot out to further and further distances; you’ll need to elevate the angle of the barrel upwards to allow the bullet to travel far. Because the bullet’s path then looks like an arc, you could find yourself moving the scope’s elevation both up and down as you shoot further and further.
This arc can be difficult to compensate for, and it’s where a faster, flatter shooting bullet like the 6.5 Creedmoor can benefit you. With a round like it, you’ll need to make smaller, and fewer adjustments, and it can compensate somewhat for range estimation errors in the field.
The last thing to consider when shooting at distance is the effect of wind on the bullet. While wind will generally only travel in one direction when shooting across a 100 yard distance, it could be affecting the bullet from multiple directions, at varying velocities, as it travels out to 1,000 yards. Estimating this effect can only be achieved through experience, and that’s where having a spotter assist your shooting can come into play. Through the larger viewing angle of a spotting scope, they’ll be able to observe tell tales—flags, foliage, dust, etc—and follow the flight of your bullet, then help you walk it on target. Scopes with windage hashmarks in the crosshairs help you adjust for wind in the field. They’re marked in MOAs, helping you hold left or right on the target to compensate for the effects of wind. You keep the elevation the same, and simply move the point of your aim left or right. A spotter can observe the wind and your shot, and tell you by how much to compensate. You can do the same yourself, but with only a rifle scope to look through, and knocked around by the recoil, it’ll take you longer to assemble the necessary information, and since wind is dynamic, you may not be able to adjust for it in time for your next shot. This is why military snipers work in teams, with one person firing, and the other calling in adjustments.
The 1,000-Yard Shot
Why 1,000? Well, it’s an awful long ways away, and it’s a round number. This particular rifle has been shown to shoot accurately out to a mile (or 1,800 yards), but 1,000 is pretty much the limit of a 14x scope. And the more a scope magnifies, the narrower of an area it observes. So, for real world conditions, 1,000 is an effective maximum range. And make no mistake, that’s on the range.
Chatting with legendary special forces sniper John Mullins at Gunsite, he explained that 600 yards or so was the furthest he felt confident taking a shot on an animal, in the field. “Beyond that, you’re just going to wound them,” he told me.
Still, the practice that goes into achieving that 1,000-yard range shot, and the skill it demonstrates, should be the goal for any rifle user. If you can reliably hit a 12-inch target at that distance, you can consider yourself competent.
To make it, you need to combine good form with a well sighted-in scope, an accurate rifle, and the data necessary to adjust for the range. Actually, that’s the formula you need to make any rifle shot, regardless of whether it’s delivering the satisfaction of a sport well practiced, or bringing home dinner.