Learn to Switch to Universal Analytics from Google Analytics
Last Updated: September 5, 2023
I get a lot of emails from webmasters who switch to Universal Analytics from Google Analytics on Google’s recommendation without understanding the implications of such migration and without evaluating the pros and cons of such a switch. Then they get stuck with tracking issues.
This article will help you assess your requirements and resources before you migrate from Google Analytics to Universal Analytics.
If you are not sure of the difference between Google Analytics and Universal Analytics, then read this article first: Difference between Google Analytics and Universal Analytics
Migrating your website from Google Analytics to Universal Analytics is a 6 step process as outlined below:
Step-1: Understand the implications of migration to Universal Analytics.
Step-2: Determine your tracking requirements.
Step-3: Do a risk assessment.
Step-4: Create a detailed project scope document.
Step-5: Set up Universal Analytics in parallel with GA and test it.
Step-6: Upgrade to Universal Analytics.
Step-1: Understand the implications of migration to Universal Analytics
You need to understand and educate your client/boss that the upgrade to Universal Analytics is not as easy as replacing the ‘Google Analytics Tracking Code’ with ‘Universal Analytics Tracking Code’.
You need to do a lot more to make this upgrade successful.
If you have implemented any type of additional tracking (tracking other than Google Analytics tracking code) on your website then you need to change the syntax of all such tracking to make your migration successful.
Following are the examples of additional tracking:
#1 Ecommerce Tracking
#2 Event Tracking
#3 Cross-domain tracking
#4 Any tracking based on virtual pageviews
#5 Video Tracking
#6 Phone Call tracking
#7 Any customized tracking based on custom variables.
#8 Any third party tracking that relies on Classic Google Analytics Cookies
If you upgrade to Universal Analytics without making changes to the syntax of all of the additional tracking, you are currently using on your website, then any/all of your additional tracking methods can stop working immediately.
Though Universal Analytics provides almost all the features of Classic Google Analytics, it uses a different syntax to collect data like: ecommerce data, virtual pageview data, event data, etc.
For example, the syntax of ecommerce tracking code in Universal Analytics is quite different from the syntax of ecommerce tracking code in Google Analytics. So if you upgrade to Universal Analytics without changing the syntax of your ecommerce tracking code, then your ecommerce tracking may stop working in Universal Analytics.
The same is the case with cross-domain tracking, event tracking, and other additional tracking methods.
Google does not automatically change the syntax of all the additional tracking methods (like ecommerce tracking) you are currently using, just because you started using the Universal Analytics Tracking Code on your website. You need to make all such changes manually.
Once you have migrated from Google Analytics to Universal Analytics then there is no turning back.
You cannot switch back to the classic Google Analytics if something goes wrong. So you must assess your requirements and resources, and understand the pros and cons before you decide to upgrade.
If you couldn’t resolve your Universal Analytics tracking issues after the migration, you may end up with little or no tracking data in your Universal Analytics reports, for days or even weeks. That is why I have written this upgrade guide to making your migration easy and successful.
Step-2: Determine your tracking requirements
Determine all of the information you want to collect. Document all of the data that is currently being tracked and why, how, and where it is being tracked. You can do that through ‘tag auditing‘. In tag auditing, you identify and document:
- all of the tags currently being deployed on the website
- why a tag has been set up,
- when (on which event) the tag is collecting data.
- where (on which page), the tag is collecting data.
The ‘tag auditing’ can later help you in diagnosing tracking issues and identifying any gaps in data accuracy after the migration to Universal Analytics is complete.
Step-3: Do a risk assessment
Upgrading to Universal Analytics is not a small task esp. if you are managing a very big website. Please don’t take this task lightly. It is not as simple as Google claims in its documentation and videos. Bigger is your website, bigger is the risk involved that something may go wrong during migration.
Consider the following factors before you start the migration process:
1. Website size and complexity
If your website has got tens of thousands of web pages, dozens of language-specific sub-domains, mobile apps, different desktop and mobile versions, and/or is managed by teams spread across the globe then the migration may take several months.
2. The complexity of the tracking
If your website is using hundreds of different configuration settings based on the classic GA (from cross-domain tracking, event tracking, video tracking, mobile apps tracking to referral site exclusions) and half a dozen other analytics solutions (Adobe Analytics, Webtrends, Kissmetrics, Piwik, etc) then migration to Universal Analytics is going to be equally complex and challenging.
3. Any type of tracking that relies on Classic Google Analytics cookies for customization and reporting.
Classic Google Analytics can use up to 7 cookies whereas Universal Analytics uses only 2. That means once you migrate to Universal Analytics, you may lose support from those 7 classic Google Analytics cookies.
4. Any third party tracking solution (esp. shopping cart) which is designed for classic Google Analytics.
This is a common problem that is often overlooked by webmasters. They upgrade to Universal Analytics on Google’s recommendation and then their ecommerce tracking stops working because their shopping cart is designed for classic Google Analytics and it does not support Universal Analytics yet.
5. API
If you are using Google Analytics API then you need to remember that Universal Analytics uses an updated API. So at least some changes will be required.
Step-4: Create a detailed project scope document
If you are like me who needs to convince at least 10 people before being able to make any code change on a website or if you are managing a very large website then this step is for you.
A project scope document is an important element of project management which may needs approval from several people/departments, before what you plan to do (in this case migration) will be carried out.
A project scope document is made up of the following components:
1. Project Justification
# what problem you are trying to solve?
# why it is important and what is the upside potential of implementing your recommendation? If the problem that you are trying to solve will not result in a big win then it may not be worth fixing in the first place.
For example, justification can be something like fulfilling specialised tracking requirements by upgrading to Universal Analytics. You can then outline the benefits of Universal Analytics to make your case.
2. Project Deliverables
# What results will your project (in our case the project is migration to Universal Analytics) produce?
For example, the following can be used as project deliverables:
- tracking visitors across multiple devices and platforms
- creating custom dimensions and custom metrics to import specialised data etc
3. Project Milestones
# a milestone is a significant project event. List all such milestones along with timelines if possible.
4. Project Exclusions
# What the project will not produce?
For example, your project may not produce any report or execute any tracking requirement which is beyond the scope of the project as outlined in ‘project deliverables’.
5. Project Assumptions
# What are the assumptions under which you will work?
For example, you could be working under the assumption that all of your queries will be resolved in a timely manner or you could be working under the assumption that you will get required access, documents, permissions or any support for your work without prolonged delays.
# You need to outline all such assumptions in order to manage expectations with your client/boss and avoid confusion and disagreements.
6. Project Constraints
# What are the constraints under which you will work? These constraints can be something like: limited development support, long approval process, CMS issues, time zone issues, etc. You need to outline all such constraints.
7. Project Plan
# What do you plan to do in this project?
# How this process will work?
# What will be the key milestones and estimated timeframe for each milestone?
# Who will be responsible for carrying out this work and how exactly it will be carried out?
# You need to include the ‘who’, ‘what’, ‘when’, ‘where’ and ‘how’ of your project in this plan. Needless to say, your project plan is going to be very detailed.
8. Project requirements
# Outline all the resources you will need from your client/boss/departments to carry out your project.
# These resources can be like: IT involvement, certain permissions, certain access, documents, etc.
9. Project Cost
This is a project cost estimate. It is generally quoted by out-house consultants/agencies.
10. Approval
Depending upon your organization structure, once you have created your project scope document, it usually first need approval from your reporting person. Then the document is sent to the IT department so that they can understand your requirements well in advance, and ask for any clarification (if required) before starting the migration process.
The project scope document could also be sent to the purchasing department for final approval, as any development work could carry a certain cost.
In big companies (companies with hundreds and thousands of employees), this process is quite common. But even if you are not working for a big client, you should still consider creating a project scope document to manage clients’ expectations and to avoid any confusion, disagreement, or conflict.
5. Set up Universal Analytics in parallel with classic Google Analytics and test it.
Google tells everyone to migrate to Universal Analytics straightaway without first testing the setup. That is a lame recommendation and is quite risky.
I see a lot of webmasters who blindly switch to Universal Analytics on Google’s recommendation and then their ecommerce tracking stops working. When they can’t figure out how to fix the issue they try helplessly to switch back to classic Google Analytics, only to find it later that there is no turning back and now they are stuck with dead tracking.
You need to run Universal Analytics in parallel with classic Google Analytics for at least 1 to 2 weeks and test all of your configuration settings well in advance. Make sure that all types of additional tracking (from ecommerce tracking, event tracking to cross-domain tracking) are working equally well in Universal Analytics before you upgrade.
That means you would need to create one new Google Analytics property that collects analytics data through Universal Analytics.
Note: Your traffic data (like users, sessions, etc) from classic Google Analytics and Universal Analytics will never exactly match number by number. This is because data is collected and processed slightly differently in Universal Analytics.
So what you need to look for is big data discrepancies between classic Google Analytics and Universal Analytics data. For example, if classic Google Analytics reports 200 users on your website on a particular day but Universal Analytics reports only 10 users then you need to check your Universal Analytics implementation for any tracking issues.
In order to run Universal Analytics in parallel with classic Google Analytics follow the steps below:
#1 Go to the Admin section of your Classic Google Analytics account.
#2 Create a new property for your website.
#3 Enter your website name and URL
#4 Get the Universal Analytics tracking code
#5 Copy paste the Universal Analytics tracking code just above the classic Google Analytics tracking code on every web page of your website.
#6 Duplicate all of your existing website tracking one by one according to the syntax / JavaScript library used by Universal Analytics.
For example, if ecommerce tracking is installed on your website and it uses the classic Google Analytics ecommerce tracking code. Then run another ecommerce tracking in parallel which uses the Universal Analytics ecommerce tracking code.
Here you will need to use two trackers in order to set up and run different versions of the same type of tracking.
To learn more about, what the trackers are and how to use them, read this article: Using multiple Google Analytics tracking codes on web pages
Similarly, you may need to set up and maintain two separate versions for event tracking, cross-domain tracking, etc. One version for the classic Google Analytics and one version for the Universal Analytics.
#7. Check the real-time reports to make sure that tracking is working in Universal Analytics.
Note(1): You can also set up Universal Analytics straightway without first running Universal Analytics in parallel with classic Google Analytics. But then you risk losing analytics data during migration.
Note (2): You can run Universal Analytics in parallel with classic Google Analytics by using Google Tag Manager. However, you will still need to use two trackers and may need to maintain two different versions of the same type of tracking for the time being.
6. Upgrade to Universal Analytics
Once you are 100% confident that all tracking is working equally well in Universal Analytics property then remove all classic Google Analytics specific tracking codes (including Classic Google Analytics Tracking Code) from your website.
However, keep all the Universal Analytics specific tracking codes intact. In this way, you won’t lose any data during the upgrade. Remember once you upgrade to Universal Analytics, you can’t downgrade to classic Google Analytics. So think twice before you decide to make a switch.
Related Article: Google Analytics Account Structure and Governance
My best selling books on Digital Analytics and Conversion Optimization
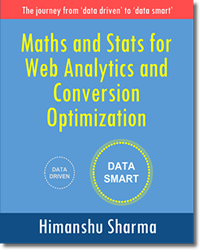
Maths and Stats for Web Analytics and Conversion Optimization
This expert guide will teach you how to leverage the knowledge of maths and statistics in order to accurately interpret data and take actions, which can quickly improve the bottom-line of your online business.
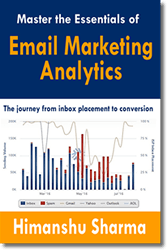
Master the Essentials of Email Marketing Analytics
This book focuses solely on the ‘analytics’ that power your email marketing optimization program and will help you dramatically reduce your cost per acquisition and increase marketing ROI by tracking the performance of the various KPIs and metrics used for email marketing.
Attribution Modelling in Google Analytics and BeyondSECOND EDITION OUT NOW!
Attribution modelling is the process of determining the most effective marketing channels for investment. This book has been written to help you implement attribution modelling. It will teach you how to leverage the knowledge of attribution modelling in order to allocate marketing budget and understand buying behaviour.
Attribution Modelling in Google Ads and Facebook
This book has been written to help you implement attribution modelling in Google Ads (Google AdWords) and Facebook. It will teach you, how to leverage the knowledge of attribution modelling in order to understand the customer purchasing journey and determine the most effective marketing channels for investment.

