- What We Are Going to Make?
- Preparing Our Plugin Files and Directory Setup
- Including Essential JS and CSS Files
- Creating Read Me Later Link Underneath Every Post
- Defining the Ajax URL
- Adding JavaScript and Your First Ajax Call
- Ajax Action Hook
- Creating a Widget for Read Me Later Posts
- Making Your Ajax Calls Secure
- Conclusion
- Frequently Asked Questions (FAQs) about Using AJAX in WordPress
Ajax has rapidly become a popular web technology, you’ll find it used on most websites. The key feature of Ajax is it can manage database operations without reloading the web page. This means, you can fetch data from the database and display it on the front-end without needing to refresh the page.
It’s a fast and smooth way for displaying content, and as a result Ajax is now used in many various ways on a website, such as submitting blog comments, liking posts and uploading files. You can even make your website completely Ajaxified, so that each page of your site will load asynchronously.
Given the popularity of Ajax, most of the leading CMS platforms use it within their architecture. WordPress is no different. Actually WordPress employs Ajax in a very robust and easy way, and today I will show you just how you can use Ajax in WordPress with a real world example. Before we get started, I’ve assumed you have some knowledge of jQuery Ajax methods and WordPress hooks, as we will need both!
If you’re looking for some basic WordPress development tutorials, check out WordPress Plugin Development for Beginners.
What We Are Going to Make?
You may already know that using Ajax in WordPress is slightly different than using it outside of WordPress, you’ll need to consider two things:
- The URL of the WordPress
admin-ajax.phpfile, where the data to be sent for processing. - The Ajax action hook called
wp_ajax_. You need to hook a custom function into it which will be executed during the Ajax call.
Let’s create a plugin to understand how this works. Let’s say we want to develop a plugin that will allow users to save their favorite blog posts in a certain area so that they can read them later. This feature is useful for magazine style blogs which provide lots of content daily. It will allow logged in users to save interesting posts in a members only area, so that they can come back and read them later.
So our ‘Read Me Later’ plugin will do several things:
- First, we will make a link at the bottom of every blog post content.
- When a user clicks to the link, the link’s post’s ID will save in the usermeta database table without page reload.
- Finally, we will create a widget to show blog posts based on the posts IDs saved in the database.
Got it? Let’s do some legwork now.
Preparing Our Plugin Files and Directory Setup
First, we’ll create a folder called read-me-later inside the plugin directory of our main WordPress installation. This folder will contain all of our files and sub-directories required for our plugin. Now inside of the read-me-later folder we will need to create another two folders called js and css.
Then we need to create four files, which I have listed below with the proper file extensions:
read-me-later.phpwidget.phpread-me-later.jsread-me-later. css
The first two files will directly go in the main plugin folder. The js and css files will be put in the js and the css folders, respectively.
Now we’ll populate the read-me-later.php file. Including the plugin header:
/**
 * Plugin Name: Read Me Later
 * Plugin URI: https://github.com/iamsayed/read-me-later
 * Description: This plugin allow you to add blog posts in read me later lists using Ajax
 * Version: 1.0.0
 * Author: Sayed Rahman
 * Author URI: https://github.com/iamsayed/
 * License: GPL3
 */
This code is important as it’s used to identify that’s it’s a plugin to WordPress. After the above code, we’ll create our main plugin class called ReadMeLater:
class ReadMeLater {}
Including Essential JS and CSS Files
Next, we need to register and enqueue our JavaScript and CSS files with proper WordPress hooks. We’ll create several methods to perform this step. Copy this code into the ReadMeLater class:
/*
 * Action hooks
 */
public function run() {
    // Enqueue plugin styles and scripts
    add_action( ‘plugins_loaded’, array( $this, 'enqueue_rml_scripts' ) );
    add_action( ‘plugins_loaded’, array( $this, 'enqueue_rml_styles' ) );
}
/**
 * Register plugin styles and scripts
 */
public function register_rml_scripts() {
    wp_register_script( 'rml-script', plugins_url( 'js/read-me-later.js', __FILE__ ), array('jquery'), null, true );
    wp_register_style( 'rml-style', plugins_url( 'css/read-me-later.css' ) );
}
/**
 * Enqueues plugin-specific scripts.
 */
public function enqueue_rml_scripts() {
    wp_enqueue_script( 'rml-script' );
}
/**
 * Enqueues plugin-specific styles.
 */
public function enqueue_rml_styles() {
    wp_enqueue_style( 'rml-style' );
}
The code is fairly self explanatory. Here, we’ve created a public method called register_rml_scripts(). Inside this method, we have registered our read-me-later.js and read-me-later.css files using proper WordPress functions.
The next two methods enqueue_rml_scripts() and enqueue_rml_styles() are used to enqueue our JavaScript and stylesheet. We’ve also created a run method, which will contain all of our action (and filter) hooks.
If you’re new to WordPress, you can check out Enqueuing Scripts and Styles in WordPress by Younes Rafie, or search the WordPress codex to learn how to register and enqueue JavaScript and CSS files properly.
Creating Read Me Later Link Underneath Every Post
Now we need to create a Read Me Later link under each blog post. By clicking the link, the user can select that post to be saved in the ‘Read Me Later’ list. After they click, the link will disappear from the post and the post ID will be saved in the database. There are two considerations when we create the link:
- Only logged in user will see the link.
- The link will contain the ‘related’ post ID for later use.
To achieve this, add the following function to the ReadMeLater class:
/**
 * Adds a read me later button at the bottom of each post excerpt that allows logged in users to save those posts in their read me later list.
 *
 * @param string $content
 * @returns string
 */
public function rml_button( $content ) {
    // Show read me later link only when the user is logged in
    if( is_user_logged_in() && get_post_type() == post ) {
        $html .= '<a href="#" class="rml_bttn" data-id="' . get_the_id() . '">Read Me Later</a>';
        $content .= $html;
    }
    return $content;
}
Here, we checked both if the user is logged in and if the post type is a post. After checking this we create the link. Notice that we use the HTML5 data attribute to contain the blog post’s ID which can be retrieved with the function get_the_id(). Since the link will be placed inside the post loop, this is the exact function we need.
To place the link under the each blog post, add the code bellow inside the run method:
// Setup filter hook to show Read Me Later link
add_filter( 'the_excerpt', array( $this, 'rml_button' ) );
add_filter( 'the_content', array( $this, 'rml_button' ) );
This will filter the post excerpt and place the link inside the loop. Now when you’re logging in to your WordPress website and you browse your home page (or the page showing your posts), you’ll see the ‘Read Me Later’ link at the bottom of every post.
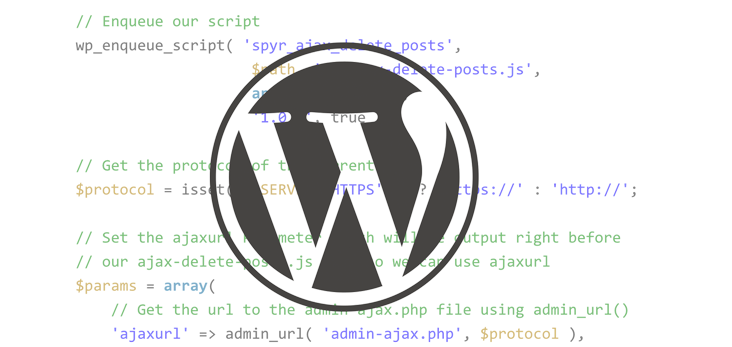
Defining the Ajax URL
When you’re going to make an Ajax call you’ll need to send the request to the admin-ajax.php file, which is a part of WordPress core. This file is responsible for handling and processing all of your Ajax requests within the WordPress context. Do NOT use the direct URL of the file path. Rather, use admin_url('admin-ajax.php') which will output the correct URL. The only problem in doing this is that you can’t put any PHP functions inside JavaScript. So we need a little trick, see the code below:
wp_localize_script( 'rml-script', 'readmelater_ajax', array( 'ajax_url' => admin_url('admin-ajax.php')) );
Here, we use a function called wp_localize_script(). It takes three arguments:
rml-script, the registration handler of theread-me-later.jsscript.- A string which will act like a JavaScript object.
- An array which is the actual data we want to pass from our JavaScript.
So, if we write rml_obj.ajax_url, it will output the value of admin_url('admin-ajax.php'), in other words, the URL of the admin-ajax.php file. We’ll use it in the JavaScript part.
Don’t forget to place the above code inside our enqueue_rml_scripts() method that we created earlier.
Adding JavaScript and Your First Ajax Call
Now it’s time to create our Ajax call. Open the read-me-later.js file from our js folder. Add the below code:
jQuery(document).ready( function(){
    jQuery('#content').on('click', 'a.rml_bttn', function(e) {
        e.preventDefault();
        var rml_post_id = jQuery(this).data( 'id' );
        jQuery.ajax({
            url : readmelater_ajax.ajax_url,
            type : 'post',
            data : {
                action : 'read_me_later',
                post_id : rml_post_id
            },
            success : function( response ) {
                jQuery('.rml_contents').html(response);
            }
        });
        jQuery(this).hide();
    });
});
In the above code we’ve created a function that will be called when the user clicks the ‘Read Me Later’ link. Inside this function we grab the post ID using data method and store it into the ‘rml_post_id’ variable. After that, we made our Ajax call using jQuery ‘$.ajax()’ method. This method takes several properties as we mentioned earlier in this article. Let me explain them one by one.
url contains the URL of the admin-ajax.php file. Remember how we defined rml_obj.ajax_url in the previous step? That’s how we use the URL here. Our Ajax request will be sent there for processing.
type indicates whether the request will send using HTTP ‘$_GET[]’ or ‘$_POST[]’ method. We use ‘$_POST[]’ method here, as we set it as post.
data contains the data we want to send with the Ajax call. Here, our data is an object as key-value pairs. post_id contains the post ID, and action contains read_me_later which is the suffix of wp_ajax_ hook. We will define the Ajax action hook and its callback function in the next step.
The last one is success which is contains an anonymous function. It will fire when the Ajax call has been finished.
Make sure your read me later link is wrapped with a div tag with a #content id attribute otherwise the jQuery won’t work.
Now we need to remove the Read Me Later link right after the user clicks on it, so that the user can’t save a post twice. To achieve this, we added the following code after the jQuery.ajax() method:
jQuery(this).hide();
This will remove the ‘Read Me Later’ link when the user clicks on it.
Ajax Action Hook
Now for the important part.
So far we’ve created the Read Me Later link and connected it with Ajax. But the link doesn’t do anything yet, because we haven’t written any server side code to process the Ajax request. When the user clicks the link we need to save that post ID in the database and then display posts in the frontend based on the database information.
To accomplish this kind of server side processing, WordPress gives us two action hooks, wp_ajax_my_action and wp_ajax_nopriv_my_action. The first one will work only for logged in users, and the second will be useful when users aren’t logged in. Because our example plugin is designed for logged in users only, we will use the first one. Note that my_action is the suffix of the wp_ajax_ hook and you can name it as you wish.
Add the following snippet inside the run() method:
// Setup Ajax action hook
add_action( 'wp_ajax_read_me_later', array( $this, 'read_me_later' ) );
The only thing you need to be careful of with the above code is to make sure that your Ajax hook suffix matches the value of the action property of your jQuery.ajax() method (seen in the previous step). You may notice that we give the same name to the callback function so that we can remember it easily. Now we’ll define our callback function:
public function read_me_later() {
    $rml_post_id = $_POST['post_id'];
    $echo = array();
    if(get_user_meta( wp_get_current_user()->ID, 'rml_post_ids', true ) !== null ) {
        $value = get_user_meta( wp_get_current_user()->ID, 'rml_post_ids', true );
    }

    if( $value ) {
        $echo = $value;
        array_push( $echo, $rml_post_id );
    }
    else {
        $echo = array( $rml_post_id );
    }

    update_user_meta( wp_get_current_user()->ID, 'rml_post_ids', $echo );
    $ids = get_user_meta( wp_get_current_user()->ID, 'rml_post_ids', true );
}
The above code should be placed inside our main plugin class. Let me explain what I did here.
First, we stored the post ID in the $rml_post_id variable. Then we declared an empty array called $echo.
After that, we check that there’s a field with the key rml_post_ids in the usermeta table in our database. If there is a row, we grab the meta value using get_user_meta() WordPress function and store it in $value.
Again, we check whether the $value exists or not. If true, we store it in the previously declared $echo array. Then we push the value of $rml_post_id inside the array using the array_push() function. If there is no $value, then we simply store $rml_post_id in $echo.
update_user_meta() is responsible for updating (or creating, if the field has not yet been created) meta field with the data stored in $echo.
Finally, we store the recently populated meta field using get_user_meta() in $ids as an array.
Now we’ve got the user chosen post IDs, we need to display those posts. Add the following code:
// Query read me later posts
$args = array(
    'post_type' => 'post',
    'orderby' => 'DESC',
    'posts_per_page' => -1,
    'numberposts' => -1,
    'post__in' => $ids
);

$rmlposts = get_posts( $args );
if( $ids ) :
    global $post;
    foreach ( $rmlposts as $post ) :
        setup_postdata( $post );
        $img = wp_get_attachment_image_src( get_post_thumbnail_id() );
    ?>
        <div class="rml_posts">
            <div class="rml_post_content">
                <h5><a href="<?php echo get_the_permalink(); ?>"><?php the_title(); ?></a></h5>
                <p><?php the_excerpt(); ?></p>
            </div>
            <img src="<?php echo $img[0]; ?>" alt="<?php echo get_the_title(); ?>" class="rml_img">
        </div>
    <?php
    endforeach;
    wp_reset_postdata();
endif;

// Always die in functions echoing Ajax content
die();
Here, we use the WordPress get_posts() function to get all the posts based on the user’s choice. The only required parameter here is post__in which contains the array of post IDs. Lastly, we use die() so that our Ajax content will echo properly.
Here is the full code of the read_me_later() function:
/**
 * Hook into wp_ajax_ to save post ids, then display those posts using get_posts() function
 */
public function read_me_later() {

    $rml_post_id = $_POST['post_id'];
    $echo = array();

    if( get_user_meta( wp_get_current_user()->ID, 'rml_post_ids', true ) !== null ) {
        $value = get_user_meta( wp_get_current_user()->ID, 'rml_post_ids', true );
    }

    if( $value ) {
        $echo = $value;
        array_push( $echo, $rml_post_id );
    }
    else {
        $echo = array( $rml_post_id );
    }

    update_user_meta( wp_get_current_user()->ID, 'rml_post_ids', $echo );
    $ids = get_user_meta( wp_get_current_user()->ID, 'rml_post_ids', true );

    // Query read me later posts
    $args = array(
        'post_type' => 'post',
        'orderby' => 'DESC',
        'posts_per_page' => -1,
        'numberposts' => -1,
        'post__in' => $ids
    );

    $rmlposts = get_posts( $args );
    if( $ids ) :
        global $post;
        foreach ( $rmlposts as $post ) :
            setup_postdata( $post );
            $img = wp_get_attachment_image_src( get_post_thumbnail_id() );
        ?>
            <div class="rml_posts">
                <div class="rml_post_content">
                    <h5><a href="<?php echo get_the_permalink(); ?>"><?php the_title(); ?></a></h5>
                    <p><?php the_excerpt(); ?></p>
                </div>
                <img src="<?php echo $img[0]; ?>" alt="<?php echo get_the_title(); ?>" class="rml_img">
            </div>
        <?php
        endforeach;
        wp_reset_postdata();
    endif;

    // Always die in functions echoing Ajax content
    die();

}
Creating a Widget for Read Me Later Posts
Now we need a widget to display posts saved by the user. We’ll make a very basic widget for the sake of simplicity. I’m not going to go into full detail here, we just need to extend WordPress’ WP_Widget class to create a custom widget. Let’s do it, open widget.php file and create a child class called RML_Widget that extends WP_Widget class.
class RML_Widget extends WP_Widget {}
Create the __construct() magic method inside the class to initialize our widget:
function __construct() {
    parent::__construct(
       'rml_widget', // Base ID
        __( 'Read Me Later', 'text_domain' ), // Name
        array( 'classname' => 'rml_widgt', 'description' => __( 'Read Me Later widget for displaying saved posts', 'text_domain' ), ) // Args
    );
}
Here we’ve set a name and description to the widget which will display in the dashboard widget section.
A backend widget form will be created by the form() method, like this:
public function form( $instance ) {
    if ( isset( $instance['title'] ) ) {
        $title = $instance['title'];
    } else {
        $title = __( 'Read Me Later Posts', 'text_domain' );
    }
    ?>
    <p>
        <label for="<?php echo $this->get_field_id( 'title' ); ?>"><?php _e( 'Title:' ); ?></label>
        <input class="widefat" id="<?php echo $this->get_field_id( 'title' ); ?>"
            name="<?php echo $this->get_field_name( 'title' ); ?>" type="text"
            value="<?php echo esc_attr( $title ); ?>">
        </p>
    <?php
}
As you can see, our form consists of a text field that contains the title of the widget. We assign our title in the $title variable. The get_field_id() and the get_field_name() gives our text field an unique ID and name, respectively.
The update() method is responsible for sanitizing and updating the user input value.
public function update( $new_instance, $old_instance ) {
    $instance          = array();
    $instance['title'] = ( ! empty( $new_instance['title'] ) ) ? strip_tags( $new_instance['title'] ) : '';

    return $instance;
}
It takes two parameters:
- The
$new_instancecontains the value entered by a user using the backend form we’ve created by theform()method. - The
$old_instanceis opposite, it contains the previous value.
Now we’ll create the widget() method which will display the ‘Read Me Later’ posts in the frontend.
public function widget( $args, $instance ) {
    $title = apply_filters( 'widget_title', $instance['title'] );
    echo $args['before_widget'];
    if ( ! empty( $title ) ) {
        echo $args['before_title'] . $title . $args['after_title'];
    }

    echo '<div class="rml_contents">';

        $ids = get_user_meta( wp_get_current_user()->ID, 'rml_post_ids', true );

        $args = array(
            'post_type' => 'post',
            'orderby' => 'DESC',
            'posts_per_page' => -1,
            'numberposts' => -1,
            'post__in' => $ids
        );

        $rmlposts = get_posts( $args );
        if( $ids ) :
            global $post;
            foreach ( $rmlposts as $post ) :
                setup_postdata( $post );
                $img = wp_get_attachment_image_src( get_post_thumbnail_id() );
                ?>
                <div class="rml_posts">
                    <div class="rml_post_content">
                        <h4><a href="<?php echo get_the_permalink(); ?>"><?php the_title(); ?></a></h4>
                        <p><?php the_excerpt; ?></p>
                    </div>
                    <img src="<?php echo $img[0]; ?>" alt="<?php echo get_the_title(); ?>" class="rml_img">
                </div>
            <?php
            endforeach;
            wp_reset_postdata();
        else :
        echo '<p>You have no saved posts now.</p>';
        endif;

    echo '</div>';
    echo $args['after_widget'];
}
Here we use the get_posts() function to display posts. Pretty much same as read_me_later() method.
Don’t forget to include the widget.php file by adding the following code at the top of the read-me-later.php file:
require(plugin_dir_path( __FILE__ ).'widget.php');
Making Your Ajax Calls Secure
While working with Ajax, you should take necessary steps to make your code secure. If you’re going to receive any data from a user, sanitise it before saving it to the database. Use nonce to check if the request is coming from the correct location and made by an authenticated user. Here I’m going to show you how to use WordPress nonce in an Ajax call.
First, we will create a nonce using the wp_create_nonce() method and pass it from JavaScript. To achieve this, use the code from the enqueue_rml_scripts() method:
wp_localize_script( 'read-me-later', 'readmelater_ajax', array( 'ajax_url' => admin_url('admin-ajax.php') ) );
And replace it with the bellow code:
wp_localize_script( 'read-me-later', 'readmelater_ajax', array( 'ajax_url' => admin_url('admin-ajax.php'), 'check_nonce' => wp_create_nonce('rml-nonce') ) );
Now we can access the nonce value from our JavaScript using readmelater_ajax.check_nonce. Add a security property in the jQuery.ajax() method in your JavaScript file, like below:
security : readmelater_ajax.check_nonce
Our final JavaScript will look like this:
jQuery(document).ready( function(){

    jQuery('#content').on('click', 'a.rml_bttn', function(e) {
        e.preventDefault();

        var rml_post_id = jQuery(this).data( 'id' );

        jQuery.ajax({
            url : readmelater_ajax.ajax_url,
            type : 'post',
            data : {
                action : 'read_me_later',
                security : readmelater_ajax.check_nonce,
                post_id : rml_post_id
            },
            success : function( response ) {
                jQuery('.rml_contents').html(response);
            }
        });

        jQuery(this).hide();
    });

});
Finally, we need to check the nonce in our Ajax callback. We will use the check_ajax_referer() function to achieve this. Add the following code at the beginning of the read_me_later() method we created earlier:
check_ajax_referer( 'rml-nonce', 'security' );
This takes two arguments. The first is the key we created using wp_create_nonce(). The second is the security property we passed from the JavaScript.
If the nonce is incorrect or not set, the Ajax call will die. This way our script will block invalid Ajax requests.
Conclusion
In this tutorial, we made a system where users will be able to save their favorite posts in a list and read them later. You can always add more features to it, such as creating a different page to show all saved posts, ability to add pages to the list or to add posts from custom post types for example. You can even make a dashboard settings page to configure all of the options. It’s up to you and the kind of features you want to create for your users.
As you can see, it’s easy to use Ajax in WordPress. It may be daunting for the first time, but once you understand how to do this, it works and looks great. WordPress Hooks are everywhere and they make your life easier. I hope you’ve picked up some useful techniques from this tutorial, now play with Ajax and make things that you love!
Frequently Asked Questions (FAQs) about Using AJAX in WordPress
What is the role of AJAX in WordPress development?
AJAX, which stands for Asynchronous JavaScript and XML, plays a crucial role in WordPress development. It allows web pages to update asynchronously by exchanging data with a web server behind the scenes. This means that it is possible to update parts of a web page, without reloading the whole page. In WordPress, AJAX can be used to improve the user experience by making the website more responsive and interactive. For example, it can be used to load content dynamically, submit forms without page refresh, and create more engaging user interfaces.
How can I use AJAX in WordPress plugins?
AJAX can be used in WordPress plugins to create more dynamic and interactive features. The process involves writing JavaScript code that sends a request to the server and then processes the response. The server-side processing can be handled by a PHP function in the plugin, which can interact with the WordPress database and other APIs. The response is then sent back to the JavaScript code, which can update the web page dynamically.
What are the common issues when using AJAX in WordPress and how can I troubleshoot them?
Some common issues when using AJAX in WordPress include problems with the AJAX URL, issues with data serialization, and conflicts with other plugins or themes. To troubleshoot these issues, you can use the browser’s developer tools to inspect the AJAX requests and responses, check the PHP error logs for any server-side errors, and disable other plugins or switch to a default theme to rule out conflicts.
How can I secure my AJAX requests in WordPress?
Securing AJAX requests in WordPress is important to prevent unauthorized access and data manipulation. This can be achieved by using nonces, which are one-time security tokens generated by WordPress. You can create a nonce using the wp_create_nonce function and pass it with your AJAX request. On the server side, you can verify the nonce using the check_ajax_referer function before processing the request.
Can I use AJAX in WordPress without a plugin?
Yes, you can use AJAX in WordPress without a plugin. You can write your own JavaScript code that sends AJAX requests to the server and processes the responses. On the server side, you can write PHP code in your theme’s functions.php file or in a custom plugin to handle the AJAX requests. However, using a plugin can make the process easier and more manageable, especially for complex AJAX functionality.
How can I test my AJAX functionality in WordPress?
Testing AJAX functionality in WordPress can be done using various tools and techniques. You can use the browser’s developer tools to inspect the AJAX requests and responses, check the PHP error logs for any server-side errors, and use debugging plugins like Query Monitor to analyze the AJAX requests. You can also write unit tests for your AJAX functions using testing frameworks like PHPUnit.
How can I optimize my AJAX requests in WordPress?
Optimizing AJAX requests in WordPress can improve the performance and user experience of your website. Some strategies for optimization include minimizing the amount of data sent and received, using efficient server-side processing, caching AJAX responses, and using AJAX sparingly and only when necessary.
Can I use AJAX with the WordPress REST API?
Yes, you can use AJAX with the WordPress REST API. The REST API provides a way to interact with your WordPress site using HTTP requests, and you can use AJAX to send these requests and process the responses. This can be a powerful combination for creating dynamic and interactive web applications.
How can I handle errors in AJAX requests in WordPress?
Handling errors in AJAX requests in WordPress is important for providing a good user experience. You can use the error callback function in your JavaScript code to handle any errors that occur during the AJAX request. On the server side, you can send a proper HTTP status code and error message in the response, which can be displayed to the user.
Can I use AJAX in WordPress with jQuery?
Yes, you can use AJAX in WordPress with jQuery. jQuery provides several methods for sending AJAX requests, such as $.ajax, $.get, and $.post. These methods make it easier to send AJAX requests and handle the responses. However, you should be aware that WordPress comes with its own AJAX API, which provides a more standardized and secure way of using AJAX in WordPress.
 Sayed Rahman
I’m a web developer, writer and web enthusiast. My primary focus is on WordPress, as I love to make themes, plugins and custom WordPress websites. Usually I like to develop and then share my experience.