Advanced WordPress Development: Introduction to Object-Oriented Programming
Want to take your WordPress game to a whole new level of coding mastery? Are you ready to really push your PHP skills and add even greater complexity and advanced functionality to your plugins and themes?
Welcome to our latest series, Advanced WordPress Development. This series follows on from our popular WordPress Development for Intermediate Users, which introduced you to some meaty coding topics, including theme development in detail, making themes customizer-ready, building plugins, custom post types and taxonomies, queries and loops, custom fields and metadata, and localization.
In this six-week series, you’re in for an even tougher challenge – but one that will give you every right to call yourself a full-fledged WordPress developer when you’ve finished! You’ll learn:
- Object-oriented programming techniques with PHP,
- How to write object-oriented plugins,
- Working with transients,
- Using the command line to improve your development workflow,
- Using Gulp to compile JavaScript and SASS, and
- Automating WordPress with WP-CLI.
Note: It’s important that you have a working knowledge of PHP as this is the foundational language of WordPress for this series, which covers advanced topics aimed at developers. I’ll be referring to code snippets throughout this series.
Before You Begin
This course assumes you have coded for WordPress before and that you have a basic understanding of how themes and plugins work. If you haven’t developed for WordPress before, or you’d like a refresher, I strongly recommend you read through WordPress Development for Intermediate Users, which will give you everything you need to know before you start this series.
You’ll also need access to a few things so that you can follow along and work alongside me. These are:
- A development WordPress installation. I recommend working on your local machine
- A code editor with FTP access if you’re working remotely (which you will be doing eventually)
- If your code editor doesn’t have FTP access, an FTP client
I deliberately haven’t given you links to help you find all these things – I’m assuming that you’re already at the level where you know about this kind of stuff and can find them yourself.
What We’ll Cover in This Tutorial
In this first tutorial, we’re going to jump right into object-oriented programming and how it applies to WordPress development. This tutorial will build on what you learned if you completed our WordPress Development for Intermediate Users series.
Object-oriented programming is not actually something you need to know as a WordPress developer, but I have found that the quality of my code increased dramatically once I started thinking with OOP in mind. I was also able to learn other languages a lot more easily because objects and classes – the basis of OOP – are prevalent in most programming languages.
So let’s take a look at the basics of OOP so you can understand what’s going on beneath some more complex WordPress constructs, and start writing better plugins and themes.
What Is Object Oriented Programming?
Object oriented programming – or OOP – is more of a mindset than a specific way of coding. Strictly speaking, it means that you use advanced things like objects, classes, interfaces and so on. In my mind, it also means thinking in a more structured fashion, encapsulating your code in a way that makes it easy to reuse later on.
On the surface, objects are very much like functions. When you first see functions you learn that they are a way of grouping together related code to create reusable functionality. Why write code that generates an excerpt every time it is needed when you can just call a function, right?
Classes and objects follow the same mindset. Whenever you need to display a post you’ll probably want to display the title, the content and use functions like the excerpt generator, and a more link creator. You can group related functions within a class, creating a logical structure that relates to a specific item, like a blog post.
Don’t worry if all this is unclear for now. We’ll look at plenty of examples throughout this tutorial to help put things in their place.
Why Use OOP?
Object-oriented code is more often good code than not. It encapsulates logical groups of code providing a cleaner, more readable codebase. Among others it provides the following benefits:
- The code is easier to follow,
- Extending the code is much easier and more straightforward,
- Function names don’t have to be long, and functions within classes do not clash with functions outside of classes,
- Well-written OOP documents itself, and
- A higher degree of reusability can be achieved.
Learning By Example
I think it would be best to start right off the bat with an example that starts out as procedural code and progresses into object-oriented code.
Let’s say we’re building something like Twitter (not to aim too big or anything!) where we need to limit the number of characters and turn specific strings into links. In the following example, I’m creating some functions that our little project can use:
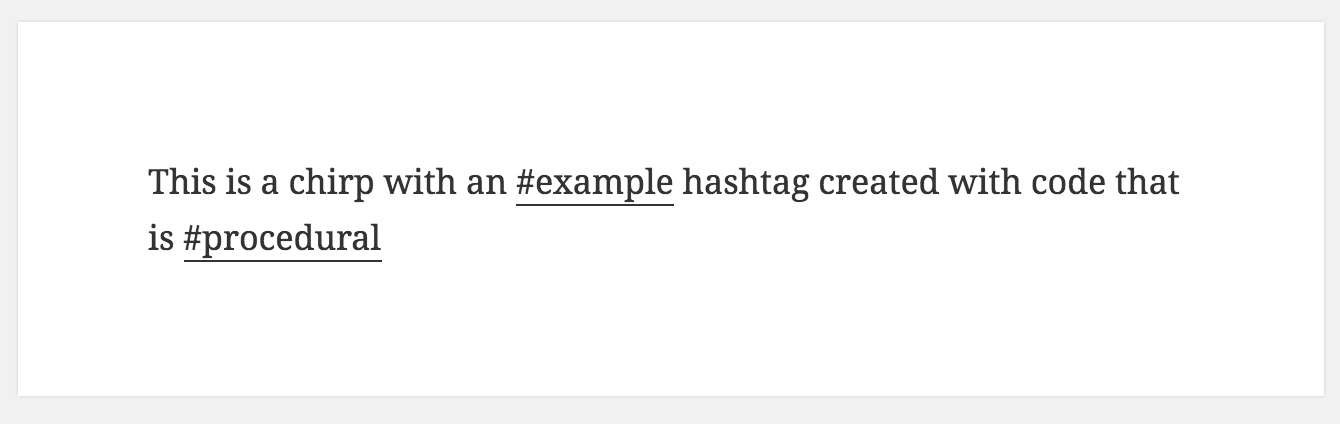
The get_chirp_text() function is passed as text and simply cuts it off after 200 characters. The get_hashtags() function uses some fancy regex to grab all strings that start with a hash sign. create_chirp() puts the previous functions to use and outputs a “chirp” which is cut down to 200 characters and has its hashtags turned into links.
So far so good. Our chirp service is up and running, but there are some potential issues with our code. What if we offer plans to monetize our service, which would allow you to use 300 or 500 characters? What if we want to change the URL of our hashtags? What if we want to list hashtags from a chirp?
None of these issues are insurmountable but they would introduce code complexity, which would be more obvious if we also had the code for managing users, display, chirping actions, streams and more.
So let’s encapsulate all of our chirp tweet functionality into some object-oriented code. I’ll start with the full code and explain it below:
Lots of things to explain here but I’ll break it down into small chunks and you’ll see how great this is! I’ll explain the example and in the next part we’ll look at the technical definitions of the components.
Right at the top you see that I’ve created a class named “chirp.” It is wrapped around a number of variables and functions. The variables describe some important properties of the objects that will be created with this class.
$textholds the original text we want to convert to a chirp$lengthholds the permitted length of the chirp$hashtag_baseholds the base URL of the hashtag link$hashtagsholds the hashtag map$chirpholds the final HTML for the chirp
Let’s skip over the __construct() function for the time being and focus on set_length(). All this function does is assign 200 to $this->length.
What is $this I hear you ask? It’s a special keyword that points to a variable or function within the class. When we set the value of our length property with $this->length we will be able to recall the value from any function within the class that runs subsequently. The result: we don’t need to pass everything around with parameters.
Next up is set_hashtags(). The functionality is similar but gets the text from $this->text which will be set in the constructor function, more on that later. I’ve changed the array it produces slightly to contain the hash as keys and the full link as values – this will make replacing in the text easier. Hashtags are set similarly to the length at the end of the function.
Finally the set_chirp() function uses $this->text and $this->length to cut down the text and $this->hashtags to replace strings with links. Finally, it assigns the resulting HTML to $this->chirp.
At the very bottom I’m using the class to create an object stored in the $chirp variable. I’ve passed a single parameter to the class. When an object is created (or, in other words, instantiated) from a class the constructor function (__construct()) within the class is run first.
Looking at __construct() you can see how it accepts the parameter passed to the class. It then does a number of things:

FREE EBOOK
Your step-by-step roadmap to a profitable web dev business. From landing more clients to scaling like crazy.

FREE EBOOK
Plan, build, and launch your next WP site without a hitch. Our checklist makes the process easy and repeatable.
- It sets the value of
$this->hashtag_basedirectly. - It sets the value of
$this->textdirectly. - It uses a function named
set_length()to set the length. Note that since this function is within the class we refer to it with$this - It creates the final chirp HTML using the
set_chirp()function.
So, right after we create our object we can echo a property from within the object. We know that the final chirp HTML is stored in the $chirp property, which we can access using $chirp->chirp.
If you didn’t understand all that 100% don’t worry! It’s a good idea to read the technical definitions of the elements we used below and then come back and re-read this section.
Elements Of Classes and Objects
In this section, we’ll backtrack a bit, take a dryer approach and look at the components of objects and classes. The difference between objects and classes is that classes are blueprints based on which objects are created.
Classes are defined using the class keyword followed by the name of our class and curly braces which contain the class’ code.
Classes can contain two things, variables and functions, but within classes we refer to them as properties and methods – go figure! That’s basically all a class is, a collection of properties and methods.
To use a property and method within a class you’ll need to refer to it using the $this keyword, eg: $this->get_chirp(). To access a method or property from outside the class you’ll need to refer to it using the name of the class, eg: $object->get_chirp().
Classes can contain a number of special functions. One such function is __construct() which runs as soon as an object is created from a class.
Any number of objects can be created from a class.
With all that information in mind, I suggest you go back to the example above and re-read it, then continue on with the section below.
Using Objects Correctly
I should have put quotes around the word “correctly” because there isn’t a single way of using objects correctly. It depends very much on what you’re doing. Let me go through some points of interest in our previous example.
Specifying The Length
We have a separate method for setting the length but all this does is set it to 200 no matter what. Is this redundant? Why not hard-code 200 into the substr() function in set_chirp()?
The reason is forward thinking. It shouldn’t be the job of set_chirp() to figure out the length. We may decide to cut back to 160, provide different lengths based on membership status or based on how long you’ve been a member.
If we separate out the code for defining the length into a separate method we can change the internal logic of the length without affecting other parts of our code.
Setter Methods
Methods that set the value of a property are often referred to as setter functions. Note that I’ve set some properties directly within the constructor but for some I used a setter.
My logic here was that if I can set something without having to perform an operation on it I’ll just do it in the constructor. If I need to do some calculations – like with hashtags – or I know that I’ll have some logic in there soon – like the length – I’ll use a setter.
Getting Chirps
A small problem with this class is that we generate the chirp, put it into the $chirp property and then refer to that property. This makes the class a bit useless once the chirp has been created.
A better solution might be to remove set_chirp() from the constructor, rename it to get_chirp() and use this function to retrieve the chirp.
This will be useful id we want to perform operations on chirps before and/or after creating them.
Working With Objects
The ability to refer to properties and methods within classes offers us a lot of strategies for working with classes. If we drop most of the constructor from our initial example we could perform the required operations from outside the class. Take a look:
The difference here is that the constructor does not take care of the hashes which means that the $this->hashtags property will not always be available. I’ve accounted for this in the get_chirp() function.
The result is that we can build a chirp in two ways:
This is awesome because we have more control right? Well, sort of. It’s on the right track but there is an issue of inconsistency. You can never be sure what will happen when you invoke get_chirp() – it may or may not have hashtag links.
This is an example of how using OOP (or just regular PHP) can lead to issues later on. A better way to do this is to create two functions, one that will always display the chirp with links, one that will always display it without links.
A WordPress Example
A great and well-documented example from WordPress is WP_Query. If you’ve used it before without OOP knowledge it should hopefully be much clearer now.
Let’s say you’re creating a special page with WordPress that will contain eight of your latest posts and three of your upcoming book reviews. You could create two objects using the same WP_Query class like so:
Looking at the documentation we can see that there are a number of properties this class provides, such as $found_posts. We know how to refer to these properties now:
A Note About Classes
The most difficult part of objects and classes is not using them, it’s using them appropriately. At worst they will provide no benefits over procedural programming, at best they will give your code structure and extendibility.
There is a lot more to classes than what we’ve learned here, these are just the very basics you need to be able to read code that uses OOP. The secret to using classes well, as with any other code, is a lot of practice.
I urge you to start writing object-oriented code. When I started learning about all this it seemed completely superfluous to me; it provided no apparent benefit. The reason was the following: it provided no benefit.
Once I started learning some OOP from WordPress through some of its classes, Laravel and other projects I became proficient enough to write truly modular and self-describing code in PHP.
Mastering WordPress Development
We’ve only just scratched the surface for now of what’s possible. As I mentioned earlier in the tutorial, there is a lot more to classes than what we’ve covered here and I encourage you to learn more, practice, make mistakes and never give up!
Here are some great resources worth checking out before you start the next tutorial in this series:
- Object Oriented PHP For Beginners – tuts+
- Magic Methods – PHP
- OOP For Beginners – WPMU DEV
- Inheritance – php5-tutorial.com
In the next tutorial in this series, we’ll put what you’ve learned so far into practice and start writing object-oriented plugins.
Tags:
Daniel Pataki Daniel is the CTO at Kinsta and has written for many outstanding publications like WPMU DEV and Smashing Magazine. In his spare time, you'll find him playing board games or planning the next amazing office game like the not-at-all-destructive Megaball.