This DIY dress form project is such a unique home decor piece! Use fabric and Mod Podge to cover a dress form – customize any way you like.


Have you ever decoupaged a dress form? You totally need to. It’s kind of fun, and then you’ll have a place to display your jewelry, or an interesting home decor piece. I’ve always wanted to Podge one, and I finally got one from Darice, and I decided it was time to go wild.
I chose to do a fabric craft and adhere scrap pieces all over the dress form. With Mod Podge, of course.
So I picked some crazy fabric and a fun paint color and went for it. What will I do with this lovely lady? I’m not sure . . . yet . . . so if you have any suggestions, let me know in the comments! Here is how I made her.
DIY Dress Form
Gather These Supplies
- Dress form
- Mod Podge Satin
- Fabric in the pattern of your choice
- Spray paint
- Paint brush
- Craft knife
- Scissors
- Painter’s tape and paper/paper towels
- Wax paper
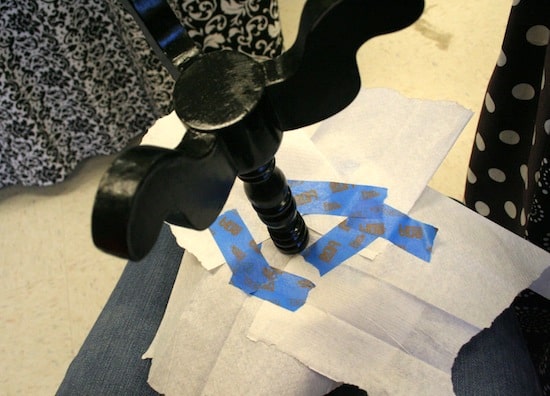

The first thing I needed to do was spray paint the base of my dress form. So I used painter’s tape and paper towels to section off the base. I did this at the top as well. Then I spray painted and let dry.

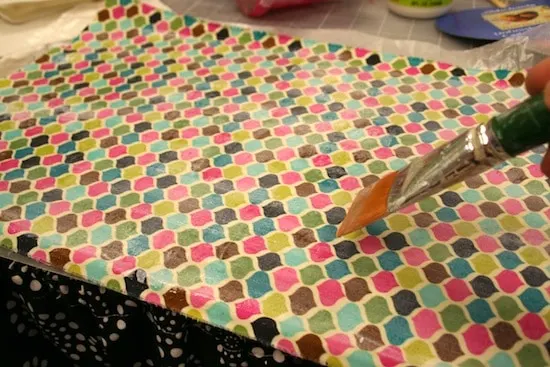
Next I prepared my fabric. When I say prepare my fabric, I mean I ironed the fabric, laid it out on wax paper and painted a medium layer of Mod Podge on top. I did this so it wouldn’t fray when I cut it. Just let it dry.

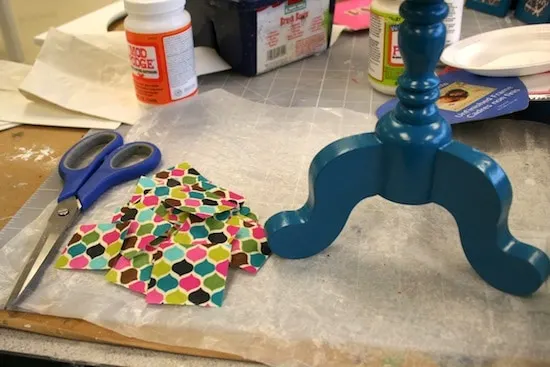
Then use your scissors to cut the fabric into A LOT of pieces. Yep, I cut a lot of pieces for my DIY dress form. But it’s not that bad once you get started. Just watch an episode of Downton Abbey or something.


Once you have your pieces, start in the center and Mod Podge each piece to the dress form. Keep overlapping the pieces and Mod Podging. You may have to get your hands a little “dirty” by smoothing the pieces down as they are wet. But it’s kind of fun.
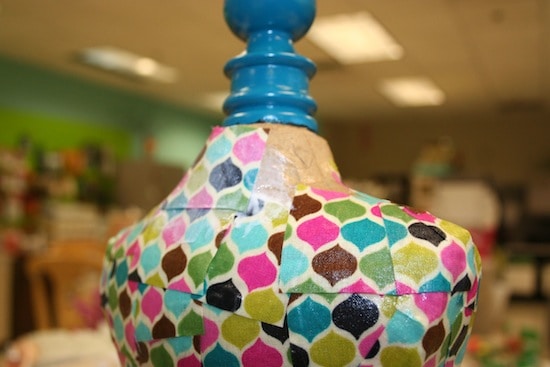

I bet you are wondering what you do as you get closer to the top. Well, I cut darts into the pieces! I just clipped into the piece and then overlapped in that area. I used Mod Podge and smoothed with my fingers.

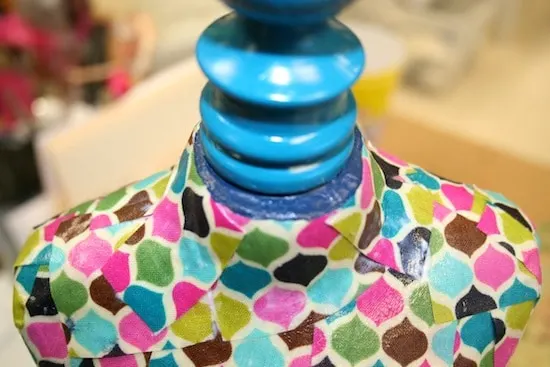
You can see in the photo above that I cut the pieces at the shoulders and separated them to make them work. I ran the pieces directly up to the neck of my little friend and then trimmed. Let her dry and give her a top coat.
Here she is in all of her splendor! This DIY dress form is kind of crazy, kind of fun. I want to make one for Halloween, actually. What do you think?
If you enjoyed this idea, I’d love for you to check out these other projects:
Lisa Clark
Monday 14th of March 2022
I wonder did you start with a fabric manikin to begin with? Or was it a hard plastic? Do you think that you could use a fabric mannequin to decoupage?
Amy
Monday 14th of March 2022
Hi Lisa! It was a paper mache mannequin! But I don't see why you couldn't do it to a fabric one. I think you could!
LadyD
Friday 19th of July 2013
I've just made a brown paper dress form body double. And this would be a great idea to finish it off.
katie
Thursday 18th of July 2013
I love everything about this. I recently got a dress form from a garage sale and wanted to upgrade it since its a little stained... I think I might be trying my hand at this!
Lori
Thursday 2nd of May 2013
Oh my goodness this is awesome!! I am totally going to make one for my daughters room... but Halloween would be awesome!!
Linda @ it all started with paint
Wednesday 1st of May 2013
I think that project is so cool and original and just plain fun! Now I need to in me a dress form ...
:) Linda