As website code becomes more complicated and repetitive steps that just beg for optimization become ever more commonplace, there should be a better and more efficient development process out there.
In this tutorial, I’ll introduce Gulp, and how to integrate it with WordPress theming to automate and enhance the theme development process by putting together an automated workflow.
Why You Need to Automate Your Development Workflow
Workflow optimization can be incredibly beneficial and rewarding for your development process. Here are some of the reasons to give it a go:
- It removes all those repetitive and boring tasks, replacing them with custom tools.
- It saves a lot of time for doing other important core development work.
- It helps optimizes your website for performance by minifying and optimizing all assets.
What You’ll Need
- WordPress installed on your development machine.
- Node.js and npm installed.
- Command line basic knowledge.
Introduction to Gulp
Gulp is a JavaScript task runner that will help automate time-consuming tasks like CSS compressing, Sass compiling, image optimization and browser reloading.
Gulp gives you the tools to do various actions automatically after certain trigger events. For example, consider the following scenarios:
- Every time you save a Sass file, Gulp will compile Sass and output a minified CSS file.
- When you add a new image to a folder, Gulp will optimize this image and move it to a new dedicated folder.
- When you save a PHP or a Sass file, Gulp will automatically reload the browser.
Gulp Setup
First, you need to install Gulp globally in your system. Later, I will show you how to install it as a package inside your theme.
Assuming Node.js is installed, open the command line tool, then install Gulp using npm via:
npm install gulp -gNow, run gulp -v (Gulp’s version command) to test that Gulp is installed correctly. You should get output similar to:
➜  ~ gulp -v
[09:33:59] CLI version 3.9.1
Theme Setup
In this tutorial, I will use Underscores as the base theme. To download it, navigate to underscores.me, generate a new theme and give it a name like “gulp-wordpress”, download it to the WordPress themes directory, then activate it from the dashboard.
From the command line, navigate to the gulp-wordpress directory where you have added the theme, for example in my case:
cd ~/www/wordpress/wp-content/themes/gulp-wordpressNext, run the npm init command and follow a few simple steps to create a package.json file which will include some information about the theme and the packages that will be installed later.
After finishing up the steps, you will have a starting file that looks similar to this:
{
  "name": "gulp-wordpress",
  "version": "1.0.0",
  "description": "WordPress Theme Development Automation with Gulp",
  "author": "Name"
}
Next, install Gulp as a development dependency:
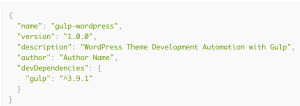
npm install gulp --save-devA node_modules directory is now created containing Gulp package source files, and your package.json file has been updated to include Gulp as a development dependency.
{
  "name": "gulp-wordpress",
  "version": "1.0.0",
  "description": "WordPress Theme Development Automation with Gulp",
  "author": "Author Name",
  "devDependencies": {
    "gulp": "^3.9.1"
  }
}
Some Gulp tasks like gulp-autoprefixer require ES6-style Promises support so that you can install the es6-promise polyfill, and then require it at the top of the gulpfile.js as we will do next.
npm install es6-promise --save-devThe last step to configure Gulp is to create an empty gulpfile.js configuration file, which will be used to define Gulp tasks such as JavaScript and Sass.
The gulpfile.js starter file will look like this:
require('es6-promise').polyfill();

var gulp = require('gulp');

// default task
gulp.task('default');
What we have done above is:
- Required the
es6-promisepolyfill on top of the file, then we have imported in gulp. - Created a
defaulttask.
To make sure that Gulp is running and everything is done perfectly, run gulp in the command line to execute the default task created in the gulpfile.js file. The output should be similar to:
[09:48:23] Using gulpfile ~/www/wordpress/wp-content/themes/gulp-wordpress/gulpfile.js
[16:33:13] Starting 'default'...
[16:33:13] Finished 'default' after 58 μs
Speeding up Development with Gulp Tasks
At this point, the theme is ready for new tasks, and it’s time to go through some common tasks that you can use to speed up your theme development.
Working with CSS (Sass)
If you are using Sass to write CSS, two main things needed to be automated, the first one is to compile Sass to CSS, the second is to use autoprefixer to add vendor prefixes to your CSS. Also note that I’m using Sass as an example, if you prefer another option like Less for example, you can find a Gulp plugin for it too.
First, install gulp-sass and gulp-autoprefixer.
npm install gulp-sass gulp-autoprefixer --save-devThe next step is to create a Sass directory with a basic structure.
├── sass
│   └── style.scss
The style.scss file is the main starting point, you are free to create your Sass architecture and import other components, modules, functions inside it based on your preference.
The first few lines will be the stylesheet header required by WordPress.
/*
  Theme Name: Gulp WordPress
  Theme URI: http://example.com/
  Author: Author Name
  Author URI: http://example.com/
  Description: Description
  Version: 1.0.0
  License:
  License URI:
  Text Domain: gulp-wordpress
*/

body {
  color: #333;
  background-color: #fff;
}
The next step is to create a sass task that will do the following things:
- Compile and autoprefix Sass.
- Build a
style.cssfile, which is the final CSS file used by WordPress.
require('es6-promise').polyfill();
var gulp          = require('gulp');
var sass          = require('gulp-sass');
var autoprefixer  = require('gulp-autoprefixer');

gulp.task('sass', function() {
  return gulp.src('./sass/**/*.scss')
  .pipe(sass())
  .pipe(autoprefixer())
  .pipe(gulp.dest('./'))
});

gulp.task('default', ['sass']);
Now, run the gulp sass task directly from the command line, this will compile the style.scss file, and build a new style.css file in the theme root.
Another way to run sass, is to pass the task name as a second parameter to the default task as I did above, so by running gulp, the sass task will be executed.
A good WordPress practice is to include the CSS table of contents in the final CSS file at the top just after the stylesheet header, and then add a CSS comment before any code or import related to the section.
Note that the comment is a standard CSS style comment like (/*----- 1.0 Normalize -----*/), and not a Sass comment like (//----- 1.0 Normalize -----). This is important because this comment needs to be to exist in the final CSS file, but with a Sass style comment it will be hidden by the Sass compiler. Also, note that this is used in the stylesheet header and the table of contents.
The following is an example of the style.scss file containing the table of content, and some imports to external sass files.
/*
  Stylesheet Header ...
*/

/*--------------------
>>> TABLE OF CONTENTS:
----------------------
1.0 Normalize
2.0 Typography
3.0 Icons
4.0 Components
--------------------*/

/*----- 1.0 Normalize -----*/
@import 'normalize';

/*----- 2.0 Typography -----*/
@import 'typography';
To automate generating the rtl.css file automatically, the gulp-rtlcss plugin can be used to auto convert LTR (left to right) CSS to RTL (right to left), so you can write Sass in one file then Gulp will generate two CSS files, the first is style.css file, and the second is a rtl.css file.
The idea behind gulp-rtlcss is to convert all the CSS properties like floats, text-align, text direction, and other properties from left to right.
The second plugin is gulp-rename which will rename the file to rtl.css automatically.
npm install gulp-rtlcss gulp-rename --save-devThe next step is to include the newly installed plugins at the top of gulpfile.js file, and modify the sass task to use rtlcss() after the style.css is generated to do the conversion.
In this step, the plugin will convert all the CSS properties like floats and text direction from left to right, then rename the file to rtl.css, and then output the file to the theme root:
var rtlcss       = require('gulp-rtlcss');
var rename       = require('gulp-rename');

gulp.task('sass', function() {
  return gulp.src('./sass/*.scss')
  .pipe(sass())
  .pipe(autoprefixer())
  .pipe(gulp.dest('./'))              // Output LTR stylesheets (style.css)

  .pipe(rtlcss())                     // Convert to RTL
  .pipe(rename({ basename: 'rtl' }))  // Rename to rtl.css
  .pipe(gulp.dest('./'));             // Output RTL stylesheets (rtl.css)
});
Run gulp sass, and you will have style.css and rtl.css files generated.
To read more about Sass structure, and how to use it with Gulp, have a read of the following:
Watching Files
Instead of running gulp sass whenever you change a Sass file, a new task is required to do this automatically for you.
The watch task will be used to view any changes made to a file, so once that file has changed, it will run another action. For example, when you save a Sass file, then the sass task should run automatically.
Inside our gulpfile.js file, add a new watch task to watch for any changes in the /sass directory, then run the sass task. The next step is to update the default task with the watch task.
gulp.task('watch', function() {
  gulp.watch('./sass/**/*.scss', ['sass']);
});

gulp.task('default', ['sass', 'watch']);
Now you can run gulp in the command line to execute sass task first then the watch task will continue working after that.
Error Handling
Sometimes while you are writing code, you might write an undefined Sass variable while in the middle of work. While you are watching files, Gulp will break because the particular task can’t compile that variable, this is annoying because you have to start Gulp again to continue working.
You can fix this by using gulp-plumber plugin, which will prevent Gulp breaking caused by errors.
To improve error handling, install the gulp-util utility functions package to customize the error message, add beep sound once the error occurred, plus adding colors to the error message which is useful identifying the error.
npm install gulp-plumber gulp-util --save-devvar plumber = require('gulp-plumber');
var gutil = require('gulp-util');
var onError = function (err) {
console.log('An error occurred:', gutil.colors.magenta(err.message));
gutil.beep();
this.emit('end');
};
gulp.task('sass', function() {
return gulp.src('./sass/*.scss')
.pipe(plumber({ errorHandler: onError }))
//
//
});
What has been done above:
- Added an
onErrorfunction to log the error message, and create a beep sound. - Updated the
sasstask to use theplumberfunction, then passed theonErrorfunction to theerrorHandlerobject property.
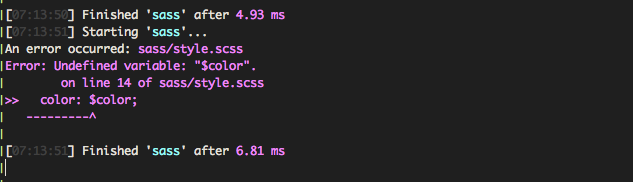
By doing this you can know exactly what’s happening with errors and in which file. Most importantly, it will also prevent Gulp from stopping!
An example of an undefined Sass variable $color.
JavaScript
For working with JavaScript, there are different tools that can speed up and improve your accompanying JavaScript development workflow, for example:
- Concatenating many JavaScript files into a single file.
- Checking code errors with JSHint.
- Minifying code to get a much smaller file size.
You can install these plugins as following:
To concatenate files:
npm install gulp-concat --save-devTo validate JavaScript:
npm install gulp-jshint --save-devTo minify code:
npm install gulp-uglify --save-devNext, inside the gulpfile.js file, we require the newly installed plugins and add a new js task.
var concat = require('gulp-concat');
var jshint = require('gulp-jshint');
var uglify = require('gulp-uglify');

gulp.task('js', function() {
  return gulp.src(['./js/*.js'])
    .pipe(jshint())
    .pipe(jshint.reporter('default'))
    .pipe(concat('app.js'))
    .pipe(rename({suffix: '.min'}))
    .pipe(uglify())
    .pipe(gulp.dest('./js'))
});
This task takes any file that ends with .js inside the ./js directory, checks for code errors with jshint, then concatenates them into app.js, and as we need a minified output, it is time to rename the file to app.min.js. We then minify the code, and in the last step, output the file to the ./js directory.
At this point, you’ll want to create a .jshintrc configuration file in the theme root, which is a simple JSON file that specifies which JSHint options to turn on or off, for example:
{
  "undef": true,
  "unused": true,
  "browser": true
}
undef: Warns when you use a variable that was not declared.unused: Warns when defining a variable and never using it.browser: Defines globals exposed by modern browsers, likenavigatoranddocument.
JSHint comes with a whole series of options that you can use based on your preference.
Now, run gulp js from the command line (or terminal). A new app.min.js file will be generated which will be used later in the theme.
By default, the _underscore theme includes customizer.js, navigation.js, and skip-link-focus-fix.js files under the /js directory.
If you only need to include specific files, you can add them inside the gulp.src array as:
gulp.task('js', function() {
  return gulp.src([
    './js/navigation.js',
    './js/skip-link-focus-fix.js'
  ])
});
The code above will do all the operations on those two files. If you need to add another new file you can append it to the array.
You can also update the watch task to watch changes to any JavaScipt file, and also update the default task to run the js actions automatically when running gulp, just as we did with Sass.
gulp.task('watch', function() {
  gulp.watch('./sass/**/*.scss', ['sass']);
  gulp.watch('./js/*.js', ['js']);
});

gulp.task('default', ['sass', 'js', 'watch']);
Inside the functions.php theme file, enqueue the generated app.min.js file as:
wp_enqueue_script( 'gulp-wordpress-javascript', get_template_directory_uri() . '/js/app.min.js', array(), '20151215', true );
You can remove other enqueued JavaScript files as they already concatenated and minified into a single file. In the current state of HTTP, including one file rather than many will speed up and improve website performance.
The enqueue scripts function inside functions.php file will end up to looking similar to:
/**
 * Enqueue scripts and styles.
 */
function gulp_wordpress_scripts() {
  wp_enqueue_style( 'gulp-wordpress-style', get_stylesheet_uri() );

  wp_enqueue_script( 'gulp-wordpress-javascript', get_template_directory_uri() . '/js/app.min.js', array(), '20151215', true );
}
add_action( 'wp_enqueue_scripts', 'gulp_wordpress_scripts' );
Images
Let’s now try to optimize images with Gulp, by doing this we will ensure that all the used pictures in the theme are automatically optimized for speed. To make this automation easier, you can set up a Gulp task to watch the images directory, and once you drag an image there, gulp will optimize it and move it to another folder for optimized and ready to use images.
Create two folders:
/images/src: Source folder contains the original images./images/dest: Destination folder contains the optimized images.
Install gulp-imagemin to minify PNG, JPEG, GIF, and SVG images.
npm install gulp-imagemin --save-dev
Create a new task (images), that will watch images located in the source folder (/images/src), optimize them, and move them to the optimized folder (/images/dest).
var imagemin = require('gulp-imagemin');

gulp.task('images', function() {
  return gulp.src('./images/src/*')
    .pipe(plumber({errorHandler: onError}))
    .pipe(imagemin({optimizationLevel: 7, progressive: true}))
    .pipe(gulp.dest('./images/dist'));
});
You can also watch the /images/src folder, so that every time you drag a new image there, the images task will run. Also, update the default task to run the images action.
gulp.task('watch', function() {
  //
  gulp.watch('images/src/*', ['images']);
});

gulp.task('default', ['sass', 'js', 'images', 'watch']);
Browser Refresh with BrowserSync
What if you want to refresh the browser after any code changes whether the code is PHP, Sass, or JavaScript? What if you are testing with more than one browser or mobile device? You will have to hit the refresh button on every single screen. BrowserSync will help in doing this effectively and automatically!
First, you’ll need to install BrowserSync as a development dependency.
npm install browser-sync --save-devNext, require BrowserSync inside your gulpfile.js file, and update the watch task to include BrowserSync:
var browserSync = require('browser-sync').create();
var reload = browserSync.reload;

gulp.task('watch', function() {
  browserSync.init({
    files: ['./**/*.php'],
    proxy: 'http://localhost:8888/wordpress/',
  });
  gulp.watch('./sass/**/*.scss', ['sass', reload]);
  gulp.watch('./js/*.js', ['js', reload]);
  gulp.watch('images/src/*', ['images', reload]);
});
Notice that you will need to update the proxy option to the local development URL. For example, if your local URL is localhost:8888/wordpress, update the proxy value above with that.
As BrowserSync can watch your files as you work, for example, I configured the task to watch any changes to PHP files.
I also updated the sass, js, and images watch tasks to reload the page if any changes happened to the files, or the content of the images folder has changed.
Now, you can run gulp, a new tab will be opened automatically in the browser to the localhost URL, and your console will look something like this:
[BS] Access URLs:
 --------------------------------------------
       Local: http://localhost:3000/wordpress/
    External: http://192.168.1.2:3000/wordpress/
 --------------------------------------------
          UI: http://localhost:3001
 UI External: http://192.168.1.2:3001
 --------------------------------------------
You can use the External URL in any device connected to the same network, so in every change browserSync will reload all the browsers.
The UI External URL is used for the Browsersync control panel, which allows you to change sync options, manage devices.
Conclusion
As you’ve seen, working with automation tools is incredibly valuable and can improve the speed of the development process. There are lots of Gulp plugins out there you can try and use based on your requirements, so there is anything that could be automated to save time, do so!
I’ve created a GitHub repo for this article’s WordPress theme and you can check out the code here. Let me know if you use any Gulp plugins in your development process that makes your life easier.
 Ahmad Ajmi
Ahmad Ajmi is a self-taught front-end developer passionate about the Web, open source, and programming.