


Introduction
In this tutorial, you'll learn how to create a 2D game using C# and Unity. We'll be taking advantage of Unity's microphone support to enhance the gameplay of the game. The objective of the game is simple, reaching the other side of the level by avoiding the obstacles along the way. The player can move the main character by blowing on the device's microphone, moving it upwards.
You'll learn the following aspects of Unity game development in this tutorial:
- setting up a 2D project in Unity
- importing sprites
- microphone controls
- working with physics collisions
1. Create a New Unity Project
Open Unity and select New Project from the File menu to open the new project dialog. Tell Unity where you want to save the project and set the Set up defaults for: menu to 2D.


2. Build Settings
In the next step, you're presented with Unity's user interface. Set the project up for your preferred platform by choosing Build Settings from the File menu and selecting the target platform.


3. Unity User Interface
Before we get started, make sure the 2D button in the Scene panel is highlighted. You can also modify the current resolution in the Game panel.
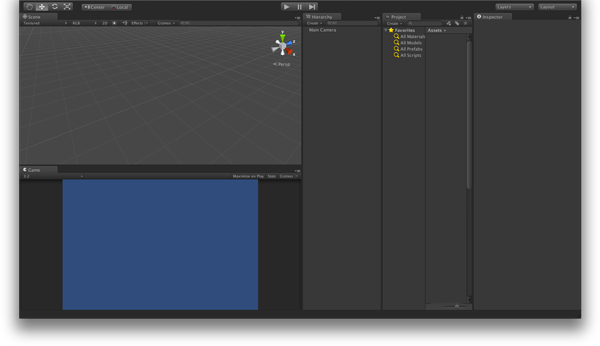

You should also see Unity's workspace panels, which we'll use in this tutorial. Take a moment to explore Unity's user interface, such as the Scene, Game, Hierarchy, Project, Assets, and Inspector. We'll be using them a lot in this tutorial.
4. Game Interface
Our game's user interface is going to be straightforward. The next screenshot gives you an idea of the assets we'll be using and how the game's final user interface will end up looking. You can find the assets we'll be using in the source files on GitHub.


5. Programming Language
You can use one of three programming languages when using Unity, C#, UnityScript, a variation of JavaScript, and Boo. Each of these programming languages has its pros and cons and it's up to you to decide which one you prefer. My personal preference goes to the C# programming language and that's the language I'll be using in this tutorial.
If you decide to use another programming language, then make sure to take a look at Unity's Script Reference for examples.
6. Assets & Sound Effects
Before we start coding, we need to add the assets to the Unity project. You can do this one of several ways:
- select Import New Asset from the Assets menu
- add the items to the assets folder in your project
- drag and drop the assets in the project window
After completing this step, you should see the assets in your project's Assets folder in the Project panel.
We'll use a number of sounds to create a great audial experience. The sound effects used in this tutorial were obtained from freesound.org.
7. Background
Start by dragging and dropping the background into the Hierarchy panel. It should automatically appear in the Scene panel.


8. Camera Size
Because the Scene panel is set to display a 2D view, you'll notice that selecting the Main Camera in the Hierarchy shows a preview of what the camera is going to display. You can also see this in the Game view. To make the entire scene visible, set the Size value of the Main Camera to 4 in the Inspector panel as shown below.

9. Sprite Sheet
We'll use a sprite sheet for our game's user interface elements. Unity has a sprite editor that makes using sprites a breeze. The artwork used in this tutorial was obtained from openclipart.org.

Import the artwork, select it from the Assets panel, and change the Sprite Mode option to Multiple in the Inspector panel.
Click the button labeled Sprite Editor and set the Type option to Automatic.

10. Cow Rigidbody 2D
With the sprite sheet sliced and ready to use, click the arrow that appears when the sprite sheet is selected and choose the sprite of the cow, the main character of our game. Drag it to the scene to add it.

To detect collisions, at least one of the colliding objects needs to have a Rigidbody 2D component attached to it. To add one to the cow, click the Add Component button in the Inspector panel. From the list of components, select RigidBody 2D in the Physics 2D section.
Check the Fixed Angle box to prevent the cow from rotating if a collision occurs. We won't be using the default physics gravity in this game, instead we'll simulate our own. Change the Gravity Scale from 1 to 0 to ensure the default gravity doesn't impact the object.

11. Adding Colliders
The floor is used to keep our main character from falling once we've added physics to the game. Create a new game object by selecting Create Empty from the GameObject menu.
To make the floor detect when the character is touching it, we need to add a Box Collider 2D component. A collider is a physics shape that defines the area that triggers a collision.
Select the floor game object in the Hierarchy, open the Inspector panel, and click Add Component. From the list of components, select Box Collider 2D in the Physics 2D section.

Change the Size property to X: 4.8 and Y: 0.05 to create a small rectangle where the cow will be positioned. Finally, add a Box Collider 2D to the cow game object by repeating these steps.


12. Cow Audio Source
An Audio Source component is used to play an audio clip when the player collects the star. This component will read the audio clip set in its options and play it when called from a script or at the start if the Play on Awake checkbox is selected.
To play a sound when the player collects a star, we first need to attach an Audio Source component to it. Select the star from the Hierarchy or Scene view, click the Add Component button in the Inspector panel, and select Audio Source in the Audio section.

As we only want the sound to play when the player touches the star, we need to uncheck the Play on Awake option. Click the little dot on the right, below the gear icon, to select the sound we want to play.

13. Adding Balloons
The balloons represent the lives or health of our main character. When a hand collides with the cow, it will pop one of the balloons to indicate that it was hit and the number of lives has decreased.

Drag the balloon sprite from the Assets to the Hierarchy panel and then back to the Assets. This will create a prefab of the balloon. You'll notice the text becomes blue indicating it's now a prefab. By creating a prefab, we can reuse the balloon without using additional resources.
Select the new prefab and press Command+D to duplicate it. Use the Rotation tool to slightly rotate the balloons as shown in the above screenshot.
We group the cow and balloons to make moving them a bit easier. To do this, drag a balloon from the Hierarchy panel and place it on top of the cow game object in the Hierarchy panel. The cow game object is highlighted to indicate that dropping the balloon onto it will add it as a child of the cow game object. The result is that moving the cow game object also moves the position of the balloons.

14. Adding Obstacles
The hands are the enemies or obstacles that need to be avoided if the player wants to finish the level by collecting the star. The hands move from side to side, leaving a narrow gap in the middle for the cow to pass through.


Because the hands are game objects that we'll use multiple times, we first convert it to a prefab as we did with the balloons. Follow the above steps to create the prefab and use the editor tools to position the hands as shown in the above screenshot.
We also need to add a collider to each hand to detect collisions. To add the collider, click the Add Component button in the Inspector panel and select Box Collider 2D in the Physics 2D section. You'll notice that a green box appears around the hand when you select it to indicate the hand has a collider tied to it.

We also play a sound when a hand collides with the cow, popping a balloon. To accomplish this, we first need to add the sound. Select the hand from the Hierarchy or Scene view, click the Add Component button in the Inspector panel, and select Audio Source from the Audio section.
The details of the audio component will show up in the Inspector Panel. Click the dot below the gear icon to select the correct sound.
15. Adding the Star
The goal of the game is to collect the star at the end of each level. The player can move the cow upwards by blowing on the device's microphone.


Drag the star from the Assets panel and add it to the Scene. In the Inspector's Transform section, change the values as shown in the screenshot below to position the star.

This will place the star at the top of the level. To detect when the cow collects the star, we need to add a collider to it like we've done a few times already. Add a Box Collider 2D to the star.
16. Adding Alerts
Alerts are also game objects. They are messages informing the player when the level has been completed or the game is over.

Drag the alerts from the Assets panel to the Hierarchy and then back to the Assets panel to convert them to a prefab. Later in this tutorial, we'll add a script to the alerts and show how they are used. Don't forget to delete them from the Scene once you've converted them to a prefab.
17. Adding Scripts
Unity includes a code editor, a version of Mono Develop. While it's a good editor, you can use whatever editor you like. Visual Studio, for example, is a popular choice if you're using Windows.
You can create a new file by launching your code editor, saving the file in the Assets folder of your project, and then adding it to a GameObject, just like you do with a component. Alternatively, you can create a new script in the Inspector by selecting New Script and then double-clicking it to open it.

18. Detecting Microphone Input
To move our main character, we'll need access to the device's microphone. By default, Unity provides basic support for capturing audio, but it doesn't include a property or method to detect the microphone's activity level, which is what we need to move the cow.
Fortunately, we can use a third party script that will give us access to a loudness property. The loudness property will allow us, along with transform.position, to move the cow.
Create an empty GameObject and name it MicrophoneInput. Use the Add Component button to attach the aforementioned script and an Audio Source component to the new game object.

By doing this, we enable the script and the application will start capturing the microphone's input. By adjusting the Sensitivity property in the Inspector, we control how much the cow is moved by the input of the microphone. The higher the value, the faster the cow will move. I've found that 50 is a good value to start with.
19. Moving the Hands
The following script defines the Hand class and controls the movement of the hands. The hands continuously move from left to right and vice versa. Let's see how this works.
Step 1: Properties
The first property we use in the script is moveSpeed, a float that defines the number of units a hand moves during every frame. It sets the x value of the transform.position property, moving the hand horizontally.
The second property, currentPos, is also a float and stores the current position of the hand before it moves. This will help us calculate the number of units the hand can move.
1 |
using UnityEngine; |
2 |
using System.Collections; |
3 |
|
4 |
public class Hand : MonoBehaviour |
5 |
{
|
6 |
private float moveSpeed = 0.02f; |
7 |
private float currentPos; |
8 |
public bool left = false; |
Lastly, the left property of type boolean defines if the hand is moving to the left. This makes it easy to change the direction of a hand by setting the left variable to either true or false.
Step 2: Start Method
The Start method is a method defined in the MonoBehaviour class that is called during initialization, before any other method is called—with the exception of Awake, which we won't cover in this tutorial.
In the Start method, we can configure the object before any other code is run. In this case, we set the currentPos property to the hand's current position, before it has moved.
1 |
void Start() |
2 |
{
|
3 |
currentPos = transform.position.x; |
4 |
}
|
Step 3: Change Position
In the Update method, we check if the hand is left or right, and move it in the correct direction during every frame. To do this, we write an if statement inside the Update method and decrease or increase the x position using the moveSpeed variable to modify the position property.
1 |
void Update() |
2 |
{
|
3 |
/* Move Hand */
|
4 |
|
5 |
/* Move to the right if hand is on the left side */
|
6 |
|
7 |
if (!left) |
8 |
{
|
9 |
transform.position -= new Vector3(moveSpeed, 0, 0); |
10 |
} else |
11 |
{
|
12 |
transform.position += new Vector3(moveSpeed, 0, 0); |
13 |
}
|
14 |
|
15 |
/* Change moveSpeed to move in the other direction, creating a movement loop */
|
16 |
|
17 |
if (transform.position.x <= currentPos - 0.7f) |
18 |
{
|
19 |
moveSpeed *= -1; |
20 |
}
|
21 |
if (transform.position.x >= currentPos + 0.7f) |
22 |
{
|
23 |
moveSpeed *= -1; |
24 |
}
|
25 |
}
|
26 |
}
|
When the hand moves 0.7 units, we multiply the moveSpeed property by -1 to make the hand move in the opposite direction. The result is that the hands move from one side to the other in a continuous loop, making it harder for the cow to pass through the hands and reaching the star.
20. Cow Script
Create a new script and attach it to the cow game object. This script will handle the player's actions and a few other functions related to the game's mechanics, such as displaying the alerts. Let's take a look at the properties used in this script.
1 |
using UnityEngine; |
2 |
using System.Collections; |
3 |
|
4 |
public class Cow : MonoBehaviour |
5 |
{
|
6 |
private Vector3 gravity = new Vector3(0, 0.02f, 0); |
7 |
public GameObject micVolume; |
8 |
private float moveSpeed; |
9 |
private byte balloons = 3; |
10 |
public GameObject alertWin; |
11 |
public GameObject alertLose; |
12 |
}
|
-
gravity: used to simulate a vertical force, it pulls the cow downwards -
micVolume: reference to theMicrophoneInputgame object -
moveSpeed: gets theloudnessvalue from theMicrophoneInputclass -
balloons: holds number of balloons, this value represents the player's lives -
alertWin: reference to thealertWingame object -
alertLose: reference to thealertLosegame object
Note that public variables need to be set up in the Unity's editor. They are all references to prefabs. Setting the value of a variable in the editor is easy. Save the script and make sure there are no errors. Then switch back to Unity and select the game object to which the script is attached. You should see the variables listed below the script component as shown below.

Drag and drop the required or preferred asset to the variable, or click the little dot below the gear icon to select it.


Make sure that the asset and the variable are of the same type or you won't be able to drop it or see it when you click on the dot icon.
21. Moving the Cow
Step 1: Moving
To move the cow upwards, we'll use the FixedUpdate method. Why not the regular Update method? This method is a predefined MonoBehaviour method that runs every fixed frame rate instead of every frame. This means that it will be smooth even if the current frame rate is a little low. Add the following code block to the script:
1 |
void FixedUpdate() |
2 |
{
|
3 |
/* Move Cow upwards based on Mic volume */
|
4 |
|
5 |
moveSpeed = micVolume.GetComponent<MicrophoneInput>().loudness * 0.01f; |
6 |
transform.position = new Vector3(0, transform.position.y + moveSpeed, 0); |
7 |
|
8 |
/* Simulate our own gravity (this one doesn't get stronger when high) */
|
9 |
|
10 |
transform.position -= gravity; |
11 |
}
|
We calculate the speed by getting the current loudness of the microphone. This loudness is obtained from the MicrophoneInput class and then multiplied by 0.01. We do this to prevent the cow from moving too fast.
The cow character is moved by increasing the y value of the transform.position property, using the speed we stored in stored in moveSpeed.
Step 2: Simulating Gravity
In addition to moving the cow, we also apply a downward force to it, the gravity. We achieve this by decreasing the position of the cow using the gravity vector we created earlier. Doing this will constantly reduce the y position of the cow without making it fall faster, which happens if we were to use the default gravity behavior.
22. Hands Collision
Step 1: Detecting Collisions
In the next step, we detect if any of the hands collide with the cow. The OnTriggerEnter2D method runs when two objects collide without physics interaction. In this case, we check if the cow collides with an object named "Hand", which can be any of the hands on the scene, and play the audio attached to the cow game object if the collision occurs. You'll notice we also inspect the cow's alpha property. Why we do this is explained in the next step.
1 |
void OnTriggerEnter2D(Collider2D other) |
2 |
{
|
3 |
/* Hands Collision */
|
4 |
|
5 |
if (other.name == "Hand" && transform.GetComponent<SpriteRenderer>().color.a == 1) |
6 |
{
|
7 |
other.audio.Play(); |
Step 2: Preventing Multiple Collisions
Collisions are tested multiple times every frame, meaning that three collisions will occur in a very short time popping all the balloons. Since we don't want this to happen, we need a way to prevent this.
A useful way to do this is to change the alpha of the hit object. This will also give the user visual feedback indicating that it has been hit. The next lines will take care of that.
1 |
/* Prevent from multiple collision */
|
2 |
|
3 |
Color alpha = new Color(1, 1, 1, 0.5f); |
4 |
transform.GetComponent<SpriteRenderer>().color = alpha; |
5 |
Invoke("EnableCollision", 1); |
We first create a new Color object and assign it the color of the game object and set the alpha value to 0.5 to make it semi-transparent. We then access the game object SpriteRenderer, which lets us modify its color.
The last line in this block of code waits a second and then calls a the EnableCollision function. This function resets the color values of the cow making it able to detect a collision again. We'll implement this function later in this tutorial.
23. Removing Balloons
When the cow is hit by a hand, one balloon needs to be removed. We call the Destroy method on a balloon game object. We use the Find function, because we don't have a reference to each of the balloons.
This function searches the game's assets and returns the game object that we're looking for, in this case a balloon.
1 |
/* Remove Balloon */
|
2 |
|
3 |
Destroy(GameObject.Find("Balloon")); |
4 |
balloons--; |
But wait, aren't there three balloons in the scene? That is correct. However, the Find function returns the first match it can find. In other words, it returns the first balloon game object it finds.
We also decrement the balloons counter to help us know when the cow has lost all its lives.
24. Game Over
The game is over when all the balloons have been popped. To test this, we check if balloons is equal to 0 and display an alert if true. We also set the gravity's y property to 0 and pause the game by setting timeScale to 0.
The timeScale property controls how time passes in the game environment. It can be used to make the game faster or slower based on its value. The default time scale is 1.0, increasing its value accelerates the frame rate associated functions and decreasing it slows them down. Setting it to 0 pauses the game, preventing any new collisions.
1 |
/* Game Over */
|
2 |
|
3 |
if(balloons == 0) |
4 |
{
|
5 |
GameObject alert = Instantiate(alertLose, new Vector3(0, 0, 0), transform.rotation) as GameObject; |
6 |
gravity.y = 0; |
7 |
Time.timeScale = 0; |
8 |
}
|
9 |
}
|
25. Level Complete
When the player gets to the other side of the level we need to remove the star and display an alert indicating that the level has been completed.
The if statement checks if the collision is in fact with the star game object and plays the audio attached to the cow if the name is correct. We then remove the star from the scene before creating the alert. We also set the gravity's y property to 0 as we did in the previous step.
1 |
/* Star Collision */
|
2 |
|
3 |
if (other.name == "Star") |
4 |
{
|
5 |
audio.Play(); |
6 |
Destroy(other.gameObject); |
7 |
GameObject alert = Instantiate(alertWin, new Vector3(0, 0, 0), transform.rotation) as GameObject; |
8 |
gravity.y = 0; |
9 |
}
|
10 |
}
|
26. Enabling Collisions
The EnableCollision method resets the alpha value of the cow game object after it has been hit by a hand. Doing this will enable the cow game object to detect another hit. Note that the Color object has an alpha of 1.
1 |
void EnableCollision() |
2 |
{
|
3 |
Color alpha = new Color(1, 1, 1, 1); |
4 |
transform.GetComponent<SpriteRenderer>().color = alpha; |
5 |
}
|
27. Restarting the Game
The Reload method uses the Application class to reload the current level. Create a new script named Restart , add the following code block to it, and attach it to both of the alert prefabs we created earlier.
1 |
using UnityEngine; |
2 |
using System.Collections; |
3 |
|
4 |
public class Restart : MonoBehaviour |
5 |
{
|
6 |
void Update() |
7 |
{
|
8 |
if (Input.GetButton("Fire1")) |
9 |
{
|
10 |
Reload(); |
11 |
}
|
12 |
}
|
13 |
|
14 |
void Reload() |
15 |
{
|
16 |
Application.LoadLevel(Application.loadedLevel); |
17 |
}
|
18 |
}
|
We first test if the user taps on the screen using the Input class and call the Reload method if true. The implementation of the Reload method is short and simple. All we do is load the current level, reseting every object and variable to its initial state.
28. Testing
It's time to test the game. Press Command-P to play the game in Unity. If everything works as expected, you are ready for the final steps.
29. Player Settings
When you're happy with your game, it's time to select Build Settings from the File menu and click the Player Settings button. This should bring up the Player Settings in the Inspector panel where you can set the parameters for your application.

These settings are application-specific and include the creator or company, application resolution, display mode, etc. These settings depend on the devices you're targeting and the stores or markets you will be publishing your game on.
30. Build and Play
Once your project is properly configured, it's time to revisit the Build Settings and click the Build button. That's all it takes to build your game for testing and/or distribution.
Conclusion
In this tutorial, we've learned how to implement microphone controls, physics interaction, sprite sheets, and other aspects of game development using Unity. I encourage you to experiment with the result and customize the game to make it your own. I hope you liked this tutorial and found it helpful.


