
Making Crochet Pennant Banner Bunting
I'm really relieved to have just got my daughter's 7th birthday party done and dusted. She had a fantastic time, the best party ever was what she said afterwards which made all the effort seem very worthwhile. But it was a lot of work and I'm happy to have got that one over with.
If you've been reading the blog here, you'll know that I made nearly all the decorations myself for the event which is partly why it took up such a lot of my time. It was the crochet bunting in particular that really had all the guests talking about how great it looked and I love the fact that we can re-use that again next year since it was made to last.
In this issue, I'm focusing on the yarn based pennant banners, garlands and bunting that I made with tips and advice on creating your own. I'm also throwing in my free pattern for basic triangle bunting as well so you can make some too.
Note: This post contains affiliate links for which I may be compensated.

If it seems like too much work, bear in mind that these yarn banners can be made using spare bits of wool or yarn that you have which is a good way of using up oddments left over from other projects.
Also bear in mind that you can work on them a little at a time and build the individual flag pieces up gradually. I did a lot of mine during the evenings. They were small and easy to make so I often watched a movie while I was making them.
I'm not a yarn snob. I know some people are fussy over yarns and only using the best of the best that's available but 1) my crafting budget is limited since I have a family to help support which always comes first and 2) why use premium yarns on hanging decorations?


These banners are hung up, you don't need to feel them since they're just to look at. So acrylic yarns will do the job fantastically well. They make durable, colorful, practical and lasting decorations that look good.
For US readers, I am always reading good things about Red Heart Super Saver Yarn which is 100% acrylic. And that's what I'd say to take a look at for projects like these.
Here in the UK, I use Top Value Double Knitting Yarn by James Brett which comes in a lovely array of colors with lots of brights that I adore for projects like this. I've had no problems crocheting with it, it doesn't feel as nice as wool mixes or my favorite which is cotton but it is very cheap and therefore I really don't worry about how much I'm using.

This is my daughter on her birthday and you can spy some of the decorations in the background which is the yarn pom pom banner and the triangle pennant banner bunting from Lucy at the Attic24 blog. First up we'll talk about the pom pom decorations since these were the hands down easiest to make and assemble.
➡️ SEE HOW TO MAKE A YARN POM POM GARLAND HERE
You can make pom poms in a variety of ways (I think I must have tried all of the methods going over the years!) but the fastest and easiest way for me is to use the new Clover pom pom makers. These plastic devices are so easy to use since you don't need to squeeze the yarn through a hole nor wrap round a flimsy bit of cardboard.
No, you get a sturdy, easy to hold device that has pull out 'arm' sections that make wrapping yarn a cinch. Ever so easy when you know how and even my 7 year old can do this. I would not have gone to the bother of making so many poms without having an easy and quick way to make them!
Here's the Clover Pom Pom Makers
The large set, the green one, is the one I mostly used for the garlands, by the way. The one downfall of the devices is with the lack of instructions so I put together a handy photo tutorial on:
How to Use the Clover Pom Makers.

Once I'd made enough of these (I had 15 pom poms for each garland made) then it was time to string them together so I could hang them up.
The easiest way to turn your finished pom poms into a finished garland is merely to 'string' them onto some strong yarn or thin twine. You need a length of yarn that is going to be long enough to comfortably stretch across the wall or area where you are placing the garland.
You also need to allow extra yarn on either side. The extra length will make a nice curved dip in the middle as well as give you yarn to tie loops at the ends for hanging.
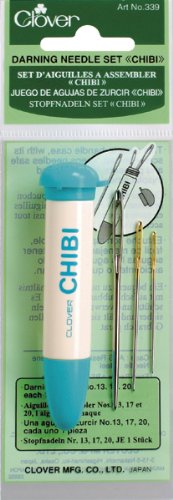
You need a long, large eye darning needle (I used one from my Clover Chibi set) to thread the yarn through. Then you simply push the needle through the center or middle of each pom. Don't worry about positioning since you can move them around into place once hung up - just get them onto the yarn.
Take great care not to drop this pom pom garland once you start to string on each piece since I made this mistake and the yarn got tangled and I ended up with a knotted mess. I ended up cutting the yarn, removing the poms and starting all over again.
Make loops in the ends and get someone else to help you hang this up - then play about with the positioning of the pom poms until you're happy with the spacing and how they look. They added a lot of fun and color to otherwise bare walls in our case.

I'd already started making some crochet triangles when I happened to see this delightful pattern in Simply Crochet Magazine #19 and it was by Lucy from the popular Attic24 blog. Of course, as soon as I saw it, I had to start making it.
This pattern was very easy once I got the hang of the process since it is like making a solid Granny Square pattern but worked in a triangle instead. Lucy's version was called summer blues which is really pretty but I wanted really bright zingy summer colors and these are all worked in 100% acrylic yarns.
I worked the top border a little differently, using just a single bright blue for that and left off the decorative buttons she'd added on in the pattern - my version was so colorful that any extra details would have just been lost in the overall design.
The Bunting Pattern: Well you can find this one in the magazine issue I mentioned. If you don't have access to Simply Crochet magazine, you can't get Lucy's exact bunting pattern free. But I have found a similar free crochet bunting pattern here. Alternatively, try my easy granny triangle crochet bunting step by step tutorial.
Lucy worked some pretty scalloped chains around the edges of her triangles but this is really quite easy to do just by chaining a length of stitches and then slip stitching them to fasten each scallop down to the triangle.
To finish, just crochet across the tops of each piece with chains worked in between to make your border length for hanging. Or you could skip this and thread these onto a length of twine or cord instead.

I love strawberries - I actually don't like eating them at all but I do love making them and have done many crafts on this fruity theme.
Not long ago, I blogged a free pattern on making these crochet strawberries and also made a full photo tutorial which is linked to from the same post.
It was always my intention to use these to make a sweet little garland to hang over our mirror which is why all my finished ones had little loops of yarn on top, ready to be strung onto cord. I made 6 of these for a small little garland and you can get the gist of what that looks like below if you look above the mirror.

You'll have to just trust me that these look really good because getting a great image of these once strung up was almost impossible. Unfortunately banners, garlands and bunting are really tricky to photograph well - especially if you're just an amateur like me. I fully admit that I just like to point and shoot with my camera and that is it.

Wow this has been an incredibly long post (I should have made it smaller!) but this one contains a free pattern for making basic crochet triangles and the option of adding on some simple butterfly motifs. You could also leave them plain or you could add flowers instead.
The basic pattern for these triangles is worked in single crochet (or dc UK) where you start at the bottom and increase your way up.
The benefit of starting at the bottom is that you can increase this triangle until you get to the desired size whereas if you started the other way around, you'd have to put up with the size given from the pattern.
I designed the easy to make crochet button butterflies and you can find a photo tutorial pattern for the butterflies here on the blog. The butterflies are optional motifs and you can easily swap those for something else entirely.
Note: the instructions are in US terms. I used a 4mm crochet hook with double knitting weight acrylic yarn. You can use your favorite yarn / hook combo. Chain 1 is the turning chain at the start of each row. A stitch counter is really useful / highly desirable on this pattern to keep track.
Chain 2.
When you get to the end, which for me is row 30, you may want to neaten the two sloped triangle edges by working sc stitches across the edges. This is optional. String up onto some twine or cord placed through the corners.
These decorations can work for birthdays, parties, anniversaries, weddings (although perhaps in more muted color schemes!) and any celebratory occasions.
FREE GRANNY TRIANGLES PATTERN IDEAL FOR BANNERS
MY CROCHET TASSELS GARLAND TUTORIAL
This has been a long post but I hope it has been useful to you in your own crafting. I hope you've enjoyed reading my craftymarie article today, thanks for your visit. If you have any questions or comments, you can leave a comment below for me.
Related Content You Should Also Love:
Page Last Updated:
If you've been reading the blog here, you'll know that I made nearly all the decorations myself for the event which is partly why it took up such a lot of my time. It was the crochet bunting in particular that really had all the guests talking about how great it looked and I love the fact that we can re-use that again next year since it was made to last.
In this issue, I'm focusing on the yarn based pennant banners, garlands and bunting that I made with tips and advice on creating your own. I'm also throwing in my free pattern for basic triangle bunting as well so you can make some too.
Note: This post contains affiliate links for which I may be compensated.
Ideas for Crochet Pennant Banner Bunting PLUS Free Pattern for a Crochet Triangle Banner
If it seems like too much work, bear in mind that these yarn banners can be made using spare bits of wool or yarn that you have which is a good way of using up oddments left over from other projects.
Also bear in mind that you can work on them a little at a time and build the individual flag pieces up gradually. I did a lot of mine during the evenings. They were small and easy to make so I often watched a movie while I was making them.
I'm not a yarn snob. I know some people are fussy over yarns and only using the best of the best that's available but 1) my crafting budget is limited since I have a family to help support which always comes first and 2) why use premium yarns on hanging decorations?


These banners are hung up, you don't need to feel them since they're just to look at. So acrylic yarns will do the job fantastically well. They make durable, colorful, practical and lasting decorations that look good.
For US readers, I am always reading good things about Red Heart Super Saver Yarn which is 100% acrylic. And that's what I'd say to take a look at for projects like these.
Here in the UK, I use Top Value Double Knitting Yarn by James Brett which comes in a lovely array of colors with lots of brights that I adore for projects like this. I've had no problems crocheting with it, it doesn't feel as nice as wool mixes or my favorite which is cotton but it is very cheap and therefore I really don't worry about how much I'm using.
1) Easy Yarn Pom Pom Garlands
This is my daughter on her birthday and you can spy some of the decorations in the background which is the yarn pom pom banner and the triangle pennant banner bunting from Lucy at the Attic24 blog. First up we'll talk about the pom pom decorations since these were the hands down easiest to make and assemble.
➡️ SEE HOW TO MAKE A YARN POM POM GARLAND HERE
You can make pom poms in a variety of ways (I think I must have tried all of the methods going over the years!) but the fastest and easiest way for me is to use the new Clover pom pom makers. These plastic devices are so easy to use since you don't need to squeeze the yarn through a hole nor wrap round a flimsy bit of cardboard.


No, you get a sturdy, easy to hold device that has pull out 'arm' sections that make wrapping yarn a cinch. Ever so easy when you know how and even my 7 year old can do this. I would not have gone to the bother of making so many poms without having an easy and quick way to make them!
Here's the Clover Pom Pom Makers
The large set, the green one, is the one I mostly used for the garlands, by the way. The one downfall of the devices is with the lack of instructions so I put together a handy photo tutorial on:
How to Use the Clover Pom Makers.
Once I'd made enough of these (I had 15 pom poms for each garland made) then it was time to string them together so I could hang them up.
The easiest way to turn your finished pom poms into a finished garland is merely to 'string' them onto some strong yarn or thin twine. You need a length of yarn that is going to be long enough to comfortably stretch across the wall or area where you are placing the garland.
You also need to allow extra yarn on either side. The extra length will make a nice curved dip in the middle as well as give you yarn to tie loops at the ends for hanging.
You need a long, large eye darning needle (I used one from my Clover Chibi set) to thread the yarn through. Then you simply push the needle through the center or middle of each pom. Don't worry about positioning since you can move them around into place once hung up - just get them onto the yarn.

Take great care not to drop this pom pom garland once you start to string on each piece since I made this mistake and the yarn got tangled and I ended up with a knotted mess. I ended up cutting the yarn, removing the poms and starting all over again.
Make loops in the ends and get someone else to help you hang this up - then play about with the positioning of the pom poms until you're happy with the spacing and how they look. They added a lot of fun and color to otherwise bare walls in our case.
2) Lucy's Solid Granny Square Crochet Bunting
I'd already started making some crochet triangles when I happened to see this delightful pattern in Simply Crochet Magazine #19 and it was by Lucy from the popular Attic24 blog. Of course, as soon as I saw it, I had to start making it.
This pattern was very easy once I got the hang of the process since it is like making a solid Granny Square pattern but worked in a triangle instead. Lucy's version was called summer blues which is really pretty but I wanted really bright zingy summer colors and these are all worked in 100% acrylic yarns.
I worked the top border a little differently, using just a single bright blue for that and left off the decorative buttons she'd added on in the pattern - my version was so colorful that any extra details would have just been lost in the overall design.
The Bunting Pattern: Well you can find this one in the magazine issue I mentioned. If you don't have access to Simply Crochet magazine, you can't get Lucy's exact bunting pattern free. But I have found a similar free crochet bunting pattern here. Alternatively, try my easy granny triangle crochet bunting step by step tutorial.
Lucy worked some pretty scalloped chains around the edges of her triangles but this is really quite easy to do just by chaining a length of stitches and then slip stitching them to fasten each scallop down to the triangle.
To finish, just crochet across the tops of each piece with chains worked in between to make your border length for hanging. Or you could skip this and thread these onto a length of twine or cord instead.
3) My Sweet Summer Strawberry Garland Pattern
I love strawberries - I actually don't like eating them at all but I do love making them and have done many crafts on this fruity theme.
Not long ago, I blogged a free pattern on making these crochet strawberries and also made a full photo tutorial which is linked to from the same post.
It was always my intention to use these to make a sweet little garland to hang over our mirror which is why all my finished ones had little loops of yarn on top, ready to be strung onto cord. I made 6 of these for a small little garland and you can get the gist of what that looks like below if you look above the mirror.
You'll have to just trust me that these look really good because getting a great image of these once strung up was almost impossible. Unfortunately banners, garlands and bunting are really tricky to photograph well - especially if you're just an amateur like me. I fully admit that I just like to point and shoot with my camera and that is it.
4) My Butterfly Bunting and Free Pattern
Wow this has been an incredibly long post (I should have made it smaller!) but this one contains a free pattern for making basic crochet triangles and the option of adding on some simple butterfly motifs. You could also leave them plain or you could add flowers instead.
The basic pattern for these triangles is worked in single crochet (or dc UK) where you start at the bottom and increase your way up.
The benefit of starting at the bottom is that you can increase this triangle until you get to the desired size whereas if you started the other way around, you'd have to put up with the size given from the pattern.
I designed the easy to make crochet button butterflies and you can find a photo tutorial pattern for the butterflies here on the blog. The butterflies are optional motifs and you can easily swap those for something else entirely.
Here's the Basic Crochet Triangle Pattern:
Note: the instructions are in US terms. I used a 4mm crochet hook with double knitting weight acrylic yarn. You can use your favorite yarn / hook combo. Chain 1 is the turning chain at the start of each row. A stitch counter is really useful / highly desirable on this pattern to keep track.
Chain 2.
- 1 ss in the 2nd chain from the hook. Turn.
- Ch 1. 2 sc in the stitch at the base and turn [2 stitches in total]
- Ch 1. 1 sc in each stitch. Turn [2]
- Ch 1. 2 sc in each stitch. Turn [4]
- Ch 1. 4 sc across the row. Turn [4]
- Ch 1. 4 sc across the row. Turn [4]
- Ch 1. 2 sc in the 1st stitch. 1 sc in each stitch except the last. 2 sc in last stitch. Turn [6]
- Ch 1. 6 sc across the row. Turn [6]
- Ch 1. 6 sc across the row. Turn [6]
- From this row up to row 30 or larger if you want a bigger triangle, follow the pattern laid out in rows 7-9. This means that on rows 10, 13, 16, 19, 22, 25 and 28 you need to increase by doing 2 sc in the first stitch, 1 sc in each stitch except the last and 2 sc in the last stitch. On all other rows, you just work a sc into each stitch across. Don't forget the ch 1 turning chain at the start of each row.
When you get to the end, which for me is row 30, you may want to neaten the two sloped triangle edges by working sc stitches across the edges. This is optional. String up onto some twine or cord placed through the corners.
These decorations can work for birthdays, parties, anniversaries, weddings (although perhaps in more muted color schemes!) and any celebratory occasions.
More Crochet Pennant Banner and Bunting Tutorials
FREE GRANNY TRIANGLES PATTERN IDEAL FOR BANNERS
MY CROCHET TASSELS GARLAND TUTORIAL
This has been a long post but I hope it has been useful to you in your own crafting. I hope you've enjoyed reading my craftymarie article today, thanks for your visit. If you have any questions or comments, you can leave a comment below for me.
Related Content You Should Also Love:
Making an Easy Banner and Garland from Felt
How to Make Cute Yarn Tassels
Crochet Strawberries Pattern
DIY Crochet Tassel Garland Tutorial
Even More Crochet Crafts
How to Make Cute Yarn Tassels
Crochet Strawberries Pattern
DIY Crochet Tassel Garland Tutorial
Even More Crochet Crafts
Page Last Updated:
Comments
Post a Comment
CraftyMarie is a craft themed website by Marie Williams Johnstone. I love to craft in the winter and garden in the summer. I make handmade cards, papercrafts, crochet and seasonal crafts. I enjoy many of the more traditional crafts and hobbies including sewing, embroidery and working with felt and fabric. Thanks for leaving me a comment. Comments do not show up until I approve them. Marie