
As a beginner photographer, you may not know the first thing about studio lights. It’s even possible to become well established as a professional photographer without ever using them – after all, natural light lends a natural and free gift. They can be expensive if you want to get started with a good kit, and after you have them, actually getting them to work properly is another question.
Here we have gathered together some simple and easy to follow tips which will help you to understand your studio lights better, and to get the most out of them.
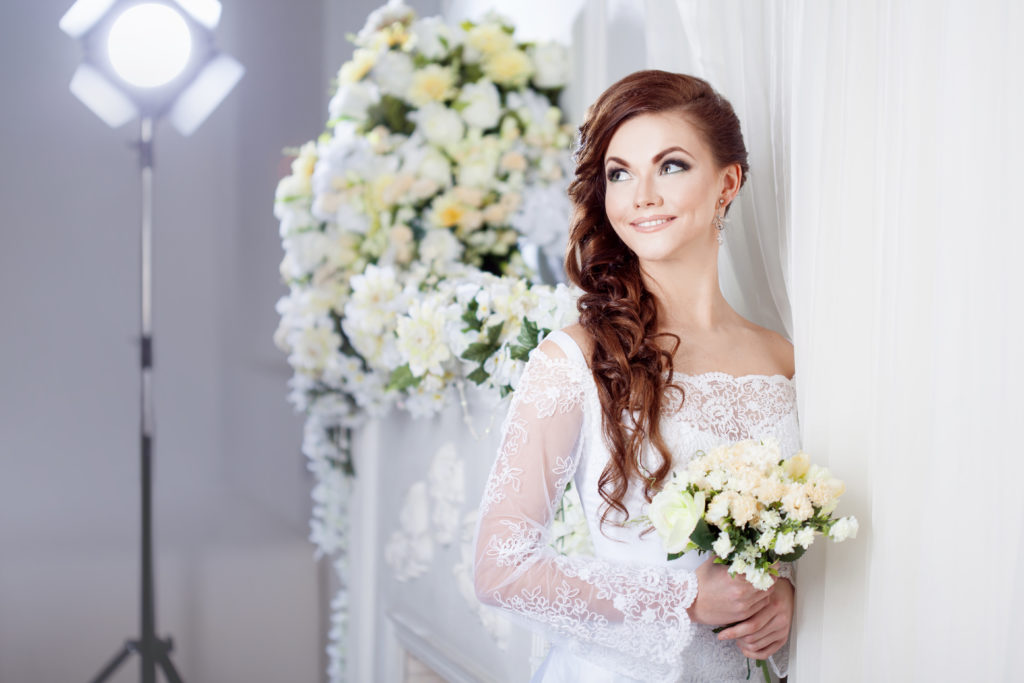
Simple is sometimes better
Just because you have four lights, doesn’t mean that every shoot is going to need four of them. Particularly if you are working within a small space, one studio light can be powerful enough to give you all of the light that you need. Your first step here is to eliminate all other light sources from the room – close curtains and shutters, shut doors, and turn off or dim electrical devices.
Next, set up your light in the center of the room. With an umbrella attached, face it away from your subject; or with a wide softbox attachment, point it towards them. Either method is going to give you a good and even spread of light. You can use the prop light mood to ensure that you can still see what you are doing in between flashes.
Test the light with your model in the center of your backdrop, facing the light. If it is too harsh, you can either move the light backwards or turn it down. If it is not strong enough, turn it up or move it closer. With this placement, you can get a fully lit portrait very easily.
You can also get some interesting results. Try placing it far to one side, and notice how shadows spring to life on the side of their face which is furthest away. This is not always a flattering effect, but can be used to create a dramatic look. To make it a little more flattering, you can use a honeycomb grid over the light: this narrows and diffuses the light a little, giving a dramatic but still even light.
Eliminate shadows
If you want no shadows at all, two lights can do the job. Set up one at each edge of the backdrop, pointing towards your subject (with softbox) or directly away (with umbrella). The two light sources will illuminate the shadows on both sides of your model, leaving them with a fully lit environment.
If you still have some residual shadows due to the particular placement or strength of the lights, you can also add a third light to remove them. This will go behind the backdrop and again face towards the model. This gives you a soft glow through the backdrop which lights the back of the model. A strong light may give a halo effect to their figure, particularly seen on the hair, while a lower intensity light will simply brighten the backdrop and remove shadows.
You can also use a reflector to fill in light. For example, placing one underneath and in front of the model – or even asking them to hold it if you are just doing headshots – can help to remove shadows from under the chin and prominent parts of the face. This really fills in all the little details and can bring a lot of clarity to the portrait.
Light the sides
Rim lighting is a technique where the sides of the model are well lit, and it works very well for nude or full body shots because it can define the shape of the body a bit better.
You place one light on either side of the model, slightly behind them and facing back towards you. This brings light to the sides of the face and body, so if you want to fill in more light on the face, you can have a reflector held just out of frame to help. This set-up can be a little tricky as the lights are pointing back towards the camera, causing lens flare. To avoid this, use a lens hood or shield, or a set of barn doors as they are known on the lights. If you have no alternative, simply stand closer to the model and make sure that the lights are well out of frame. This may not eliminate the flare totally, but will be a better result.
Putting a light that hits the back of your subject’s head can also illuminate their head and hair better, making them stand out from the background. This gives them the halo effect again, and it’s not something that everyone is a fan of – but it can be very effective.
Color filters and gels
This is where things can get really arty. If you put color gels or filters over your lenses – something as simple as tissue paper held in place with tape away from the bulb will do – it will lend a color cast to your images. This can also be done in Photoshop during your post-production, so many people prefer to do it that way. This can help to bring in different levels of contrast, add depth to an image, or give a certain feel – for example, shooting with a red filter for a Halloween shoot can give it a really creepy element.
Fill light
If you have any shadows that you want to get rid of, a reflector is perfect. A white reflector will give you a simple fill-in, while a gold one will make the light warmer and a silver one colder. You can use reflectors to direct light away as well – a black card or fabric will block light and reduce the amount that bounces on to a certain area. It’s easiest to use reflectors with an assistant.
Talking of the way you fill in light, catchlights in the eyes are always something that you will want to create. They bring life to the image and make your subject more powerful. You can read all about catchlights in our guide to using them.
General tips
Finally, a few general tips for how to make sure that your studio lights give you the best possible results. First, always remember to keep your camera set to the right shutter speed. This is normally 1/125, the same setting as your lights. That means they are flashing at the same rate that your shutter is open for. If you do not have them set up in the same way, then you will end up with an image that is partially obscured in shadow as the shutter opened on a dark subject.
Also try to make sure that your cables are secured or kept out of the way. You can do this by placing gaffer or duct tape over them, particularly if using a bright color which will stand out to those walking around the set. This will ensure good safety on set and will prevent anyone from tripping over the cables or pulling the lights over by accident.
Also, don’t assume you always need to spend a lot of money to get good shots. Your lights are your main priority. If you have no money left after you buy them, don’t panic. Reflectors can be pieces of cardboard covered in tissue paper, or just foam board. A white backdrop can be a sheet or simply a plain wall.
The more practice you have with lighting, the easier you will find using them. Experimenting will help you to find your preferred style and give you a go-to set-up that you know works well.
Do you have any lighting tips to add? Let’s hear from you in the comments.
Pingback: Top Photographers of the Week – Then & Now - Summerana - Photoshop Actions for Photographers