In today’s Photoshop tutorial we’re going to create a cool portrait effect using a long passage of text that bends and deforms around the contours of the face. Known as a Calligram, this effect is particularly powerful when used to present famous quotes or speeches by depicting the author/speaker with the actual words. Photoshop’s Displace filter is the key ingredient in this recipe which allows us to accurately wrap the text around the subject.
Watch the video
Subscribe to the Spoon Graphics YouTube Channel
In my example, I’m combing a stock photo with a transcript of the speech from the movie The American President (1995) to create a totally fictional presidential address, but this calligram effect would be a great style for a series of famous speeches from the real American presidents of the past.
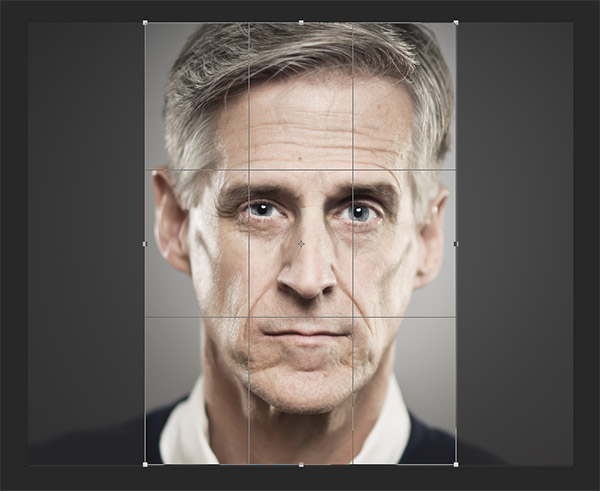
Begin with your chosen image in Photoshop. I’m using this stock portrait of a senior man from Shutterstock. Crop your image to fit into your final poster dimensions.
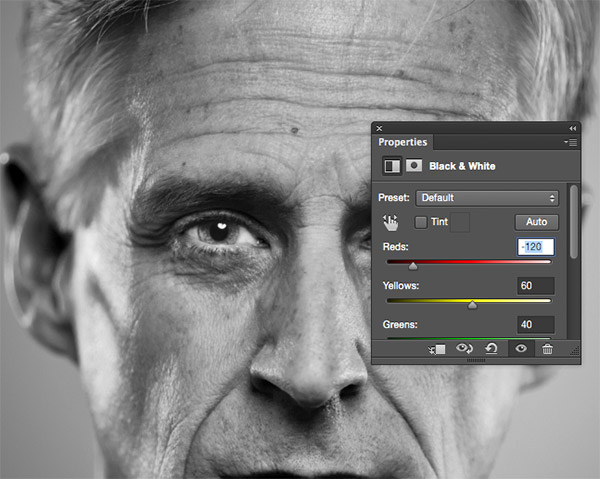
Add a Black and White Adjustment Layer and add more contrast to the image by darkening the Red channel. Unlike a normal Levels or Brightness/Contrast adjustment, altering the Red channel only produces some lovely tones.
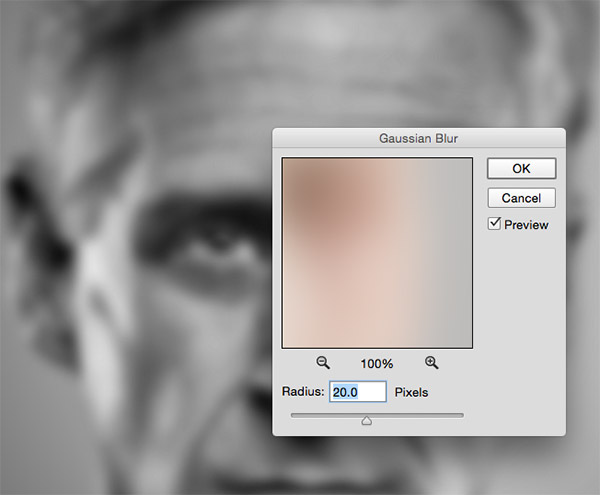
Select the image layer then add a Gaussian Blur from the Filter menu. Enter around 20px for the radius. This blurring will help soften the displacement effect.
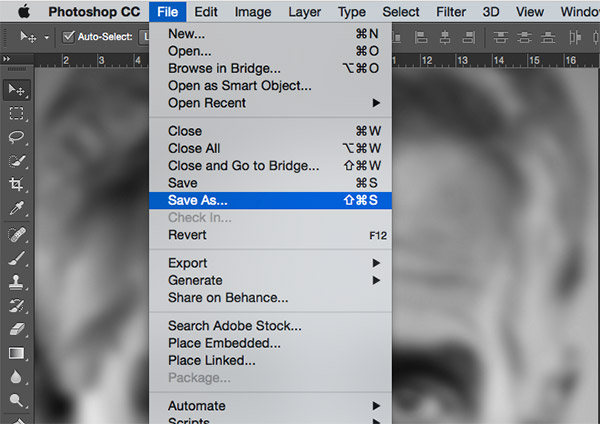
Go to File > Save As and save this document as displace.psd, then use the Step Backward shortcut of CMD+Alt+Z to undo the blurring effect.
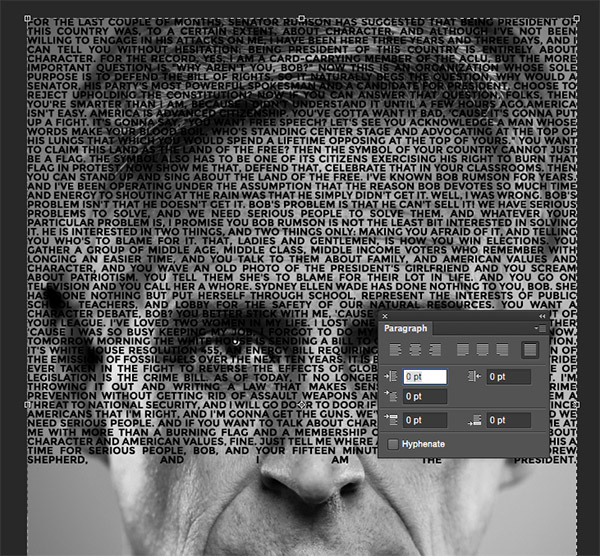
Select the Type tool and draw a container across the entire document. Paste in your chosen quote/speech and delete any line breaks to leave a continuous wall of text. Turn off the Hyphenate option and select a Justified paragraph layout.
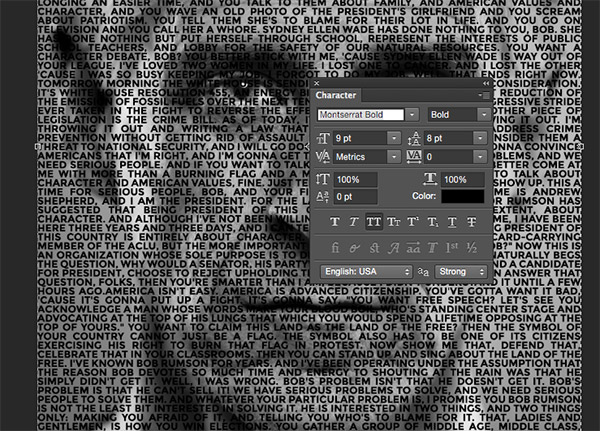
If the text doesn’t completely fill the image simply copy and paste the contents to fill out the required space. Select a font for your design, I’m using Montserrat Bold in uppercase. Reduce the text size and leading so the text densely covers the portrait.

With the text layer selected, go to Filter > Distort > Displace. Agree to Rasterize the type, then enter 10 in the Horizontal and Vertical scale options. After clicking OK, navigate to the displace.psd file we saved earlier.
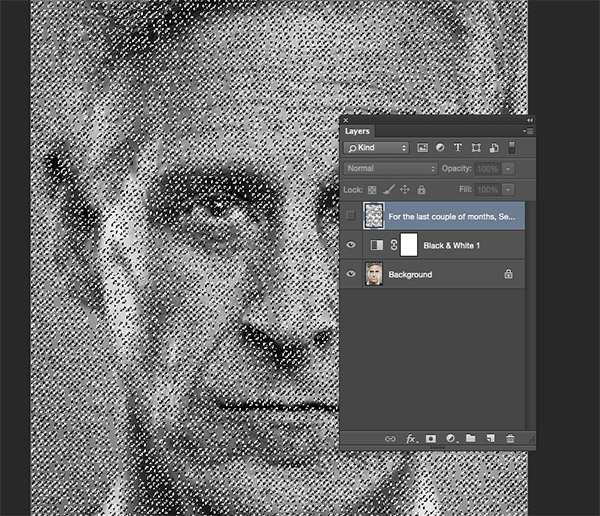
CMD+Click the thumbnail of the displaced text layer to load its selection, then turn off the layer visibility. Go to Edit > Copy Merged (or CMD+Shift+C) to take a clipping of the face using the outline of the words.
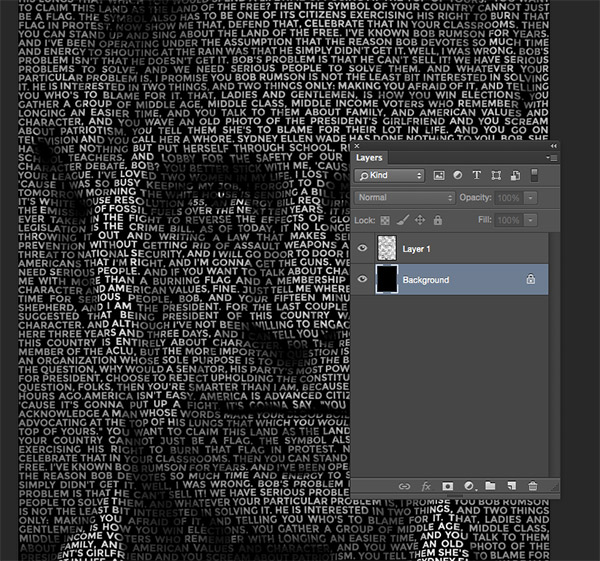
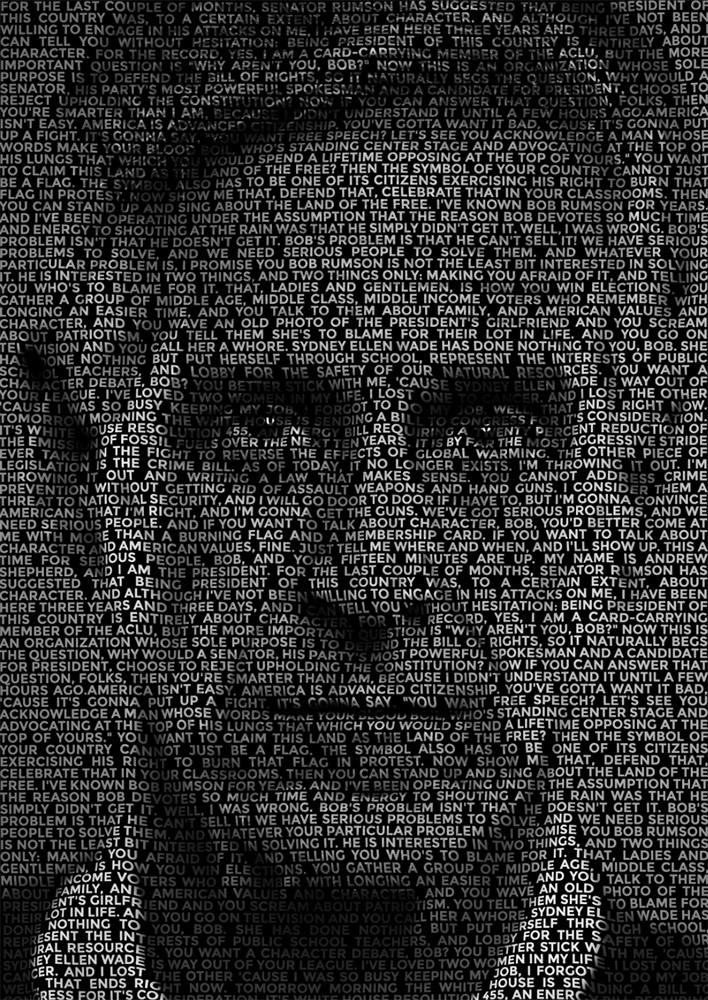
Create a new document, which Photoshop will automatically size to the dimensions of your text clipping. Paste in the artwork, then fill the background with black to see the original portrait constructed out of tiny words that warp around the facial contours.
Thanks to the displacement effect, the portrait image is still clearly visible despite being made from a wall of text. From a distance it looks like a simple pattern overlay, but up close it becomes intriguing to read the tiny words that construct the image.


Hi. My daughter has asked me design this for summer artwork. This is amazing. Thank you so much. I run a small web design company in Newcastle. I will try this on some of my customers websites too. Kind Regards Sally. Head designer at Web Design Newcastle
Doesn’t seem to work for me. When i go to edit>copy merged, i cant select as it isn’t highlighted? Any ideas please? I am not a genius unfortunately.
many thanks in advance
Mal I had the same issue and what I did was hide all the layers except the displaced text layer, so you will only be able to see the text, then, with this layer selected go to Select>Color Range>OK and this will show you a mask over the text (maybe you will need to play a little bit with the options of the color mask option in order to have the best mask). When you already have this mask you can follow the procedure that Chris place… hide the displaced text layer, unhide the others two and then, yes, copy merge from the Edit menu will be able for you to use it, at least it works for me. I hope you can work it out since I believe it´s a cool tool. Seeya!!!
I have this exact same problem, getting frustrated. maybe I am too much of a noob to do this one..
Awesome tutorial! Your site is really helping me to get design inspiration.
Your tutorial didnt work for me either. After the Filter > Distort > Displace step my image doesnt look the same as yours. I did it multiple times and had the same results
That is pretty awesome. I’ve tried it a few times but I can’t get the contrast right (too dark).
How does it look without any adjustment to the black and white filter? My example image was quite bright so the same amount of red alteration might be way too dark in other images.
I’ve personally tried to use an image with wide tones, so ensured not too much black in the b/w conversion.
It’s the text that only shows up as an outline and not filled which is really weird?
I’m going to give it a try again with a full B/W rather than RGB then :)
Ok I’m getting there! I have a man with no eyes as it’s covered in text and the background fill seems to have stolen his eye sockets, but I’ve changed the font and I would say that when you fill the background layer to black don’t tell it to ‘select all’ first…that makes a difference!
:) Thanks for your help Chris !
Same here! I’ve had 5 goes now and it’s driving me nuts! All I’m getting is an outline of the font I’ve used. Help us out Chris!
I’ve followed your instructions to the T and it just doesn’t do it??
Have we missed out anything re: layer style or layer blending that helps? Argh! I so want to learn this!
I have the same problem.
Chris, you rock! this is truly amazing :)
thank you :) i didn’t know that there is such way to do it like in your tutorial. other guys have used techniques more complex and time consuming (some have claimed several hours for their work). the only thing i did with text effect was few years ago when i made a wallpaper dedicated to albert einstein. what i did was just placing text over image using clipping mask.
Excellent tutorial,I love this!
Awsome! THX!
I tried this using a Henry Rollins photo and it turned out pretty good. I am going to try this with some other photos and text to see if I can perfect this. Thanks for sharing this Chris!
Hi…I’m in final step but i don’t know what have to do ..what do you mean by Create a new document, which Photoshop will automatically size to the dimensions of your text clipping. Paste in the artwork, then fill the background with black to see the original portrait constructed out of tiny words that warp around the facial contours. ???? I need help please
That’s awesome! I’m going to learn this text mosaic effect and apply it not only on portraits, but also other photos and objects with good contrast. Probably I might try to experiment a little bit – give it some glow, or overlay some color. :)
Colour overlays can definitely work really well with this effect. I actually tried a U.S flag over my example but the mono effect looked more powerful
I just copied the original photograph, pasted it at the top layer of the letterfill version, shifted the blend mode to color, then clipped it to the letter layer to add color – I had to do a levels adjustment to brighten it up, but the color looks really good.
I’ve always wanted to know how to do that! Thanks for sharing – I’d never have figured that out all on my own.
So this will only work for black and white?
The initial stage needs to be black and white as the displacement map uses the tones to determine how to warp the text, you can always revert back to the full colour image after saving the map PSD though.
This tutorial is very helpful for me but i think it will be very helpful for all categorizes beginner
I really appreciate all the tutorials Chris!!!
This is an awesome tutorial this will make my day thanks chris for sharing this.
I had something similar in mind for a project I’m working on and then this popped in my inbox. Easy and very well explained, I was able to do that thing in no time at all… so, thanks a whole lot, you’re a life saver!
Let’s try using my photo :)
Thanks for the tutorial Chris
Wow chris! You have just made my day! Thank you for this awesome tutorial.
Thanks for the tutorial – very easy and I’m happy with the results.
http://i.imgur.com/zka55Wk.png
Chris, this is a fabulous tutorial. I followed your instructions… and it works brilliantly! Just created a lovely portrait of Woody Allen (from a pic I took a few years ago of him playing Jazz at the Carlyle Cafe) and overlaid with Woody quote lines… it looks amazing!!
wow that is amazing tutorial Chris! Love it..
Very creative and easy tutorial. Chris I see your all tutorial very easy but effective. Thanks gift for your helpful tutorial.
I tried this but the text is very warped and hard to read. good tutorial