- A Brief Introduction
- Drag and Drop API Events
- Drag and Drop API Methods
- Drag and Drop API Properties
- Building Something with the Native API
- Processing Data Between Elements on Drag and Drop
- Example: A Drag-and-Drop Puzzle Game
- Moving Data from Other Tabs and Locally from the Desktop
- Example: Dragging Images from External Sources
- Overview of Browser Support
- Additional Resources
- Wrapping Up
- Frequently Asked Questions (FAQs) about HTML5 Native Drag and Drop API
Everyone loves an easy-to-use and interactive user interface and ever since the introduction of smartphones there has been a jump in expectations from users; The expectation is that your website will be intuitive, will use universally understood actions, and overall proving an easy way to engage with your site.
Giving your users the ability to drag, drop, and sort makes your site more intuitive as people understand how to move element X to position Y and that moving object A in front of object B makes object A come first.
Handling dragging, dropping, and sorting has always been a task for JavaScript and developers have previously had the option of building their own interactions or to use a prebuilt solution. With the advent of the HTML5 Drag and Drop API, developers will be able to hook into native events and attributes to handle these interactions.
A Brief Introduction
Lets go through the API so we can get an overview of how it all works.
The native API lets us define elements that are draggable by using the draggable="true" attribute on your desired elements. Some elements are by default draggable even without any modifications (such as images or text).

By default when draggable elements are dragged, only form elements such as input will be able to accept them as a drop. You would have seen this before; if you select some text and drag it into a textarea the text is copied into the textarea element.

The native API also handles drags from external areas on your OS onto your drop zones. Almost all good Content Management Systems provide drag and drop uploading of content. Since these elements are external, all you need to configure is the drop zone (and also have a compatible browser).
A quick note about mobile devices
Currently the native API doesn’t support mobile devices. While this may change in the future, it’s best to view the examples from a desktop browser so you can see how it all works
Drag and Drop API Events
The native API provides the following events that you can listen for. These events will apply to either the draggable item or the drop zone and will be triggered at set times.
When these events are fired, we have access to a local object (which we will call event). This object holds more information about the event itself and will give you access to the dataTransfer object where you will set most of your methods and properties.
We will need to hook a callback function onto each of the events so we can interact with the API:
// add a handler to trigger on dragstart
document.addEventListener('dragstart', function(event) {
  // add your dragstart code here
}, false);
Drag-related Events
These events are triggered only on draggable items.
dragstart
Triggered as soon as we start dragging. It’s here we will need to tell the API about what we will be dragging and set up other values. Use the setData() method to set the data you want to save, set the effectAllowed property for the draggable element, and define the draggable helper with setDragImage().
drag
This event is triggered continually during dragging. The number of times it occurs depends on the browser. This is useful for determining exactly where the draggable item is.
dragend
This is event fires as soon as the draggable is dropped (regardless of where it is dropped) and generally triggered directly after the drop zone’s drop event. You can use this event to reset styles applied when dragging or to perform other cleanup actions. The dragend event has access to the draggable so you can do calculations after dragging has ended (for example seeing if the drop event was successful by looking for newly added elements and then removing the original draggable).
Drop-related Events
These events are triggered only on elements that you specify as drop targets (or are already naturally drop targets, like form elements):
dragenter
Triggered just once as soon as a draggable enters a droppable area. This will trigger when more than 50% of the draggable is inside the drop zone.
This event sets the dropEffectof the drop zone. By default drops on non-form elements won’t do anything. You will need to manually call event.preventDefault() and event.stopPropagation() to tell the API that this drop should take place.
You can check the dataTransfer object for the effectAllowed value that has been set by the draggable and then compare it to the value your drop zone has for its dropEffect. If these values won’t work together (i.e one is copy and the other is link) then the browser won’t drop the item successfully (even if you prevented defaults and stopped propagation).
You can use the types property to get a list of all data types that have been set in the dragstart event. You can’t see the data but you can see its type. It’s here you can use another method called contains to see if a certain type of data has been set up. This is done via the event.dataTransfer.types.contains(type) method. You could use this to ensure that something has been set to the text/html type for example.
You can set classes or trigger actions now that you know your draggable has entered into the drop zone (a common theme is to style the drop zone differently to show it is being activated).
dragover
This event is essentially the same as dragenter but it is called continually while the draggable item is inside the drop zone. This event is perfect if you want to determine the exact position of the draggable (because it is updated continually).
This event sets the dropEffect of the drop zone and, like dragenter, you will need to prevent default and propagation.
dragleave
This is triggered once a draggable has moved away from a drop zone. It’s generally used to remove styles added in either the dragenter or dragover events and fires once the draggable is not overlapping with the drop zone.
drop
This event is triggered once the draggable has been released and the drop area agrees to accept the drop. This will only fire if the draggable element and the drop area have correct dropEffect andeffectAllowed values. On drop you will need to collect the information using the getData() method.
Drag and Drop API Methods
The dataTransfer object is the main item we will interact with when dealing with the native drag and drop API. It is exposed to us as part of the callback function for the events and gives us several functions to play with.
setData
This method sets the data that will be collected from the draggable by calling the event.datatransfer.setData(type, data) method. You will need to pass in the type of data being saved and the data itself. This must be set in the dragstart event or it will fail. Its values can only be collected later during the drop event.
The type argument should be an applicable data type. You can use many different types such as text/html or text/uri-list if you are using Chrome, Safari, or Firefox. If you are using Internet Explorer you must set it as Text or URL (in exactly that way or it will cause an error).
The data argument is the data you want to save. You can save a URL, a chunk of HTML, or any other piece of data. You can set only one piece of data per type. For example if you set text/html to be some HTML, you can’t then call the setData() method again with new information as it will replace the old content.
getData
This is the counterpart to the setData() method and it’s used to collect data set by the dragged element during the startdrag event. You collect your data by calling event.dataTransfer.getData(type), specifying the type of data to be collected.
You will most likely have to check what types are set using event.dataTransfer.types to see what formats have been passed. If you try and access data types that have not been set, Internet Explorer will throw an error.
This method can be used only inside the drop event as only at that point does the API expose the values so you can collect them (this is to protect the data during transmission).
clearData
This does exactly what its name implies, it clears any data set using setData and it’s written in the format: event.dataTransfer.clearData(type). You will need to specify the type of data that is being cleared (e.g. text/html or URL). This method can only be used inside the dragstart event.
setDragImage
This method sets the drag image to be displayed when dragging starts using the format: event.dataTransfer.setDragImage(). By default, when dragging, the user will see a semi-transparent image of what they are dragging. Using this method you can define your own image or element to appear during the drag. This works in all browsers except Internet Explorer and there is currently no planned work for it’s inclusion either.
Drag and Drop API Properties
There are several properties that we can set for the dataTransfer object. We use our event variable that’s passed to us from the event callback to set these properties.
effectAllowed
This is specified on the draggable item. This tells the API about the drag event and what icons will be used for the cursor (this is OS and browser dependent). It’s called by assigning a value to event.dataTransfer.effectAllowed inside the dragstart event and takes the possible values of copy, move ,link ,copyLink, copyMove, linkMove, all, none, or uninitialized.
If this value doesn’t match dropEffect it will prevent the drop event being called (ensures only appropriate drops happen).
dropEffect
This property is specified on the drop zone and determines what drag items are allowed to drop on this zone. It should be assigned a value via event.dataTransfer.dropEffect during the dragenter or dragover events. dropEffect Takes the possible values of copy, link, move, or none.
Just like effectAllowed, if this value doesn’t match effectAllowed it will prevent the drop event being called (ensures only appropriate drops happen).
files
This property contains a list of all local files that have been set. It’s called using event.dataTransfer.files. Only called files have been dragged from the OS onto the website (e.g. images from your desktop to your website’s upload container). This property will always be empty if a regular on-site item has been dragged (e.g. if you drag an image, there will be no data set for files).
It’s here that you can check to see if we have files. If we do have them we can read in and process the contents of the files using the fileReader object.
types
This property provides a list of all data types that have been set in the current drag. Called by using the event.dataTransfer.types method. This is useful during the dragenter and dragover events so that you can see what data types have been set.
effectAllowed and dropEffect in action
If you’re keen on seeing how you can use these properties in a practical way, have a look at the following CodePen demo:
See the Pen Native Drag and Drop — the effectAllowed and the DropEffect properties by SitePoint (@SitePoint) on CodePen.
Here we define different draggable items and set where they can be dropped. We also create several droppable zones and set which draggable types they will accept. Setting these properties correctly will ensure that your browser knows which draggable items are allowed to be dropped.
Even though Internet Explorer supports both the effectAllowed and dropEffect properties, it doesn’t implement any native ability to allow only applicable drags into drop zones. Chrome, Safari, and Firefox will restrict your drag item and prevent incorrect drops, refusing to fire the drop event. On IE you will need to manually reject these drops yourself by comparing values as the drop event will still fire.
Building Something with the Native API
There’s quite a lot of information to deal with for the API so let’s put everything together into a practical example.
The native API is concerned primarily with the interactions between the draggable and droppable elements and their transmission of data. The native API doesn’t care that you are moving two elements around trying to switch their positions, the API is more concerned with its data and it’s this focus that makes it unique.
One of the best things about the native API is that it can handle different types of data and also data from multiple locations.
Data types include:
- Plain text strings
- Text / HTML content
- URL lists
- Single or multiple files
- Multiple other types / custom types
Data locations include:
- Data from internal elements being dragged and dropped
- Data from draggable elements from a different tab, window, or from a different browser
- Data from a local source like your desktop
Processing Data Between Elements on Drag and Drop
The native API provides the basics to support dropping and dragging of elements. While the API provides you with events to hook onto to know when a successful drag has taken place, unlike jQuery UI, you will need to manually move/copy elements to adjust the API.
This is because as you start dragging an element, you trigger its dragStart event during which you set the data you want to transfer (along with the appropriate effects you want your draggable to have, such as copy, move, link etc). When you finally drop your dragged element, ig it’s in the right place it will trigger the drop area’s drop event. It handles the data that you want to move, not the UI elements (which you will need to manually adjust with JavaScript).
Let’s look at a practical example so you can see how this works.
Example: A Drag-and-Drop Puzzle Game
Take a look at the following example to see how we can use the API to transfer data between elements on the same page.
See the Pen Native Drag & Drop – Data transfer on a single page by SitePoint (@SitePoint) on CodePen.
What we are doing in this example is defining a series of zones. The left side will hold our main puzzle pieces while the right side has a series of empty drop zones. The ‘game’ is to drag the pieces from the left to the right, completing the puzzle.
Setting Data on dragStart
On the dragStart event for our puzzle piece we first set the effectAllowed to tell the item that it accepts a copy based drag.
We then collect the src(image source) and the outerHTML (HTML Node) and put them inside of our data transfer object as text/uri-list and text/html. If we are on Internet Explorer we just save the src of the element being dragged and save it into its text format.
var dragItem;
// triggered draggable as we start dragging
function dragStart(event) {
  drag = event.target;
  dragItem = event.target;

  // set the effectAllowed for the drag item
  event.dataTransfer.effectAllowed = 'copy';

  var imageSrc = $(dragItem).prop('src');
  var imageHTML = $(dragItem).prop('outerHTML');

  // check for IE (it supports only 'text' or 'URL')
  try {
    event.dataTransfer.setData('text/uri-list', imageSrc);
    event.dataTransfer.setData('text/html', imageHTML);
  } catch (e) {
    event.dataTransfer.setData('text', imageSrc);
  }

  $(drag).addClass('drag-active');
}
Correct effectAllowed / dropEffect
Before we even drop the puzzle piece, both the dragEnter and dragOver events will fire. Remember that for us to be able to drop we need to return false / prevent default to tell the browser it’s OK to drop. Both of these functions will set the drop zone’s dropEffect to copy which means it will accept all drag items with copy as their effectAllowed (which our items happen to have so it’s all good). I mention this here since if they didn’t match, the drop event wouldn’t fire, and the drag would be canceled.
Collecting data on our drop
When we drop over our zones to the right, we use the getData method to extract our text/uri-list and text/html data sets. If we don’t have them (if we are accessing this on Internet Explorer) we simply extract the text data.
Here is where we differ based on what data we have. If we have access to the dataHTML it means we are on a fully supported browser and we have access to the entire dragged node. If we do we add the whole item to the drop zone and the drop is done.
If we don’t have support we need to clone the dragItem we set back in the dragStart event to get the node. We then add it to the drop zone and finish everything up.
// called when draggable is dropped on droppable
function drop(event) {

  drop = this;
  $(drop).removeClass('drop-active');

  var dataList, dataHTML, dataText;

  // collect our data (based on what browser support we have)
  try {
    dataList = event.dataTransfer.getData('text/uri-list');
    dataHTML = event.dataTransfer.getData('text/html');
  } catch (e) {
    dataText = event.dataTransfer.getData('text');
  }

  // we have access to the HTML
  if (dataHTML) {
    $(drop).empty();
    $(drop).prepend(dataHTML);

    // check if this element is in the right spot
    checkCorrectDrop(drop, dragItem);

    // see if the final image is complete
    checkCorrectFinalImage();
  }

  // only have access to text (old browsers + IE)

  else {
    $(drop).empty();
    $(drop).prepend($(dragItem).clone());

    // check if this element is in the right spot
    checkCorrectDrop(drop, dragItem);

    // see if the final image is complete
    checkCorrectFinalImage();
  }

  event.preventDefault();
  event.stopPropagation();
}
Completing the game
Both drop events call the checkCorrectDrop(drop, dragItem) and checkCorrectFinalImage() functions. These are used for our game.
The checkCorrectDrop() function checks to see if the custom attribute called data-value is the same for both the drag item and the drop zone. If both of these are the same then this piece belongs here and is highlighted with a green border (and the active class).
The checkCorrectFinalImage() function checks to see if all of the puzzle pieces have been dropped in the correct spot. If we have as many correct items as there are items to drag, it means we’ve completed the puzzle – hooray!
Moving Data from Other Tabs and Locally from the Desktop
With the native API, you can define drop zones that will accept dragged elements. While this might sound like something jQuery UI can also do, what jQuery UI can’t do is allow us the ability to drag content from any external tab, window, or external browser directly into our drop area.
There are plenty of places in which you’ve seen this already. There are several websites in which you can drag an image from one tab directly into a drop area and the receiving website will take care of the interaction.
To get the most out of the dragging and dropping, the drop zone has to be configured so that it knows how to handle the data it’s receiving (as basically any draggable element such as images, text, links, and content would be dropped into the drop zone).
Dragging content from your desktop or local device onto a web page and automating the upload process is one of those revolutionary features that makes you wonder how we ever got anything done without it.
Most CMS’s (e.g. WordPress) have native support of content uploads via a drag-and-drop interface. Other web apps like Gmail also provide this functionality, letting you drop your content directly into a zone and automatically attach it or store it for use.
Example: Dragging Images from External Sources
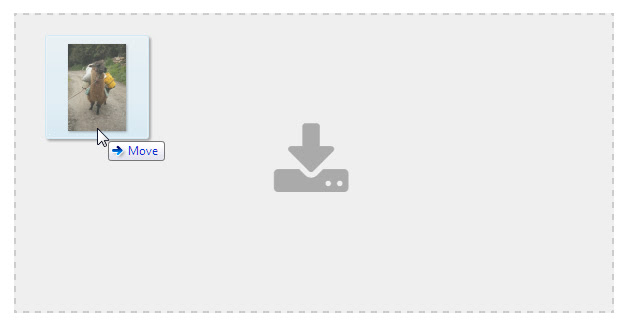
The next example will handle interactive drops from other tabs / windows, letting the drop zone collect images for display.
In addition, the example also will handle locally dropped images. You will be able to drop photos from your desktop directly onto the dropzone and the native API will process the images and display them.
If you’re keen on seeing how this all works, here’s another CodePen demo:
See the Pen Native Drag and Drop – Dragging files directly onto the website by SitePoint (@SitePoint) on CodePen.
What this example focuses on is processing dropped items. Unlike our other examples where we had to set data on our drag, for this one we need to only collect the data and determine how we will process it.
Inside our main drop function, we start by collecting information from our dataTransfer object using the getData(format) method.
// get the URL of elements being dragged here
try {
  dataValue = event.dataTransfer.getData('text/uri-list');
  dataType = 'text/uri-list';
} catch (e) {
  dataValue = event.dataTransfer.getData('URL');
  dataType = 'URL';
}
We wrap this inside of a try-catch block mainly for Internet Explorer, which will throw an error and stop execution if we try and access a format inside of getData() that it doesn’t understand.
If we are able to get our data in the text/uri-list format, we collect it; if we can’t, we fall back to using the basic URL property.
Most dragged items such as images, links, or data will come across with several data types. Since we are only interested in the URL of these items, this works well.
If we have our dataValue set, it means the user dropped something into our zone. We now need to figure out what it is. We only want to handle images, but since the API can’t differentiate between an image URL and a standard link, we need to do some checks to ensure we are dropping an image.
// determine if our URL is an image
imageDropped = false;
var imageExtensions = ['.jpg','.jpeg','.png','.bmp','.gif'];
for (i = 0; i< imageExtensions.length; i++) {
  if (dataValue.indexOf(imageExtensions[i]) !== -1) {
    // create our image to add
    var image = '<img src="' + dataValue + '">';
    drop.append(image);
    imageDropped = true;
    break;
  }
}
We create a list of image extensions with known image types such as .jpg and .png and check to see if one of these appears in our URL. If it does, then we can assume we have an image. We create a new image and use our collected value as its source.
Processing locally dropped items
Locally dropped elements are a little different. We don’t use the getData(format) method to get these, we use the files() method. This will get us a list of all elements that have been dropped so we can iterate through them.
var dataFiles = event.dataTransfer.files;
var dataOutput = [];
if (dataFiles) {
  for (i =0; i < dataFiles.length; i++) {
    // do processing here
  }
}
For our example we want to go through all dropped files and check to see if there is an image. When we are iterating through each file we can access a range of properties, including the type property, which lists the mime type of the item.
// check if this is an image
if (dataType.match('image.*')) {
  // it's an image, process further
}
If we match an image type, we create a new fileReader object that we will use to read the file into memory. We use the readAsDataURL(item) method to read in our file and when it’s ready it will trigger its onload event where we will process further.
// read into memory
var reader = new FileReader();

// load element
reader.readAsDataURL(dataItem);
All we do now is collect the result of the file reader and add it the DOM. We have successfully dragged an image from our desktop to our site!
// when our image is loaded
reader.onload = (function(theFile) {
  return function(e) {
    var url = e.target.result;

    drop.append('<img src="' + url + '" title="' + dataName + '"/>');
    messageContainer.append('
      <p><strong>Successfully dropped an image from your desktop</strong></p>
    ');
  };
})(dataItem);
Overview of Browser Support
Exactly as its name suggests, this API provides developers with a set of events and methods they can use to provide UI interactions without the need for a third party JavaScript library.
Overall browsers have strong desktop support and almost non existent mobile support, so it will work well in most modern desktop browsers following the specification. Internet Explorer though has its own set of unique issues.
Desktop support is surprisingly good with Chrome, Firefox, Safari and Opera all having comprehensive support. Internet Explorer on the other hand handles the API differently, supporting different aspects depending on what version you are on. For example:
- No support in IE7, IE8, and IE9 for the
dataTransfer.filesor.typesobjects. This means up to IE9 you won’t be able to use native drag and drop to allow users to drag files from the desktop to a web page. - Limited supported formats for
dataTransfer.setData/getDataIn practice when we drag items, we need to store data in our drag that can be accessed in our drop. In other browsers you can store this in a variety of types (e.g.text/htmlortext/uri-list) along with your own custom types. IE will only support theTextorURLtype, which means you’re limited to how you will handle your data. - No support in any version of IE or Edge for the dataTransfer.setDragImage() method. Basically there is no ability to set a custom drag image or element. You will always get the browser default (which most of the time will be a copy of the element that is semi-transparent).
For mobile, there is basically no practical support for the API (as of October 2015). This probably has to do with how mobile browsers will handle the interactions themselves as normally you need to drag and scroll to move around. IE11 is the only mobile browser that will support it.
Additional Resources
There are plenty of great resources to get more details on the Drag and Drop API. Some of them discuss the methods available and events you can hook into while others detail browser inconsistencies or outline great examples.
Start with these links, which helped me when I was first looking into native drag and drop:
- Native HTML5 Drag and Drop on HTML5 Rocks
- The dataTransfer object on the Dottoro Web Reference
- Introduction to Drag and Drop from Mozilla
Wrapping Up
At this point, you should now have a good fundamental understanding of the native Drag and Drop API and how you can leverage it to provide an interactive interface. You’ll likely have to do a lot of experimenting to really start to understand much of what I’ve discussed here.
Even with the lack of mobile support, browser support is pretty strong so there’s good reason to consider using the native API in new projects.
Frequently Asked Questions (FAQs) about HTML5 Native Drag and Drop API
What is the HTML5 Native Drag and Drop API?
The HTML5 Native Drag and Drop API is a powerful feature that allows developers to make elements in their web pages draggable and droppable, enhancing the user experience. It is a part of the HTML5 specification and is supported by most modern browsers. This API provides a set of events and properties that can be used to control the drag and drop operations, including the drag start, drag, drag enter, drag leave, drag over, drop, and drag end events.
How does the HTML5 Drag and Drop API work?
The HTML5 Drag and Drop API works by listening for specific events that are fired during the drag and drop operation. When an element is dragged, the ‘dragstart’ event is fired, and the dataTransfer object is populated with data about the dragged element. As the element is dragged over other elements, ‘dragenter’ and ‘dragleave’ events are fired. If the element is dropped, the ‘drop’ event is fired, and the dataTransfer object can be used to retrieve the data about the dragged element.
How can I make an element draggable using the HTML5 Drag and Drop API?
To make an element draggable using the HTML5 Drag and Drop API, you need to set the draggable attribute of the element to true. This can be done in the HTML code by adding the attribute draggable=”true” to the element’s tag, or in JavaScript by setting the draggable property of the element to true.
How can I handle the drop event in the HTML5 Drag and Drop API?
To handle the drop event in the HTML5 Drag and Drop API, you need to add an event listener for the ‘drop’ event to the element where you want to allow drops. In the event handler function, you can use the dataTransfer object of the event to retrieve the data about the dragged element and perform the desired operation.
Can I use the HTML5 Drag and Drop API on touch screen devices?
The HTML5 Drag and Drop API is primarily designed for use with a mouse or similar pointing device. However, it is possible to use it on touch screen devices with some additional code to handle touch events. There are also libraries available that can provide this functionality.
What are some common uses of the HTML5 Drag and Drop API?
The HTML5 Drag and Drop API is commonly used to enhance the user interface of web applications. Some common uses include creating drag-and-drop interfaces for file uploads, implementing drag-and-drop sorting of lists or grids, and building interactive games.
Are there any limitations or issues with the HTML5 Drag and Drop API?
While the HTML5 Drag and Drop API is powerful and flexible, it does have some limitations and issues. For example, it is not fully supported in all browsers, and its behavior can be inconsistent across different browsers. Also, it can be challenging to use on touch screen devices without additional code or libraries.
How can I customize the appearance of the dragged element in the HTML5 Drag and Drop API?
The appearance of the dragged element in the HTML5 Drag and Drop API can be customized using CSS. You can use the :active pseudo-class to style the element during the drag operation, and you can use the dataTransfer.setDragImage method to set a custom drag image.
Can I drag and drop multiple elements at once using the HTML5 Drag and Drop API?
The HTML5 Drag and Drop API does not directly support dragging and dropping multiple elements at once. However, it is possible to achieve this with some additional code. You would need to keep track of the selected elements and handle the drag and drop operations for all of them in your event handler functions.
Can I use the HTML5 Drag and Drop API to drag and drop files from the user’s file system?
Yes, the HTML5 Drag and Drop API supports dragging and dropping files from the user’s file system. You can use the dataTransfer.files property in the drop event handler function to access the dropped files. This can be used to implement a drag-and-drop file upload feature.
 Simon Codrington
Full stack developer and overall web enthusiast. I love everything to do with web / design and my passion revolves around creating awesome websites. Focusing primarily on WordPress, I create themes, plugins and bespoke solutions.


