
Richard Adenot is a French photographer who is really eager to learn. He currently lives in Paris, the so called “capital of love,” with his beloved wife and their cutest little baby, who recently became best friends with their blue-eyed cat.
Photography has been a hobby for a while now, but since the discovery of the inspiring 500px community 6 months ago, he has decided to really focus on his craft and continuously push his skills to the next level. He can’t wait for his next big trip to capture new landscapes and cultures.
He recently launched a photography business called “Ditch That Selfie” and is available for both indoor and outdoor portraits of individuals, couples, and families.
To see more of his work, you can follow him on 500px, visit the Ditch That Selfie website, or check him out on Facebook and Twitter
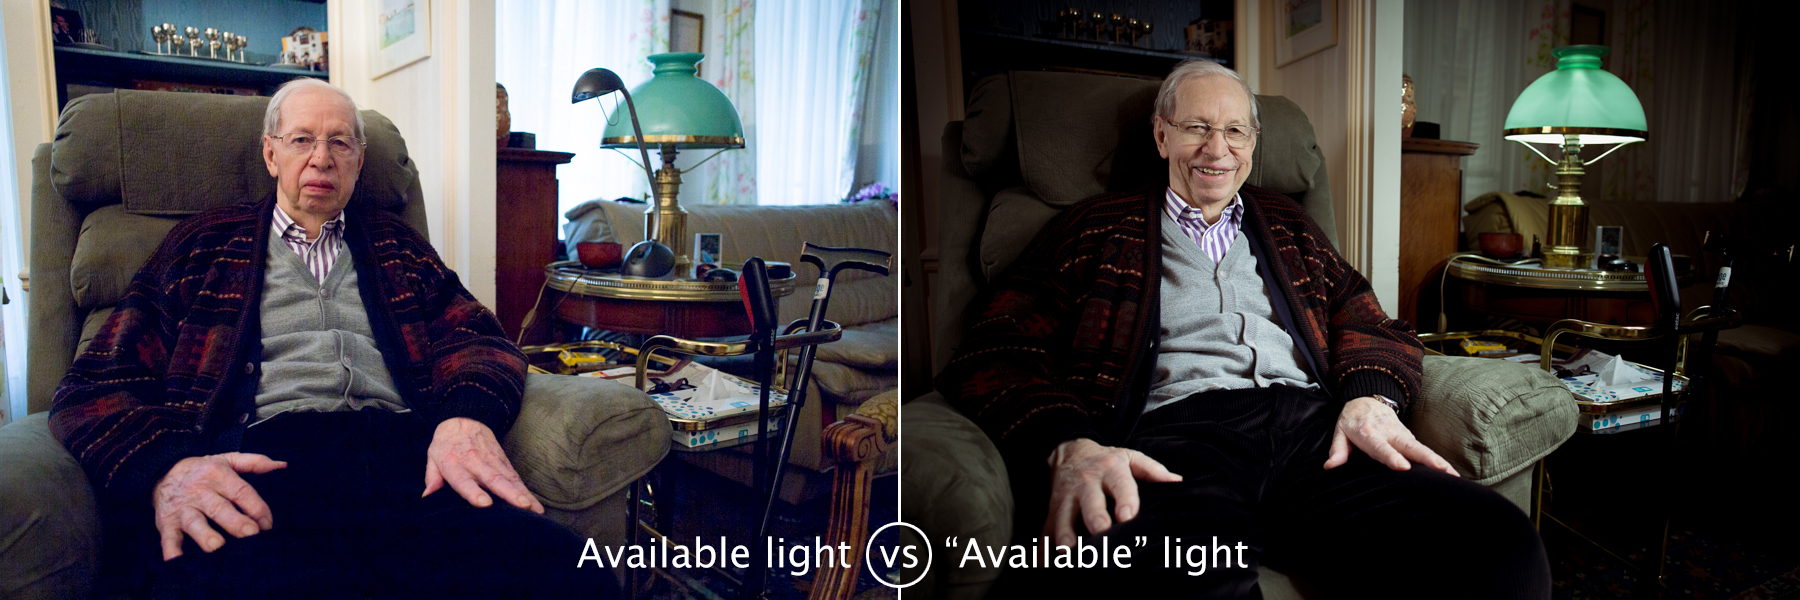
For quite some time I held a very strong stance against flash photography. Looking back at it now, I think you could simply call it a fear of the unknown. I keep hearing people declare they don’t want to use flash in their photography and only use available light, but at the end of the day, flashes are also an available source of light. I wanted to share with you the benefits I’ve gained from making the big step, and hopefully reconcile you to the idea of using them.
Using flash brings a new tool to your artistic kit: controlling light. It can seem really scary at first; you probably won’t know why, where, and how to place them. But just like every other aspect of photography, there is no secret to it: trial and error will be your best friend.
Flashes can also be your worst enemy. Careless usage of them will happily ruin an absolutely gorgeous photograph. As time goes, you’ll realize they are nothing more than a tool, you’ll know when to use them to your advantage, and when to leave them in your bag.
This is not a technical tutorial on how to use flashes, but rather a step-by-step layout of how flashes can help you compose a memorable photograph that would have otherwise been just a quick little snapshot.
Last weekend I went to visit my grandfather. For a while I had been wanting to take a memorable picture of him in his home that captures who he is.
The camera used was a Canon 6D with the Canon 24mm f/2.8 mounted on a tripod for consistent framing. The tripod is really important, as it allows you to first find your framing, then focus solely on the placement of lights. Doing things one step at a time is crucial- it helps you better understand what you’re doing bit by bit. Undertaking multiple steps in one go would be like learning to juggle and ride a unicycle at the same time.
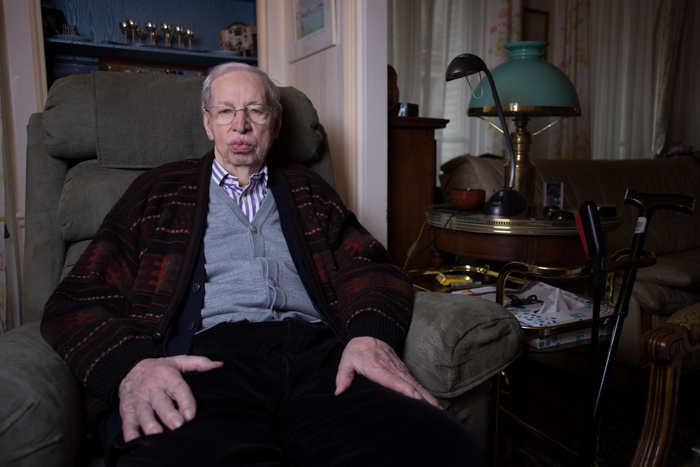
Here is the final picture:

For the final picture I used:
– 3 Yongnuo YN560-II speedlights
– 2 Yongnuo RF-603 remote triggers
– 1 Westcott 43″ collapsible umbrella
– 1 off brand speedlight 60*60cm softbox
– 2 lightstands
So let’s get started, shall we?
After getting there and sharing the usual cup of tea and biscuits with my grandfather, I scouted around his apartment for the best area to take the picture. His reading chair very quickly took the cake.
Placement of lights can take some time to get it right — it’s why photo studios place them before clients comes in. In my case, this wasn’t possible, so I politely asked if he wouldn’t mind sitting there, and explained to him what I was going to do.
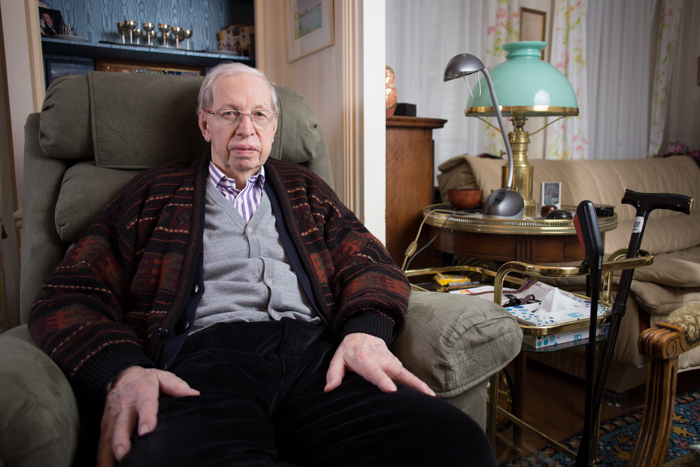
Once he got comfortable, I took my camera out and started to look for my composition, and once the best camera placement was found, I took the tripod out to lock the camera in place and started working on my lighting. I usually like to first take a picture with the available lighting to get a baseline.
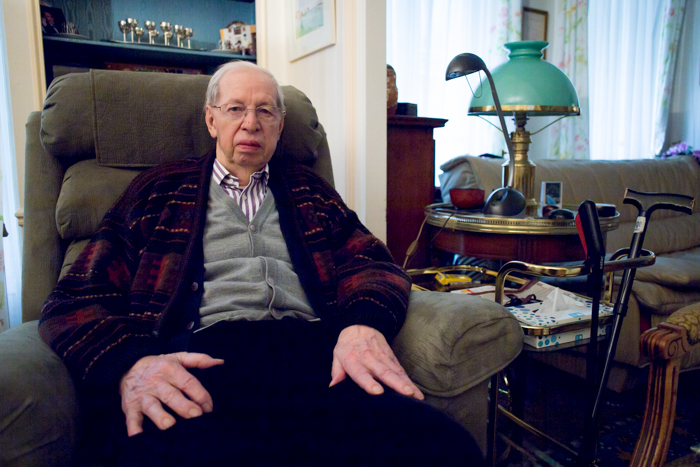
The available light was not really doing a great job on its own… my grandpa seems to agree.
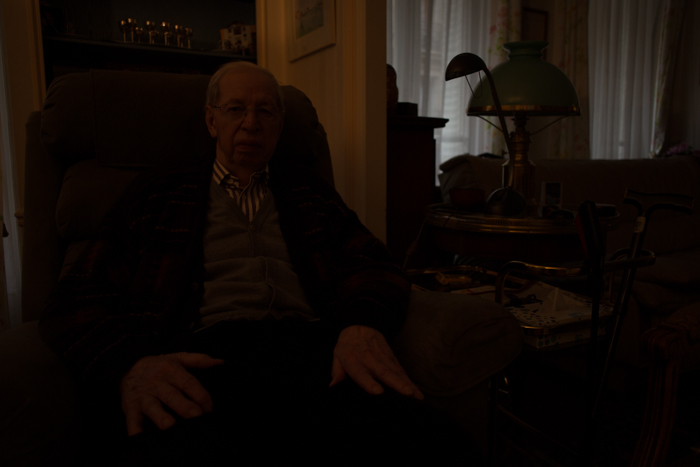
Now that the camera was in place, I placed the 60*60 cm softbox to my grandfather’s right, intending for it to be my key light. Before turning the flash on though, I looked for the correct exposure I was after to not have blown-out windows.
Here it is:
The camera settings remained the same from here on out. The flash was then turned on, and although the resulting picture was quite horrible, it was already offering a better result than before:
Duck faces should be illegal, whoever and whatever age you are.
Right off the bat something was bothering me: I wanted to bring focus to my grandfather, not his blue shelves behind his chair. I rotated the softbox a little towards me to fix that problem.

Ahh… Much better, but way too dramatic for my taste! It was time to add a second flash for some fill light. I knew that I would end up using it at some point, but as mentioned before, it’s important to move one step at a time to really see what you’re doing.
So this is when I took the second flash out and mounted it on the second light stand with the 43″ Wescott umbrella. I love this umbrella, because it collapses and ends up being really travel-friendly, and has a removable black layer that allows you to use it as a shoot-through or bounce umbrella. It was positioned on his left and was setup as a shoot-through.
Being on a budget, and because I prefer to work manually rather than in TTL mode, (automatic light measurement from flash to compensate exposure with flash light) I ended up making a mistake and over-powered it:
This mistake screamed one thing- my lights had been set wrong! The umbrella would now be my new key light and the softbox my new fill light. Another thing that you can see in the above picture was that the new key light was lighting the background way too much, and was distracting the eye away for the main subject: my grandpa.
So to avoid light spillage due to the shoot through method, I decided to add the removable black layer on the umbrella and rotating it by 180°, transforming it into to a bounce umbrella instead.
Now that the background was taken care of, it brought another problem: his grey reading lamp was casting a nasty shadow on the wall. It didn’t look nice in the picture anyway, so I got rid of it altogether.
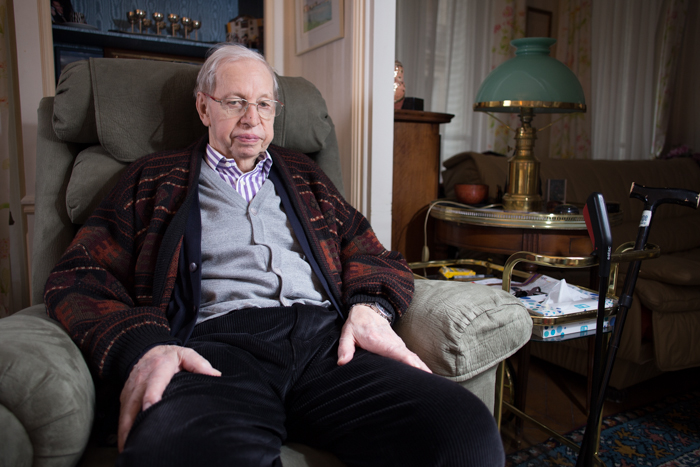
Great! I was starting to be very happy with the result, but something was still missing to balance the frame. I decided to turn on his old-school green lamp, but unfortunately it wasn’t working.
It was a little bothersome but I got the upper hand on the situation by placing my third flash behind the stand, firing right up in it. Not only did it fake the fact that the lamp was turned on, but it also allowed me to have better control of its intensity and temperature.

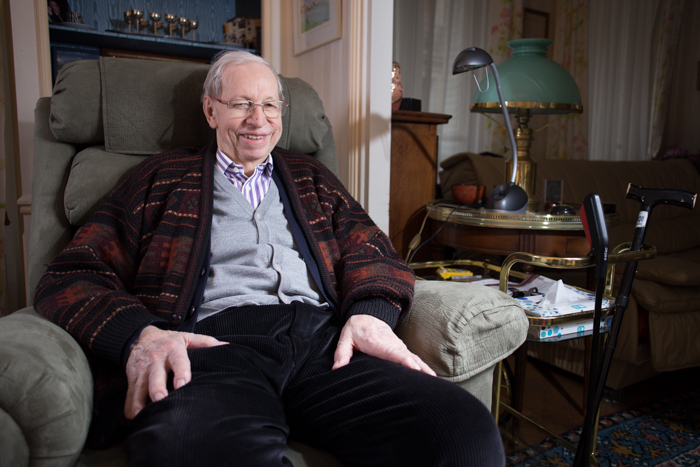
From this point I knew I had everything in place, my composition was working, my lights were working, and there was only one thing missing… a smile 🙂
So I made a little joke and snap! Here it was:
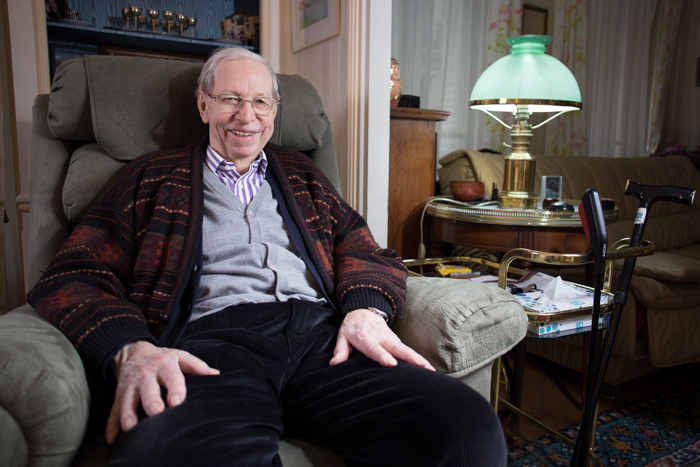
The picture could have stayed as is. I really like the way it looked, and had spent a lot of time trying to get it right on camera. It did feel, however, that it could be taken one step further with digital processing.
For most people this would be considered a simple picture that someone took of a person sitting by a lamp. As you see though, getting this picture right was a whole different story.
Most people won’t be able to tell why your pictures are looking better, and will probably assume that you have that you have a better camera than them. Congrats! This means you have succeeded at using flashes to your advantage. With flash photography, if you’ve done your job right, your lighting will seem natural and the use of flashes will become invisible. What you will be left with, though, is a picture worth framing.
Keep in mind that whether you are working with professional models or regular people, you should keep interacting with them and not bury yourself behind your gear. It took me 20 minutes to get from the first picture to the last one, yet my grandfather and I had a really nice conversation all the way through. He shared plenty of stories from his youth, and was amused by all the back-and-forth I was doing to get things right.
He hasn’t seen this picture yet — computers are not his thing — and I’m going to offer it to him framed, as a thank you for his patience during the session. Who doesn’t like giving gifts to loved ones, anyway? So it will be a present for next time we see each other.
I really hope this guide has been helpful, and that you will no longer treat flashes as the enemy, but as a tool to improve the quality of your work!


Leave a reply