Camel is a Node.js blogging platform that was designed to be fast, simple, and lean.
In the words of Casey Liss, the author of Camel:
Camel is neither a static blogging platform nor a truly dynamic one. It is a little from column A, and a little from column B. The first time a post is loaded, it is rendered by converting from Markdown to HTML, and then post-processed by adding headers & footer, as well as making metadata replacements. Upon a completed render, the resultant HTML is stored and used from that point forward.
If you want to look at some examples of Camel running in the wild, you can check out the original Camel-powered blog at Liss is More, or my two Camel-powered blogs: The Data McFly Blog, and RogerStringer.com. The latter was formerly a WordPress blog with over 2,550 blog posts covering over a decade of blogging, and it migrated to Camel pretty smoothly.
I’ve been using Camel since October 2014, and it’s fun to work with, although the initial set up can be a little interesting. With that in mind, in this article, we’re going to walk through setting up your first Camel blog and deploying to Heroku.
Getting Started with Camel
First, make sure you have Node.js and npm installed. You can download Node from here, and npm from here. If you need help installing Node.js (or npm) then check out this recent SitePoint article which covers that very subject.
Next, we need a copy of the Camel repo:
git clone https://github.com/cliss/camel.gitThis will create a folder called camel, go into this folder and run npm install to install the dependencies.
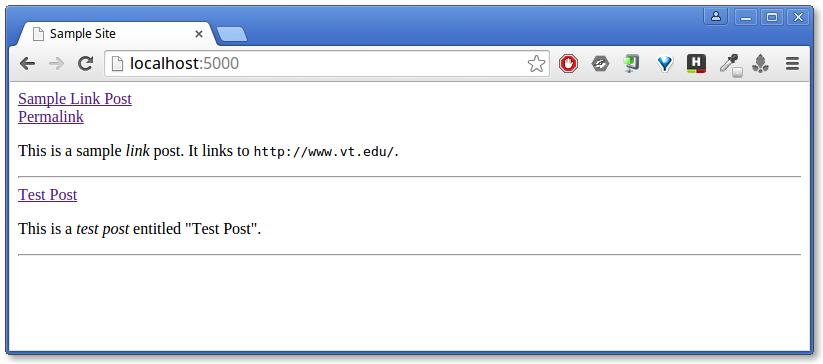
Now, we can test if Camel is working by typing node camel.js. If everything has gone smoothly, you should be able to visit http://localhost:5000 in your browser and see a basic Camel installation.
The Camel Template System
Camel’s template files are stored in the templates folder.
+-- templates/
|     +-- defaultTags.html
|     +-- header.html
|     +-- footer.html
|     +-- postHeader.html
|     `-- rssFooter.html
defaultTags.htmlis where we store our site-wide metadata, such as author info, site URL and site title.header.htmlis the header of our blog, this is displayed on every page of the site.footer.htmlis the site footer, also displayed on every page.postHeader.htmlis the file that is used to display post headers. This is inserted after the site header and is displayed for each post.rssFooter.htmlis displayed at the end of every RSS item. This could be a link back to your blog, or a blurb to tell readers where the post came from.
Loops are handled a little differently in Camel, instead of being in separate files, they are stored as Handlebars templates in the posts/index.md file:
@@ Title=Home
@@ BodyClass=homepage
@@ DayTemplate=<div class="day">...</div>
@@ ArticlePartial=<div class="article">...</div>
@@ FooterTemplate=<div class="paginationFooter">...</div>
This page contains three Handlebars templates that are used site-wide:
DayTemplateis used to render each day on a list of posts.ArticlePartialis used to render a single article.FooterTemplateis used to render pagination at the bottom of the page.
Finally, we need to consider styling. Open up templates/header.html, and replace the <body> tag with:
<body class="@@BodyClass@@">
<div class="container">
<div class="content">
<div class="header">
<div class="siteTitle"><a href="/">@@SiteTitle@@</a></div>
<div class="siteByline">By @@siteAuthor@@</div>
<nav>
<a href="/about" rel="author">About</a>
<span class="dot">•</span>
<a href="/rss">RSS</a>
</nav>
</div><!-- header -->
<div class="main">This will give our site header its definition.
Open up templates/footer.html and add the site footer:
</div><!-- main -->
</div><!-- content -->
<footer>
<p class="copyright">Copyright © 2015 - My Site</p>
</footer>
</div><!-- container -->
</body>
</html>Finally, open public/css/site.css to add some styles. We’re going to use this snippet, but feel free to add your own.
Commit your changes to Git:
git add .
git commit -m "Added basic styling"
Then restart the server and refresh your browser
A Word about Caching
By default you have to restart your server every time you make any changes to your Camel blog and you want to view them in the browser (the cache is cleared every thirty minutes). This can get annoying quite quickly.
To address this problem uncomment the following lines in camel.js:
// app.get('/tosscache', function (request, response) {
//     emptyCache();
//     response.send(205);
// });
Restart the server and you’ll then have a /tosscache route available to you which, as the name suggests, empties the cache and allows you to preview changes without having to restart.
Putting Camel Live
Now it’s time to launch your Camel blog for the world to see. We’ll be using Heroku as our web host, as it handles Node.js sites nicely.
First, sign up for a free account. Then, download and install the Heroku Toolbelt—a really handy command-line tool that lets you manage your sites from the terminal.
In five easy steps we are now going to create our Heroku app and deploy our blog. From the terminal in your camel folder:
heroku loginto log into Heroku.heroku createto create the application within Heroku.git push heroku masterto push your site to Heroku.heroku ps:scale web=1to tell Heroku to create a dyno (a worker, to respond to web requests).heroku opento open your browser at your new, custom URL.
Adding Your Own Domain Name
Now, you will get a randomly generated subdomain that is represented as http://random-name-12345.herokuapp.com. This is fine for testing, but not for your actual world-class blog that you want everyone to read.
To add your own domain name to your Heroku app, run the following command from the terminal:
heroku domains:add www.mysite.comThen, when you go to your DNS management tool, which could be GoDaddy, CloudFlare (or anywhere else), you just point your domain as a CNAME record to your site.
So if you had the Heroku subdomain of: random-name-12345.herokuapp.com, and you were pointing it to a domain called myawesomeblog.com, you would have your CNAME look like this:
www CNAME random-name-12345.herokuapp.com
myawesomeblog.com CNAME random-name-12345.herokuapp.com
Managing Posts Locally
When you add a new post, the file is added by first going to the year’s folder, then to the month’s folder, then to the folder of the day for which you are creating the post. For example, to add a post for February 24, 2015, we would have the following folder structure:
`-- posts/
    +-- 2015/
    |     +-- 2/
    |     |   +-- 24/
    |     |   |    `-- my-new-blog-post.md
The file my-new-blog-post.md is the new post. If you are creating a post on a new month or day, then you would create these folders as you go.
Pages, such as /about, are created in the root of the posts folder.
Now, let’s edit our my-new-blog-post.md and add some content. For each post, metadata is specified at the top, and can be leveraged in the body.
@@ Title=Hello, World!
@@ Date=2015-03 17:50
@@ Description=This is a short description used in Twitter cards and Facebook Open Graph.
@@ Image=http://somehost.com/someimage.png

This is a *test post* entitled "@@Title@@".
The Title and Date fields are required. Any other metadata, such as Description and Image, is optional.
Pushing Updates to Heroku
Once you’ve added or edited posts, you will want to deploy your updated blog to Heroku.
To do this, commit the files to Git (as shown above), then run:
git push heroku master
heroku open
Which will to push your changes to Heroku and open the updated blog in your browser
The only drawback to this method, is that you are limited to the computer you’ve set this up on. It’s not suitable if you are mobile, and want to edit posts on a tablet or phone.
Luckily, Heroku has you covered and lets you sync with your Dropbox account.
Managing Posts from Your Dropbox Account
Setting up your Camel blog to sync with your Dropbox account lets you edit posts from anywhere. I routinely draft posts from my iPhone or iPad and then deploy the new posts to Heroku.
To set this up, let’s go to your Heroku account and click on your Heroku app that you set up for your blog.
Click the Deploy button and choose Dropbox.
You will then be prompted to link your Dropbox account to your Heroku app. Once you’ve done this, your Camel blog will appear in your Dropbox account.
Heroku sets up your site in the following folder structure:
`– Apps/
    +– Heroku/
    |     +– my-camel-blog/
From now on, you can just go to that folder and add or edit posts and templates.
Deploying via Dropbox
Once you’ve made your changes, you are ready to deploy again.
Using the Dropbox setup, changes are pushed to Heroku by logging into your Heroku dashboard instead of pushing changes from the terminal.
When you are ready to deploy changes, type in a short description of what changed and click the Deploy button on your Heroku dashboard. The message you enter for the deploy serves as the commit message.
The dashboard will show the progress of a release after you kick it off, and will let you know if there are any issues.
Conclusion
In this tutorial you’ve learned how to deploy your first Camel blog to Heroku, how to work with your blog locally and how to use Dropbox to edit and compose posts from any device.
Over all, Camel is a neat blog engine, it’s easy to extend and build on. For example, if you take a look at the Data McFly version of Camel, I’ve added support for categories and sitemaps.
I actually prefer Camel over other blog engines, mainly because of its simplicity and lack of bloat.
 Roger Stringer
Roger Stringer spends most of his time solving problems for people, and otherwise occupying himself with being a dad, cooking, speaking, learning, writing, reading, and the overall pursuit of life. He regularly words on RogerStringer.com.